Transform Your Site: A Case Study on Redesigning with WordPress Gutenberg on AWS Lightsail

Website Revamp with WordPress Gutenberg via AWS Lightsail

AWS Lightsail

Dan owns a theatre costume shop called “On Cue Costumes” in Montclair, New Jersey. Like many of my clients, he had an existing website that needed to be modernized. It needed to be redesigned and responsive. This project reminded me a lot of an art website I did a few years ago. It had lots of pages, content, and images that needed to be transferred. And, like that project, I chose to use Amazon Web Services as our cloud provider and WordPress as the content management system. Last time, I installed WordPress and all of the server software manually using AWS EC2. This time I decided to use AWS Lightsail to setup a managed WordPress instance. The WordPress installation uses Bitnami as the package library.
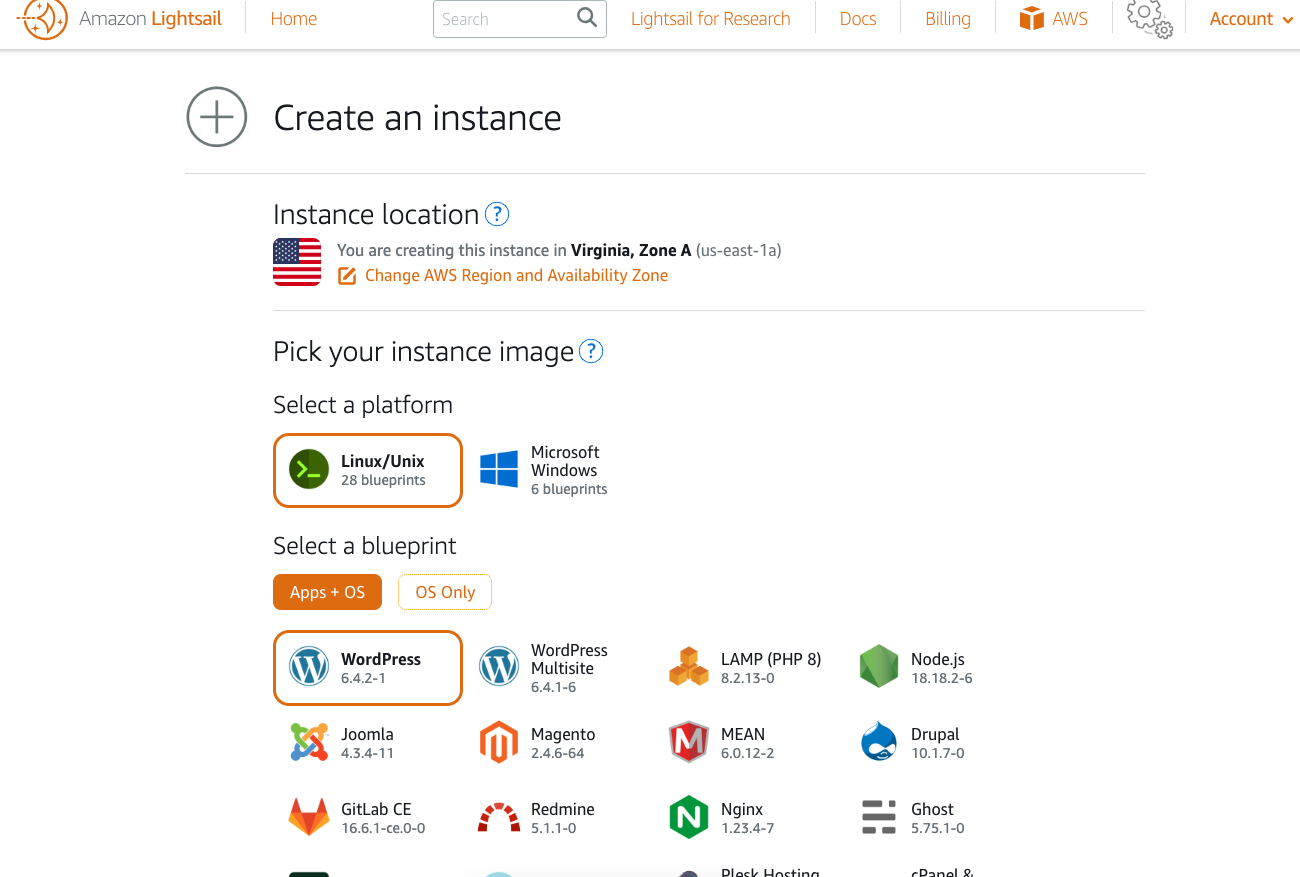
selecting wordpress for aws lightsail

This greatly reduced the time it took to get things up and running. It also provides cost predictably (EC2 is pay as you go) and automatic backups. (When running WordPress on EC2 I would run nightly SQL dumps as a redundancy mechanism). A month before starting work on this website I purchased a new domain in my personal AWS account.

When time came to begin working, I created a new AWS account for Dan’s business. Route 53 made it easy to transfer the domain name. Then, I created a new hosted zone for that domain and pointed the A record to the Lightsail instance’s IP address. Set up was easy enough to not need a walk-through. But, just to be sure, I watched a YouTube first. I’m glad I did because the top comment mentioned “Why did you not set a static IP address before creating your A records?”

The documentation mentions that “The default dynamic public IP address attached to your Amazon Lightsail instance changes every time you stop and restart the instance”. To preempt that from being a problem, I was able to create a static IP address and attach it to the instance. I updated the A record to use that new address.

Here is a before shot of the business’s website:

The legacy site, "OnCueCostumesOnline.com"
The legacy site, “OnCueCostumesOnline.com”

WordPress Gutenberg

Now that the infrastructure was set up, I was able to login to wp-admin. The Lightsail dashboard gives you the default credentials along with SSH access details. I used a premium theme called “Movie Cinema Blocks”. It has an aesthetic that fit the theatre look and made sense for this business.

premium wordpress theme
The original layout provided by the theme

The Gutenberg editor made it easy to craft the homepage with essential information and photos. The theme came with a layout pattern that I adjusted to highlight the content in a meaningful way. In a few places where I wanted to combine existing photos , I used the built in collage utility found in the Google Photos web app.

I created a child-theme after connecting via sFTP and edited the templates to remove the comment sections. I added custom CSS to keep things responsive:

@media(max-width: 1630px){
	.navigation-column .wp-block-navigation{
		justify-content: center !important;
	}
}
@media(max-width: 1550px){
	.navigation-columns .menu-column{
		flex-basis: 45% !important;
	}
}

@media(max-width: 1000px){
	 .hide-on-mobile{
		 display: none
	 }
	.navigation-columns{
		flex-wrap: wrap !important;
	}

	.navigation-column{
		flex-basis: 100% !important;
    	flex-grow: 1 !important;
	}
	.navigation-column h1{
		text-align: center;
	}
	.navigation-column .header-download-button{
		justify-content: center !important;
	}
	.navigation-column .wp-block-navigation a{
		font-size: 14px;
	}
}

@media (min-width: 1000px) {
    .hide-on-desktop {
        display: none !important;
    }
}

.homepage-posts img{
	border-radius: 10px;
}
.homepage-posts a{
	text-decoration: none;
}

@media (max-width: 780px) {
	.mobile-margin-top{ 
		margin-top: 32px !important;
	}
}

h6 a{
	text-decoration:none !important;
}

.entry-content a{
	text-decoration: none !important;
}

input[type="search"]{
       background-color: white !important;
}

I kept the existing color palette and I used a free web font, called Peace sans, for the site logo:

@font-face {
  font-family: 'peacesans';
  src: url('https://www.oncuecostumes.com/wp-content/themes/movie-cinema-blocks/assets/fonts/peacesans.ttf') format('truetype');
  font-weight: normal;
  font-style: normal;
}

.logo-font {
  font-family: 'peacesans', Lexend Deca, sans-serif;
}

The biggest challenge was importing all of the content from the existing website. We added each costume show as a post and used categories for taxonomy. The “Latest Posts” block in Gutenberg allowed us to showcase the content organized by that classification.

The original website displayed a simple list of all records. It has separate pages only for shows that have images. Others are just listed as plain text. After manually adding all of the hyperlinked content, over one-hundred remained that were only titles.
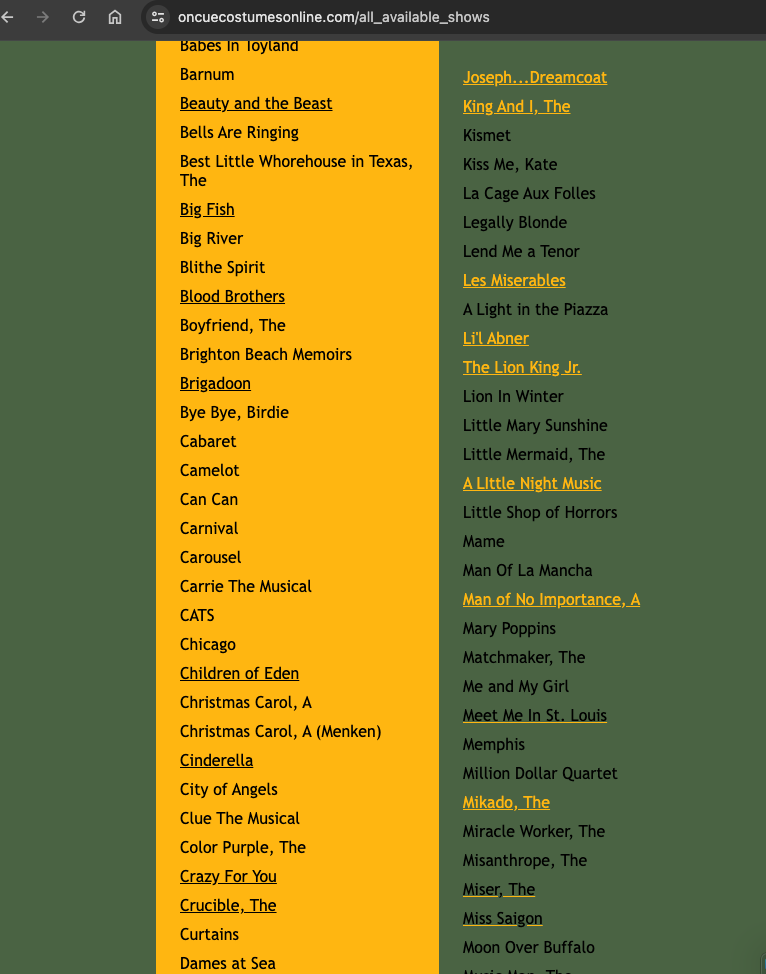
list of shows

To remove the hyperlinked entries, so that I could copy/paste the rest, I used some plain JavaScript in the browser console:

// Get all anchor elements
const allLinks = document.getElementsByTagName('a');

// Convert the HTMLCollection to an array for easier manipulation
const linksArray = Array.from(allLinks);

// Remove each anchor element from the DOM
linksArray.forEach(link => {
    link.parentNode.removeChild(link);
});

It was easier to copy the remaining entries from the DOM inspector than it was from the UI. But that left me with <li> markup that needed to be deleted on every line. I pasted the result into Sublime Text, used the Selection -> Split into Lines control to clean up all at once, and found an online tool to quickly remove all empty lines.  I saved it as a plain text file. Then, I used a plugin called “WordPress Importer” to upload each title as an empty post.

Contact Form Email

The contact page needed to have a form that allows users to send a message to the business owner. To create the form, I used the “Contact Form 7” plugin. “WP Mail SMTP” let us integrate AWS SES to power the transactional messages. Roadblocks arose during this integration.

Authoritative Hosted Zone

The domain verification failed even though I added the appropriate DKIM CNAME records to the hosted zone I created in this new account. At this point, I still needed to verify a sending address. This business used a @yahoo account for their business email. I decided to use AWS WorkMail to create a simple info@ inbox. (In the past, Google Workspace has been my go-to). This gave me a pivotal clue to resolving the domain verification problem.
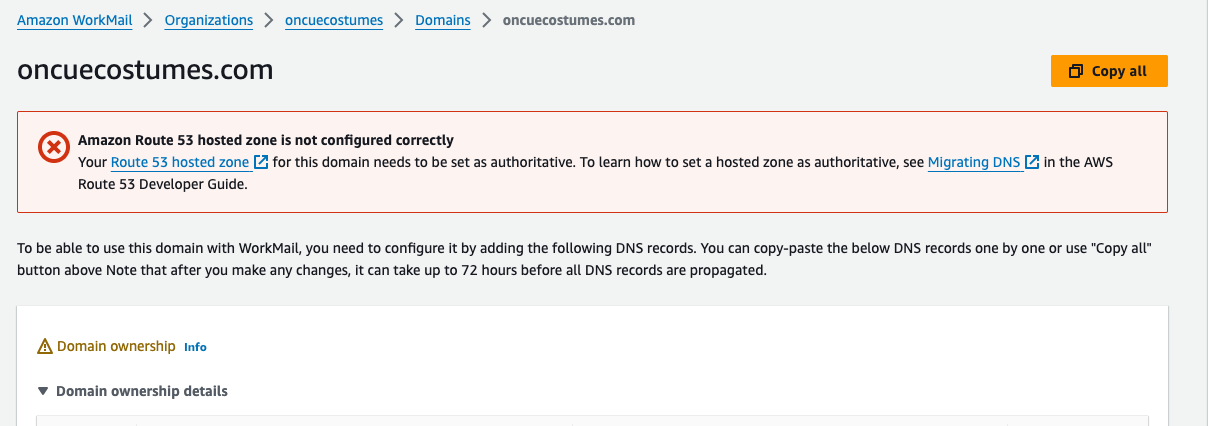
aws workmail warning

At the top of the WorkMail domain page, it warned that the domain’s hosted zone was not authoritative. It turns out, that after I transferred this domain from my personal account to the new one the nameserver records continued to point to the old hosted zone. I deleted the hosted zone in the origin account, and updated the NS records on the domain in the new account to point to the new hosted zone. Minutes later, the domain passed verification.

Sandbox limits

The initial SES sandbox environment has sending limits – only 200 per day and only to verified accounts. Since messages were only being sent to the business owner, we could have just verified his receiving email address. The main issue was that the default WordPress admin email address was literally user@example.com. When I tried updating this to a verified address, WordPress would also try to send an email to user@example.com, causing SES to fail. I requested production access, and in the mean time tried to update that generic admin address in the database directly.

SSH Tunnel and Database Access

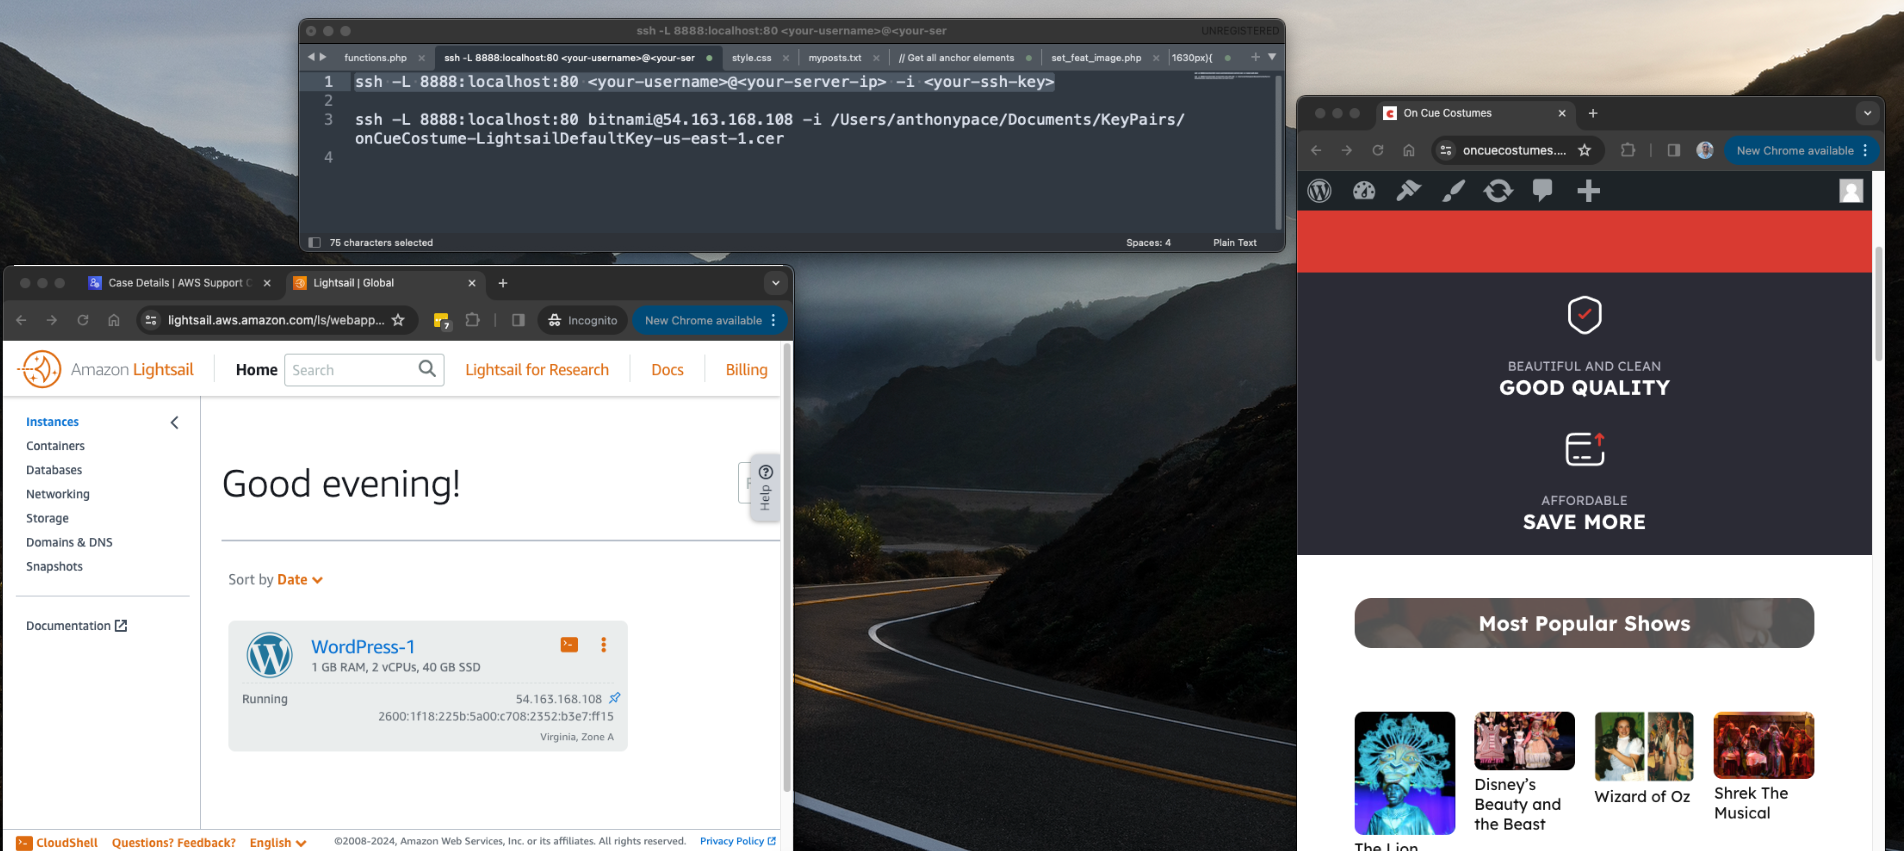
When looking at the server files in FileZilla, I noticed that phpMyAdmin was installed. I tried to access it from a web browser, but it warned that it was only accessible from localhost. I set up an SSH tunnel to access phpMyAdmin through my computer. From my Mac Terminal, I commanded:

ssh -L 8888:localhost:80 <your-username>@<your-server-ip> -i <your-ssh-key>

It told me that there was a bad permissions issue with the key file (even though this was the same file I had been using for sFTP). I fixed it from the command line:

chmod 600 onCueCostume-LightsailDefaultKey-us-east-1.cer

Once connected, I could access the server’s installation of phpMyAdmin from this browser URL: `http://localhost:8888/phpmyadmin`

Presented with a login screen, I didn’t know what credentials to use. From the Lightsail dashboard I connected to the server via web terminal. I looked up the MySql password with this command: `cat /home/bitnami/bitnami_credentials`

I assumed the username would be root – but no, it turned out to be user.

Production Access

After requesting production access, AWS responded, “It looks like we previously increased the sending limits for at least one other AWS account that you do not appear to be using. Before we make a decision about your current request, we would like to know why you cannot send from your existing unused account.”

What did this mean? I think it happened because I used my credit card on this new account, before switching it over to the business owner. This probably set off an automatic red flag on their end. Interestingly, the correspondence said “To protect our methods, we cannot provide any additional information about how we identified the related accounts.”

I responded and explained the situation honestly, “I am not aware of another account that I am not using. I do have my own AWS account for my web design business, but it is unrelated to this account – and it is not unused.” Within a few hours, production access was granted.

New Website

The original scope of this project was to build a new website showcasing content that already existed.  We were able to finalize the layout and design quickly. Here is a screenshot of the homepage:

homepage design of a wordpress website

To write this article, I referred to my ChatGPT chat log as a source of journal notes.

Adding SSL Certificate for HTTPS

The Bitnami installation comes with a tool `bncert-tool` that handles everything. It even sets up redirects to ensure your site always uses the secure HTTPS protocol. Refer to this AWS documentation: “Enable HTTPS on your WordPress instance in Lightsail“. You can run it from the command line interface. If it is not already installed you can download it: `wget -O bncert-linux-x64.run https://downloads.bitnami.com/files/bncert/latest/bncert-linux-x64.run`

At first, I tried installing the certs manually, using Let’s Encrypt – which was a bad idea. I encountered a problem resulting in a mismatch between the SSL certificate (server.crt) and the private key (server.key). This prevented Apache from restarting (panic). I was able to resolve the problem by generating a new self-signed certificate (relief). Make sure you take back-ups and snapshots before messing with anything via command line.

Snapshots

Lightsail allows for manual and automatic snapshots. My WordPress installation was about 40 gigabytes. Storage costs five cents per gigabyte – which is about two dollars per month to store a single snapshot.
 

Case Study: Fixing a WooCommerce Website for a New Client

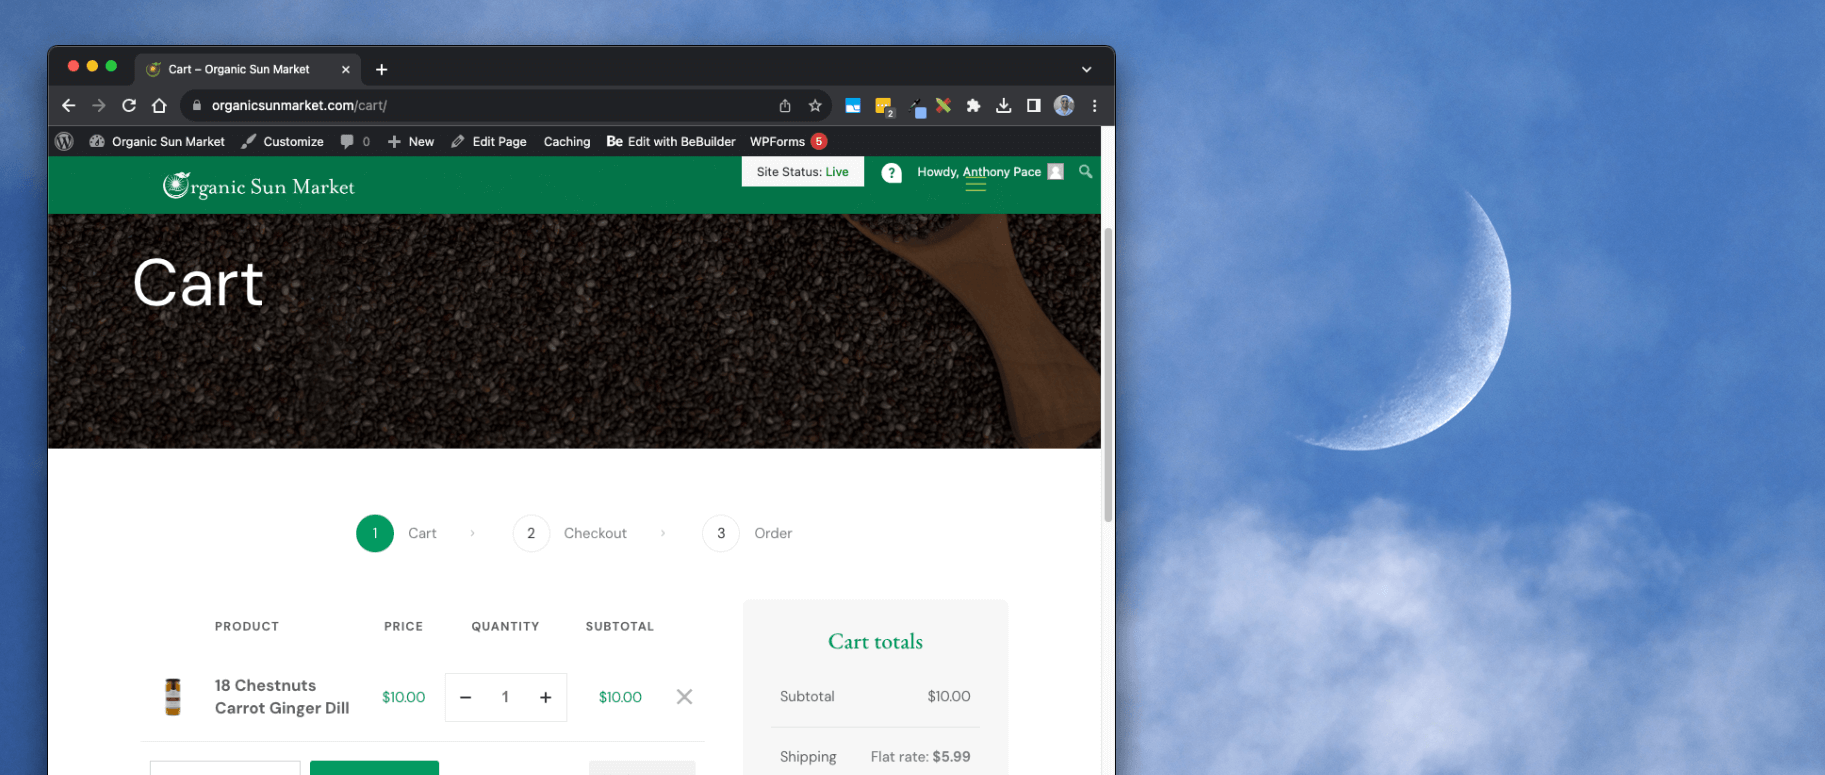
I met Steven at his store on Bloomfield Avenue in Northern New Jersey. After I gave him my business card he told me his website needs help. The checkout wasn’t working, and users couldn’t even add products to their cart. This was how the previous web development vendor left things before their arrangement ended.

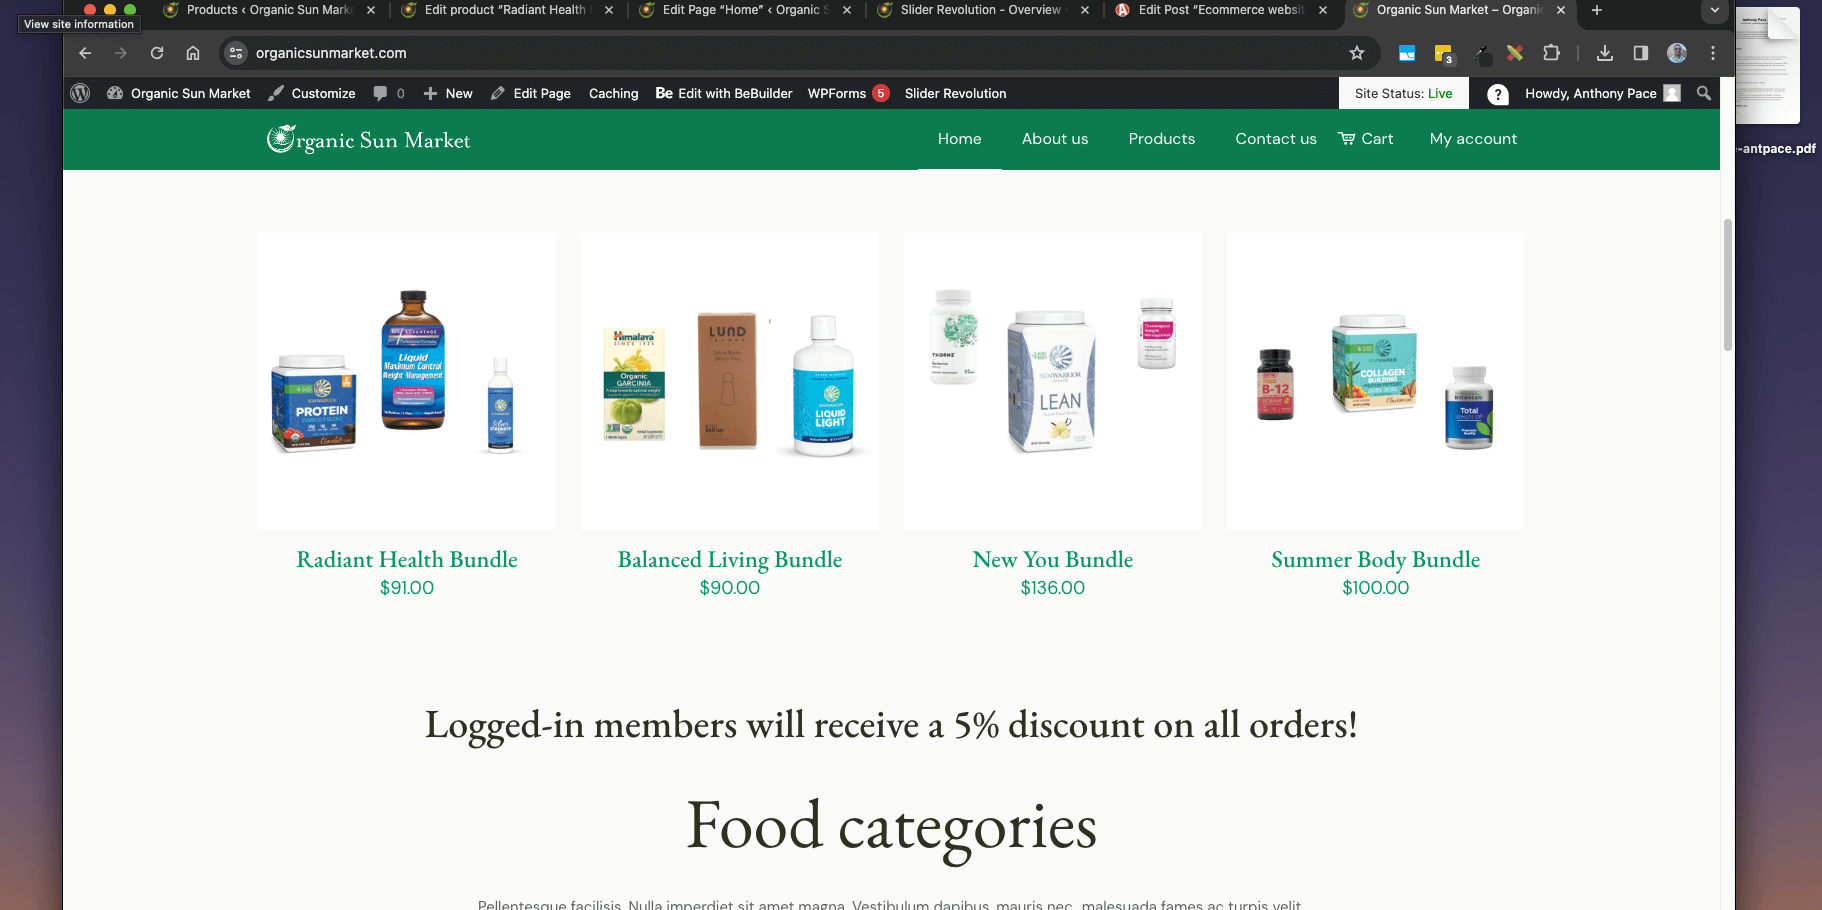
The website was powered by WordPress (managed by Bluehost), and used WooCommerce as its ecommerce solution. I helped him create a Stripe account, and connect it to his online store.  I finished configuring a premium WordPress theme called BeTheme, and gave him a multi-week marketing plan to help sales grow.

website screenshot

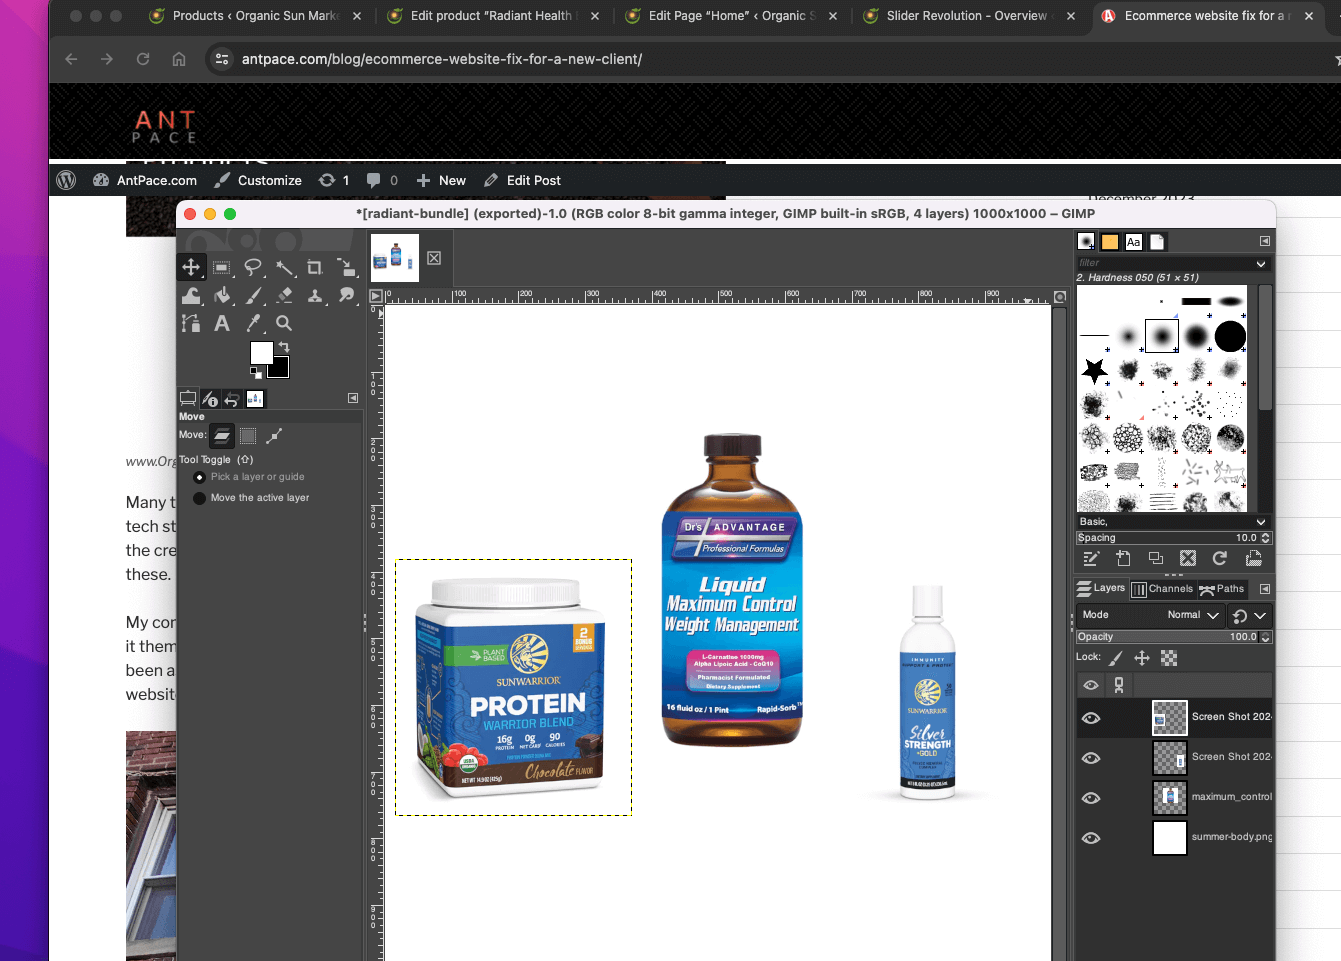
I used an image manipulation program (the GIMP) to create graphic assets used throughout the shop:

website graphic design

Many times I have to pick up where someone else left off. I could tell you another story about inheriting a Frankenstein tech stack from a previous vendor. They left off on non-talking terms after demanding back work payments to release the credentials to my team. My skill in figuring things out, regardless of the technology involved, shines in times like these.

My company tag line is “I can build your website” – it should really be “I can fix your website”. Business owners try to do it themselves, and often make it most of the way. When you need help, I am there to carry it over the finish line. I’ve been asked if services like Wix cuts into my business – it’s actually the opposite. Broken, incomplete, or unoptimized websites created on easy-to-use platforms have provided a solid market for my expertise.

Organic market

Local small businesses are what make neighborhoods unique and give families a chance to make a living themselves. It feels great to help people knowing we can both benefit. You can read more about the plan I use to help businesses with their existing website in another blog post.

Membership Discounts Without a Plugin

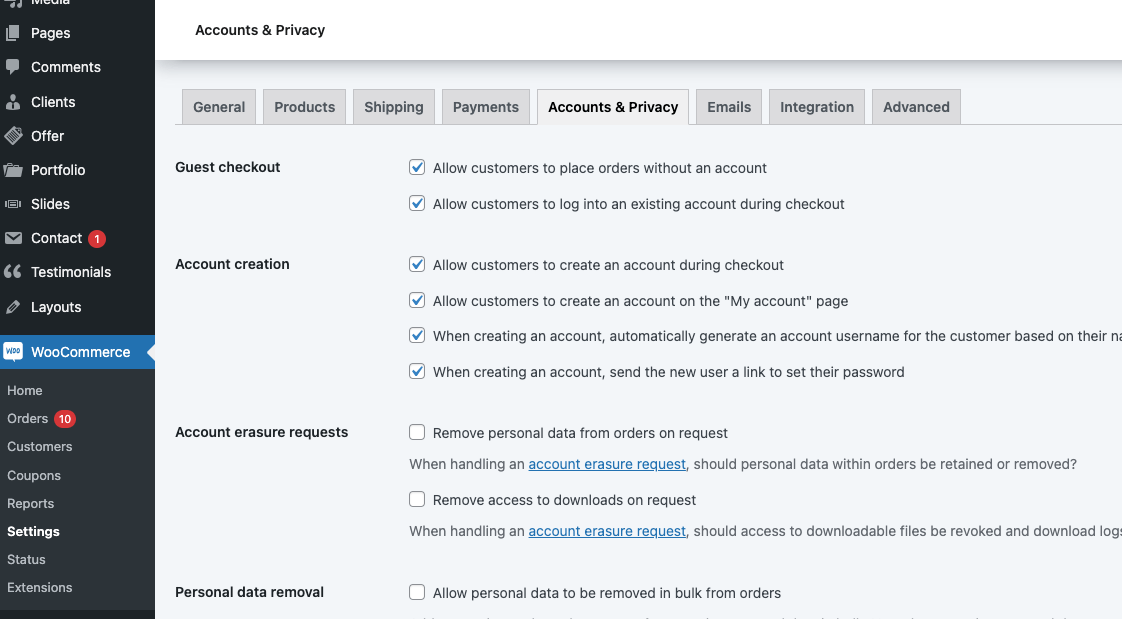
As part of the marketing plan, we decided to add membership accounts to the WordPress ecommerce website for Organic Sun Market. Enabling that capability was a few settings in the dashboard: WooCommerce > Settings > Accounts & Privacy

woocommerce accounts and privacy settings

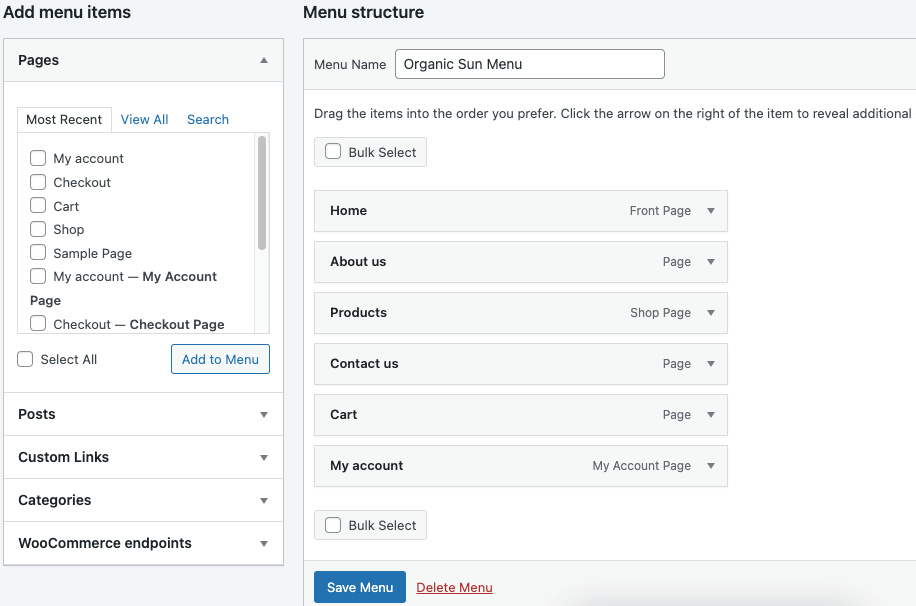
I also added a “My Account” link to the site’s global navigation.

menu in wordpress

By default, WooCommerce provides a “My Account” page where users can log in, view their orders, update their information, and more. You can specify a custom page in the advanced settings: WooCommerce > Settings > Advanced

woocommerce advanced setting

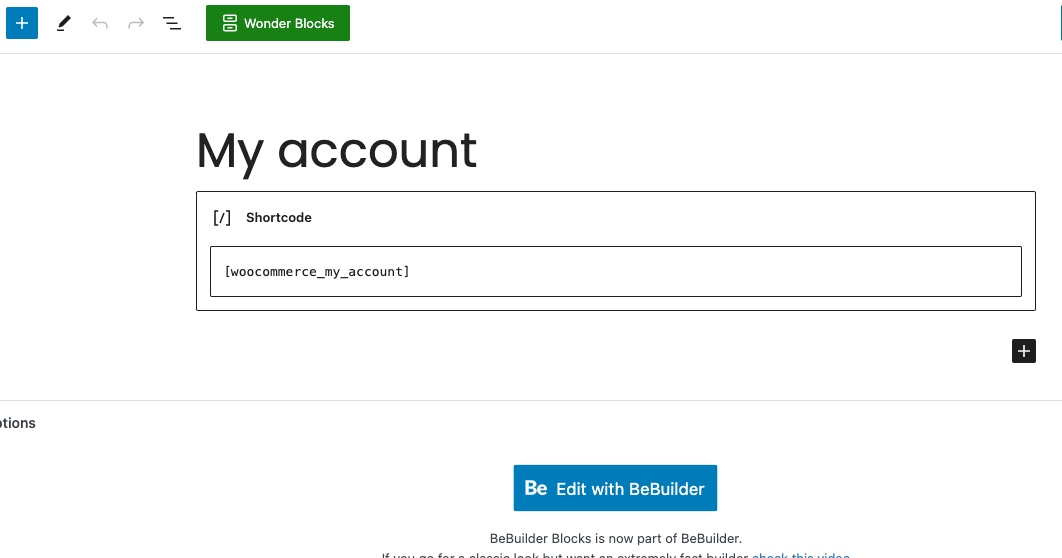
The account page specified uses a WooCommerce short code to handle the content: [woocommerce_my_account]

account page shortcode

Change menu text if user is logged into WordPress

I wanted the “My Account” menu text to change if the user is not logged in. I was able to do this with the WordPress hook `wp_nav_menu` and a simple string replacement PHP function:

add_filter('wp_nav_menu', 'change_my_account_menu_item', 10, 2);

function change_my_account_menu_item($nav_menu, $args) {
// Check if the user is not logged in
    if (!is_user_logged_in()) {
        // Change "My Account" link to "Login/Register"
        $nav_menu = str_replace('My account', 'Login/Register', $nav_menu);
    }
    return $nav_menu;
}

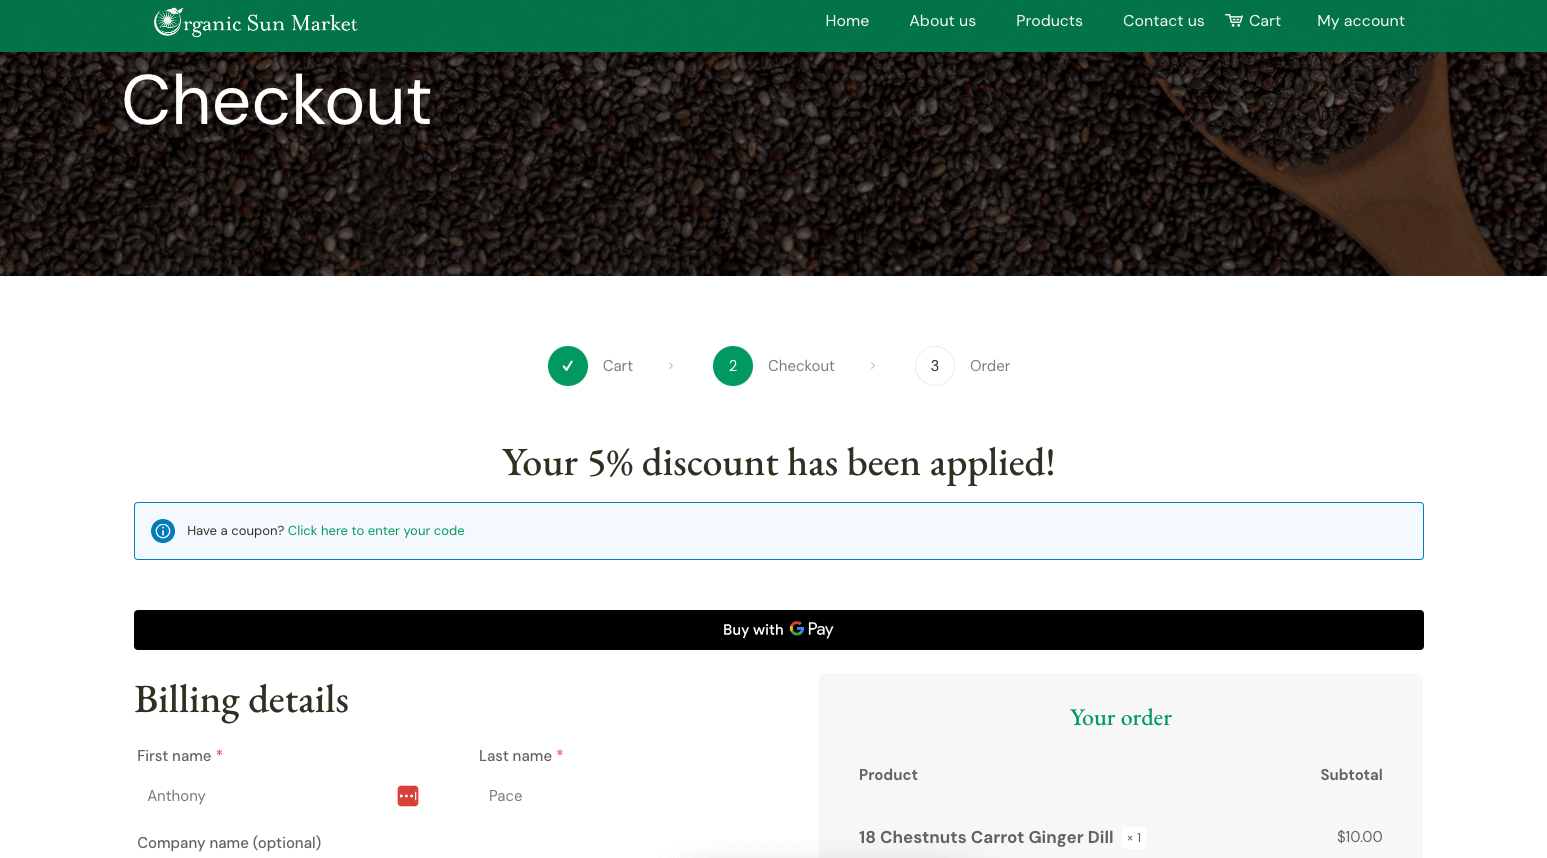
To incentivize users to create an account, we offer a 5% discount to any one logged in. The checkout page contains conditional messaging (depending on wether they are logged in or not) to communicate this incentive.

conditional css messaging on checkout

Hide or show UI elements if user is logged into WordPress

I am able to apply that  style condition with two custom CSS classes, specific to the presence of the WordPress body class ‘logged-in’:

.only-show-while-logged-in{display: none;}
body.logged-in .dont-show-while-logged-in{display:none;}
body.logged-in .only-show-while-logged-in{display:block;}

Apply WooCommerce discount to logged in users

I applied the discount by using custom PHP code in the child theme’s functions.php file with the `woocommerce_before_calculate_totals` hook:

add_action( 'woocommerce_before_calculate_totals', 'no_discount_if_not_logged_in', 10, 1);
function no_discount_if_not_logged_in( $cart ) {
	if (is_user_logged_in()) {              
		foreach ( $cart->get_cart() as $cart_item ) {        
			$discount_eliminate = $cart_item['data']->get_regular_price();
			$discount_percentage = 5; // Set your desired discount percentage
			$discount_amount = $discount_eliminate * ($discount_percentage / 100);
			$new_price = $discount_eliminate - $discount_amount;

			$cart_item['data']->set_price($new_price);
		}
	}
}

Apply WooCommerce discount to logged in users on a specific category of products

Later, we changed the logic to be a 10% discount for logged-in members, but only on products that were part of a specific category called “bundles”.

add_action( 'woocommerce_before_calculate_totals', 'discount_for_specific_category', 10, 1);

function discount_for_specific_category( $cart ) {
    if ( is_user_logged_in() ) {
        // Define the category slug you want to apply the discount to
        $target_category = 'bundles';

        foreach ( $cart->get_cart() as $cart_item ) {
            $product_id = $cart_item['product_id'];

            // Check if the product belongs to the target category
            if ( has_term( $target_category, 'product_cat', $product_id ) ) {
                $discount_eliminate = $cart_item['data']->get_regular_price();
                $discount_percentage = 10; // Set your desired discount percentage
                $discount_amount = $discount_eliminate * ( $discount_percentage / 100 );
                $new_price = $discount_eliminate - $discount_amount;

                $cart_item['data']->set_price( $new_price );
            }
        }
    }
}

Print Design

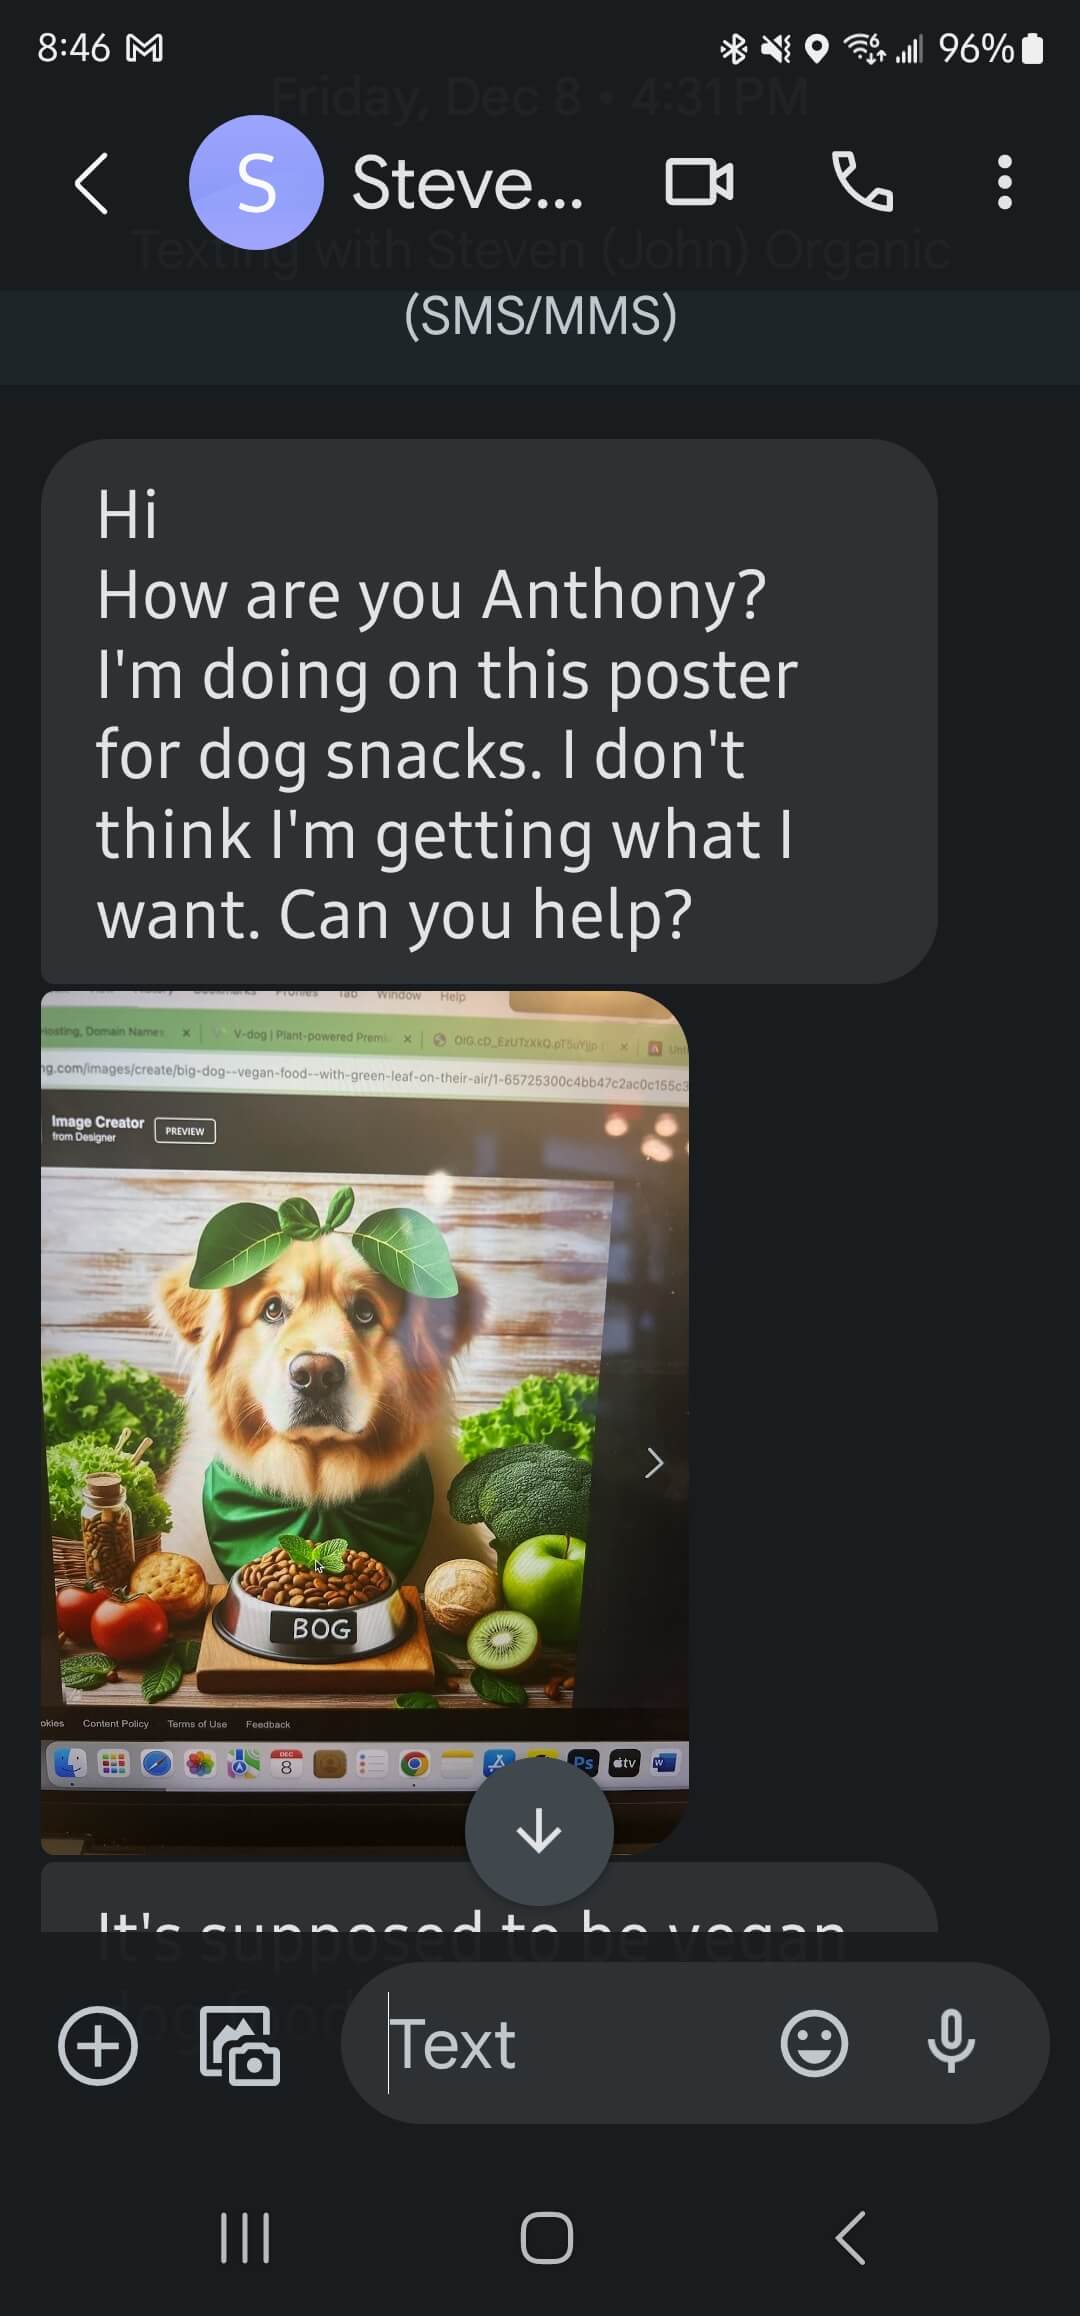
Many local small businesses take their marketing offline and into the real world. Print marketing is a business I have been a part of for almost two decades. I have designed, delivered, and distributed flyers, menus, business cards and more. As the holiday season approached, Steven asked me to create a poster for one of his healthy products.

graphic design request via text message

He sent me a draft he has been working on, along with some inspiration examples that expressed the direction he wanted things to go. This was the final product:

Dog treats poster

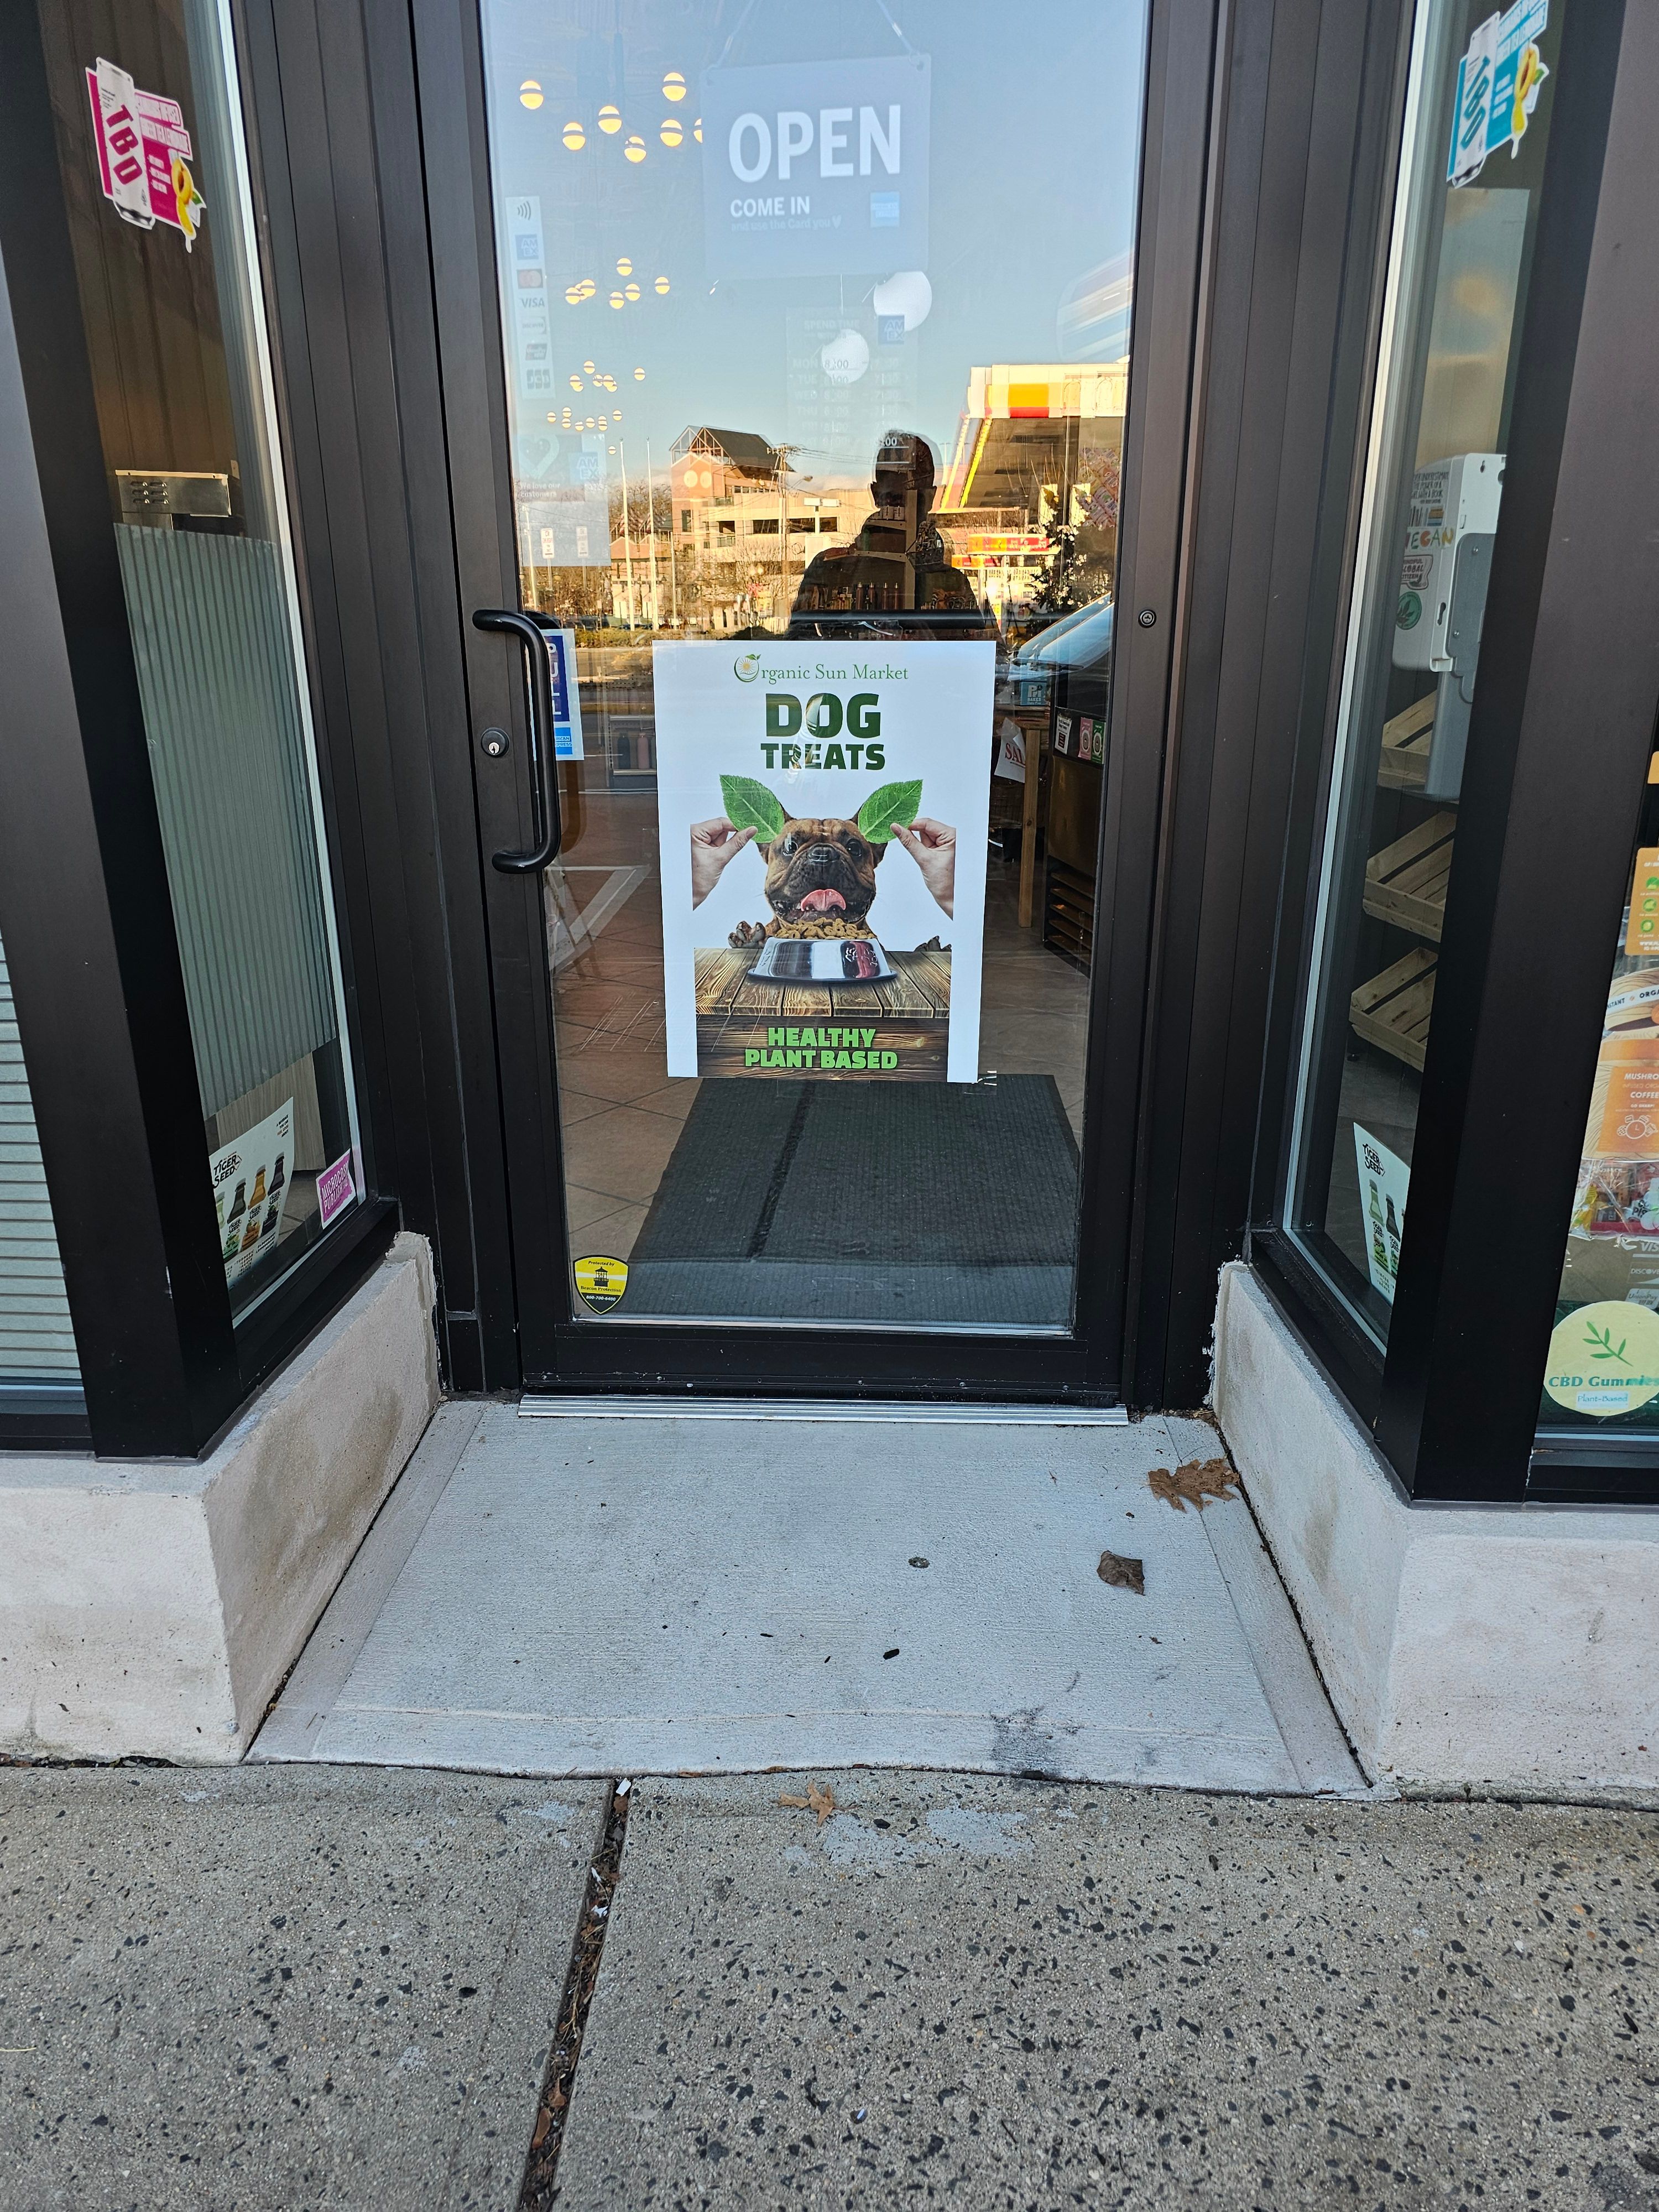
And here it is hanging in the store front:

Printed poster design

Error establishing connection to database – WordPress solution

solutions for wordpress database errors

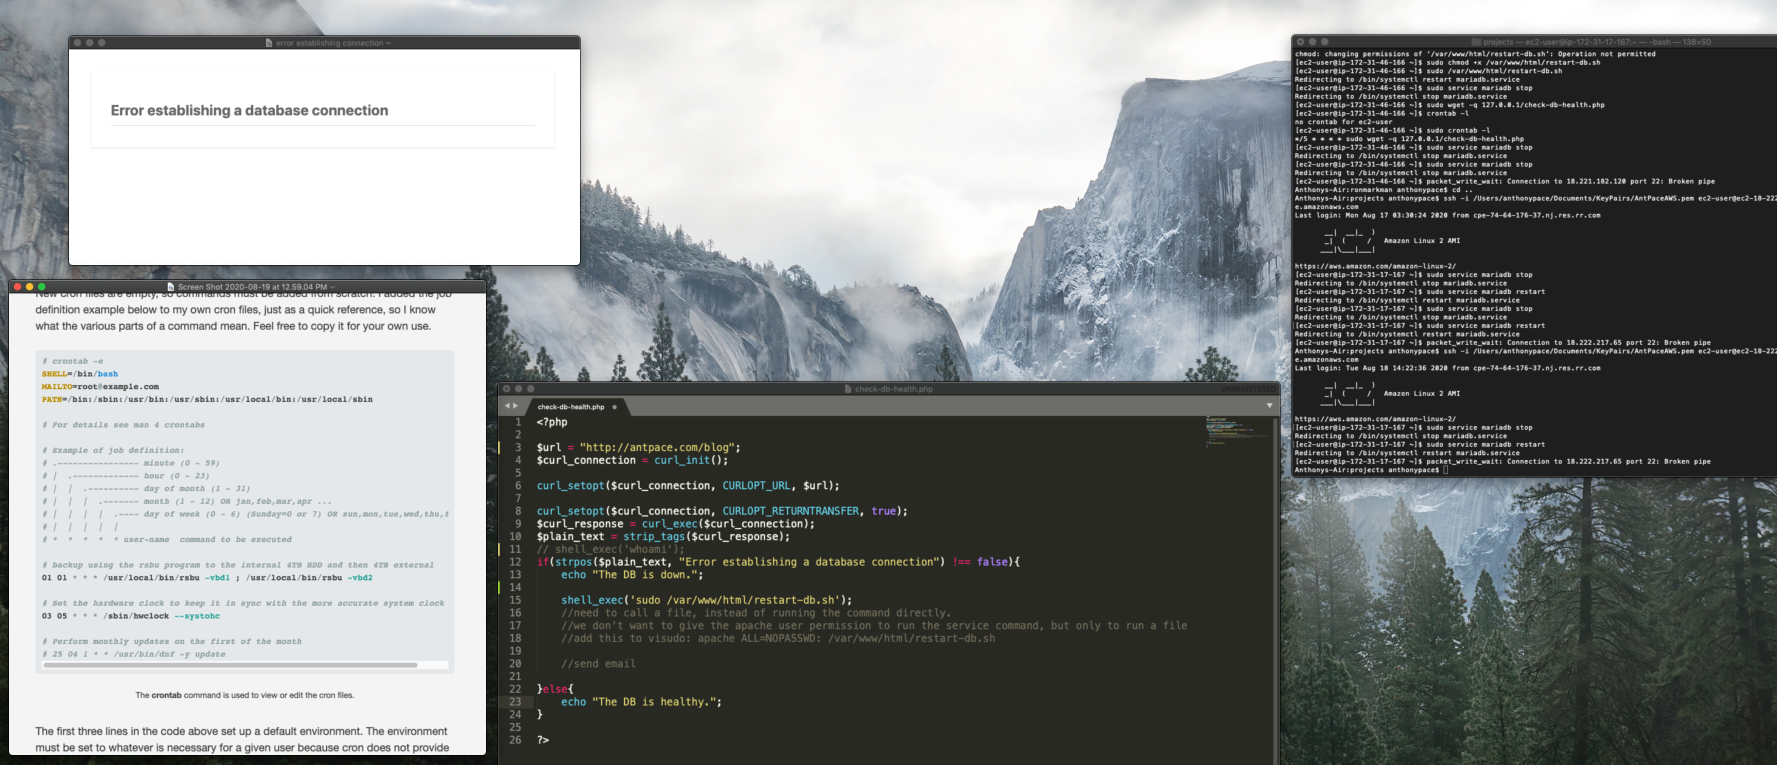
A crashed database is a problem I’ve encountered across multiple WordPress websites. When trying to load the site you’re faced with a dreaded “Error establishing a database connection” message. Restarting the DB service usually clears things up. But, sometimes it won’t restart at all – which is why I started automating nightly data dumps to an S3 bucket.

Recently, one particular site kept going down unusually often. I assumed it was happening due to low computing resources on the EC2 t3.micro instance. I decide to spin up a a new box with more RAM (t3.small) and migrate the entire WordPress setup.

Since I couldn’t be sure of what was causing the issue, I needed a way to monitor the health of my WordPress websites. I decided to write code that would periodically ping the site, and if it is down send an email alert and attempt to restart the database.

warning message when a website can't connect to the database

The first challenge was determining the status of the database. Even if it crashed, my site would still return a 200 OK response. I figured I could use cURL to get the homepage content, and then strip out any HTML tags to check the text output. If the text did match the error message, I could take further action.

Next, I needed to programmatically restart MySql. This is the command I run to do it manually: sudo service mariadb restart 

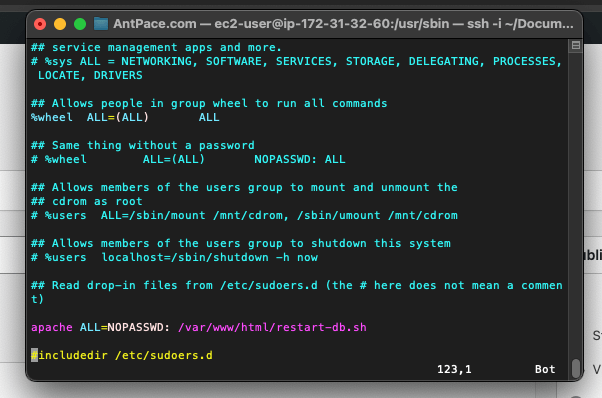
After doing some research, I found that I could use shell_exec() to run it from my PHP code. Unfortunately, Apache wouldn’t let the (non-password using) web server user execute that without special authorization. I moved that command to its own restart-db.sh file, and allowed my code to run it by adding this to the visudo file: apache ALL=NOPASSWD: /var/www/html/restart-db.sh

My visudo file was located at /usr/sbin/visudo. It is a tool found on most Linux systems to safely update the /etc/sudoers file, which is the configuration file for the sudo command. To edit this file, I don’t open it in vim like I would with other editable files. Instead, I run the file as its own command: sudo visudo. Once it is open, you can press the i key to enter “insert” mode. It is considered “safe” because it edits the sudoers file following a strict procedure.

edit the visduo file

I also needed to make the file executable by adjusting permissions: sudo chmod +x /var/www/html/restart-db.sh

Once those pieces were configured, my code would work:

<?php

$url = "https://www.antpace.com/blog/";
$curl_connection = curl_init();

curl_setopt($curl_connection, CURLOPT_URL, $url);

curl_setopt($curl_connection, CURLOPT_RETURNTRANSFER, true);
$curl_response = curl_exec($curl_connection);
$plain_text = strip_tags($curl_response);

if(strpos($plain_text, "Error establishing a database connection") !== false){
	echo "The DB is down.";
        
        //restart the database
        shell_exec('sudo /var/www/html/restart-db.sh');
        
        //send notification email
        include 'send-email.php';
        send_email();
}else{
	echo "The DB is healthy.";
}

?>

You can read more about how to send a notification email in another post that I wrote on this blog.

The contents of restart-db.sh looks like this:

#!/bin/bash

sudo service mariadb restart

Create the cron job

A cron job is a scheduled task in Linux that runs at set times. For my PHP code to effectively monitor the health of the database, it needs to run often. I decided to execute it every five minutes. Below are three shell commands to create a cron job.

The first creates the cron file for the root user:

sudo touch /var/spool/cron/root

The next appends my cron command to that file:

echo "*/5 * * * * sudo wget -q 127.0.0.1/check-db-health.php" | sudo tee -a /var/spool/cron/root

And, the last sets the cron software to listen for that file:

sudo crontab /var/spool/cron/root

Alternatively, you can create, edit, and set the cron file directly by running sudo crontab -e . The contents of the cron file can be confirmed by running sudo crontab -l .


Migrate a WordPress Site to AWS

Migrate a WordPress site to AWS

In a previous article I discussed launching a website on AWS. The project was framed as transferring a static site from another hosting provider. This post will extend that to migrating a dynamic WordPress site with existing content.

Install WordPress

After following the steps to launch your website to a new AWS EC2 instance, you’ll be able to connect via sFTP. I use FileZilla as my client. You’ll need the hostname (public DNS), username (ec2-user in this example), and key file for access. The latest version of WordPress can be downloaded from wordpress.org. Once connected to the server, I copy those files to the root web directory for my setup: /var/www/html

Make sure the wp-config.php file has the correct details (username, password) for your database. You should use the same database name from the previous hosting environment.

Data backup and import

It is crucial to be sure we don’t lose any data. I make a MySql dump of the current database and copy the entire wp-content folder to my local machine. I’m careful to not delete or cancel the old server until I am sure the new one is working identically.

Install phpMyAdmin

After configuring my EC2 instance, I install phpMyAdmin so that I can easily import the sql file.

sudo yum install php-mbstring -y
sudo systemctl restart httpd
sudo systemctl restart php-fpm
cd /var/www/html
wget https://www.phpmyadmin.net/downloads/phpMyAdmin-latest-all-languages.tar.gz
mkdir phpMyAdmin && tar -xvzf phpMyAdmin-latest-all-languages.tar.gz -C phpMyAdmin --strip-components 1
rm phpMyAdmin-latest-all-languages.tar.gz
sudo systemctl start mariadb

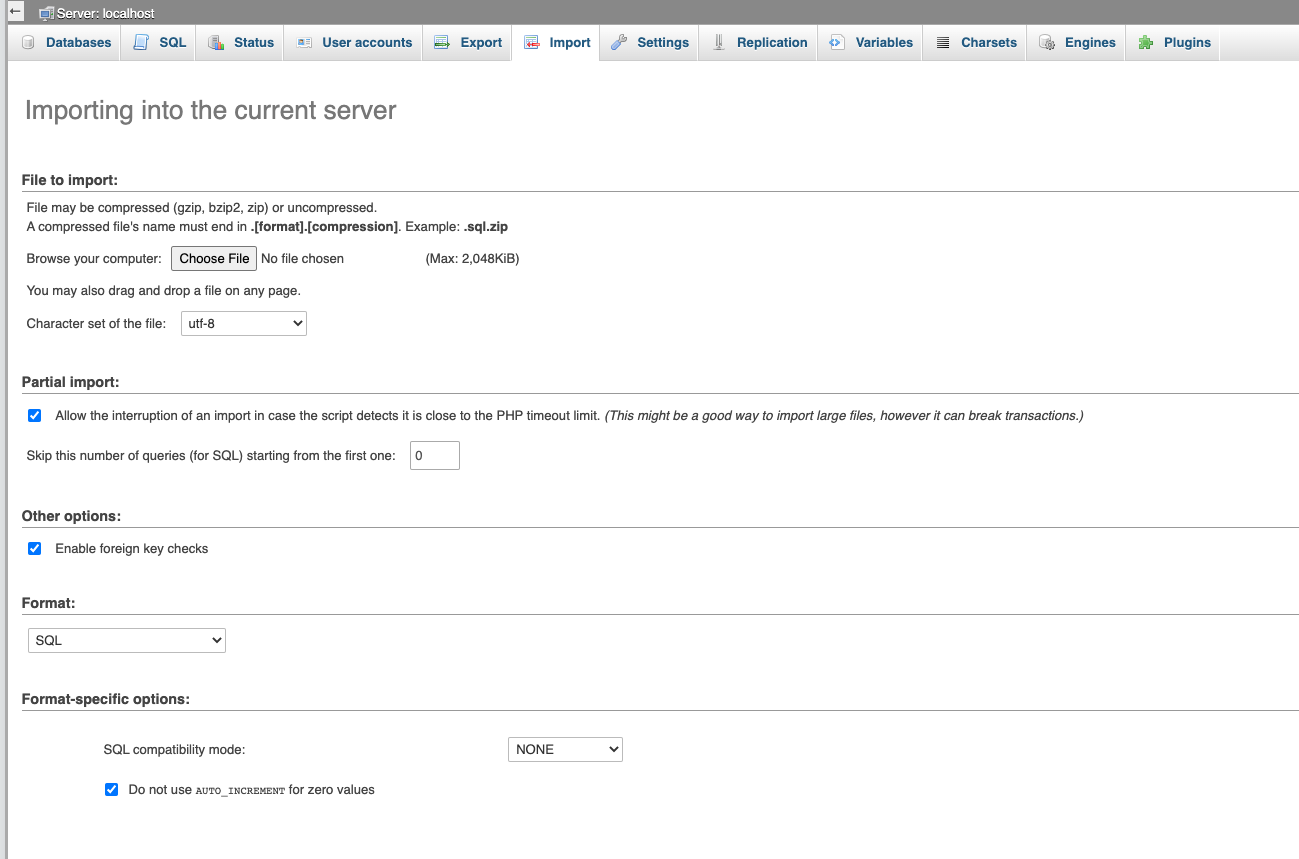
The above Linux commands installs the database management software on the root directory of the new web server. It is accessible from a browser via yourdomainname.com/phpMyAdmin. This tool is used to upload the data to the new environment.

phpMyAdmin import screen

Create the database and make sure the name matches what’s in wp-config.php from the last step. Now you’ll be able to upload your .sql file.

Next, I take the wp-content folder that I stored on my computer, and copy it over to the new remote. At this point, the site homepage will load correctly. You might notice other pages won’t resolve, and will produce a 404 “not found” response. That error has to do with certain Apache settings, and can be fixed by tweaking some options.

Server settings

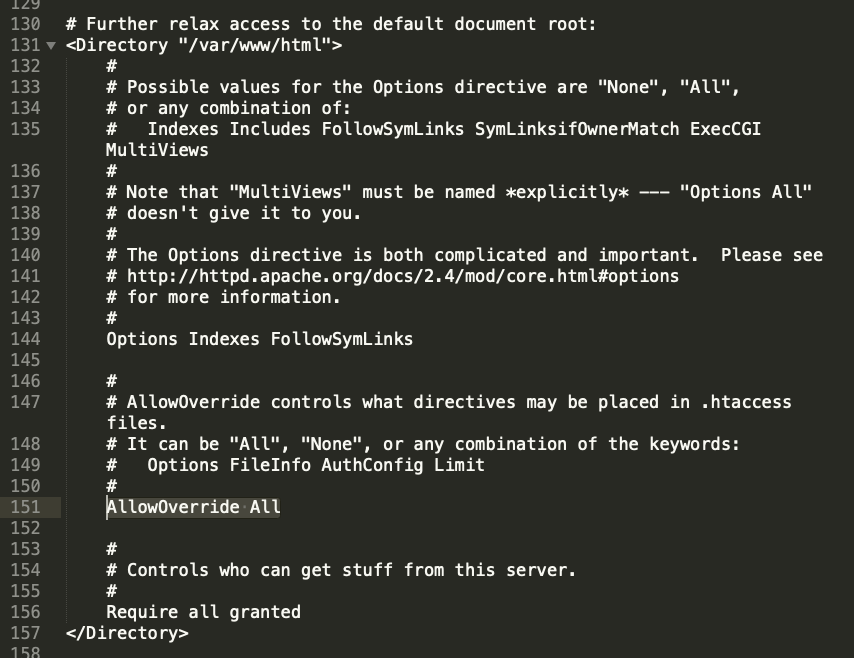
With my setup, I encountered the above issue with page permalinks . WordPress relies on the .htaccess file to route pages/posts with their correct URL slugs. By default, this Apache setup does not allow its settings to be overridden by .htaccess directives. To fix this issue, the httpd.conf file needs to be edited. Mine was located in this directory: /etc/httpd/conf

You’ll need to find (or create) a section that corresponds to the default document root: <Directory “/var/www/html”></Directory>. In that block, they’ll be a AllowOverride command that is set to “None”. That needs to be changed to “All” for our configuration file to work.

apache config settings found in the HTTPD conf file

Final steps

After all the data and content has been transferred, do some smoke-testing. Try out as many pages and features as you can to make sure the new site is working as it should. Make sure you keep a back-up of everything some place secure (I use an S3 bucket). Once satisfied, you can switch your domain’s A records to point at the new box. Since the old and new servers will appear identical, I add a console.log(“new server”) to the header file. That allows me tell when the DNS update has finally resolved. Afterwards, I can safely cancel/decommission the old web hosting package.

Don’t forget to make sure SSL is setup!

Updates

AWS offers an entire suite of services to help businesses migrate. AWS Application Migration Service is a great choice to “simplify and expedite your migration while reducing costs”.

Upgrade PHP

In 2023, I used this blog post to stand-up a WordPress website. I was using a theme called Balasana. When I would try to set “Site Icon” (favicon) from the “customize” UI I would receive a message stating that “there has been an error cropping your image“. After a few Google searches, and also asking ChatGPT, the answer seemed to be that GD (a graphics library) was either not installed or not working properly. I played with that for almost an hour, but with no success. GD was installed, and so was ImageMagick (a back-up graphics library that WordPress falls back on).

The correct answer was that I needed to upgrade PHP. The AWS Linux 2 image comes with PHP 7.2. Upgrading to version 7.4 did the trick. I was able to make that happen, very painlessly, by following a blog post from Gregg Borodaty . The title of his post is “Amazon Linux 2: Upgrading from PHP 7.2 to PHP 7.4” (thanks Gregg).

Update

My recommendation, as of 2024, is to use a managed WordPress service. I wrote a post about using AWS Lightsail for that purpose: Website Redesign with WordPress Gutenberg via AWS Lightsail


Lazy Load Images and Assets on WordPress with IntersectionObserver

wordpress homepage design

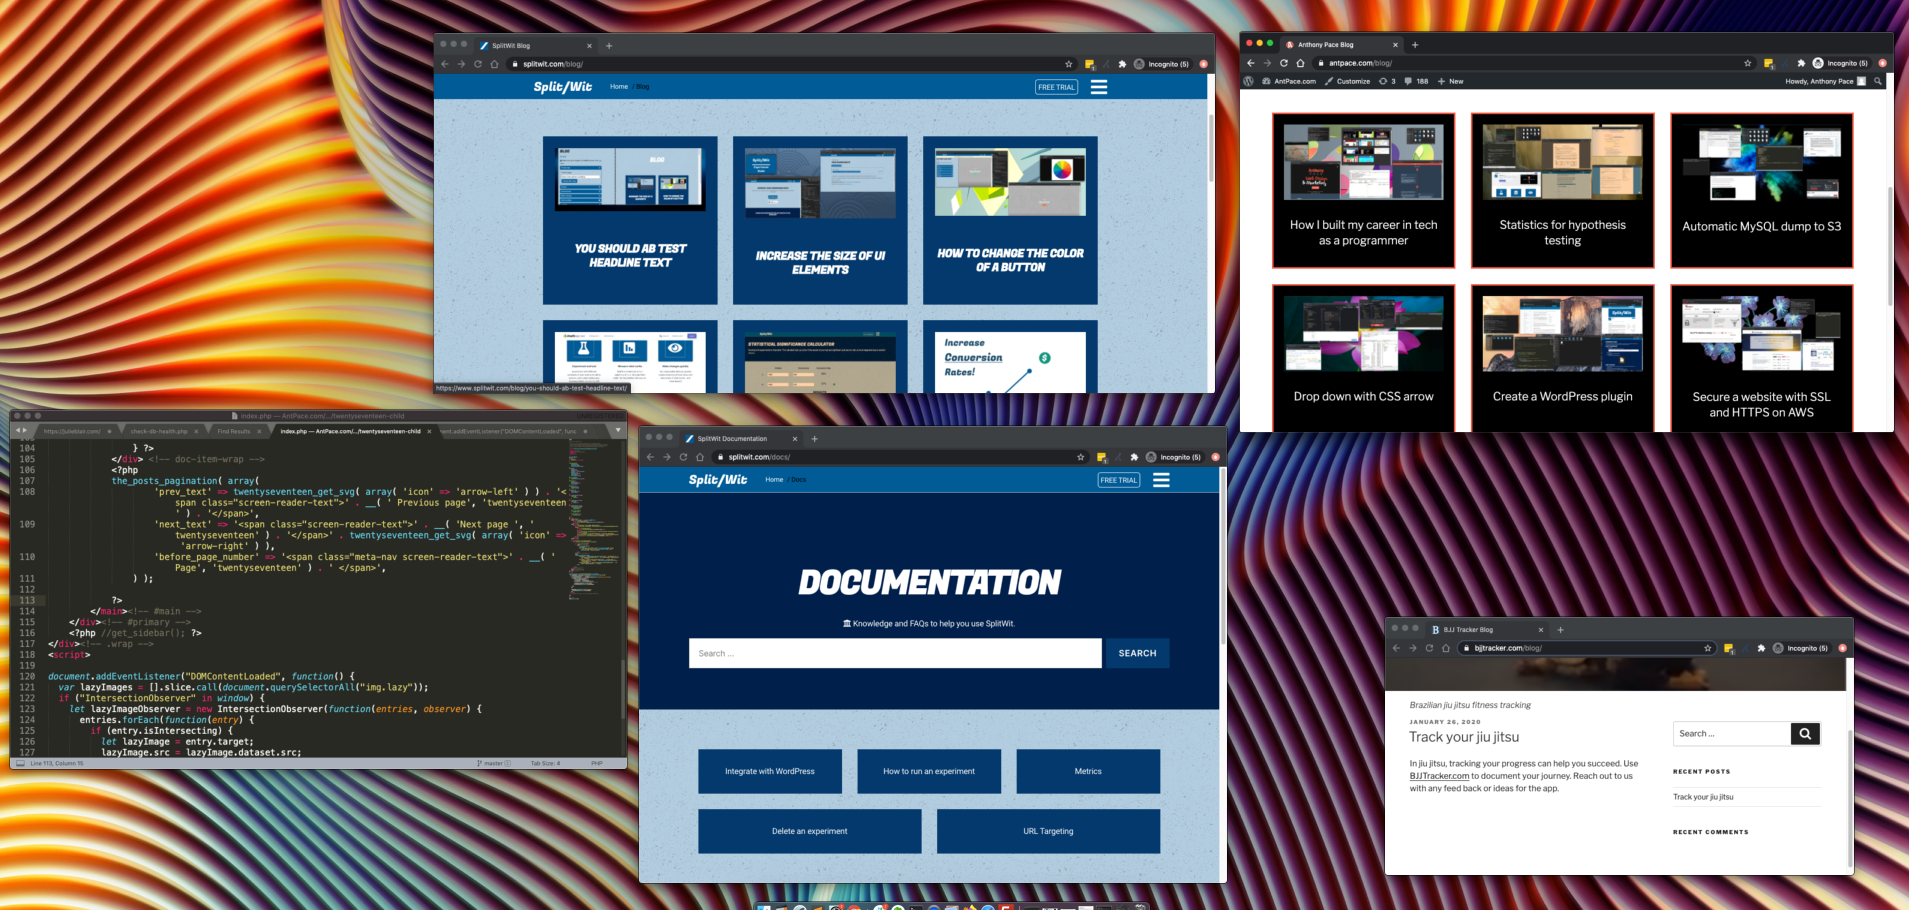
I write online a lot. Adding articles to this blog serves to build a catalog of technical solutions for future reference. Updating the homepage has improved user experience and SEO. The new design displays the most recent articles as clickable cards, rather than listing the entire text of each one. The changes for this were added to index.php file, in the child-theme folder. The theme’s original code already used a While() loop to iterate through the post records. My modification removed the article content, and only kept the title and image:

<div class="doc-item-wrap">
	<?php
	while ( have_posts() ) {
		the_post();
		echo "<div class='doc-item'><a href='". get_the_permalink() ."'><img class='lazy' data-src='".get_the_post_thumbnail_url()."'><h2>" . get_the_title() . "</h2></a></div>";
	} ?>
</div> <!-- doc-item-wrap -->

I used custom CSS, leveraging Flexbox, to style and position the cards:

.doc-item-wrap{
    display: flex;
    flex-wrap: wrap;
    justify-content: center;
}
.doc-item{
    width: 30%;
    padding: 20px;
    border: 3px solid #f0503a;
    margin: 15px;
    background: black;
    flex-grow: 1;
    text-align: center;
}
.doc-item:hover{
    background-color: #34495e;
}
.doc-item p{
    margin: 0px;
    line-height: 40px;
    color: white;
}
.doc-item img{
    display: block;
    margin: 0 auto;
}
.doc-item h2{
    font-size: 22px;
    color: white;

}
@media(max-width: 1000px){
	.doc-item{
		width: 45%
	}
}
@media(max-width: 700px){
	.doc-item{
		width: 100%
	}
}

The media queries adjust the size of the cards (and how many are in a row), based on screen size.

Look and feel of the design

Card layout design is a common way to arrange blog content. It gives visitors a visual overview of what’s available. It also stops the homepage from duplicating content that’s already available on the individual post pages.

You can see this pattern throughout the digital world. Card layout translates well across screen sizes and devices. Since I put much effort into writing, making it organized was a priority. This implementation can be extended to add additional content (such as date, description, etc.) and features (share links, animations, expandability). And, it fits nicely with what WordPress already provides.

Lazy loaded images

Image content can often be the biggest drag to site speed. Lazy loading media defers rendering until it is needed. Since this blog’s homepage has an image for each post, this was essential.

While iterating through post records the image URL is assigned to a custom data-src attribute on the image tag, leaving the normal src blank. This assures the image is not immediately retrieved nor loaded. I wrote a JavaScript function to lazy load the images, relying on the IntersectionObserver API. The card’s image does not load until a user scrolls it into view. This improves the speed of the page, which has a positive effect on SEO and UX.

The code creates a IntersectionObserver object.  It observes each of the image elements, checking to see if they are within the browser viewport. Once the image elements come into view, it takes the image URL from the data-src attribute, and assigns it to the tag’s src – causing the image to load.

document.addEventListener("DOMContentLoaded", function() {
  var lazyImages = [].slice.call(document.querySelectorAll("img.lazy"));
  if ("IntersectionObserver" in window) {
    let lazyImageObserver = new IntersectionObserver(function(entries, observer) {
      entries.forEach(function(entry) {
        if (entry.isIntersecting) {
          let lazyImage = entry.target;
          lazyImage.src = lazyImage.dataset.src;
          // lazyImage.srcset = lazyImage.dataset.srcset;
          lazyImage.classList.remove("lazy");
          lazyImageObserver.unobserve(lazyImage);
        }
      });
    });

    lazyImages.forEach(function(lazyImage) {
      lazyImageObserver.observe(lazyImage);
    });
  } 
});

The original JS code was referenced from a web.dev article. Web.dev is a resource created by Google that provides guidance, best practices, and tools to help web developers build better web experiences.

You can also use this same method for lazy loading videos, backgrounds, and other assets.

IntersectionObserver to lazily load JavaScript assets

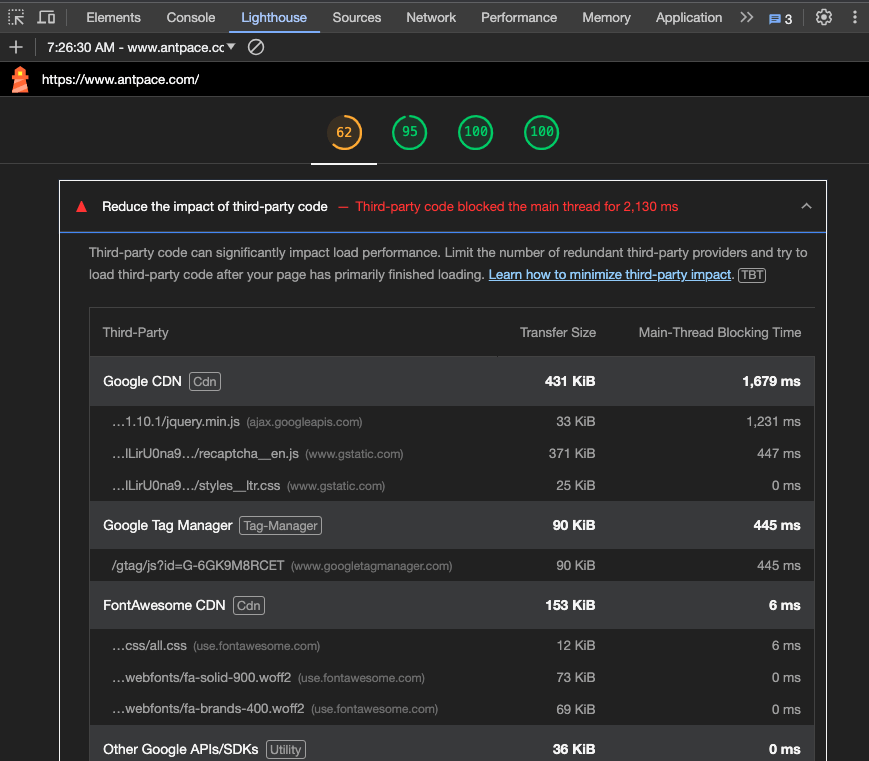
I discovered another application for the IntersectionObserver implementation that I used above to load lazy load images. The Google Lighthouse performance score on my homepage was being dinged due to the “impact of third-party code”.

impact of 3rd party js on performance scores

The largest third-party resource was is used for the reCaptcha on a contact form at the bottom of my homepage. It makes sense to not load it until the user scrolls down to that section – especially because the UX expects them to take time to fill out the form before hitting “submit” anyway.

Using the same pattern as above, I created a new `IntersectionObserver` and passed the contact form section as the target:

function captchaLazyLoad(){
	contactCaptchaTarget = document.getElementById('contactSection')
	if (!contactCaptchaTarget) {
        return;
    }
	let contactCaptchaObserver = new IntersectionObserver(function(entries, observer) {
		if (entries[0].isIntersecting) {
            var script = document.createElement('script');
		    script.src = "https://www.google.com/recaptcha/api.js";
		    document.body.appendChild(script);
            contactCaptchaObserver.unobserve(contactCaptchaTarget);
        }
	})
	contactCaptchaObserver.observe(contactCaptchaTarget);
}

I included this function to the already existing `DOMContentLoaded`  event listener just below the loop to observe lazy image elements:

<script>
function captchaLazyLoad(){
	contactCaptchaTarget = document.getElementById('contactSection')
	if (!contactCaptchaTarget) {
        return;
    }
	let contactCaptchaObserver = new IntersectionObserver(function(entries, observer) {
		if (entries[0].isIntersecting) {
            var script = document.createElement('script');
		    script.src = "https://www.google.com/recaptcha/api.js";
		    document.body.appendChild(script);
            contactCaptchaObserver.unobserve(contactCaptchaTarget);
        }
	})
	contactCaptchaObserver.observe(contactCaptchaTarget);
}

document.addEventListener("DOMContentLoaded", function() {
  var lazyImages = [].slice.call(document.querySelectorAll("img.lazy"));
  if ("IntersectionObserver" in window) {
    let lazyImageObserver = new IntersectionObserver(function(entries, observer) {
      entries.forEach(function(entry) {
        if (entry.isIntersecting) {
          let lazyImage = entry.target;
          lazyImage.src = lazyImage.dataset.src;
          // lazyImage.srcset = lazyImage.dataset.srcset;
          lazyImage.classList.remove("lazy");
          lazyImageObserver.unobserve(lazyImage);
        }
      });
    });

    lazyImages.forEach(function(lazyImage) {
      lazyImageObserver.observe(lazyImage);
    });

    //
    captchaLazyLoad()

  } else {
    // Possibly fall back to a more compatible method here if IntersectionObserver does not exist on the browser
  }

});

</script>

This update raised my Lighthouse performance score by fifteen points!

Building my career in tech as a programmer

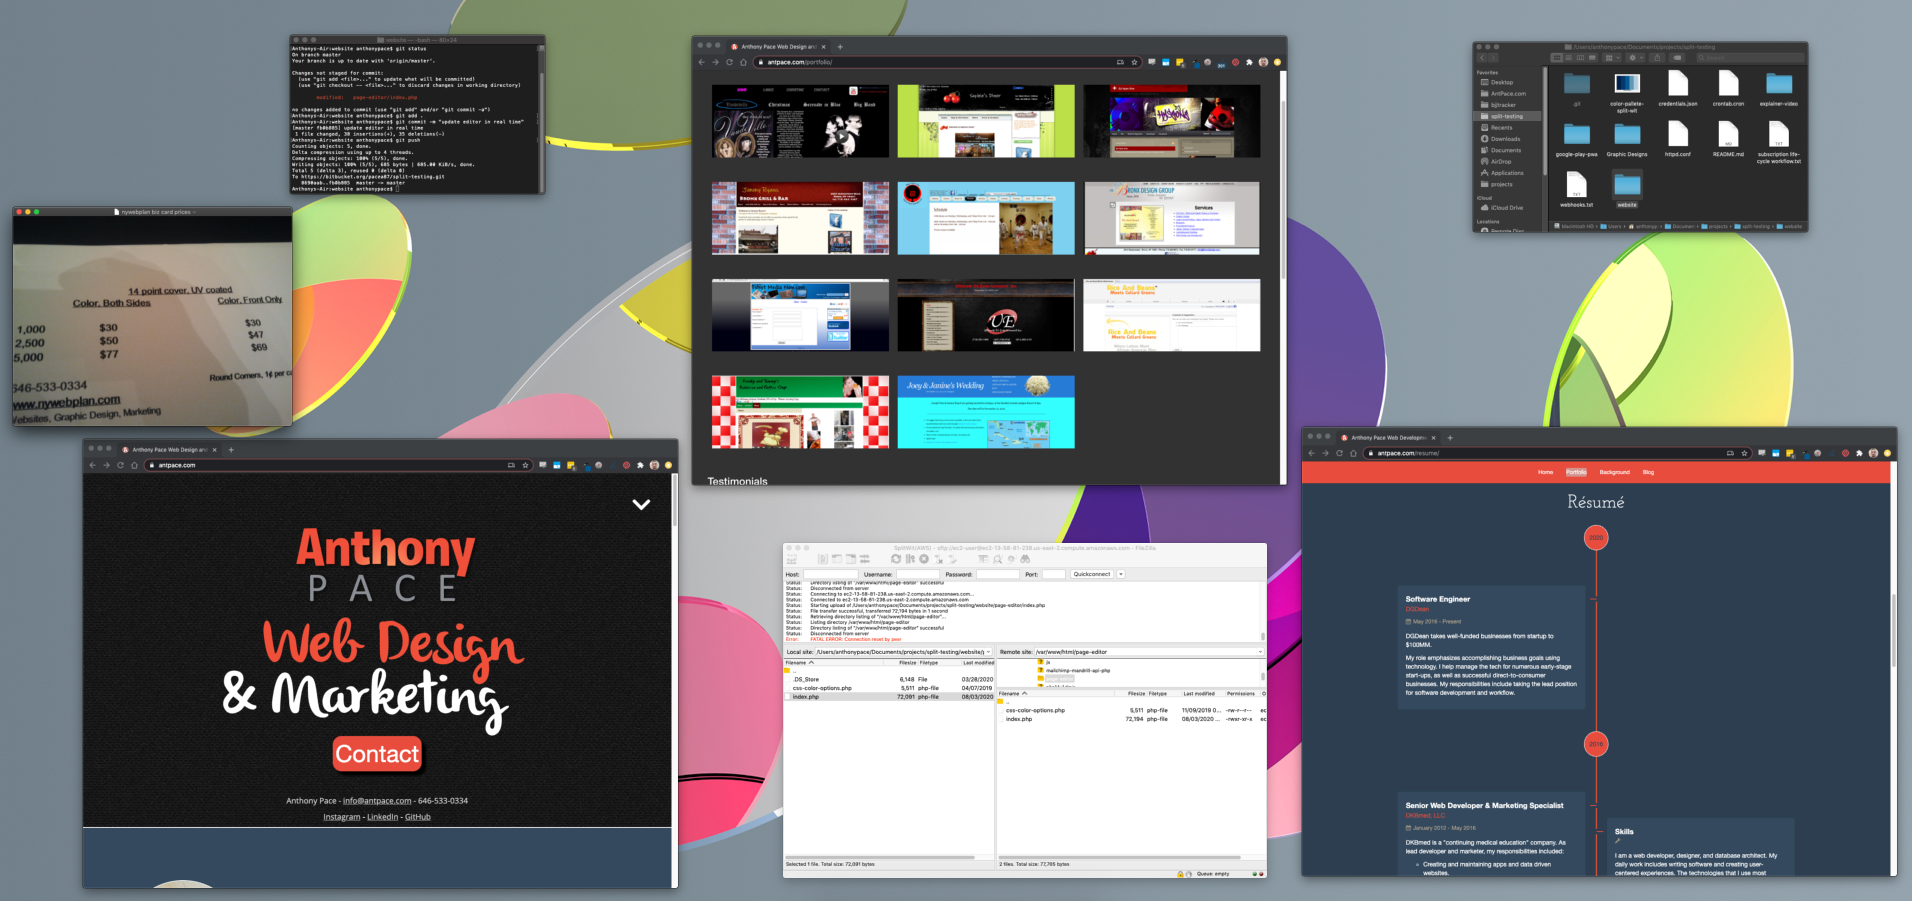
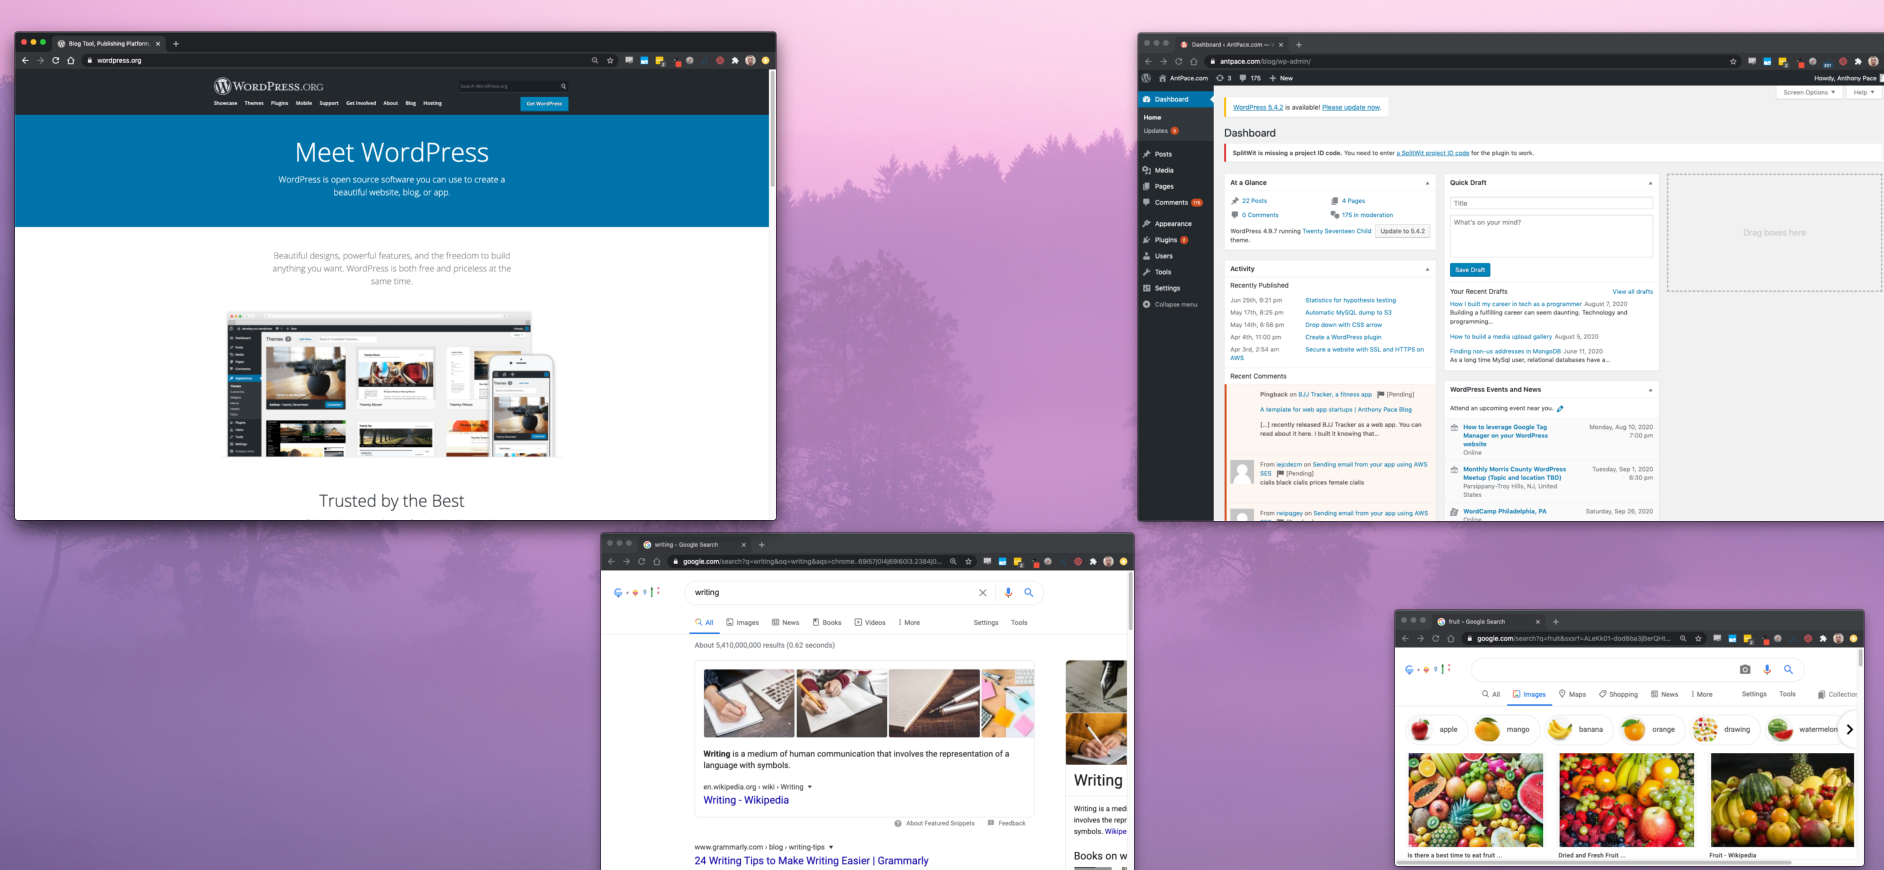
Anthony Pace's resume and portfolio

Building a fulfilling career can seem daunting. Technology and programming is a great option in today’s world. Resources and opportunities are abundant. You can work from anywhere and help build the future. When I started out, I faced challenges, doubt, and struggle. The ride has been worth it, and I’m excited to keep moving forward.

Starting out

About half way through college, I decided to dropout. I was majoring in Philosophy at a small school in New York.  My main source of income was delivering pizza in the Bronx.

A decade earlier, I found computer programming. I spent my nights coding desktop applications, learning HTML, and exploring the web. Those early days of technology laid the foundation for what would be my career.

When I left school in 2007, I wasn’t sure what to do next. I started earning money in tech that same year by starting a business. It focused on creating blogs and producing content. Ads and affiliate programs served to generate revenue.

It wasn’t as lucrative as I hoped. The real value came from the web development skills I honed. The software and technologies I used then, I still rely on today.

WordPress, Linux, and PHP. Writing, SEO, and digital marketing. These were the bricks I used to form the ground floor of my career in tech.

Service worker

While my early stint at entrepreneurship didn’t make me wealthy, it proved valuable. I managed to grow a freelance business leveraging this experience.

Networking and word-of-mouth were my primary means of growth. After printing business cards, I would give them to everyone I met. While delivering pizzas, I would hand them out to any small businesses or shops I passed.

I found my first paying customer in 2008. Since then, my client list has grown to triple digits.

The services I’ve offered range beyond web development. I’ve designed logos and written copy. I’ve managed infrastructure: web hosting, domain names, email, and more.

I have designed and managed both print and digital marketing campaigns. I’ve given strategy advice to young startups. Truly full stack: business, technology, and design. This has been a theme that has rung true my entire career.

The lessons learned during this period were ones of hard-work and getting the job done. The most valuable skills translate across industries. Finding clients fuels the engine of any business. The art of pitching and selling is a career-long study. Being able to manage business needs has proven to be foundational.

Office life

By 2011 I landed my first in-house gig, working at a marketing company. It felt like a turning point. I was the only developer, and got to deal directly with clients. I worked there for less than a year.

In 2012 I connected with a recruiter for the first time. They set me up on many interviews. I clicked with a small medical education company based in Manhattan. Hired as a web developer, I graduated to senior engineer and marketing specialist.

Team work

There, I was the head of all things digital. That meant building websites, coding native apps, and managing infrastructure. After a promotion to head of marketing my responsibilities expanded. Managing analytics took time. Copywriting promotional materials required patience. My horizons expanded while coordinating live events, and traveling internationally to exhibition shows.

Educational grants funded our projects. They included apps, websites, live events, and digital newsletters. Having a coordinated team was imperative to making things work. The project management and leadership was world-class and invaluable.

A single project was multifarious. I would design responsive layouts, build registration websites, deploy apps, and more. Once a product would launch, I would travel to live events to handle promotion and logistics. While I fulfilled many roles, I was lucky to work with a talented group.

Software Engineer

After four years, I made the difficult decision to leave the job that helped shape my career. A better opportunity presented itself in 2016. I was hired as a software engineer. This is when I came into my own as a programmer. I was able to collaborate with a brilliant team. The technologies I became familiar with continued to grow.

I got to work with early-stage startups and brands backed by venture capital. I learned the intricacies of building digital products and growing direct-to-consumer brands. My colleagues included entrepreneurs, CEOs, and product experts. The office was exciting and full of talent.

At the time of writing this (2020), we are stuck in quarantine due to the COVID-19 pandemic. We’re working remotely, but continuing to grow. Uncertain times prompt us to evaluate our circumstances and take inventory of what we value. What is the future of my career? How does it play into my life overall?

What’s next?

I love what I do for a living. I enjoy programming; I love problem solving; I’m an artist at heart. I plan on continuing to build software products. Chances are, I’ll be doing it somewhere other than New York City – especially since remote work seems to be the future of business.

If you’re thinking about starting a career in technology as a programmer, my advice is to jump right in. Start building, keep learning, and put yourself out there. If anyone reading this wants to chat about careers, technology, programming, or anything else, feel free to email me!

Create a WordPress plugin – How to

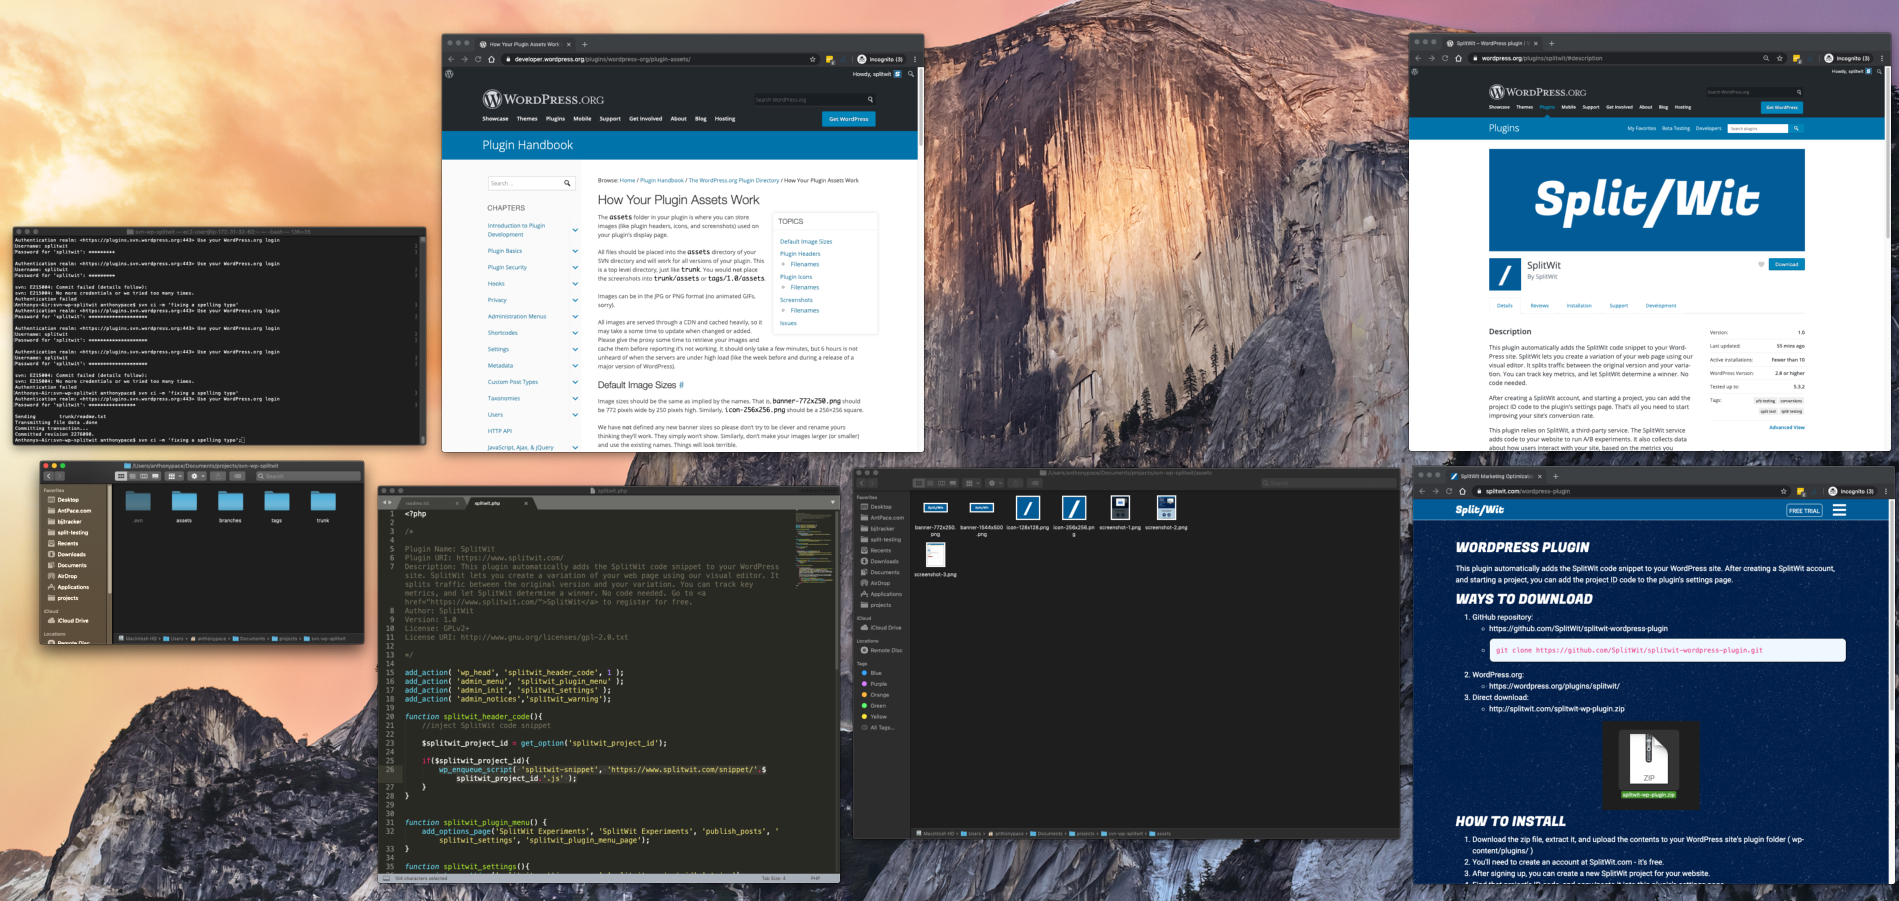
Splitwit plugin

Distributing software to app and plugin markets is a great way to gain organic traffic. Last year I submitted BJJ Tracker to the Google Play store as a Progressive Web App. Since then, I get signups every few days – with zero marketing effort.

I created a WordPress plugin for SplitWit, to grow its reach in a similar way. SplitWit helps run A/B experiments on the web. A JavaScript snippet needs to  be added to your code for it to work. This plugin injects the code snippet automatically.

Here is the process I took to develop and submit it to the WordPress plugin directory.

Plugin code

Since this is such a simple plugin, all I needed was one PHP file, and a readme.txt file. “At its simplest, a WordPress plugin is a PHP file with a WordPress plugin header comment.

The header comment defines meta-data:

/*

Plugin Name: SplitWit
Plugin URI: https://www.splitwit.com/
Description: This plugin automatically adds the SplitWit code snippet to your WordPress site. SplitWit lets you create a variation of your web page using our visual editor. It splits traffic between the original version and your variation. You can track key metrics, and let SplitWit determine a winner. No code needed. Go to SplitWit to register for free.
Author: SplitWit
Version: 1.0
License: GPLv2+
License URI: http://www.gnu.org/licenses/gpl-2.0.txt

*/

My PHP code defines six functions, uses four action hooks, and one filter hook.

The first function injects the SplitWit snippet code into the WordPress website’s header:

function splitwit_header_code(){
	//inject SplitWit code snippet
	 
	$splitwit_project_id = get_option('splitwit_project_id');
	 
	if($splitwit_project_id){
		wp_enqueue_script( 'splitwit-snippet', 'https://www.splitwit.com/snippet/'.$splitwit_project_id.'.js' );
	}
}
add_action( 'wp_head', 'splitwit_header_code', 1 );

Another defines the WordPress plugin’s menu page:

function splitwit_plugin_menu_page() { ?>

	<div>
		<h1>SplitWit Experiments</h1>
		<p>This plugin automatically adds the <a href="https://www.splitwit.com" target="_blank">SplitWit</a> code snippet to your WordPress site. <a href="https://www.splitwit.com" target="_blank">SplitWit</a> lets you create a variation of your web page using our visual editor. It splits traffic between the original version and your variation. You can track key metrics, and let SplitWit determine a winner. No code needed.
		</p>
		<p>You'll need to create an account at SplitWit.com - it's free. After signing up, you can create a new SplitWit project for your website. Find that project's ID code, and copy/paste it into this page.</p>
		
		<form method="post" action="options.php">
			<?php settings_fields( 'splitwit_settings_group' ); ?>
			<input style="width: 340px;display: block; margin-bottom: 10px;" type="text" name="splitwit_project_id" value="<?php echo get_option('splitwit_project_id'); ?>" />
			<input type="submit" class="button-primary" value="Save" />
		</form>
	</div>

<?php }

I add that menu page to the dashboard:

function splitwit_plugin_menu() {
	add_options_page('SplitWit Experiments', 'SplitWit Experiments', 'publish_posts', 'splitwit_settings', 'splitwit_plugin_menu_page');
}
add_action( 'admin_menu', 'splitwit_plugin_menu' );

And link to it in the Settings section of the dashboard:

function splitwit_link( $links ) {
     $links[] ='<a href="' . admin_url( 'options-general.php?page=splitwit_settings' ) .'">Settings</a>';
    return $links;
}
add_filter('plugin_action_links_'.plugin_basename(__FILE__), 'splitwit_link');

When the SplitWit code snippet is injected into the website’s header, it needs to reference a project ID. I register that value from the menu page:

function splitwit_settings(){
	register_setting('splitwit_settings_group','splitwit_project_id','string');
}
add_action( 'admin_init', 'splitwit_settings' );

If the project ID value has not been defined, I show a warning message at the top of the dashboard:

function splitwit_warning(){
  if (!is_admin()){
     return;
  }

  $splitwit_project_id = get_option("splitwit_project_id");
  if (!$splitwit_project_id || $splitwit_project_id < 1){
    echo "<div class='notice notice-error'><p><strong>SplitWit is missing a project ID code.</strong> You need to enter <a href='options-general.php?page=splitwit_settings'>a SplitWit project ID code</a> for the plugin to work.</p></div>";
  }
}
add_action( 'admin_notices','splitwit_warning');

The readme.txt defines additional meta-data. Each section corresponds to parts of the WordPress plugin directory page. The header section is required, and includes some basic fields that are parsed to the plugin page UI.

=== SplitWit ===
Contributors: SplitWit
Plugin Name: SplitWit
Plugin URI: https://www.splitwit.com
Tags: split test, split testing, ab testing, conversions
Requires at least: 2.8
Tested up to: 5.3.2
Stable tag: 1.0

Optimize your website for maximum convertibility. This plugin lets you use SplitWit to run experiments on your WordPress website.

I also added sections for a long description and installation instructions. Later, I included a screenshots section (see Subversion repo).

Submit for review

Plugin zip files can be uploaded to WordPress.org.  Plugins can also be distributed to WordPress users without this step – but having it listed in the WordPress directory lends credibility and visibility. After my initial submission, I received an email indicating issues with my code and requesting changes. The changes were simple: “use wp_enqueue commands” and “document use of an external service”.

Originally, my “splitwit_header_code()” function include the SplitWit JS snippet directly as plain text. I changed it to use the built-in function “wp_enqueue_script()”.

//wrong:
echo '<script type="text/javascript" async src="https://www.splitwit.com/snippet/'.$splitwit_project_id.'.js"> </script>';

//correct:
wp_enqueue_script( 'splitwit-snippet', 'https://www.splitwit.com/snippet/'.$splitwit_project_id.'.js' );

Next, they wanted me to disclose the use of SplitWit, the service that powers the plugin. I added this to my readme.txt:

This plugin relies on SplitWit, a third-party service. The SplitWit service adds code to your website to run A/B experiments. It also collects data about how users interact with your site, based on the metrics you configure.

After making these changes, I replied back with an updated .zip. A few days later I received approval. But, that wasn’t the end  – I still needed to upload my code to a WordPress.org hosted SVN repository.

Subversion Repo

I’ve used Git for versioning my entire career. I had heard of SVN, but never used it. What a great opportunity to learn!

The approval email provided me with a SVN URL. On my local machine, I created a new folder, “svn-wp-splitwit”. From a terminal, I navigated to this directory and checked out the pre-built repo:

svn co https://plugins.svn.wordpress.org/splitwit

I added my plugin files (readme.txt and splitwit.php) to the “trunk” folder. This is where the most up-to-date, ready-to-distribute, version of code belongs.

In the “tags” folder, I created a new directory called “1.0” and put a copy of my files there too – for the sake of version control. This step is completely optional and is how SVN handles revisions.

In the assets folder I included my banner, icon, and screenshot files. The filenames follow as prescribed by WordPress.org. I made sure to reference the screenshot files in my readme.txt file, under a new “Screenshots” section.

Finally, I pushed my code back up to the remote:

 svn ci -m "Initial commit of my plugin."

You can now find my plugin in the WordPress.org plugin directory. SplitWit is available for a free trial. Give it a try, and let me know what you think.


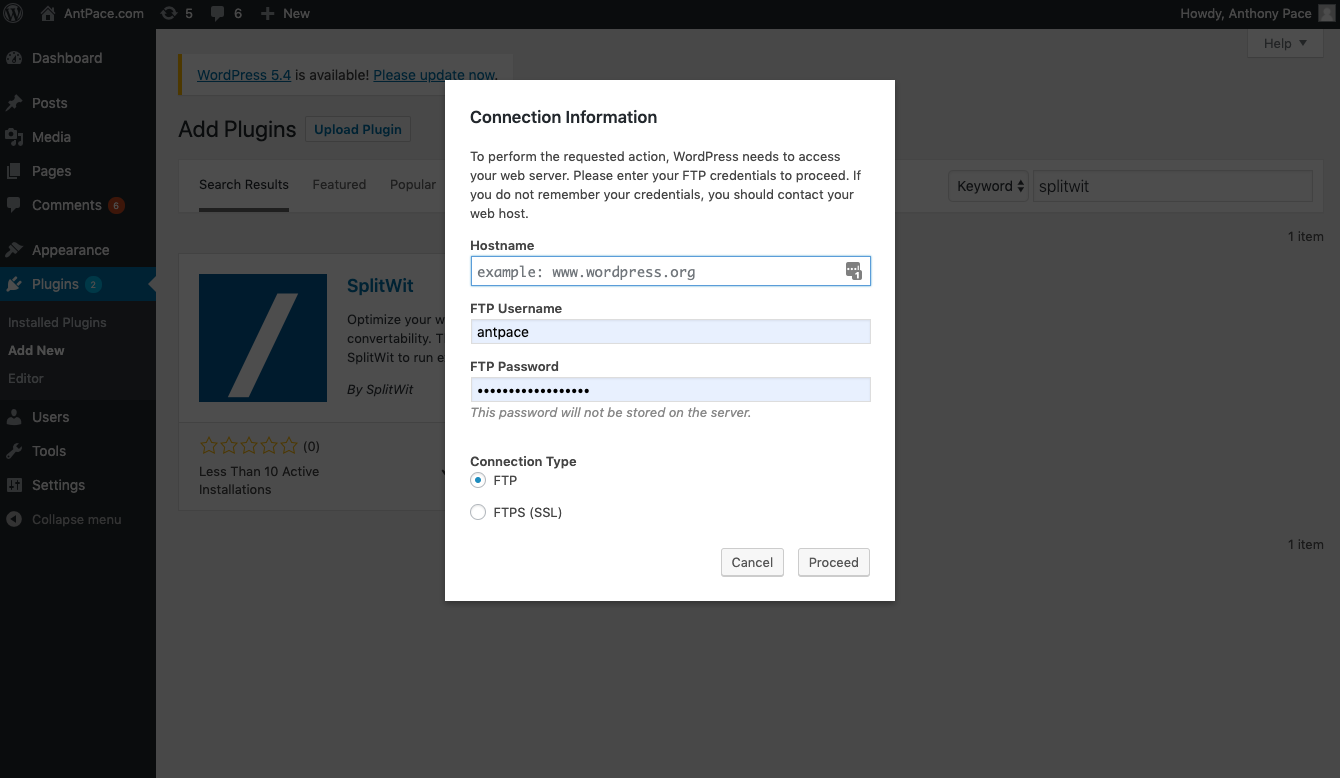
Pro-tip: Some WordPress setups won’t let you to install plugins from the dashboard with out providing FTP credentials, including a password. If you use a key file, instead of a password, this is a roadblock.

Install WordPress plugin roadblock
Not everyone uses a password to connect to their server.

You can remedy this by defining the file system connection method in your functions.php file:

define( 'FS_METHOD', 'direct' );


Writing, engineering, and creativity

writing resources

It was 2006 and I had just installed WordPress on a web server. I would draft blog posts nightly, before getting ready for bed. At the time I was a philosophy major and wrote prose more than code. That was my first venture into web development and digital marketing. It started with writing.

Writing blog posts and publishing software have a lot in common. For both, “perfect” is the opposite of ready. It’s easy to keep editing your own work. It’s even easier to keep adding half-done features and clutter. That’s why having a plan before you start helps so much. When I write, my first draft tends to be bullet points and a vague outline. The same goes for software. If I’m building something complex, I write comments explaining its functionality before any code. It’s my way of “thinking out loud”, and making sure that what I plan on doing even makes sense.

It’s been over a decade since I’ve maintained a blog. Creative tasks require hard work, lest they bear no fruit. (“Writer’s block is for amateurs”). Problem solving, in its many shapes, is the highest form of creativity. It’s how we build our reality. Modern technology gives us creative leverage through tools, knowledge, and community. We’re being given opportunities to build and create things, to grow and be better, at an unprecedented scale. It’s the best time in history to be CEO of your own life; creative director of your destiny. This also sets the bar higher to stand out.

My plan here is to write regularly, and discuss what I’ve been working on and learning, as well as what’s next. This gives me a chance to explore my thoughts, and prune the branches from which they stem. Hopefully, working at this will help to make me a better storyteller too. This blog is my notes and stories from the field, on the ground!