Error establishing connection to database – WordPress solution

solutions for wordpress database errors

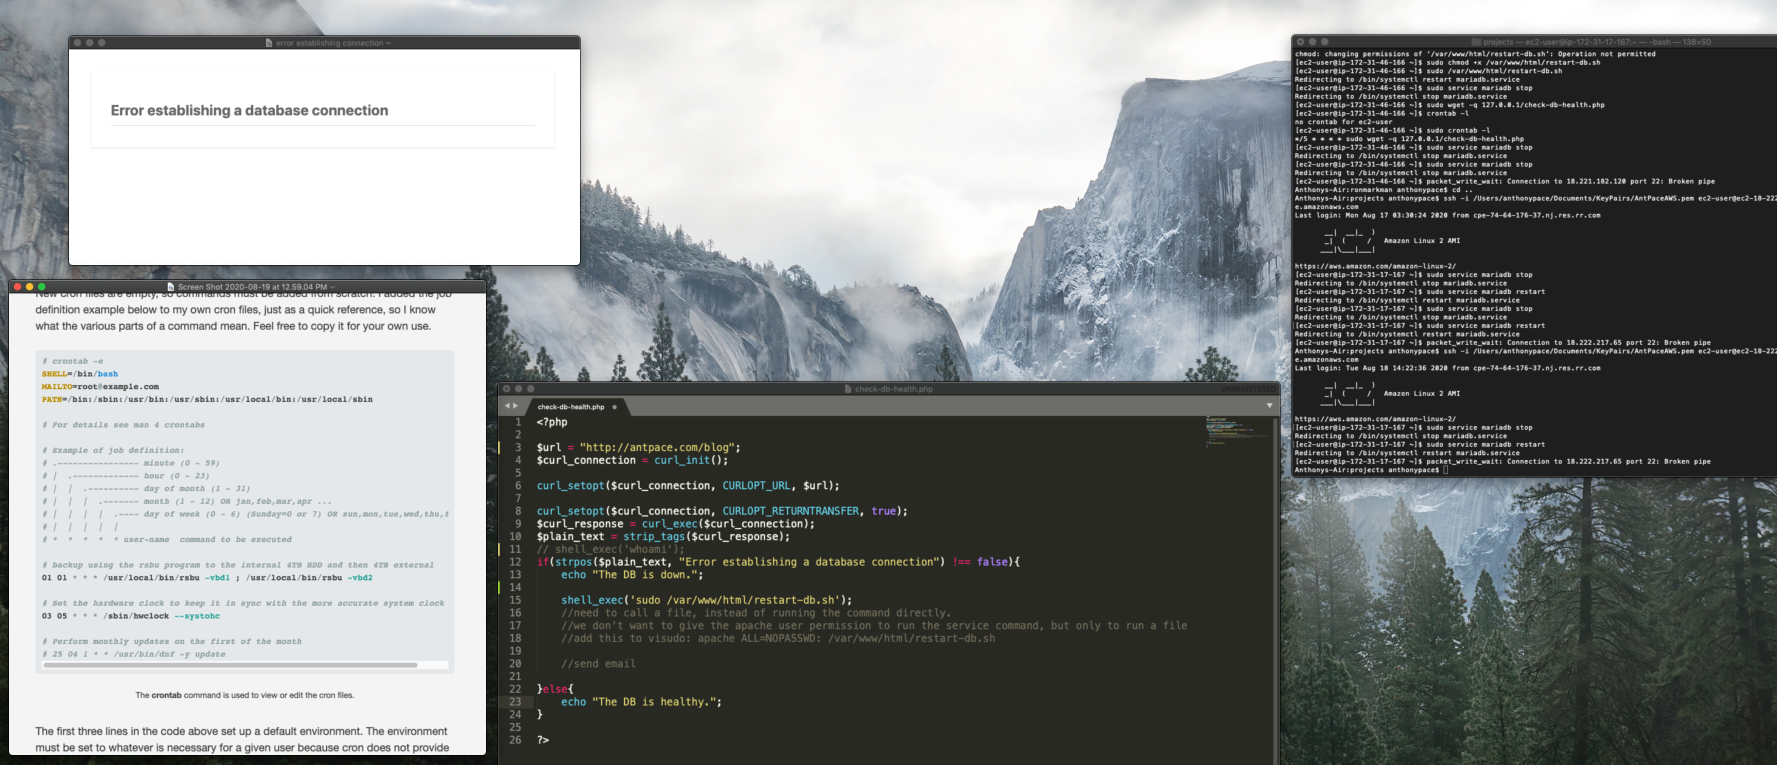
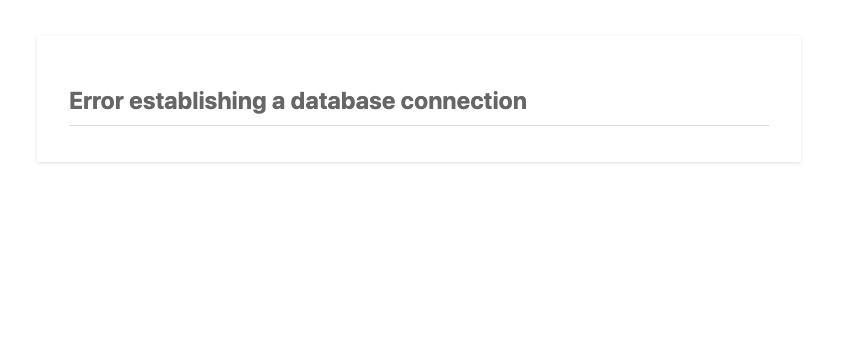
A crashed database is a problem I’ve encountered across multiple WordPress websites. When trying to load the site you’re faced with a dreaded “Error establishing a database connection” message. Restarting the DB service usually clears things up. But, sometimes it won’t restart at all – which is why I started automating nightly data dumps to an S3 bucket.

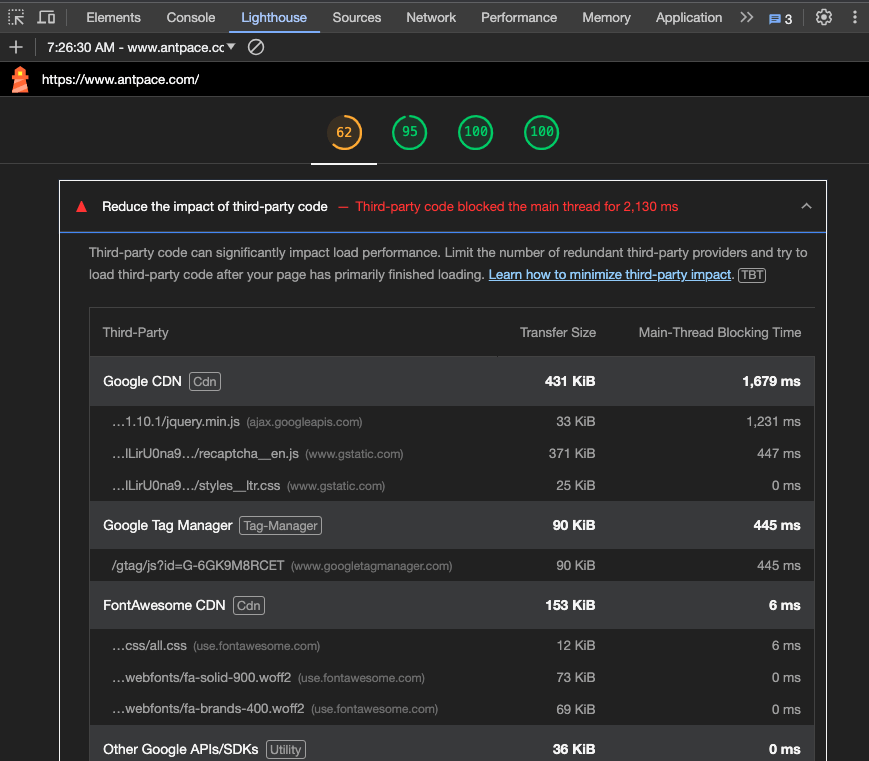
Recently, one particular site kept going down unusually often. I assumed it was happening due to low computing resources on the EC2 t3.micro instance. I decide to spin up a a new box with more RAM (t3.small) and migrate the entire WordPress setup.

Since I couldn’t be sure of what was causing the issue, I needed a way to monitor the health of my WordPress websites. I decided to write code that would periodically ping the site, and if it is down send an email alert and attempt to restart the database.

warning message when a website can't connect to the database

The first challenge was determining the status of the database. Even if it crashed, my site would still return a 200 OK response. I figured I could use cURL to get the homepage content, and then strip out any HTML tags to check the text output. If the text did match the error message, I could take further action.

Next, I needed to programmatically restart MySql. This is the command I run to do it manually: sudo service mariadb restart 

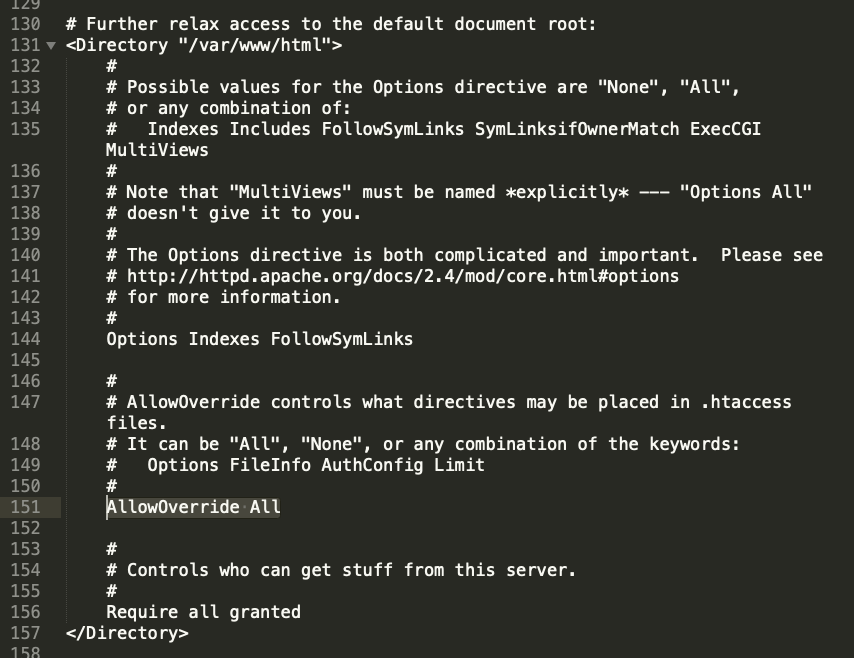
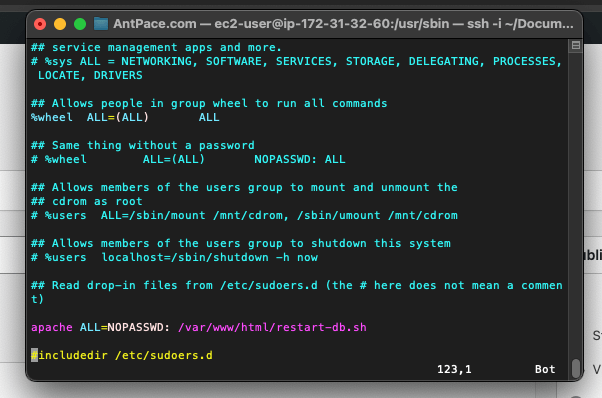
After doing some research, I found that I could use shell_exec() to run it from my PHP code. Unfortunately, Apache wouldn’t let the (non-password using) web server user execute that without special authorization. I moved that command to its own restart-db.sh file, and allowed my code to run it by adding this to the visudo file: apache ALL=NOPASSWD: /var/www/html/restart-db.sh

My visudo file was located at /usr/sbin/visudo. It is a tool found on most Linux systems to safely update the /etc/sudoers file, which is the configuration file for the sudo command. To edit this file, I don’t open it in vim like I would with other editable files. Instead, I run the file as its own command: sudo visudo. Once it is open, you can press the i key to enter “insert” mode. It is considered “safe” because it edits the sudoers file following a strict procedure.

edit the visduo file

I also needed to make the file executable by adjusting permissions: sudo chmod +x /var/www/html/restart-db.sh

Once those pieces were configured, my code would work:

<?php

$url = "https://www.antpace.com/blog/";
$curl_connection = curl_init();

curl_setopt($curl_connection, CURLOPT_URL, $url);

curl_setopt($curl_connection, CURLOPT_RETURNTRANSFER, true);
$curl_response = curl_exec($curl_connection);
$plain_text = strip_tags($curl_response);

if(strpos($plain_text, "Error establishing a database connection") !== false){
	echo "The DB is down.";
        
        //restart the database
        shell_exec('sudo /var/www/html/restart-db.sh');
        
        //send notification email
        include 'send-email.php';
        send_email();
}else{
	echo "The DB is healthy.";
}

?>

You can read more about how to send a notification email in another post that I wrote on this blog.

The contents of restart-db.sh looks like this:

#!/bin/bash

sudo service mariadb restart

Create the cron job

A cron job is a scheduled task in Linux that runs at set times. For my PHP code to effectively monitor the health of the database, it needs to run often. I decided to execute it every five minutes. Below are three shell commands to create a cron job.

The first creates the cron file for the root user:

sudo touch /var/spool/cron/root

The next appends my cron command to that file:

echo "*/5 * * * * sudo wget -q 127.0.0.1/check-db-health.php" | sudo tee -a /var/spool/cron/root

And, the last sets the cron software to listen for that file:

sudo crontab /var/spool/cron/root

Alternatively, you can create, edit, and set the cron file directly by running sudo crontab -e . The contents of the cron file can be confirmed by running sudo crontab -l .


Migrate a WordPress Site to AWS

Migrate a WordPress site to AWS

In a previous article I discussed launching a website on AWS. The project was framed as transferring a static site from another hosting provider. This post will extend that to migrating a dynamic WordPress site with existing content.

Install WordPress

After following the steps to launch your website to a new AWS EC2 instance, you’ll be able to connect via sFTP. I use FileZilla as my client. You’ll need the hostname (public DNS), username (ec2-user in this example), and key file for access. The latest version of WordPress can be downloaded from wordpress.org. Once connected to the server, I copy those files to the root web directory for my setup: /var/www/html

Make sure the wp-config.php file has the correct details (username, password) for your database. You should use the same database name from the previous hosting environment.

Data backup and import

It is crucial to be sure we don’t lose any data. I make a MySql dump of the current database and copy the entire wp-content folder to my local machine. I’m careful to not delete or cancel the old server until I am sure the new one is working identically.

Install phpMyAdmin

After configuring my EC2 instance, I install phpMyAdmin so that I can easily import the sql file.

sudo yum install php-mbstring -y
sudo systemctl restart httpd
sudo systemctl restart php-fpm
cd /var/www/html
wget https://www.phpmyadmin.net/downloads/phpMyAdmin-latest-all-languages.tar.gz
mkdir phpMyAdmin && tar -xvzf phpMyAdmin-latest-all-languages.tar.gz -C phpMyAdmin --strip-components 1
rm phpMyAdmin-latest-all-languages.tar.gz
sudo systemctl start mariadb

The above Linux commands installs the database management software on the root directory of the new web server. It is accessible from a browser via yourdomainname.com/phpMyAdmin. This tool is used to upload the data to the new environment.

phpMyAdmin import screen

Create the database and make sure the name matches what’s in wp-config.php from the last step. Now you’ll be able to upload your .sql file.

Next, I take the wp-content folder that I stored on my computer, and copy it over to the new remote. At this point, the site homepage will load correctly. You might notice other pages won’t resolve, and will produce a 404 “not found” response. That error has to do with certain Apache settings, and can be fixed by tweaking some options.

Server settings

With my setup, I encountered the above issue with page permalinks . WordPress relies on the .htaccess file to route pages/posts with their correct URL slugs. By default, this Apache setup does not allow its settings to be overridden by .htaccess directives. To fix this issue, the httpd.conf file needs to be edited. Mine was located in this directory: /etc/httpd/conf

You’ll need to find (or create) a section that corresponds to the default document root: <Directory “/var/www/html”></Directory>. In that block, they’ll be a AllowOverride command that is set to “None”. That needs to be changed to “All” for our configuration file to work.

apache config settings found in the HTTPD conf file

Final steps

After all the data and content has been transferred, do some smoke-testing. Try out as many pages and features as you can to make sure the new site is working as it should. Make sure you keep a back-up of everything some place secure (I use an S3 bucket). Once satisfied, you can switch your domain’s A records to point at the new box. Since the old and new servers will appear identical, I add a console.log(“new server”) to the header file. That allows me tell when the DNS update has finally resolved. Afterwards, I can safely cancel/decommission the old web hosting package.

Don’t forget to make sure SSL is setup!

Updates

AWS offers an entire suite of services to help businesses migrate. AWS Application Migration Service is a great choice to “simplify and expedite your migration while reducing costs”.

Upgrade PHP

In 2023, I used this blog post to stand-up a WordPress website. I was using a theme called Balasana. When I would try to set “Site Icon” (favicon) from the “customize” UI I would receive a message stating that “there has been an error cropping your image“. After a few Google searches, and also asking ChatGPT, the answer seemed to be that GD (a graphics library) was either not installed or not working properly. I played with that for almost an hour, but with no success. GD was installed, and so was ImageMagick (a back-up graphics library that WordPress falls back on).

The correct answer was that I needed to upgrade PHP. The AWS Linux 2 image comes with PHP 7.2. Upgrading to version 7.4 did the trick. I was able to make that happen, very painlessly, by following a blog post from Gregg Borodaty . The title of his post is “Amazon Linux 2: Upgrading from PHP 7.2 to PHP 7.4” (thanks Gregg).

Update

My recommendation, as of 2024, is to use a managed WordPress service. I wrote a post about using AWS Lightsail for that purpose: Website Redesign with WordPress Gutenberg via AWS Lightsail


Lazy Load Images and Assets on WordPress with IntersectionObserver

wordpress homepage design

I write online a lot. Adding articles to this blog serves to build a catalog of technical solutions for future reference. Updating the homepage has improved user experience and SEO. The new design displays the most recent articles as clickable cards, rather than listing the entire text of each one. The changes for this were added to index.php file, in the child-theme folder. The theme’s original code already used a While() loop to iterate through the post records. My modification removed the article content, and only kept the title and image:

<div class="doc-item-wrap">
	<?php
	while ( have_posts() ) {
		the_post();
		echo "<div class='doc-item'><a href='". get_the_permalink() ."'><img class='lazy' data-src='".get_the_post_thumbnail_url()."'><h2>" . get_the_title() . "</h2></a></div>";
	} ?>
</div> <!-- doc-item-wrap -->

I used custom CSS, leveraging Flexbox, to style and position the cards:

.doc-item-wrap{
    display: flex;
    flex-wrap: wrap;
    justify-content: center;
}
.doc-item{
    width: 30%;
    padding: 20px;
    border: 3px solid #f0503a;
    margin: 15px;
    background: black;
    flex-grow: 1;
    text-align: center;
}
.doc-item:hover{
    background-color: #34495e;
}
.doc-item p{
    margin: 0px;
    line-height: 40px;
    color: white;
}
.doc-item img{
    display: block;
    margin: 0 auto;
}
.doc-item h2{
    font-size: 22px;
    color: white;

}
@media(max-width: 1000px){
	.doc-item{
		width: 45%
	}
}
@media(max-width: 700px){
	.doc-item{
		width: 100%
	}
}

The media queries adjust the size of the cards (and how many are in a row), based on screen size.

Look and feel of the design

Card layout design is a common way to arrange blog content. It gives visitors a visual overview of what’s available. It also stops the homepage from duplicating content that’s already available on the individual post pages.

You can see this pattern throughout the digital world. Card layout translates well across screen sizes and devices. Since I put much effort into writing, making it organized was a priority. This implementation can be extended to add additional content (such as date, description, etc.) and features (share links, animations, expandability). And, it fits nicely with what WordPress already provides.

Lazy loaded images

Image content can often be the biggest drag to site speed. Lazy loading media defers rendering until it is needed. Since this blog’s homepage has an image for each post, this was essential.

While iterating through post records the image URL is assigned to a custom data-src attribute on the image tag, leaving the normal src blank. This assures the image is not immediately retrieved nor loaded. I wrote a JavaScript function to lazy load the images, relying on the IntersectionObserver API. The card’s image does not load until a user scrolls it into view. This improves the speed of the page, which has a positive effect on SEO and UX.

The code creates a IntersectionObserver object.  It observes each of the image elements, checking to see if they are within the browser viewport. Once the image elements come into view, it takes the image URL from the data-src attribute, and assigns it to the tag’s src – causing the image to load.

document.addEventListener("DOMContentLoaded", function() {
  var lazyImages = [].slice.call(document.querySelectorAll("img.lazy"));
  if ("IntersectionObserver" in window) {
    let lazyImageObserver = new IntersectionObserver(function(entries, observer) {
      entries.forEach(function(entry) {
        if (entry.isIntersecting) {
          let lazyImage = entry.target;
          lazyImage.src = lazyImage.dataset.src;
          // lazyImage.srcset = lazyImage.dataset.srcset;
          lazyImage.classList.remove("lazy");
          lazyImageObserver.unobserve(lazyImage);
        }
      });
    });

    lazyImages.forEach(function(lazyImage) {
      lazyImageObserver.observe(lazyImage);
    });
  } 
});

The original JS code was referenced from a web.dev article. Web.dev is a resource created by Google that provides guidance, best practices, and tools to help web developers build better web experiences.

You can also use this same method for lazy loading videos, backgrounds, and other assets.

IntersectionObserver to lazily load JavaScript assets

I discovered another application for the IntersectionObserver implementation that I used above to load lazy load images. The Google Lighthouse performance score on my homepage was being dinged due to the “impact of third-party code”.

impact of 3rd party js on performance scores

The largest third-party resource was is used for the reCaptcha on a contact form at the bottom of my homepage. It makes sense to not load it until the user scrolls down to that section – especially because the UX expects them to take time to fill out the form before hitting “submit” anyway.

Using the same pattern as above, I created a new `IntersectionObserver` and passed the contact form section as the target:

function captchaLazyLoad(){
	contactCaptchaTarget = document.getElementById('contactSection')
	if (!contactCaptchaTarget) {
        return;
    }
	let contactCaptchaObserver = new IntersectionObserver(function(entries, observer) {
		if (entries[0].isIntersecting) {
            var script = document.createElement('script');
		    script.src = "https://www.google.com/recaptcha/api.js";
		    document.body.appendChild(script);
            contactCaptchaObserver.unobserve(contactCaptchaTarget);
        }
	})
	contactCaptchaObserver.observe(contactCaptchaTarget);
}

I included this function to the already existing `DOMContentLoaded`  event listener just below the loop to observe lazy image elements:

<script>
function captchaLazyLoad(){
	contactCaptchaTarget = document.getElementById('contactSection')
	if (!contactCaptchaTarget) {
        return;
    }
	let contactCaptchaObserver = new IntersectionObserver(function(entries, observer) {
		if (entries[0].isIntersecting) {
            var script = document.createElement('script');
		    script.src = "https://www.google.com/recaptcha/api.js";
		    document.body.appendChild(script);
            contactCaptchaObserver.unobserve(contactCaptchaTarget);
        }
	})
	contactCaptchaObserver.observe(contactCaptchaTarget);
}

document.addEventListener("DOMContentLoaded", function() {
  var lazyImages = [].slice.call(document.querySelectorAll("img.lazy"));
  if ("IntersectionObserver" in window) {
    let lazyImageObserver = new IntersectionObserver(function(entries, observer) {
      entries.forEach(function(entry) {
        if (entry.isIntersecting) {
          let lazyImage = entry.target;
          lazyImage.src = lazyImage.dataset.src;
          // lazyImage.srcset = lazyImage.dataset.srcset;
          lazyImage.classList.remove("lazy");
          lazyImageObserver.unobserve(lazyImage);
        }
      });
    });

    lazyImages.forEach(function(lazyImage) {
      lazyImageObserver.observe(lazyImage);
    });

    //
    captchaLazyLoad()

  } else {
    // Possibly fall back to a more compatible method here if IntersectionObserver does not exist on the browser
  }

});

</script>

This update raised my Lighthouse performance score by fifteen points!