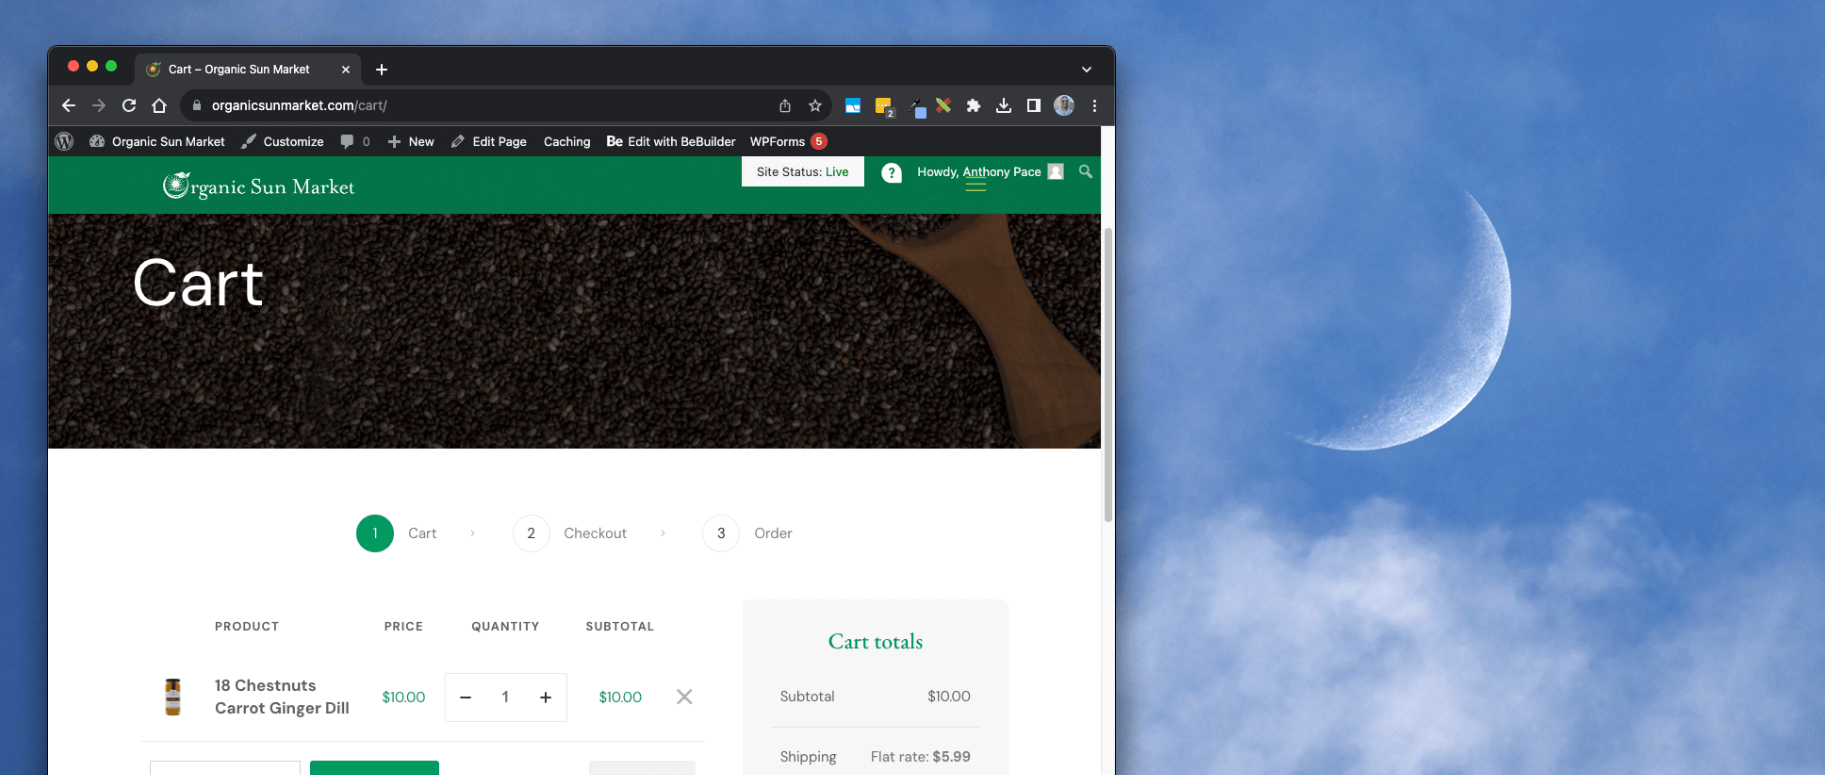
I met Steven at his store on Bloomfield Avenue in Northern New Jersey. After I gave him my business card he told me his website needs help. The checkout wasn’t working, and users couldn’t even add products to their cart. This was how the previous web development vendor left things before their arrangement ended.
The website was powered by WordPress (managed by Bluehost), and used WooCommerce as its ecommerce solution. I helped him create a Stripe account, and connect it to his online store. I finished configuring a premium WordPress theme called BeTheme, and gave him a multi-week marketing plan to help sales grow.
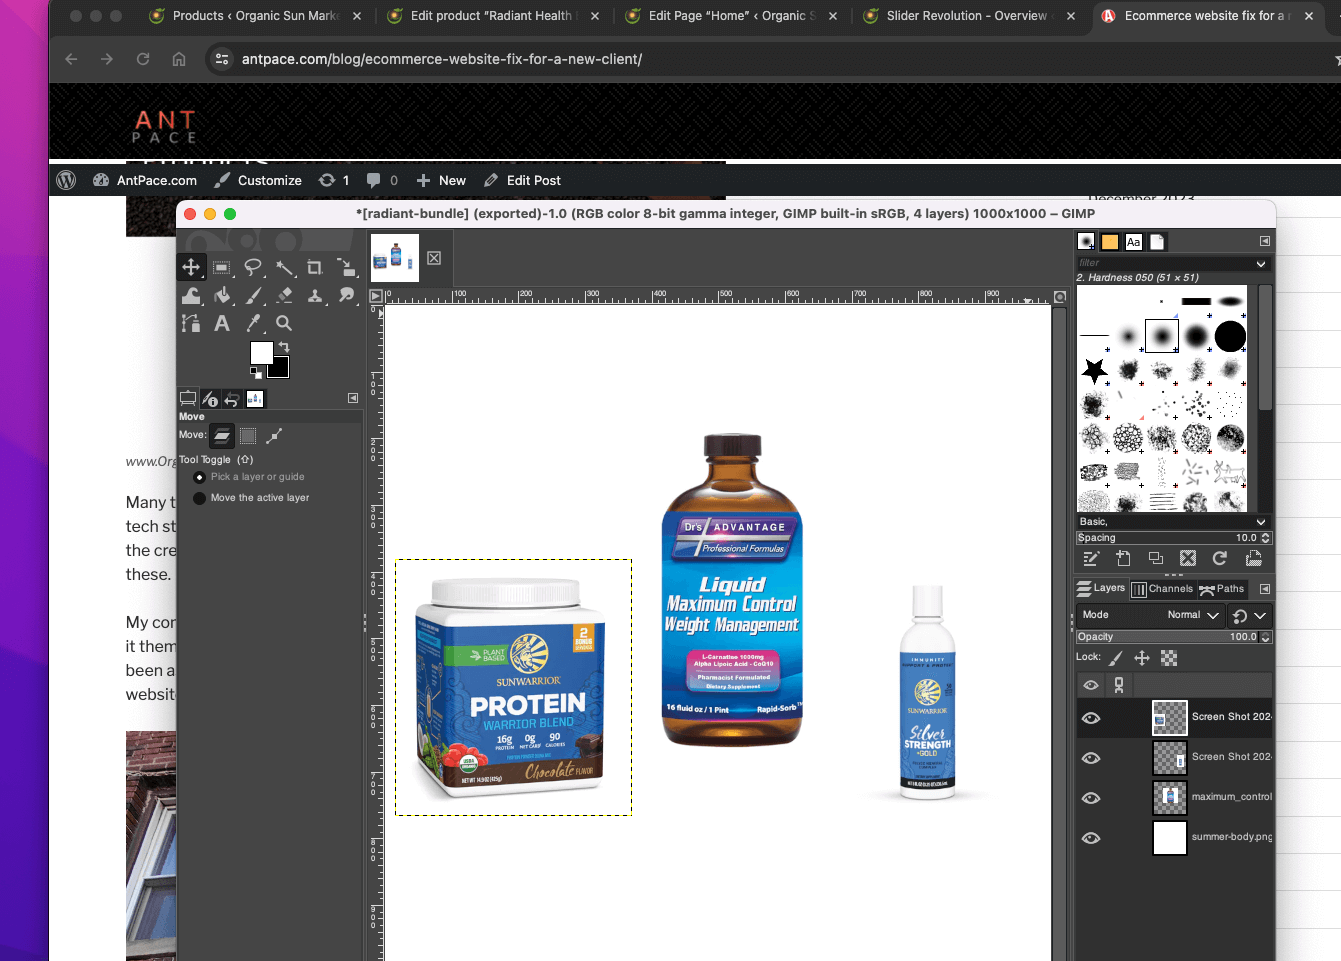
I used an image manipulation program (the GIMP) to create graphic assets used throughout the shop:
Many times I have to pick up where someone else left off. I could tell you another story about inheriting a Frankenstein tech stack from a previous vendor. They left off on non-talking terms after demanding back work payments to release the credentials to my team. My skill in figuring things out, regardless of the technology involved, shines in times like these.
My company tag line is “I can build your website” – it should really be “I can fix your website”. Business owners try to do it themselves, and often make it most of the way. When you need help, I am there to carry it over the finish line. I’ve been asked if services like Wix cuts into my business – it’s actually the opposite. Broken, incomplete, or unoptimized websites created on easy-to-use platforms have provided a solid market for my expertise.
Local small businesses are what make neighborhoods unique and give families a chance to make a living themselves. It feels great to help people knowing we can both benefit. You can read more about the plan I use to help businesses with their existing website in another blog post.
Membership Discounts Without a Plugin
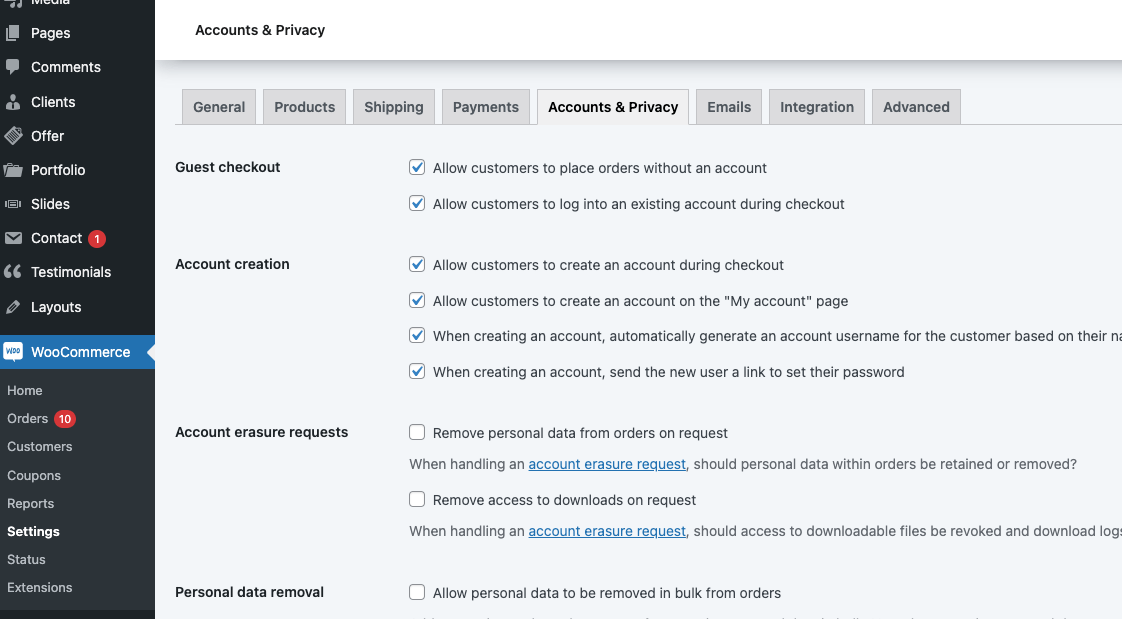
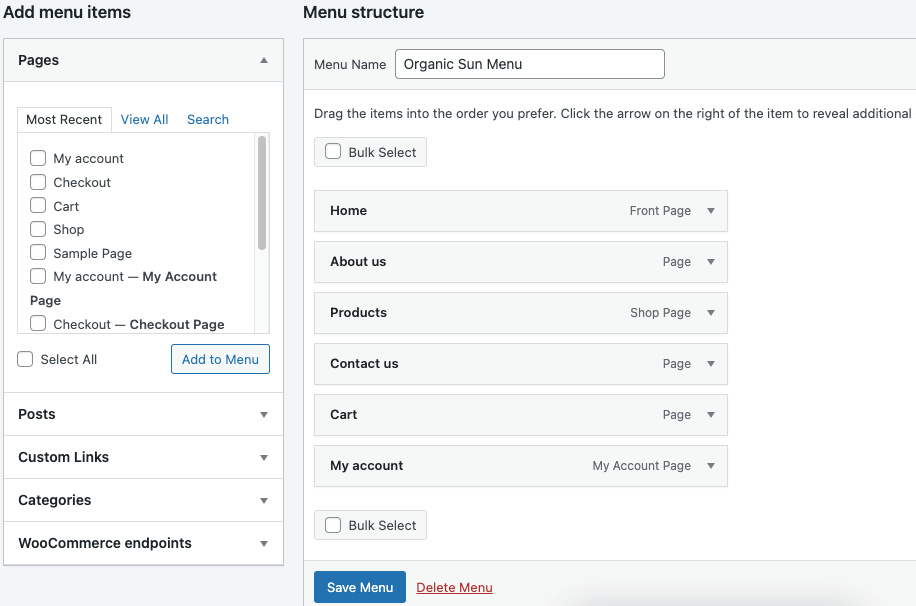
As part of the marketing plan, we decided to add membership accounts to the WordPress ecommerce website for Organic Sun Market. Enabling that capability was a few settings in the dashboard: WooCommerce > Settings > Accounts & Privacy
I also added a “My Account” link to the site’s global navigation.
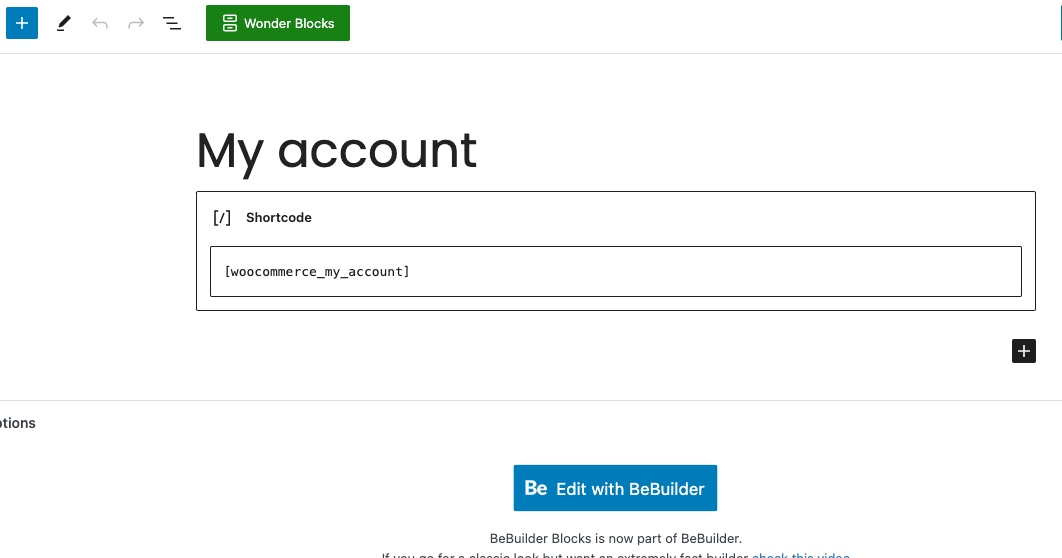
By default, WooCommerce provides a “My Account” page where users can log in, view their orders, update their information, and more. You can specify a custom page in the advanced settings: WooCommerce > Settings > Advanced
The account page specified uses a WooCommerce short code to handle the content: [woocommerce_my_account]
Change menu text if user is logged into WordPress
I wanted the “My Account” menu text to change if the user is not logged in. I was able to do this with the WordPress hook `wp_nav_menu` and a simple string replacement PHP function:
add_filter('wp_nav_menu', 'change_my_account_menu_item', 10, 2);

function change_my_account_menu_item($nav_menu, $args) {
// Check if the user is not logged in
    if (!is_user_logged_in()) {
        // Change "My Account" link to "Login/Register"
        $nav_menu = str_replace('My account', 'Login/Register', $nav_menu);
    }
    return $nav_menu;
}
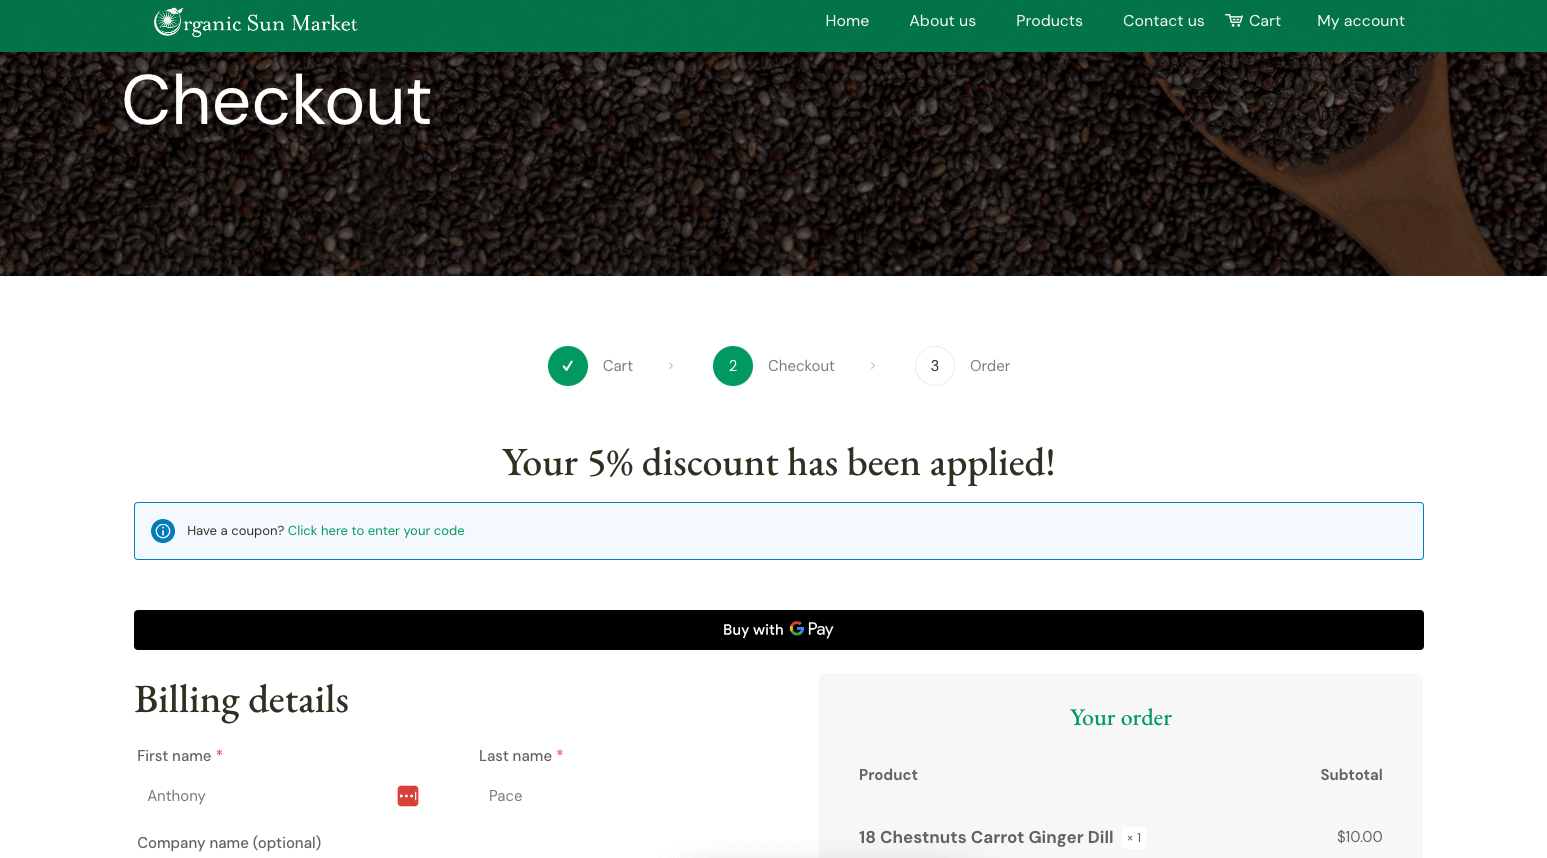
To incentivize users to create an account, we offer a 5% discount to any one logged in. The checkout page contains conditional messaging (depending on wether they are logged in or not) to communicate this incentive.
Hide or show UI elements if user is logged into WordPress
I am able to apply that style condition with two custom CSS classes, specific to the presence of the WordPress body class ‘logged-in’:
I applied the discount by using custom PHP code in the child theme’s functions.php file with the `woocommerce_before_calculate_totals` hook:
add_action( 'woocommerce_before_calculate_totals', 'no_discount_if_not_logged_in', 10, 1);
function no_discount_if_not_logged_in( $cart ) {
	if (is_user_logged_in()) {
		foreach ( $cart->get_cart() as $cart_item ) {
			$discount_eliminate = $cart_item['data']->get_regular_price();
			$discount_percentage = 5; // Set your desired discount percentage
			$discount_amount = $discount_eliminate * ($discount_percentage / 100);
			$new_price = $discount_eliminate - $discount_amount;

			$cart_item['data']->set_price($new_price);
		}
	}
}
Apply WooCommerce discount to logged in users on a specific category of products
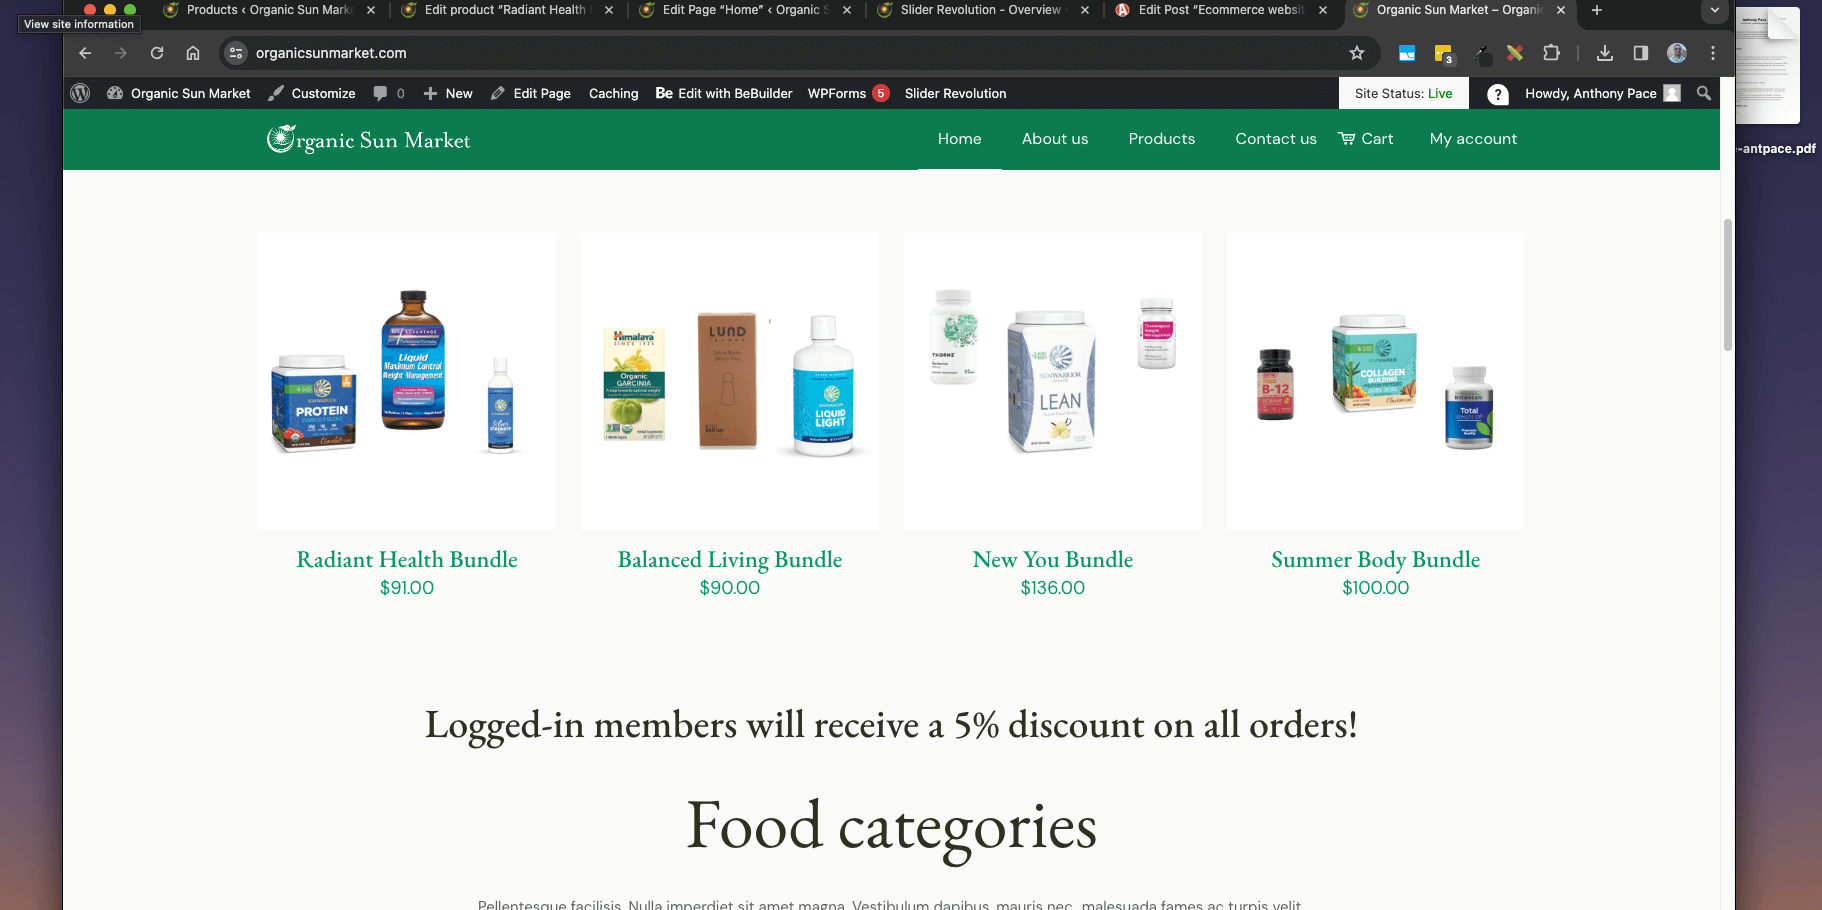
Later, we changed the logic to be a 10% discount for logged-in members, but only on products that were part of a specific category called “bundles”.
add_action( 'woocommerce_before_calculate_totals', 'discount_for_specific_category', 10, 1);

function discount_for_specific_category( $cart ) {
    if ( is_user_logged_in() ) {
        // Define the category slug you want to apply the discount to
        $target_category = 'bundles';

        foreach ( $cart->get_cart() as $cart_item ) {
            $product_id = $cart_item['product_id'];

            // Check if the product belongs to the target category
            if ( has_term( $target_category, 'product_cat', $product_id ) ) {
                $discount_eliminate = $cart_item['data']->get_regular_price();
                $discount_percentage = 10; // Set your desired discount percentage
                $discount_amount = $discount_eliminate * ( $discount_percentage / 100 );
                $new_price = $discount_eliminate - $discount_amount;

                $cart_item['data']->set_price( $new_price );
            }
        }
    }
}
Print Design
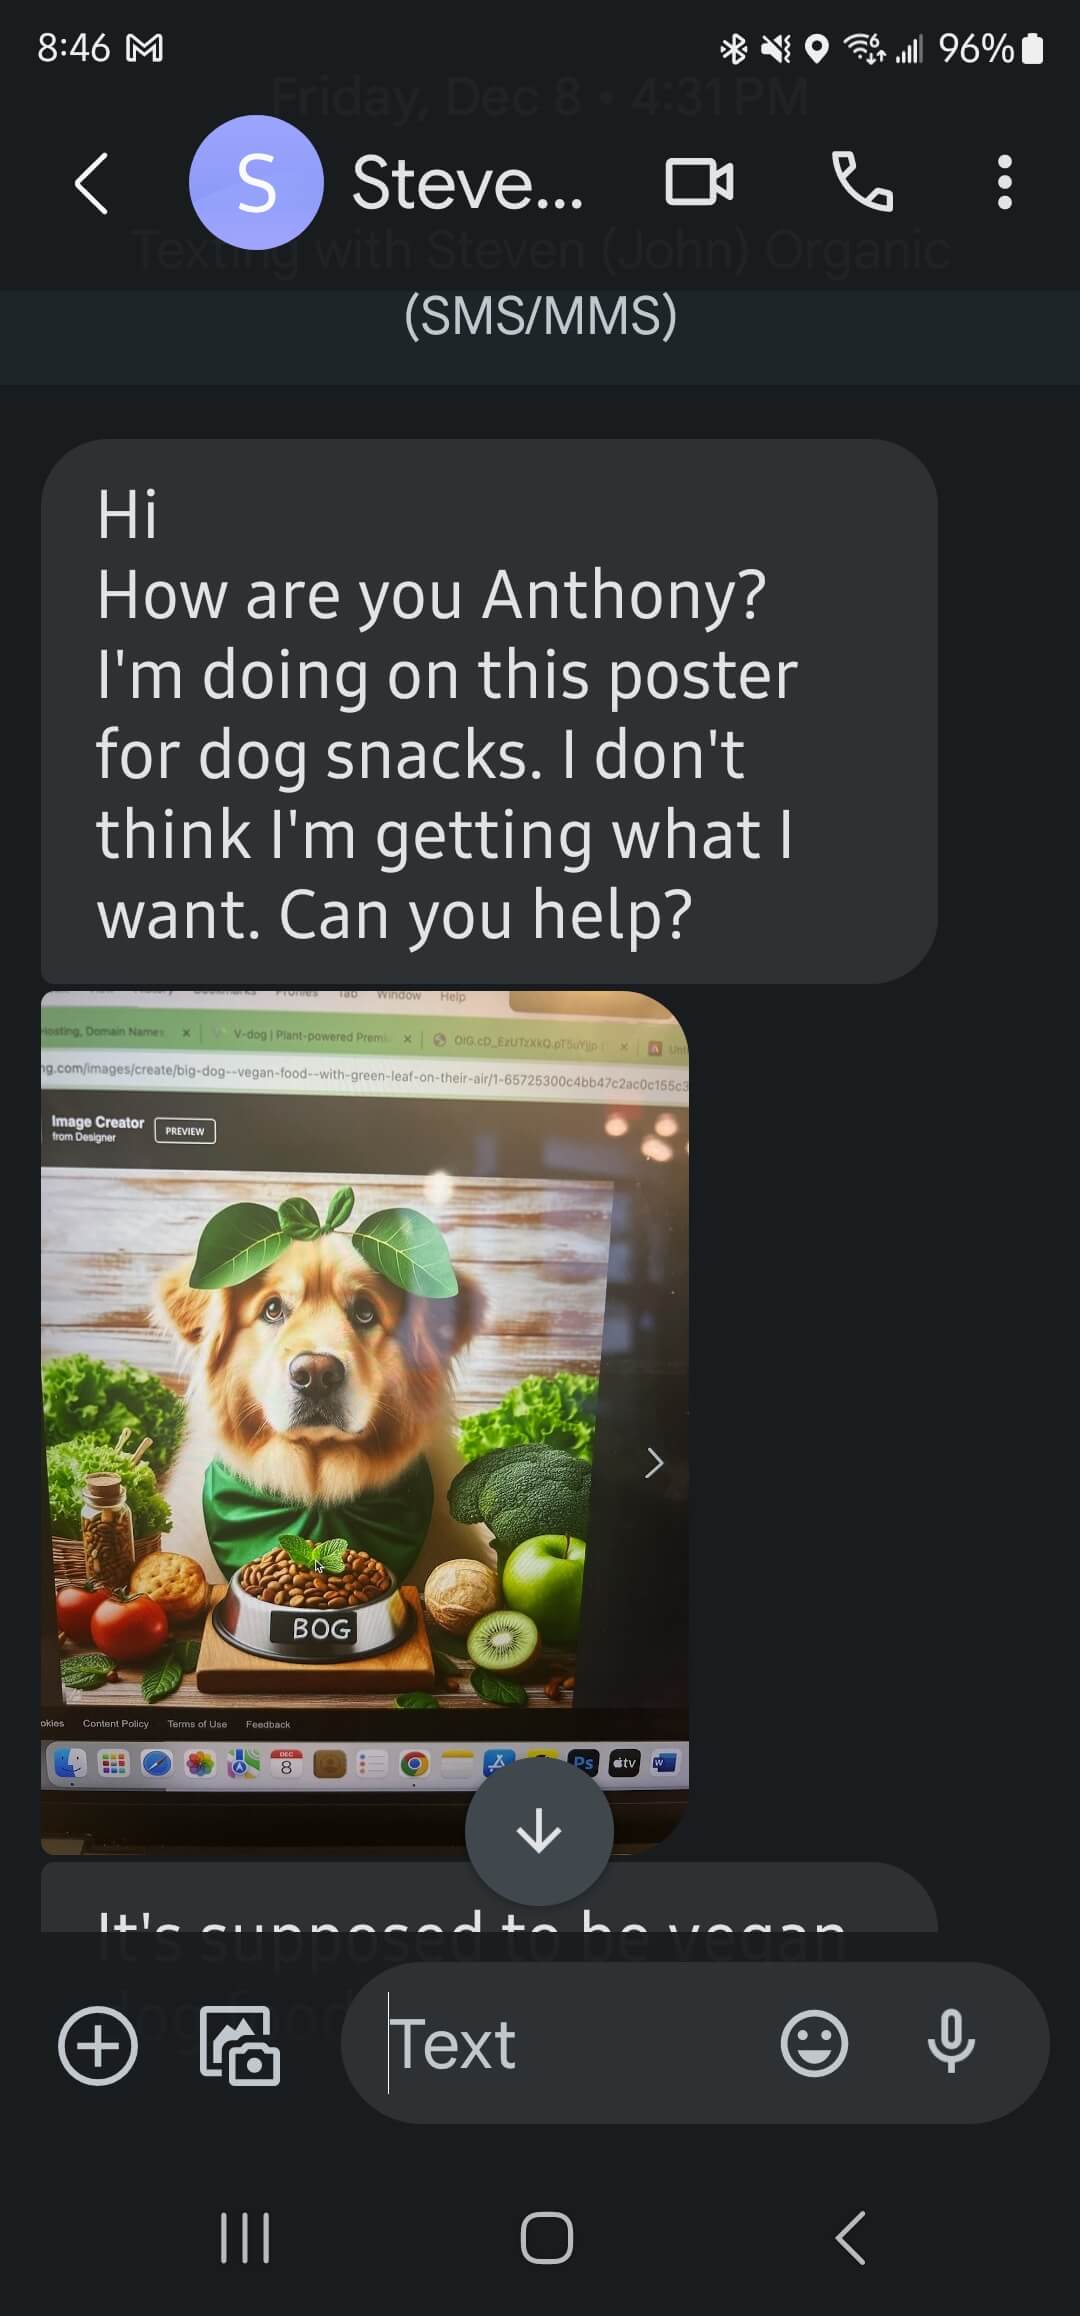
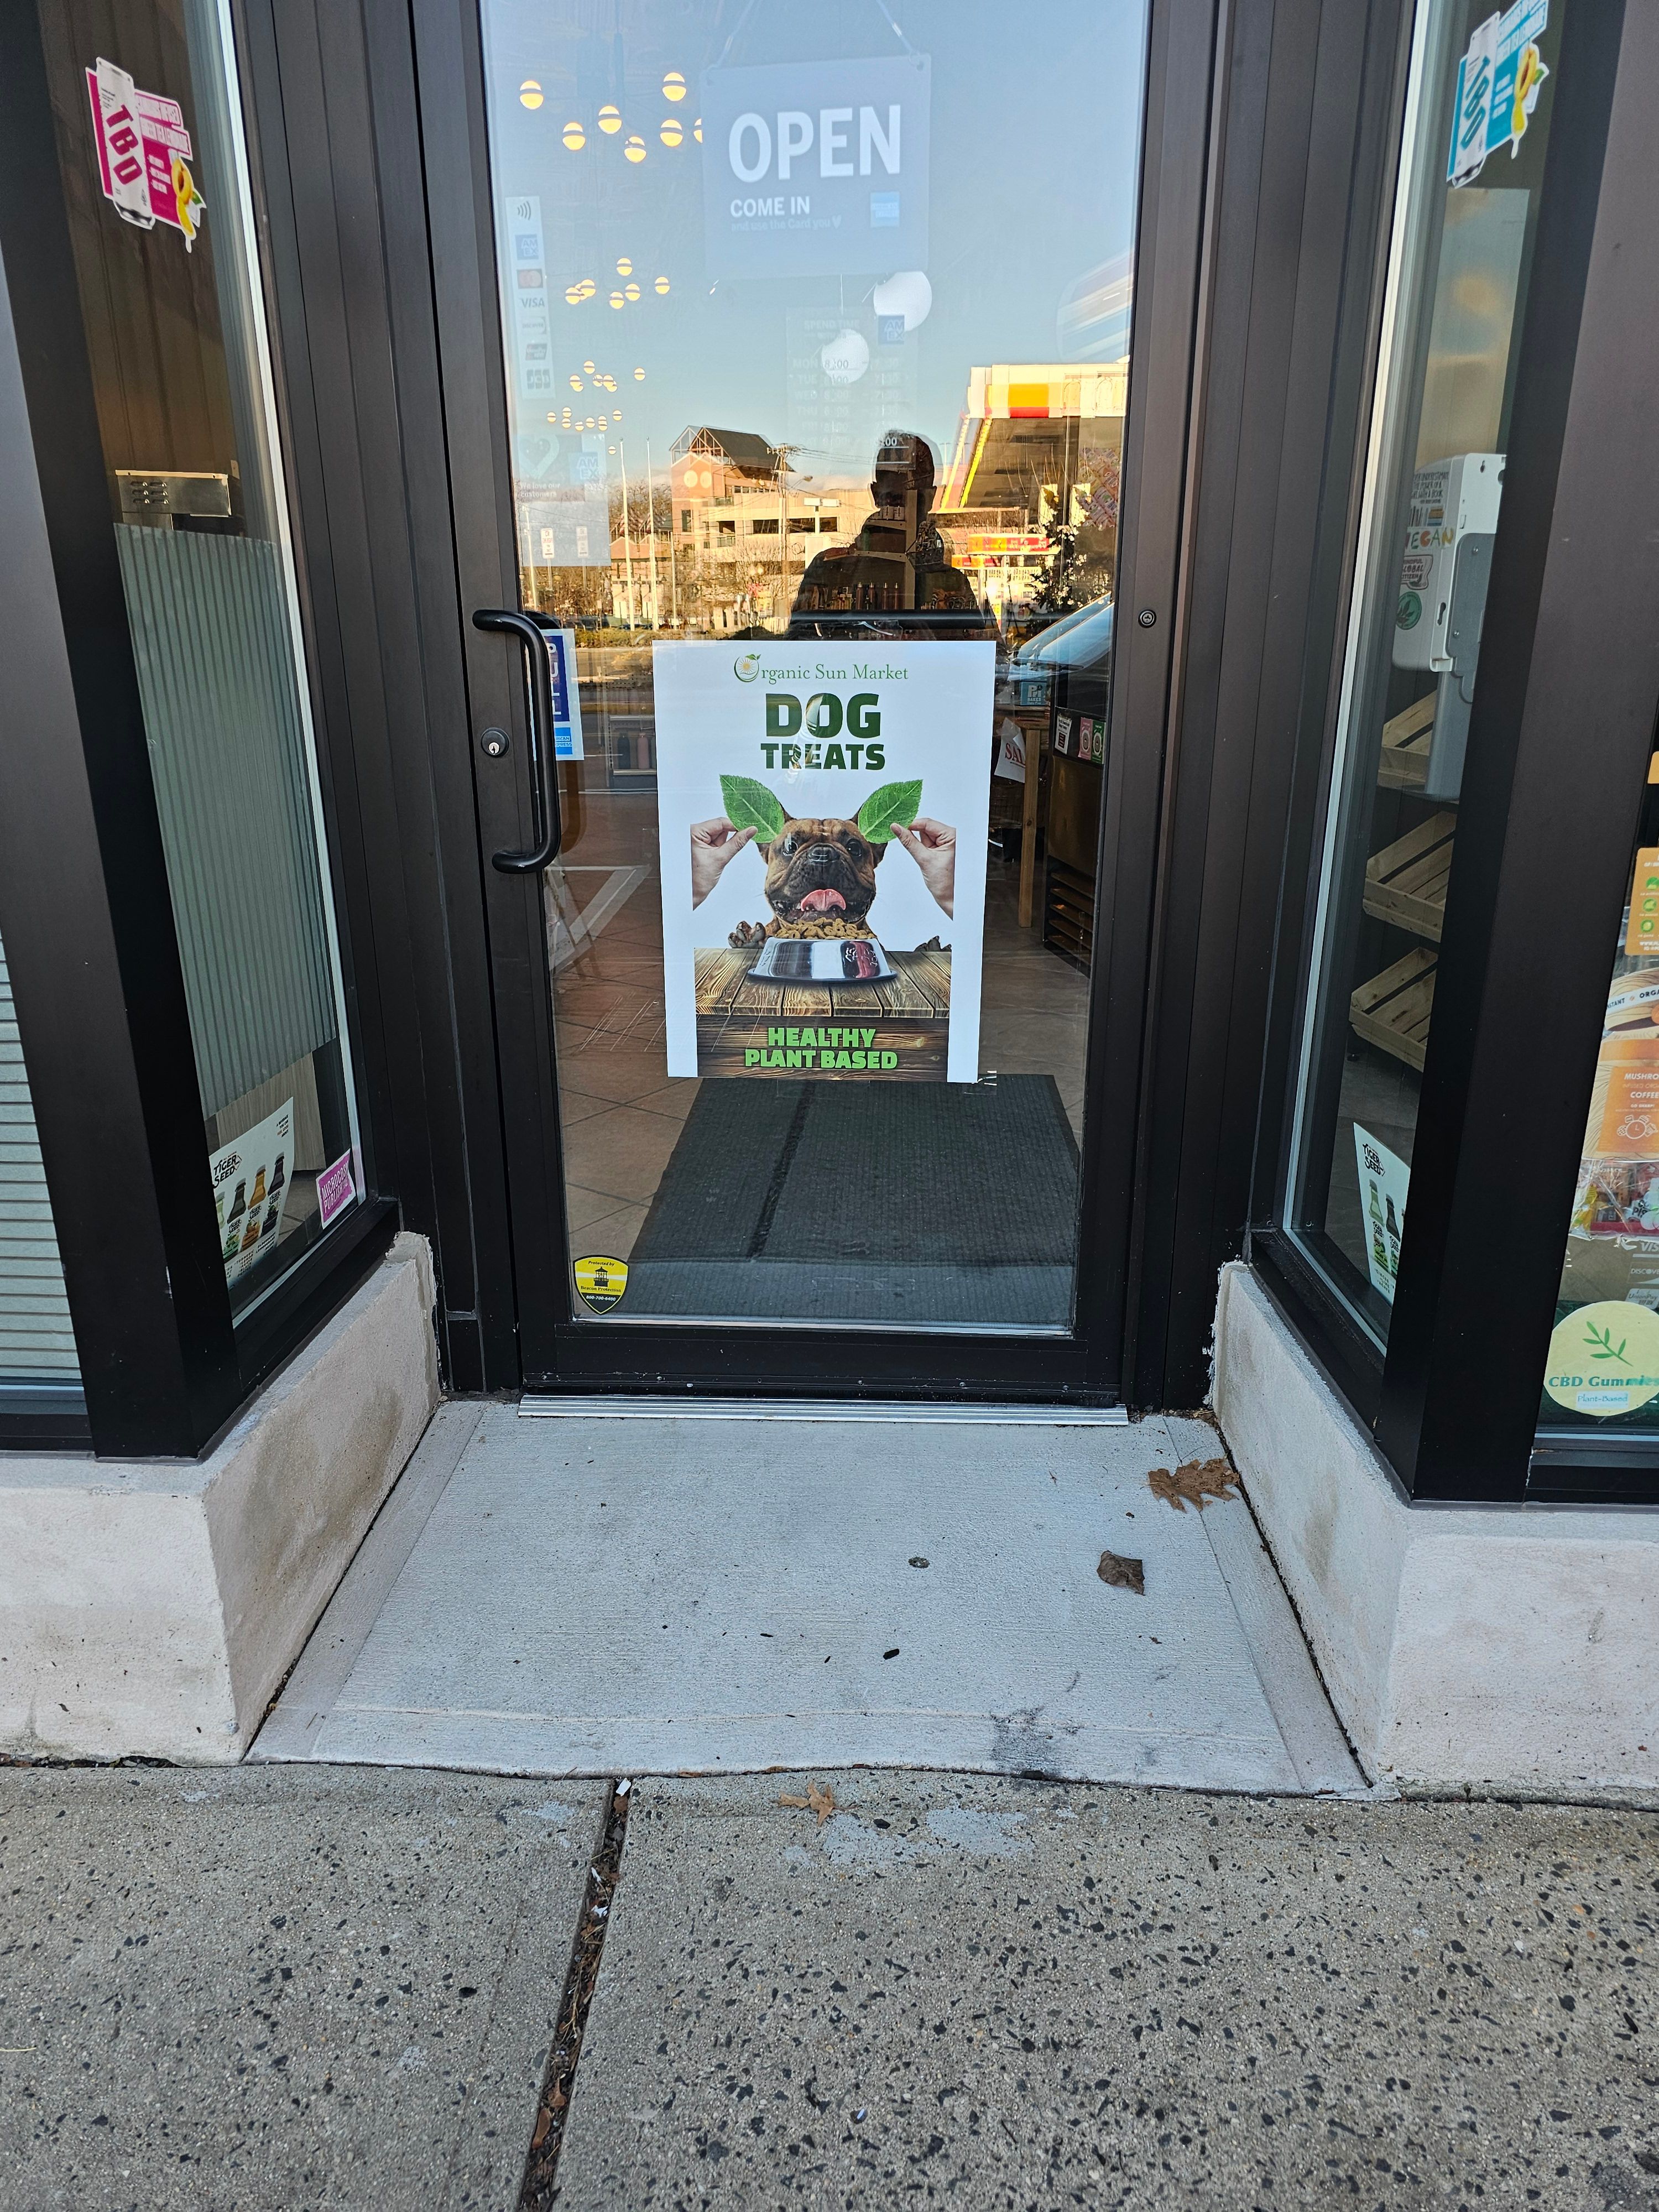
Many local small businesses take their marketing offline and into the real world. Print marketing is a business I have been a part of for almost two decades. I have designed, delivered, and distributed flyers, menus, business cards and more. As the holiday season approached, Steven asked me to create a poster for one of his healthy products.
He sent me a draft he has been working on, along with some inspiration examples that expressed the direction he wanted things to go. This was the final product:
A Digital Transformation Case Study: Boosting Restaurant Sales with Custom Web Development and Online Ordering Integration
Client background & challenge
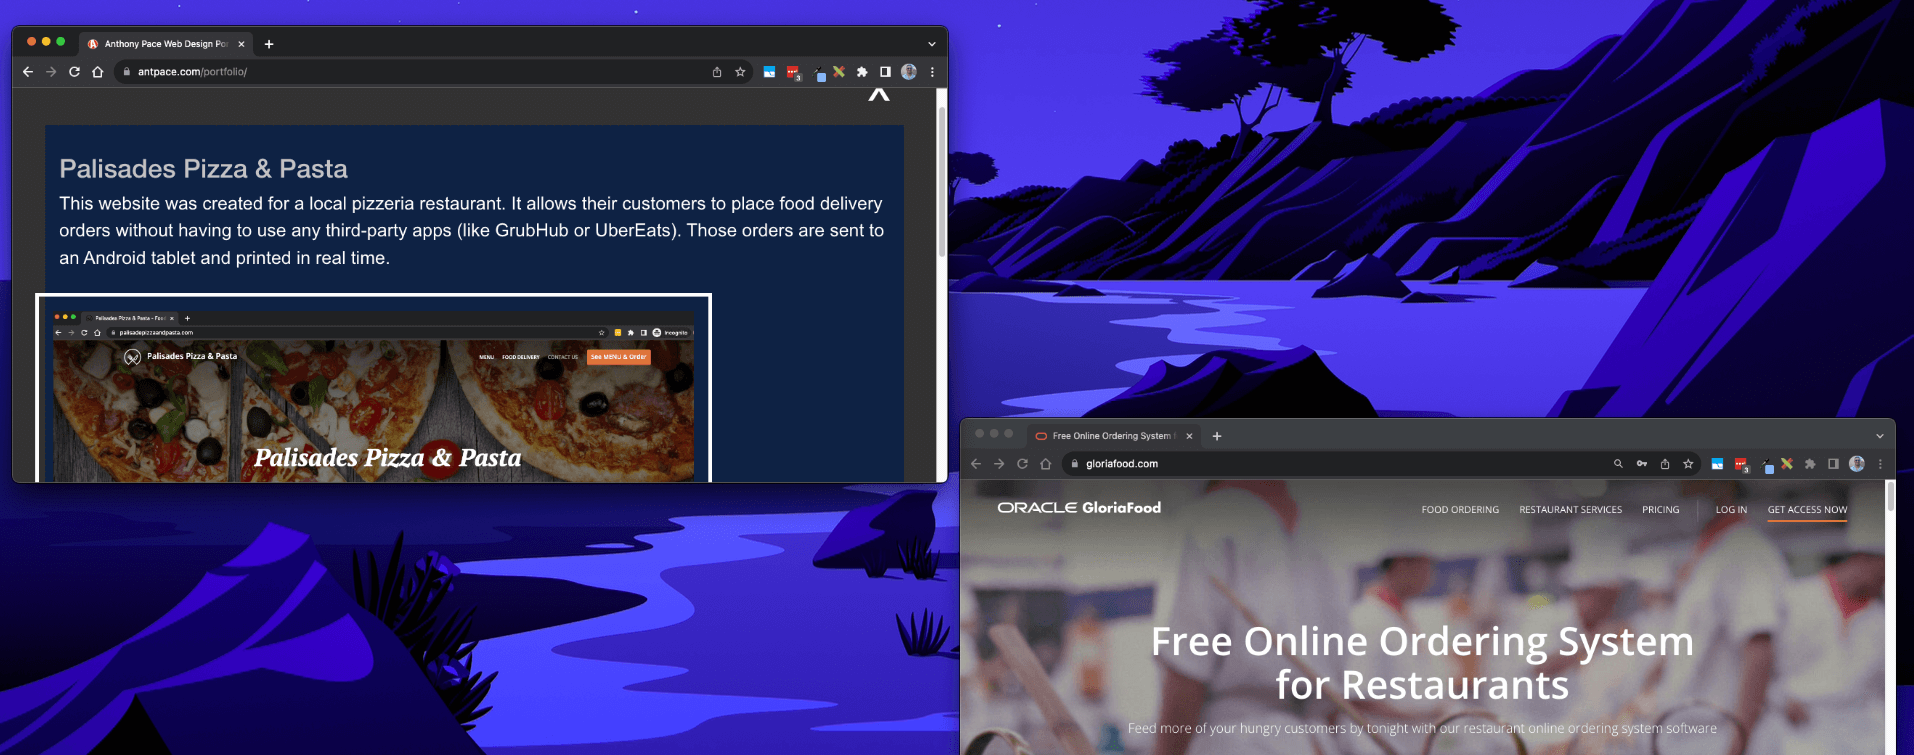
When I was younger I worked as a pizza delivery driver. Years later, the pizzeria where I once worked commissioned me to build their website. They were busier than ever thanks to online ordering (GrubHub, Seamless, UberEats), but were getting hit with high service fees.
They wanted their own website to be able to take orders for food online and send a notification to their iPad. That way they could avoid using apps like GrubHub that charged additional fees.
Project overview & execution
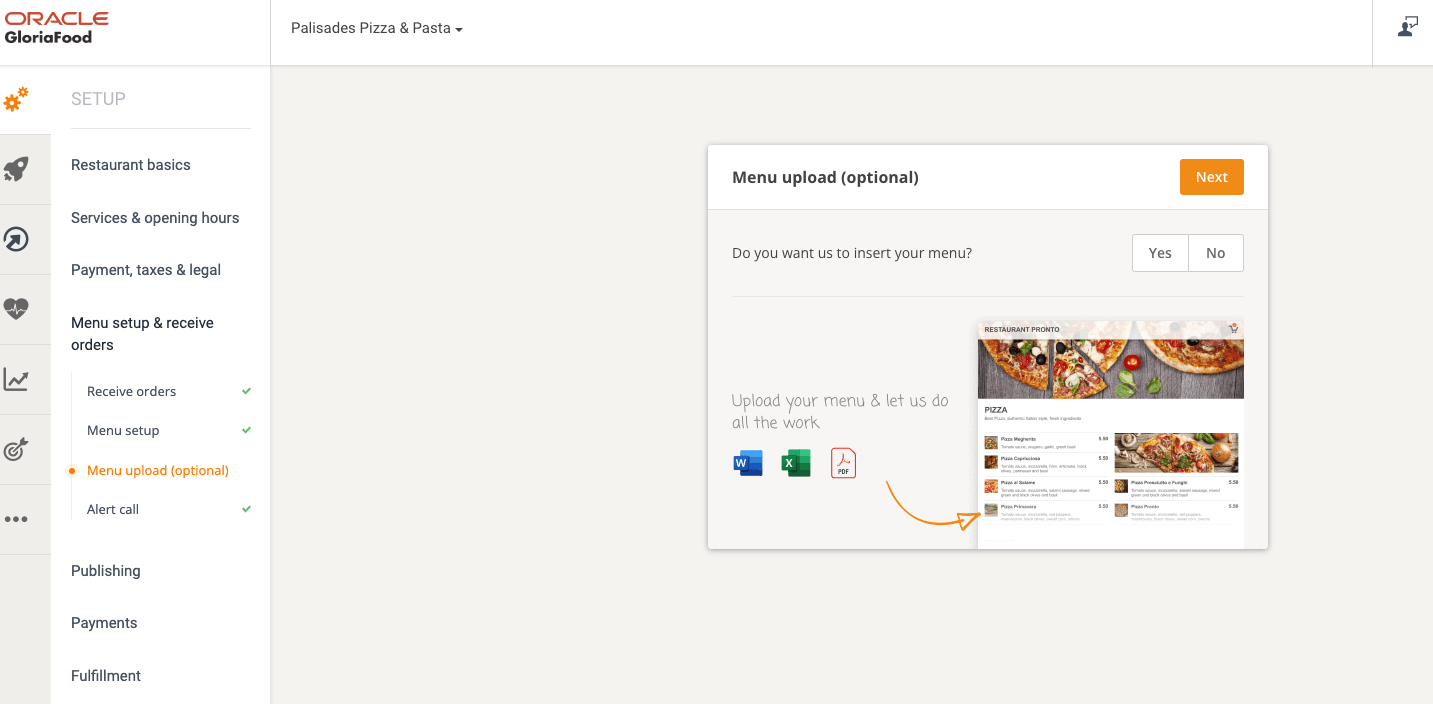
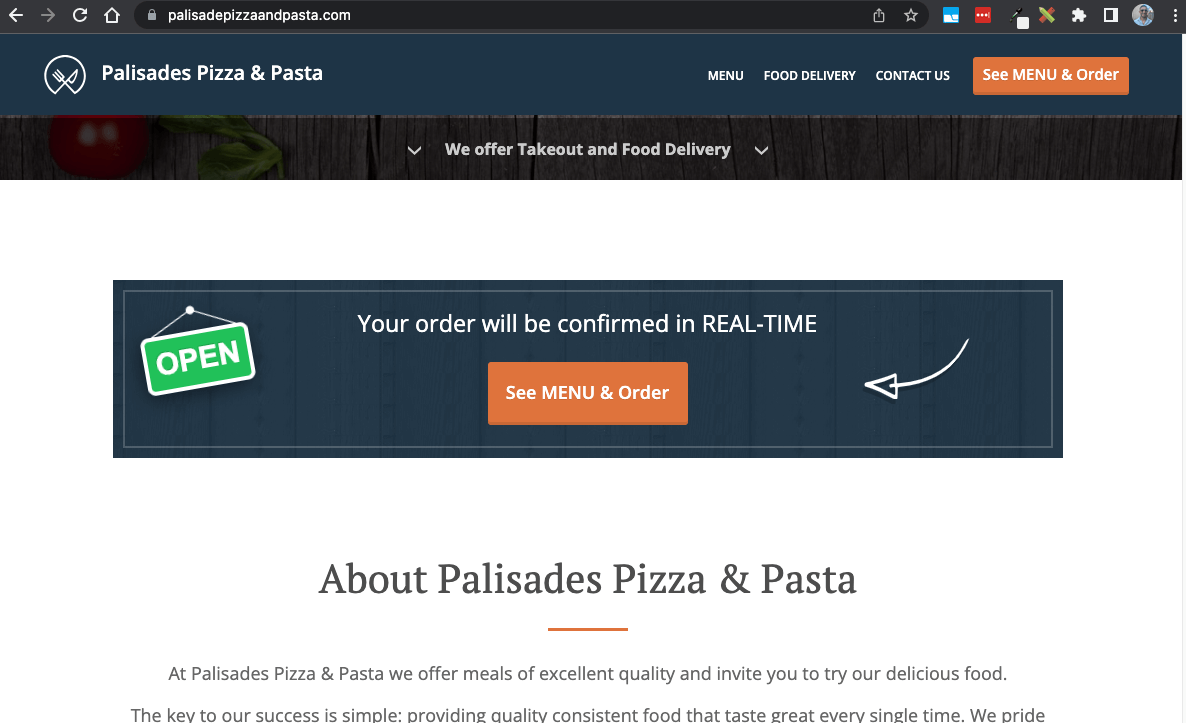
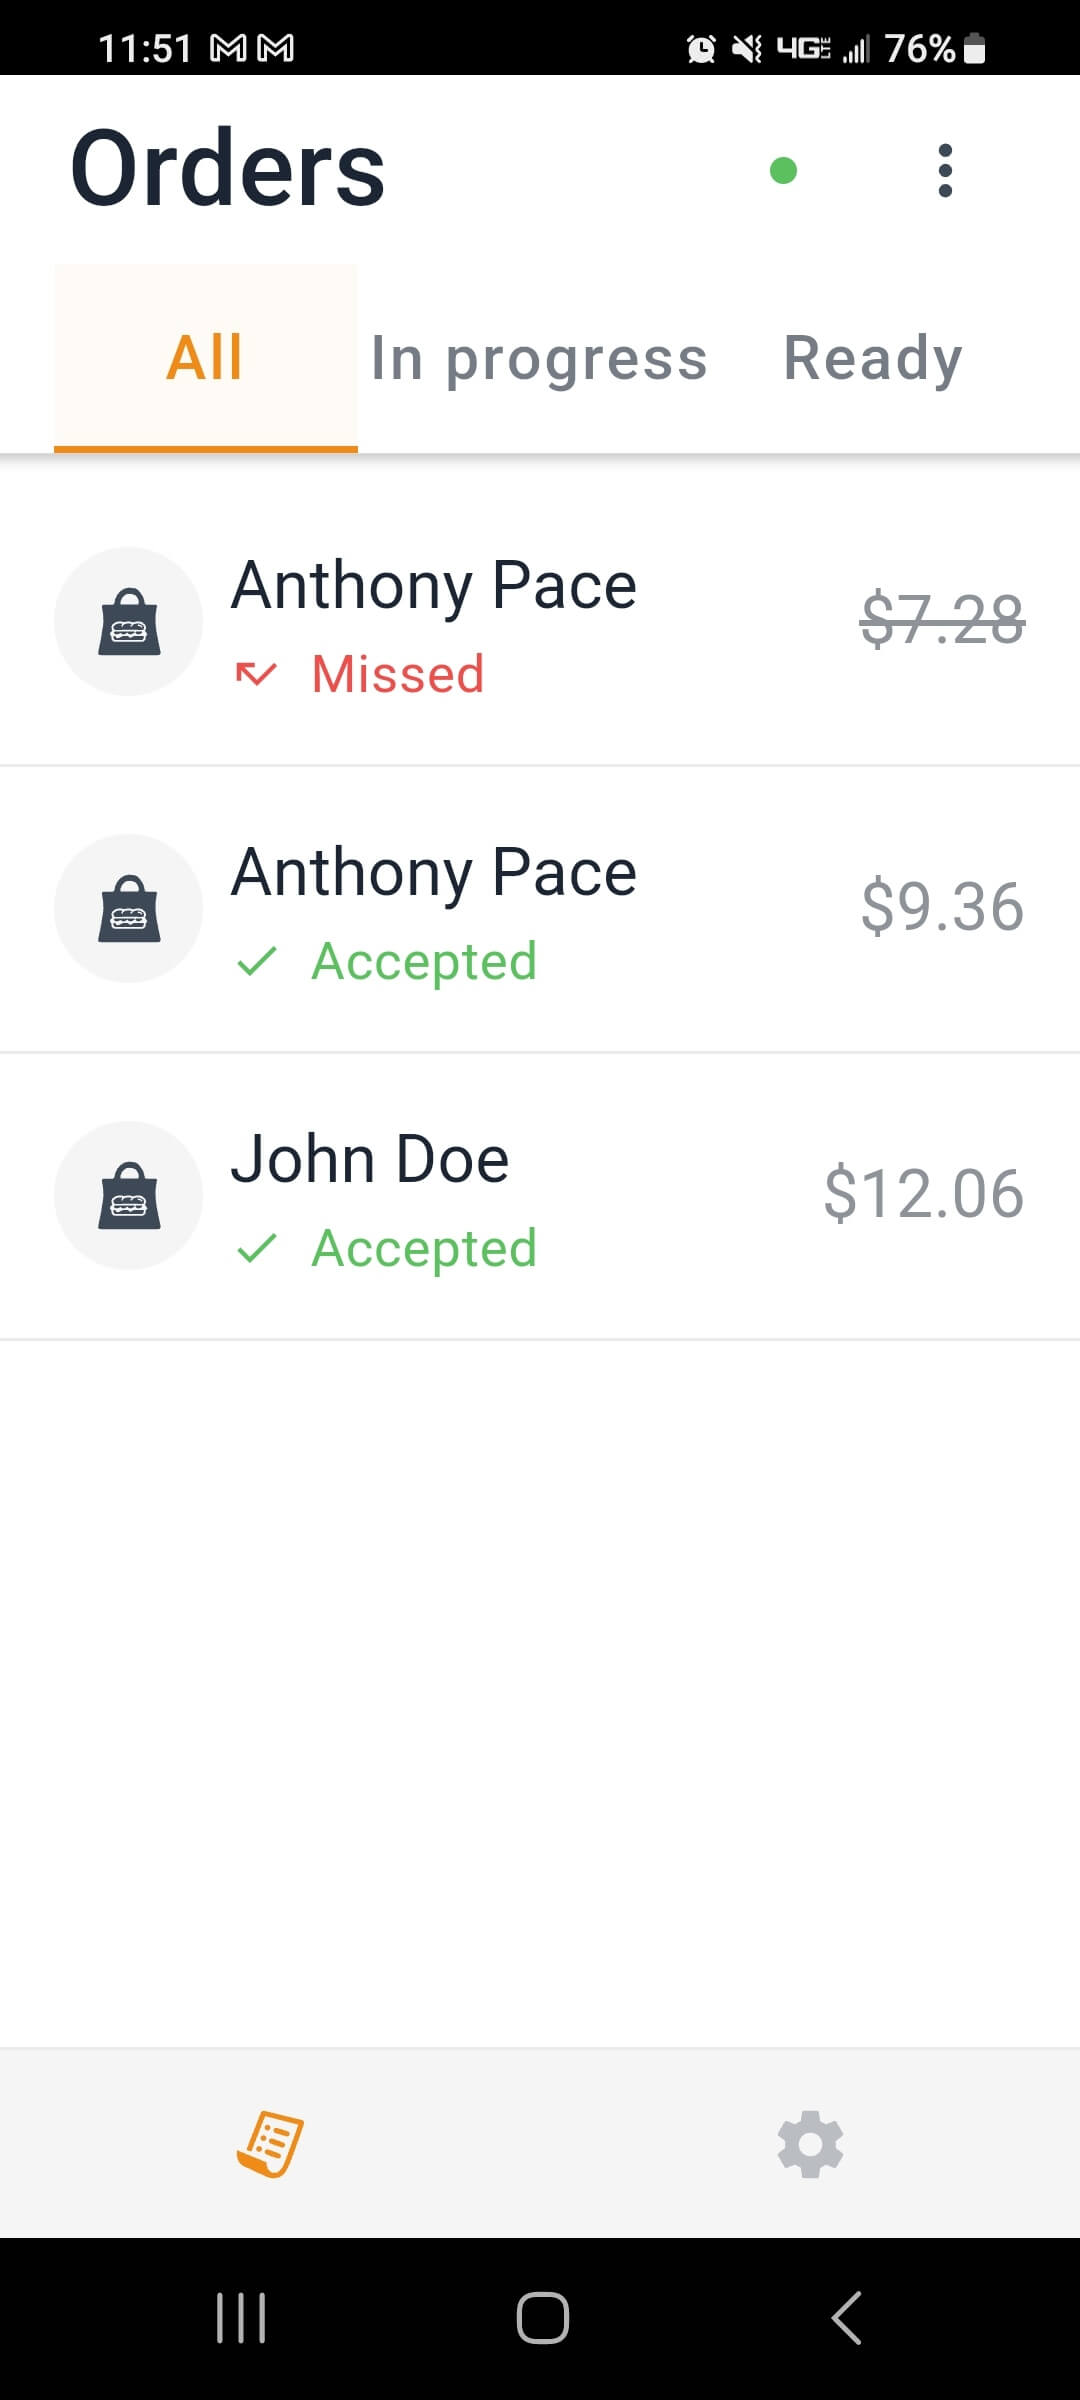
I used a service called GloriaFood that provides ready-made website templates, a secure payment process, and a messaging system. It integrates with Stripe for processing payments. There is an iPad app that receives push notifications when new orders are placed. The website builder required no code, and had a ton of options. I was able to register the pizzeria’s domain name directly though the admin portal, and generate a sales optimized website with hosting all setup. It was “seamless” – pun intended!
There are also options for integrating their ordering UI with an existing website, a Facebook page, or a dine-in QR code. The an option to publish a custom app required an additional cost per month.
I even traveled to this restaurant’s physical location, selected and purchased a tablet computer for them, installed the GloriaFood app to receive orders, and connected it to their mobile printer.
It’s amazing how much I was able to accomplish without writing a single line of code. The most technical part of this project was setting up a Stripe account and putting the API keys into the GloriaFood admin panel. GloriaFood is a product by Oracle, a company that specializes in providing a wide range of software and hardware products and services.
Print Design
As an extra part of this project, I designed a business card with a QR code linking to the new website. The business owner planned to give this to customers who ordered through other food ordering apps such as GrubHub, Seamless, UberEats, and Slice.
Results
Sales Increase
Since the launch of the new website, the restaurant has witnessed a notable surge in online orders, marking a 25% increase. This substantial rise not only signifies a successful digital transformation but also illustrates the growing customer preference for a seamless, direct ordering experience. The intuitive interface and easy navigation on the restaurant’s website have played a strong role in attracting and retaining customers, driving a higher volume of online orders and significantly contributing to the restaurant’s revenue growth.
Cost Savings
Transitioning from third-party ordering platforms like GrubHub, Seamless, and UberEats to a self-hosted online ordering system through has led to big cost savings. Third-party platforms usually charge hefty commissions, which eat into the restaurant’s profits and inflate prices for customers. With the new website, the restaurant has eliminated these intermediary costs, ensuring better profitability while also offering customers more competitive pricing.
Customer Feedback
The feedback received from both the restaurant management and its customers has been overwhelmingly positive. The restaurant staff has praised the streamlined process, which has simplified order management and allowed for a smoother operation during busy hours.
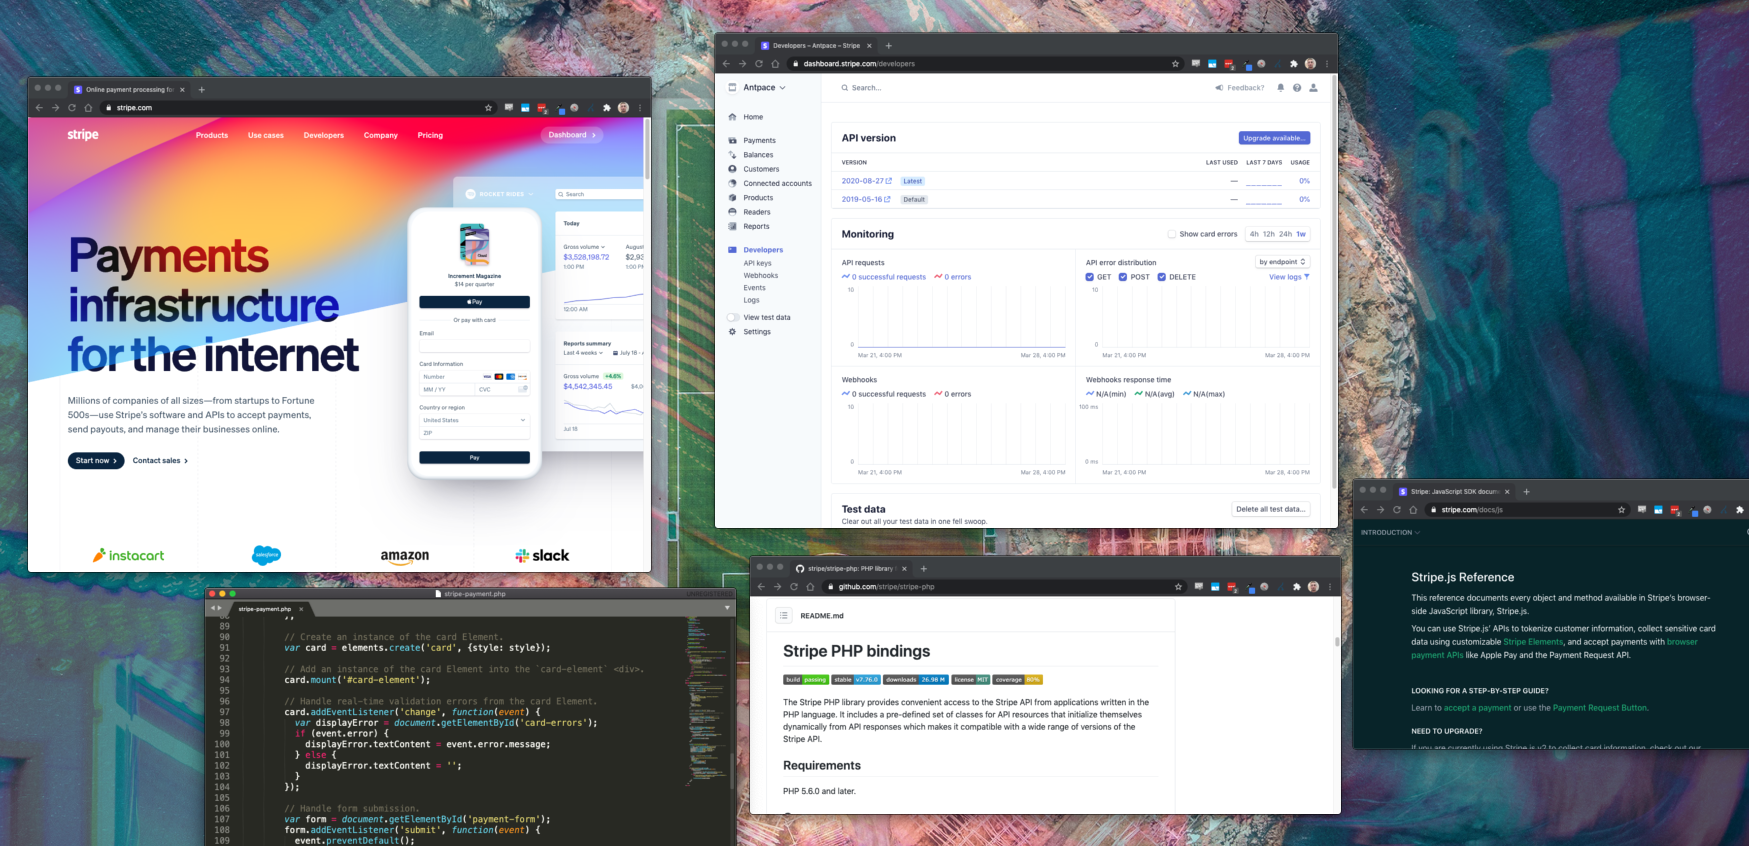
Letting users pay for your software service is important part of building a “Software as a Service” business. Accepting payment requires a third-party service, such as Stripe. Their PHP library makes it easy to accept credit cards and subscribe users to monthly payment plans. My examples use version 6.43. The Stripe JavaScript library is used to create secure UI elements that collect sensitive card data.
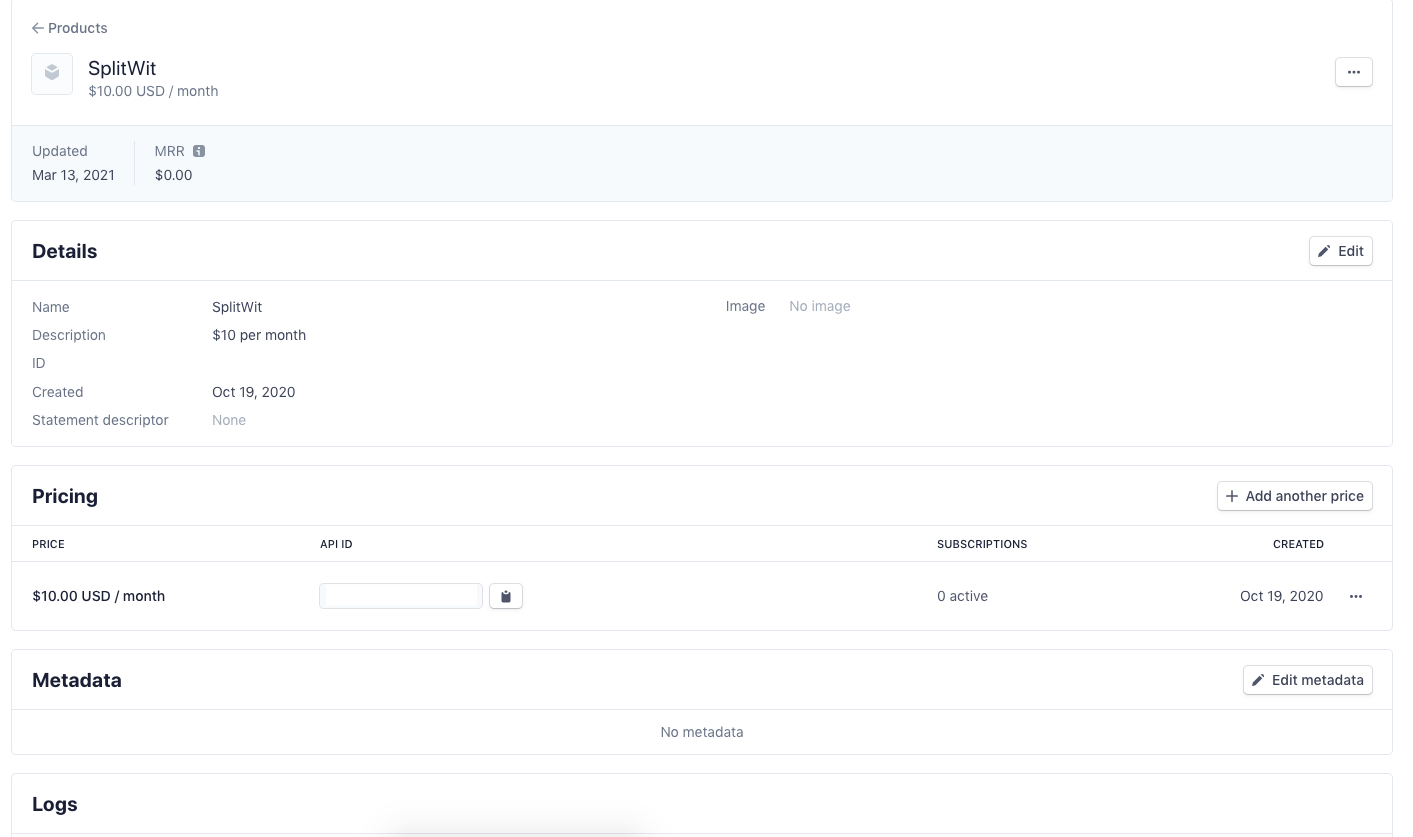
Before any coding, log into your Stripe account. Create a product with a monthly price. That product’s API ID is used to programmatically charge users and subscribe them recurring billing.
User Interface (front end)
In this part Stripe collects the payment information, and returns a secure token that can be used server-side to create a charge. Payment does not actually happen until the token is processed on the back-end.
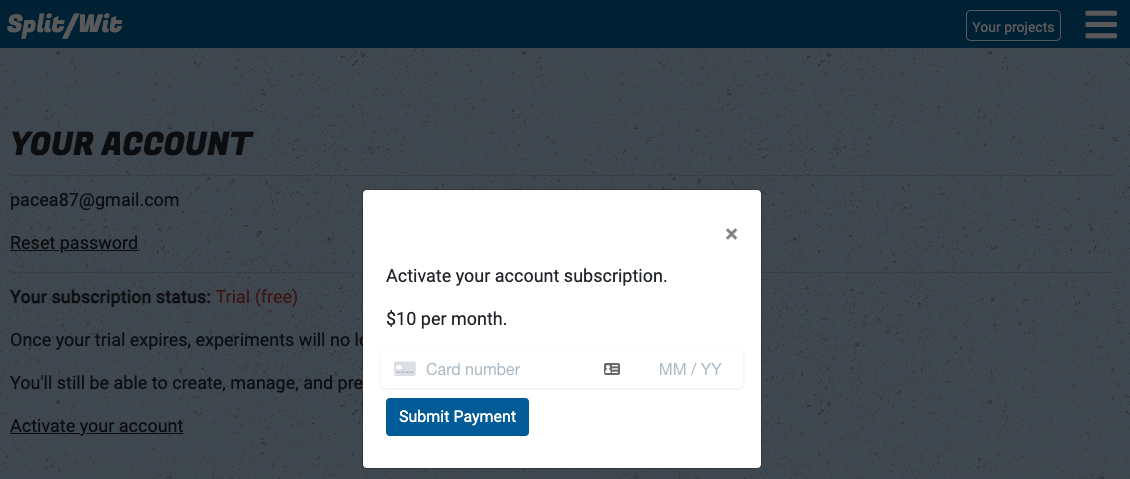
My software product gives users a 7-day free trial before core functionality is disabled. When they decide to activate their account they are presented with a credit card input user interface.
The actual input elements are generated by Stripe’s JavaScript. The Stripe form handles real-time validation and generates a secure token to be sent to your server.
<script src="https://js.stripe.com/v3/"></script>
<script type="text/javascript">

	$(document).ready(function() {
		// var stripe = Stripe('pk_test_xxxx'); //sandbox
		var stripe = Stripe('pk_live_xxxx');

		var elements = stripe.elements();

		// Custom styling can be passed to options when creating an Element.
		var style = {
		  base: {
		    color: '#32325d',
		    fontFamily: '"Helvetica Neue", Helvetica, sans-serif',
		    fontSmoothing: 'antialiased',
		    fontSize: '16px',
		    '::placeholder': {
		      color: '#aab7c4'
		    }
		  },
		  invalid: {
		    color: '#fa755a',
		    iconColor: '#fa755a'
		  }
		};

		// Create an instance of the card Element.
		var card = elements.create('card', {style: style});

		// Add an instance of the card Element into the `card-element` <div>.
		card.mount('#card-element');

		// Handle real-time validation errors from the card Element.
		card.addEventListener('change', function(event) {
		  var displayError = document.getElementById('card-errors');
		  if (event.error) {
		    displayError.textContent = event.error.message;
		  } else {
		    displayError.textContent = '';
		  }
		});

		// Handle form submission.
		var form = document.getElementById('payment-form');
		form.addEventListener('submit', function(event) {
		  event.preventDefault();

		  stripe.createToken(card).then(function(result) {
		    if (result.error) {
		      // Inform the user if there was an error.
		      var errorElement = document.getElementById('card-errors');
		      errorElement.textContent = result.error.message;
		    } else {
		      // Send the token to your server.
		      stripeTokenHandler(result.token);
		    }
		  });
		});

		// Submit the form with the token ID.
		function stripeTokenHandler(token) {
		  // Insert the token ID into the form so it gets submitted to the server
		  var form = document.getElementById('payment-form');
		  var hiddenInput = document.createElement('input');
		  hiddenInput.setAttribute('type', 'hidden');
		  hiddenInput.setAttribute('name', 'stripeToken');
		  hiddenInput.setAttribute('value', token.id);
		  form.appendChild(hiddenInput);

		  var data = $("#payment-form").serialize();
		  $.ajax({
		  	url:"/service-layer/stripe-service?method=subscribe",
		  	method: "POST",
		  	data: data,
		  	complete: function(response){
		  		console.log(response);
		  		window.location.reload();
		  	}
		  })
		}

		$(".submit-payment").click(function(){
			stripe.createToken(card).then(function(result) {
		    if (result.error) {
		    	// Inform the customer that there was an error.
		    	var errorElement = document.getElementById('card-errors');
		    	errorElement.textContent = result.error.message;
		    } else {
				$(".submit-payment").attr("disabled", "disabled").html('Working <i class="fas fa-spinner fa-spin"></i>');
		      	// Send the token to your server.
		      	stripeTokenHandler(result.token);
		    }
		  });
		});

	});

</script>
After referencing the CDN JS library, the Stripe object accepts a public API key. That object then creates a customizable element that can be mounted into an existing <div> on your webpage. In your JavaScript, you can either listen for the form to be submitted or for an arbitrary button to be clicked. Then, we rely on the Stripe object to create a card token, which we can pass along to our back-end service.
Once the token is passed along to the server, it can be used to subscribe to the monthly product. We will need to load the PHP library and provide our secret API key. The key can be found in Stripe’s web dashboard.
A Stripe customer ID is needed to create the subscription. Our code checks if the user record already has a Stripe customer ID saved to our database (in case they signed up previously, and cancelled). If not, we call the “customer create” method first.
function subscribe(){
	$stripe_token = $_POST['stripeToken'];
	$conn = $this->connection;

	if(isset($_SESSION['email'])){
		$email = $_SESSION['email'];
	}else{
		die("No email found.");
	}

	if(strlen($email)>0){
		$sql = "SELECT * FROM `account` WHERE email = ?";
		$result = $conn->prepare($sql);
		$result->execute(array($email));
		$row = $result->fetch(PDO::FETCH_ASSOC);
	}
	$customer_id = $row['billing_customer_id'];
	//check if this account already has a billing_customer_id
	if(strlen($customer_id) < 1){
		//if not, create the customer
		$customer = \Stripe\Customer::create([
		  'email' => $email,
		  'source' => $stripe_token,
		]);
		$customer_id = $customer['id'];
		//write stripe ID to db
		$sql = "UPDATE `account` SET billing_customer_id = ? WHERE email = ?";
		$result = $conn->prepare($sql);
		$result->execute(array($customer_id, $email));
	}

	// Create the subscription
	$subscription = \Stripe\Subscription::create([
	  'customer' => $customer_id,
	  'items' => [
	    [
	      // 'plan' => 'plan_FjOzMSMahyM7Ap', //sandbox.
	      'plan' => 'price_1He7vwLjg3FTECK8lb3GDQhV', //"basic" plan. setup in Stripe dashboard.
	    ],
	  ],
	  'expand' => ['latest_invoice.payment_intent'],
	  'billing_cycle_anchor' => time()
	]);
	$subscription_status = $subscription['status'];
	$subscription_id = $subscription['id'];
	if($subscription_status == "active"){
		//set current_period_end to 32 days (1 month plus some leeway) in the future. set past_due as false
		$sql = "UPDATE `account` SET stripe_subscription_id = ?, current_period_end = ?, past_due = 0 WHERE email = ?";
		$result = $conn->prepare($sql);
		$past_due = false;
		$current_period_end = new DateTime;
		$current_period_end->modify( '+32 day' );
		$current_period_end = $current_period_end->format('Y-m-d H:i:s');
		$result->execute(array($subscription_id, $current_period_end, $email));
	}
}
With the subscription complete, their account’s “past due” property is marked as false and “current period end” is recorded to about 1 month in the future. The Stripe subscription ID is recorded for later use and reference.
Subscription life-cycle workflow
The application knows if an account is paying for premium service based on that “past due” property. After a user first signs up, that value is managed by a nightly scheduled cron job. If the “current period end” date is in the past, “past due” is marked as true, all projects are turned off, and a notification email is sent.
function checkPastDue(){
	$sql = "SELECT * FROM `account` WHERE past_due = '0'";
	$result = $conn->prepare($sql);
	$result->execute();
	$rows = $result->fetchAll(PDO::FETCH_ASSOC);
	$number_of_rows = $result->rowCount();

	include 'send-email-service.php';

	foreach ($rows as $key => $value) {
		$current_period_end = $value['current_period_end'];
		$date = new DateTime($current_period_end);
		$now = new DateTime();
		if($date < $now) {

		    //extend their trial 1 time, for an additional week
		    $extended_trial = $value['extended_trial'];
		    $accountid = $value['accountid'];
		    $email = $value['email'];
		    $billing_customer_id = $value['billing_customer_id'];
		    if($extended_trial == 0 && strlen($billing_customer_id) == 0){

		    	$sql = "UPDATE `account` SET extended_trial = '1' WHERE accountid = ?";
				$result1 = $conn->prepare($sql);
				$result1->execute(array($accountid));

				$current_period_end = new DateTime;
				$current_period_end->modify( '+8 day' );
				$current_period_end = $current_period_end->format('Y-m-d H:i:s');

		    	$sql = "UPDATE `account` SET current_period_end = ? WHERE accountid = ?";
				$result1 = $conn->prepare($sql);
				$result1->execute(array($current_period_end, $accountid));

				$SendEmailService = new SendEmailService();

				$subject = "SplitWit trial extended!";

				$body = "Your SplitWit trial was supposed to expire today. As a courtesy, we're extending it another 7 days!<br><br>";

				$altBody = "Your SplitWit trial was supposed to expire today. We're extending it another 7 days!";

				$SendEmailService -> sendEmail($subject, $body, $altBody, $email);


		    }else{

				$sql = "UPDATE `account` SET past_due = '1' WHERE accountid = ?";
				$result1 = $conn->prepare($sql);
				$result1->execute(array($accountid));

				//turn off all experiments
				$status = "Not running";
				$sql = "UPDATE `experiment` set status = ? where accountid = ?";
				$result2 = $conn->prepare($sql);
				$result2->execute(array($status, $accountid));


				//update all snippets for this account (1 snippet per project)
				$sql = "SELECT * FROM `project` WHERE accountid = ?";
				$result3 = $conn->prepare($sql);
				$result3->execute(array($accountid));
				$rows3 = $result3->fetchAll(PDO::FETCH_ASSOC);
				foreach ($rows3 as $key3 => $value3) {
					$projectid = $value3['projectid'];
			    	$write_snippet_service = new ProjectService();
					$write_snippet_service -> writeSnippetFile(false, false, $projectid);
				}

				$SendEmailService = new SendEmailService();
				$subject = "SplitWit account past due";

				$body = "Your SplitWit account is past due. Please login to your account and update your payment information to continue running A/B experiments.<br><br>";

				$body .= "A/B testing helps you increase conversion rates and avoid unnecessary risk. <a href='https://www.splitwit.com/blog/'>Check out the SplitWit blog for experiment ideas</a>. Remember, everything is testable!";

				$body .= "<br><br><a href='https://www.splitwit.com/'><img src='https://www.splitwit.com/img/splitwit-logo.png'></a>";

				$altBody = "Your SplitWit account is past due. Please login to your account and update your payment information to continue running A/B experiments. A/B testing helps you increase conversion rates and avoid unnecessary risk. Check out the SplitWit blog for experiment ideas: https://www.splitwit.com/blog/ ";

				$SendEmailService -> sendEmail($subject, $body, $altBody, $email);

		    }

		}
	}

}
The “current period end” date is updated each month after the customer is invoiced.
When the Stripe “payment succeeded” event happens, a webhook triggers our custom end-point code.
Although there is a webhook available for payment failure, the scheduled cron job handles that scenario.
If a user decides to cancel their subscription, we use their Stripe subscription ID and update their account records.
function cancelSubscription(){
	include '/var/www/html/service-layer/project-service.php';
	$conn = $this->connection;
	if(isset($_SESSION['userid'])){
		$accountid = $_SESSION['userid'];
	}else{
		die("No userid found.");
	}

	if(strlen($accountid)>0){

		$sql = "SELECT * FROM `account` WHERE accountid = ?";
		$result = $conn->prepare($sql);
		$result->execute(array($accountid));
		$row = $result->fetch(PDO::FETCH_ASSOC);
	}
	$stripe_subscription_id = $row['stripe_subscription_id'];
	$subscription = \Stripe\Subscription::retrieve($stripe_subscription_id);
	$subscription->cancel();

	//#TODO: We should let the cron job handle this, so the user gets the rest of their month's service.
	//turn off experiments and update snippets. clear stripe IDs. set current_period_end to yesterday. set past_due = 1
	$current_period_end   = new DateTime;
	$current_period_end->modify( '-1 day' );
	$current_period_end = $current_period_end->format('Y-m-d H:i:s');
	$sql = "UPDATE `account` SET billing_customer_id = '', stripe_subscription_id = '', past_due = 1, current_period_end = ? WHERE accountid = ?";
	$result = $conn->prepare($sql);
	$result->execute(array($current_period_end, $accountid));

	//turn off all experiments
	$status = "Not running";
	$sql = "UPDATE `experiment` set status = ? where accountid = ?";
	$result2 = $conn->prepare($sql);
	$result2->execute(array($status, $accountid));

	//update all snippets for this account (1 snippet per project)
	$sql = "SELECT * FROM `project` WHERE accountid = ?";
	$result3 = $conn->prepare($sql);
	$result3->execute(array($accountid));
	$rows3 = $result3->fetchAll(PDO::FETCH_ASSOC);
	foreach ($rows3 as $key3 => $value3) {
		$projectid = $value3['projectid'];
    	$write_snippet_service = new ProjectService();
		$write_snippet_service -> writeSnippetFile(false, false, $projectid);
	}

	$this->status = "complete";
}
Being able to charge money for your web based software is an important step in building a SAAS business. Using a Stripe as your payment infrastructure makes it easy. Build stuff that people love and you can get paid to do it!
Update
I recently integrated Stripe payments for one of my apps, BJJ Tracker. I used version 13.0.0 of Stripe’s PHP library, which requires a slightly different code syntax. For this use-case I only needed to create a one-time payment instead of a subscription. I was able to create a charge on the fly, and did not need to create a “product” in the Stripe dashboard:
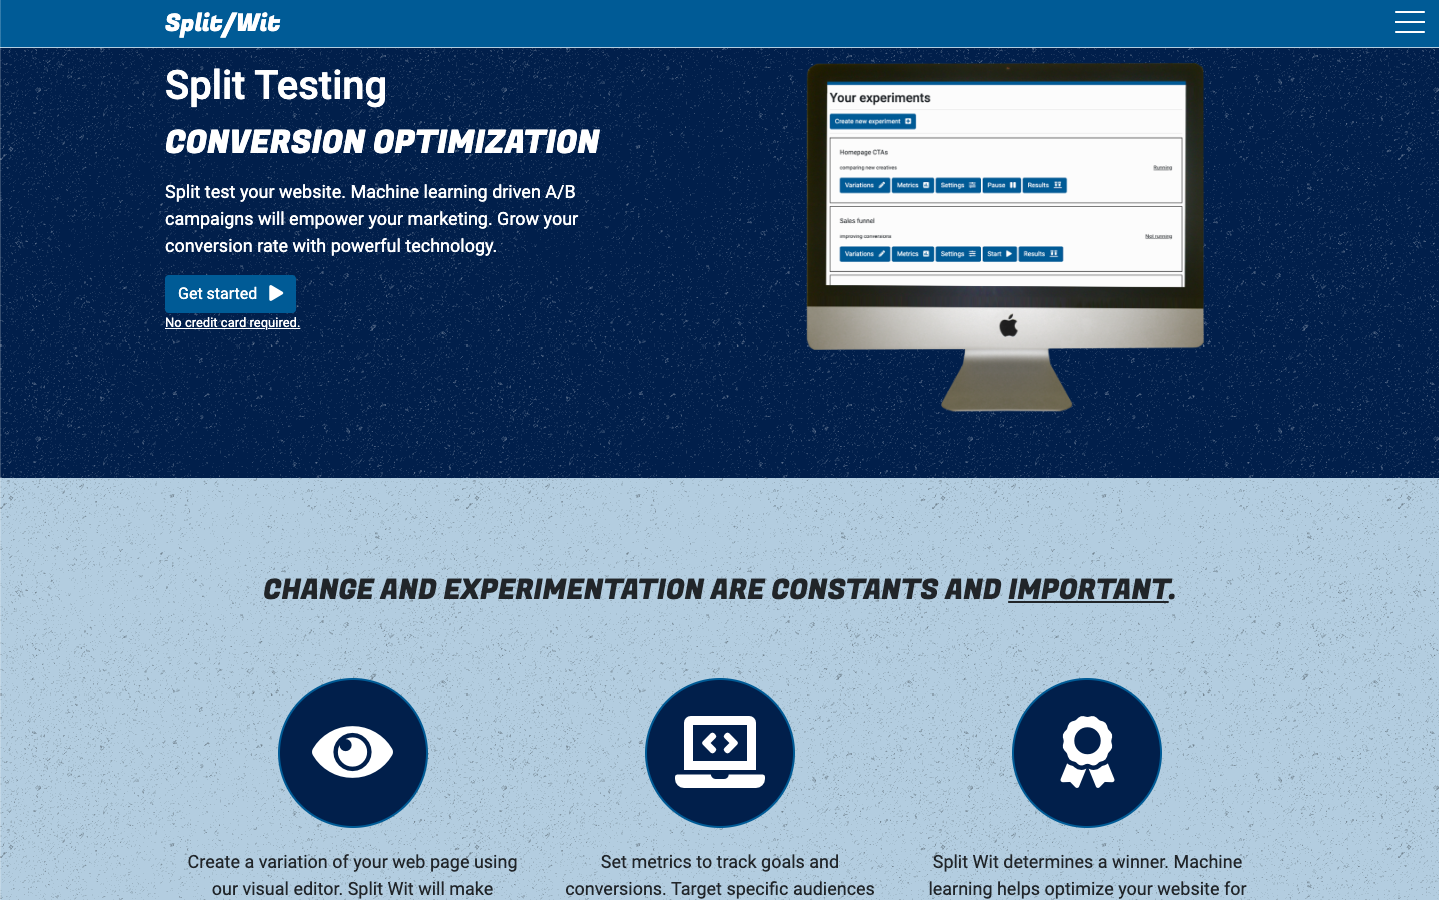
SplitWit is a digital product. It is a “software as a service” platform that helps split test websites and apps. That means it allows us to make changes to a website, that only half of visitors will see, and then determine which version has better results (sales, sign-ups, etc.).
The front-end design utilizes basic principles that focus on user experience. I iterated through various color pallets, and ended with a blue-shaded scheme. Subtle textured patterns applied to background sections help add a finished look. And of course, FontAwesome is my go-to icon set.
https://www.SplitWit.com
I used a CSS rule on the main container of each page to have a minimum height of 100% of the viewport. This ensures that the page footer doesn’t end up in the middle of the screen if there is not enough content.
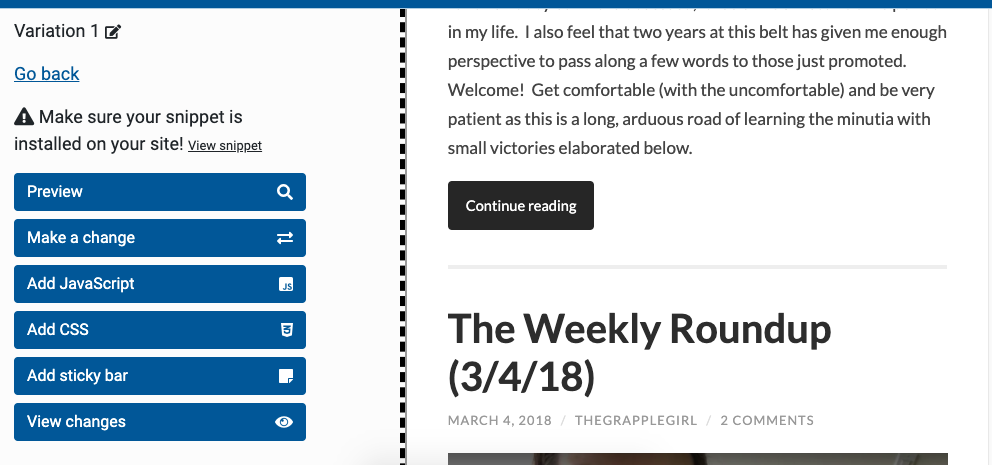
After setting up an account, users can create experiments that target certain pages of a website. The visual optimizer lets changes be made easily between the control and variation versions.
The editor loads up a website as an iFrame on the right side of the page. Once a page is loaded, SplitWit adds an overlay to the iFrame. This way, instead of interacting with the page, clicks can be intercepted. Any elements that get clicked are loaded up as HTML into the “make a change” section of the editor. Any changes made are saved to that variation, and will be displayed to half of visitors.
Here is an example of the code that powers the overlay and connects it to the editor:
The editor has lots of built in options, so users can change the style and behavior of a page without needing to know how to code. A marketer can use this tool without the help of a developer.
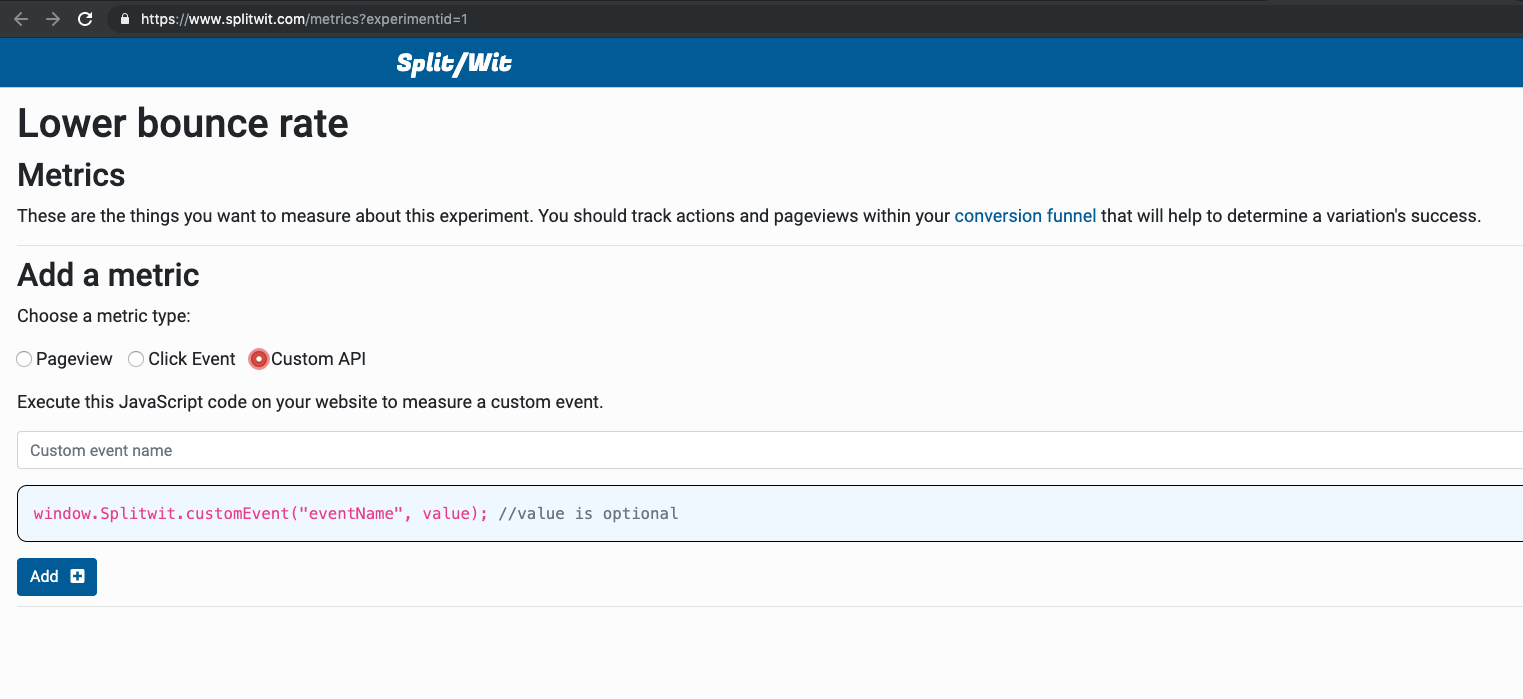
Metrics and statistical significance
A key feature of SplitWit is to measure conversion metrics and performance indicators. The platform determines which variation is a winner based on the metrics set. Three types of metrics are offered: page views, click events, and custom API calls.
Algorithms calculate statistical significance based on the number of visitors an experiment receives and the conversion metrics configured. This makes sure that the result is very unlikely to have occurred coincidently.
The code snippet
Each project setup in SplitWit generates a code snippet. Once this snippet is added to a website, SplitWit is able to do its magic. Using JavaScript, it applies variation changes, splits user traffic between versions, and measures key metrics about the experiments running.
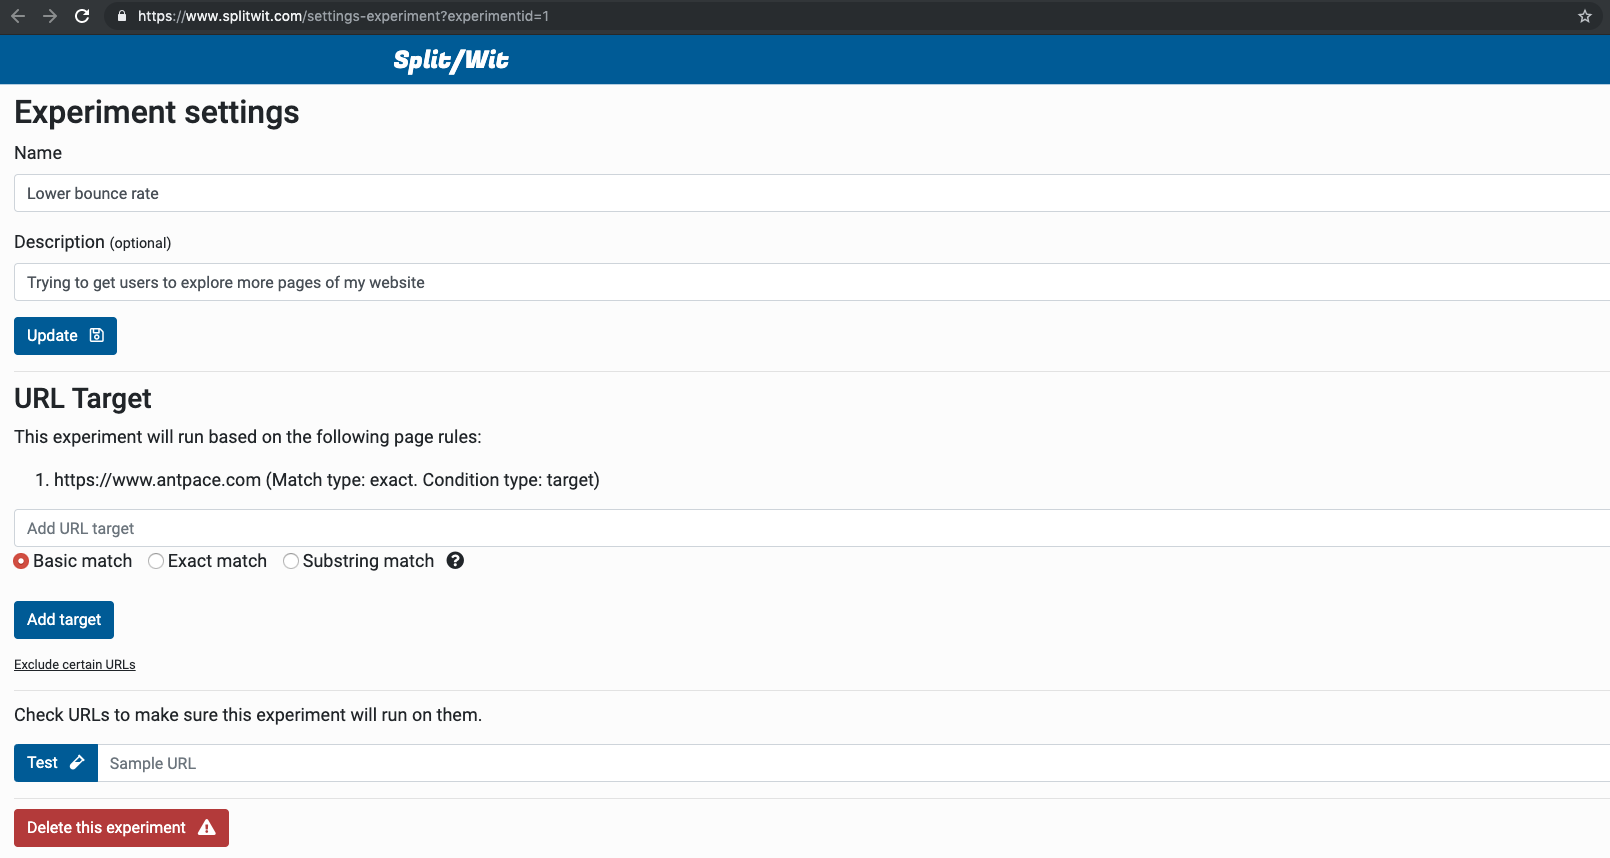
The platform uses a relational database structure. As changes are made to experiments, the details are saved and written to a unique snippet file. When the snippet file loads, the first thing is does is check to see if there are any experiments that should be running on the current page. Each experiment can be configured to run on various URLs. The configuration rules contain three parts: a URL pattern, a type (target or exclude), and a match type (exact, basic, or substring). You can read SplitWit documentation to find an explanation of these match types.
Here is the code used to test a URL against an experiment’s configuration rules:
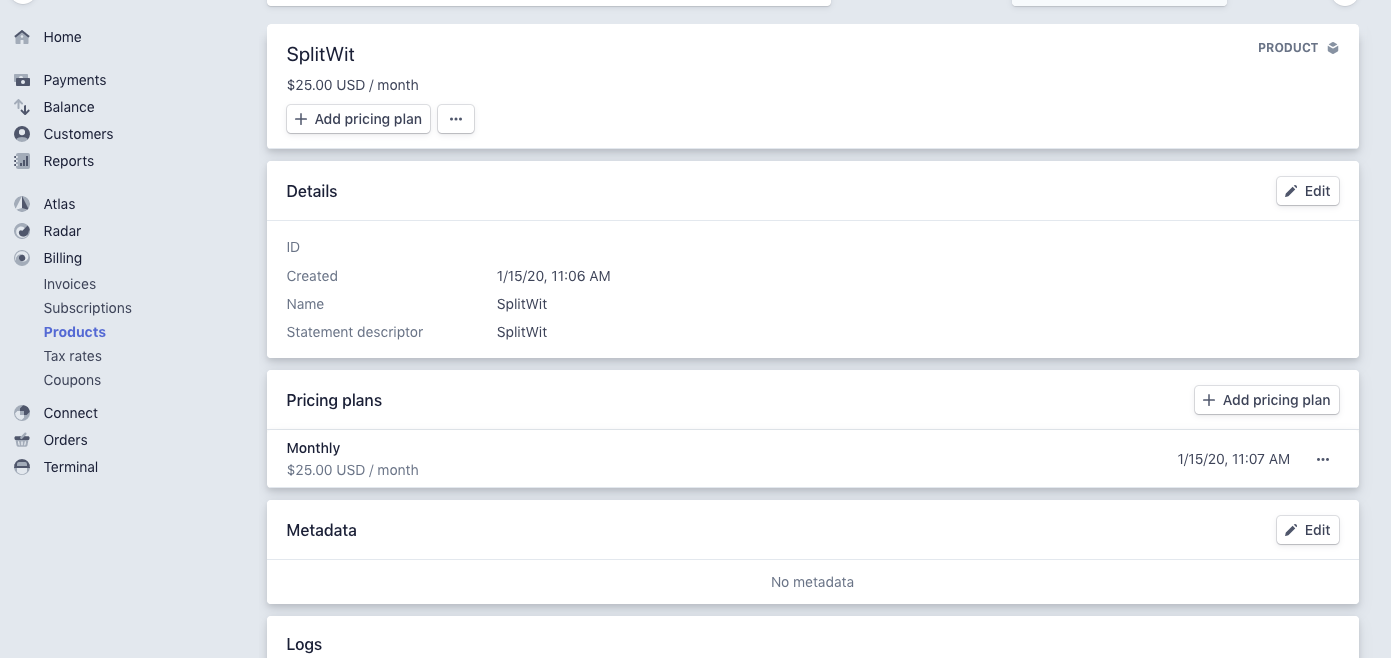
Stripe is used to bill customers. In the billing dashboard we can create a product, and assign it a monthly pricing plan.
The payment processor handles re-billing customers each month. Our software is responsible for keeping track of each account’s payment status. In the database we record the date of when an account will be considered delinquent. Upon registration each account has this field set to 15 days in the future, affording a two week trial. At this point, users have not entered any credit card information.
Initial payment
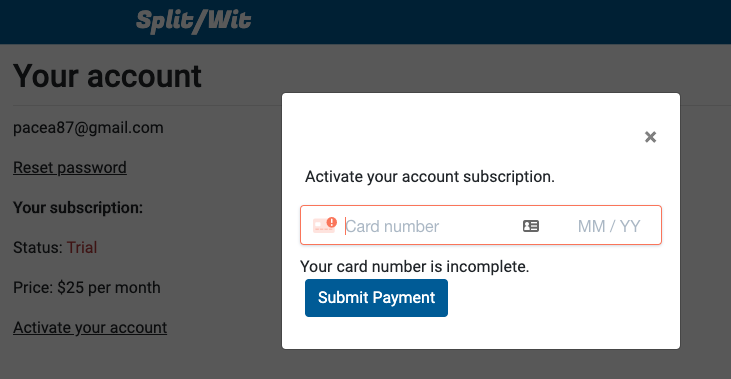
Stripe’s JavaScript SDK is used during initial payment to tokenize credit card information before passing it along to the server.
Stripe’s JS library handles card validation and tokenization.
Below is the HTML used for a Stripe payment element:
<div id="stripe-payment-modal" class="modal stripe-payment-modal" style="display: none;">
<!-- Modal content -->
<div class="modal-content">
<p>
<button type="button" class="dismiss-modal close" >×</button>
</p>
<p>Activate your account subscription.</p>
<form id="payment-form">
<div class="form-row">
<!-- <label for="card-element">
Credit or debit card
</label> -->
<div id="card-element">
<!-- A Stripe Element will be inserted here. -->
</div>
<!-- Used to display Element errors. -->
<div id="card-errors" role="alert"></div>
</div>
<button type="button" class="btn submit-payment">Submit Payment</button>
</form>
</div>
</div>
And the JavaScript:
<script src="https://js.stripe.com/v3/"></script>
<script type="text/javascript">
var stripe = Stripe('your-public-key-goes-here');

var elements = stripe.elements();

// Custom styling can be passed to options when creating an Element.
var style = {
  base: {
    color: '#32325d',
    fontFamily: '"Helvetica Neue", Helvetica, sans-serif',
    fontSmoothing: 'antialiased',
    fontSize: '16px',
    '::placeholder': {
      color: '#aab7c4'
    }
  },
  invalid: {
    color: '#fa755a',
    iconColor: '#fa755a'
  }
};

// Create an instance of the card Element.
var card = elements.create('card', {style: style});

// Add an instance of the card Element into the `card-element` div.
card.mount('#card-element');

// Handle real-time validation errors from the card Element.
card.addEventListener('change', function(event) {
  var displayError = document.getElementById('card-errors');
  if (event.error) {
    displayError.textContent = event.error.message;
  } else {
    displayError.textContent = '';
  }
});

// Handle form submission.
var form = document.getElementById('payment-form');
form.addEventListener('submit', function(event) {
  event.preventDefault();

  stripe.createToken(card).then(function(result) {
    if (result.error) {
      // Inform the user if there was an error.
      var errorElement = document.getElementById('card-errors');
      errorElement.textContent = result.error.message;
    } else {
      // Send the token to your server.
      stripeTokenHandler(result.token);
    }
  });
});

// Submit the form with the token ID.
function stripeTokenHandler(token) {
  // Insert the token ID into the form so it gets submitted to the server
  var form = document.getElementById('payment-form');
  var hiddenInput = document.createElement('input');
  hiddenInput.setAttribute('type', 'hidden');
  hiddenInput.setAttribute('name', 'stripeToken');
  hiddenInput.setAttribute('value', token.id);
  form.appendChild(hiddenInput);

  var data = $("#payment-form").serialize();
  $.ajax({
  	url:"stripe-payment-service.php",
  	method: "POST",
  	data: data,
  	complete: function(response){
  		console.log(response);
  		window.location.reload();
  	}
  })
}

$(".submit-payment").click(function(){
	stripe.createToken(card).then(function(result) {
    if (result.error) {
    	// Inform the customer that there was an error.
    	var errorElement = document.getElementById('card-errors');
    	errorElement.textContent = result.error.message;
    } else {
	$(".submit-payment").attr("disabled", "disabled").html('Working...');
      	// Send the token to your server.
      	stripeTokenHandler(result.token);
    }
  });
});
</script>
The above code creates a new Stripe object using a public API key. That object injects a credit card form into our ‘#card-element’ div, with custom styles attached. It listens for any changes, and displays validation errors. When the form is submitted, the Stripe object creates a token from the payment information. That token is passed to our back-end. Stripe’s PHP library is used to finish the transaction:
<?php
function subscribe(){
        require_once('stripe-php-6.43.0/init.php');
        \Stripe\Stripe::setApiKey('sk_XXXX');
	$stripe_token = $_POST['stripeToken'];
	$conn = $this->connection;

	if(isset($_SESSION['email'])){
		$email = $_SESSION['email'];
	}else{
		die("No email found.");
	}

	if(strlen($email)>0){
		$sql = "SELECT * FROM `account` WHERE email = ?";
		$result = $conn->prepare($sql);
		$result->execute(array($email));
		$row = $result->fetch(PDO::FETCH_ASSOC);
	}
	$customer_id = $row['stripe_customer_id'];
	//check if this account already has a stripe_customer_id
	if(strlen($customer_id) < 1){
		//if not, create the customer
		$customer = \Stripe\Customer::create([
		  'email' => $email,
		  'source' => $stripe_token,
		]);
		$customer_id = $customer['id'];
		//write stripe ID to db
		$sql = "UPDATE `account_table` SET stripe_customer_id = ? WHERE email = ?";
		$result = $conn->prepare($sql);
		$result->execute(array($customer_id, $email));
	}

	// Create the subscription
	$subscription = \Stripe\Subscription::create([
	  'customer' => $customer_id,
	  'items' => [
	    [
	      'plan' => 'plan_XXX', //setup in Stripe dashboard.
	    ],
	  ],
	  'expand' => ['latest_invoice.payment_intent'],
	  'billing_cycle_anchor' => time()
	]);
	$subscription_status = $subscription['status'];
	$subscription_id = $subscription['id'];
	if($subscription_status == "active"){
		//set current_period_end to 32 days (1 month plus some leeway) in the future. set past_due as false
		$sql = "UPDATE `account_table` SET stripe_subscription_id = ?, current_period_end = ?, past_due = 0 WHERE email = ?";
		$result = $conn->prepare($sql);
		$past_due = false;
		$current_period_end = new DateTime;
		$current_period_end->modify( '+32 day' );
		$current_period_end = $current_period_end->format('Y-m-d H:i:s');
		$result->execute(array($subscription_id, $current_period_end, $email));
	}

}
?>
On the server side our secret API key is used. A customer record is created in Stripe using the payment token and user’s email. The Stripe customer ID is then used to create a subscription. We record the the customer ID and subscription ID to our database. The account’s new subscription period end is updated to 32 days in the future.
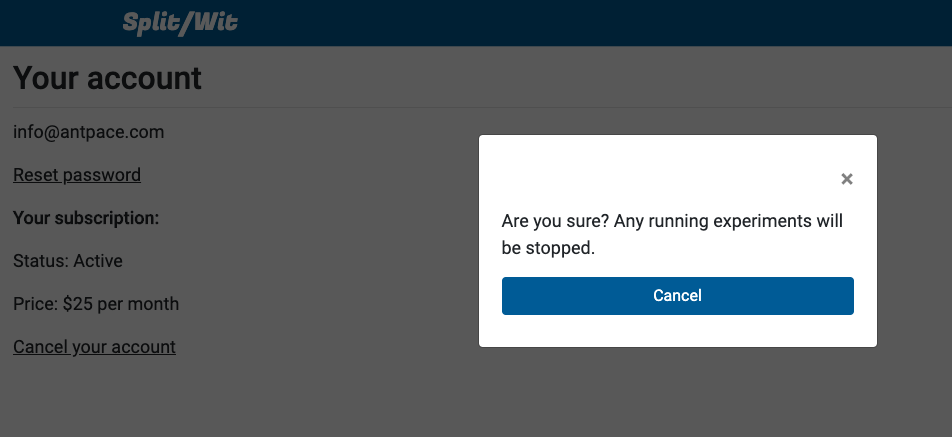
Cancel a subscription
The user is able to cancel their subscription from the SplitWit account dashboard.
We retrieve their subscription from Stripe, and cancel it, using their subscription ID. They will no longer be billed. We update our database to turn off the account’s experiments, delete any Stripe details, mark their subscription as delinquent, and re-write their snippet file.
<?php

function cancelSubscription(){
	require_once('stripe-php-6.43.0/init.php');
        \Stripe\Stripe::setApiKey('sk_XXXX');

	$conn = $this->connection;
	if(isset($_SESSION['userid'])){
		$accountid = $_SESSION['userid'];
	}else{
		die("No userid found.");
	}

	if(strlen($accountid)>0){
		$sql = "SELECT * FROM `account` WHERE accountid = ?";
		$result = $conn->prepare($sql);
		$result->execute(array($accountid));
		$row = $result->fetch(PDO::FETCH_ASSOC);
	}
	$stripe_subscription_id = $row['stripe_subscription_id'];
	$subscription = \Stripe\Subscription::retrieve($stripe_subscription_id);
	$subscription->cancel();

	//turn off experiments and update snippets. clear stripe IDs. set current_period_end to yesterday. set past_due = 1
	$current_period_end   = new DateTime;
	$current_period_end->modify( '-1 day' );
	$current_period_end = $current_period_end->format('Y-m-d H:i:s');
	$sql = "UPDATE `account` SET stripe_customer_id = '', stripe_subscription_id = '', past_due = 1, current_period_end = ? WHERE accountid = ?";
	$result = $conn->prepare($sql);
	$result->execute(array($current_period_end, $accountid));

	//turn off all experiments
	$status = "Not running";
	$sql = "UPDATE `experiment` set status = ? where accountid = ?";
	$result2 = $conn->prepare($sql);
	$result2->execute(array($status, $accountid));

	//update all snippets for this account (1 snippet per project)
	$sql = "SELECT * FROM `project` WHERE accountid = ?";
	$result3 = $conn->prepare($sql);
	$result3->execute(array($accountid));
	$rows3 = $result3->fetchAll(PDO::FETCH_ASSOC);
	foreach ($rows3 as $key3 => $value3) {
		$projectid = $value3['projectid'];
    	        $databaseProjectService = new DatabaseProjectService();
		$databaseProjectService -> writeSnippetFile(false, false, $projectid);
	}

	$this->status = "complete";
}

?>
Re-billing subscriptions
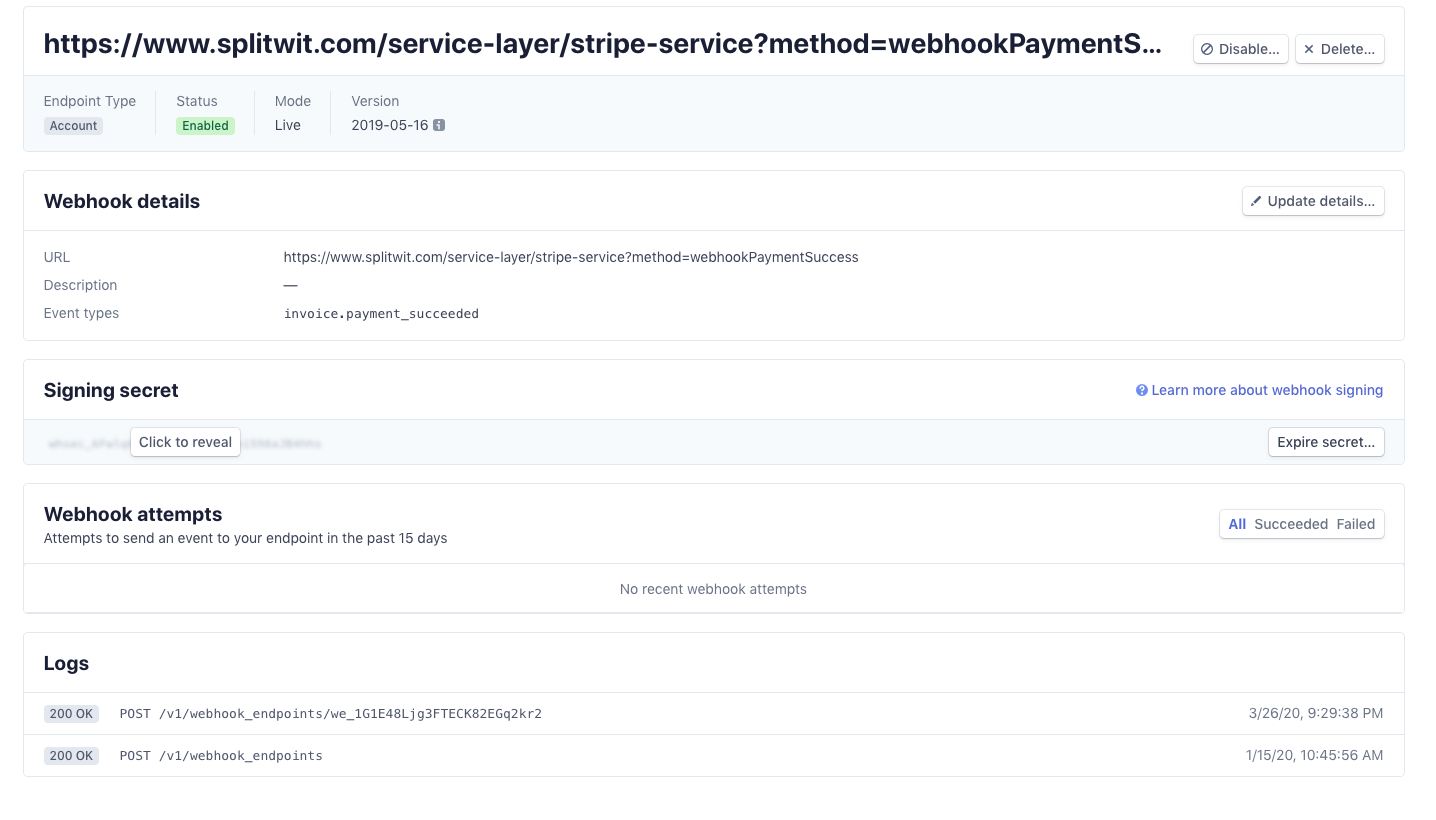
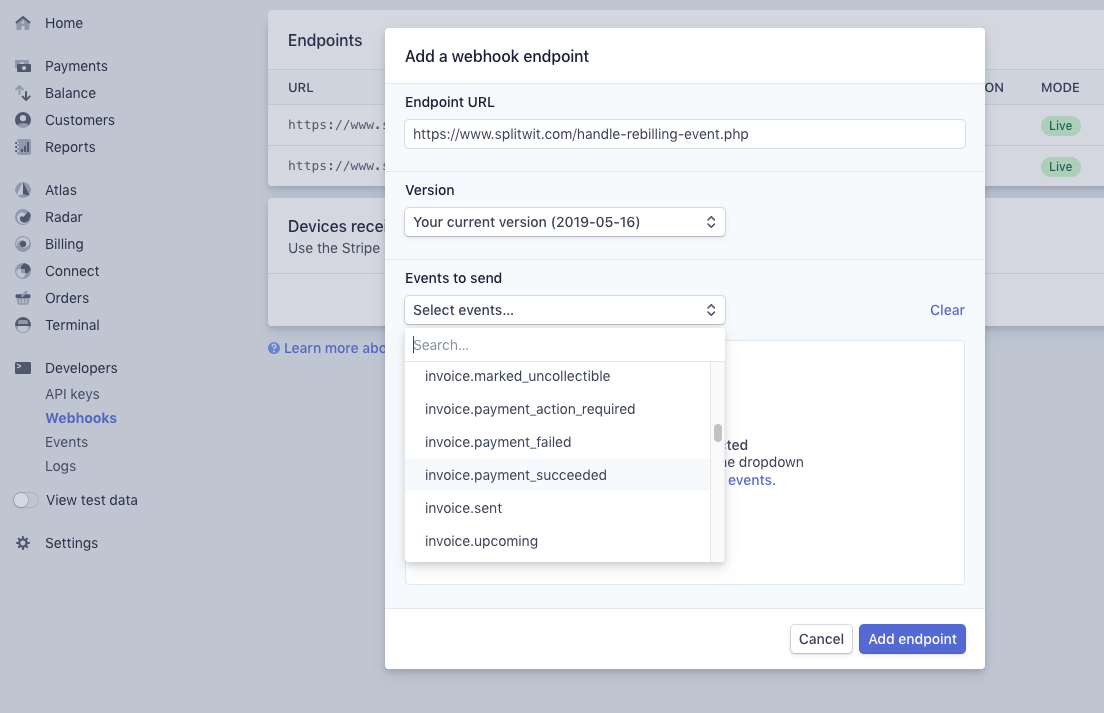
As long as an account has an active subscription in Stripe, they will be automatically re-billed each month. When this event takes place, Stripe can deliver data about it to an end-point of our choice (commonly known as a webhook).
SplitWit listens for an event called “invoice.payment_succeeded”, which occurs when a customer’s monthly payment is successful. When that happens the account’s subscription period end is updated to 32 days in the future.
What if payment fails or never happens? The account’s subscription period end never gets updated.
A daily scheduled task checks each active account’s subscription period end date. If that date is in the past, we mark the account as past due, turn off all experiments, and update its snippet files.
The value of experimentation
Driving digital conversions is a science. Experimentation should be a constant exercise in this respect. Take any field and we can benefit from testing the waters and adjusting our sail. Our ability to interpret that data is the bottle neck to making good decisions. The best lesson I’ve learned is that intuition is usually not enough. It’s better to look at the numbers and trust data.
Influencing users through a funnel of action, finally leading to a conversion, is a challenge. Optimizing conversions, sales, and leads can be broken down into a system based approach. SplitWit focuses on that point.