Developing a marketplace app for your SAAS will grow organic traffic and lets users find you. Potential customers can discover your digital product where they are already looking. Software services that occupy the eCommerce space have a chance to help Shopify store owners grow their businesses. Creating a public Shopify app benefits both developers and the merchant user-base in the Shopify App Store ecosystem.
Recently, Shopify announced that it is decreasing the share of profit that it takes from developers. Each year, developers keep all of their revenue up to the first one-million dollars.
Why Build a Marketplace App?
The short answer: Discoverability.
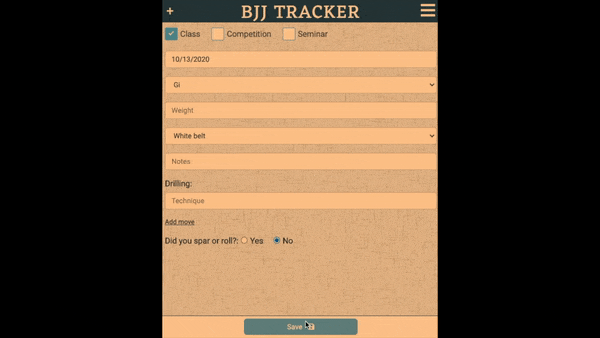
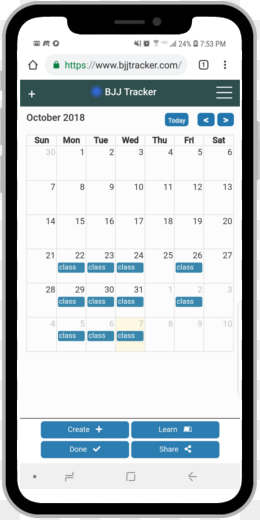
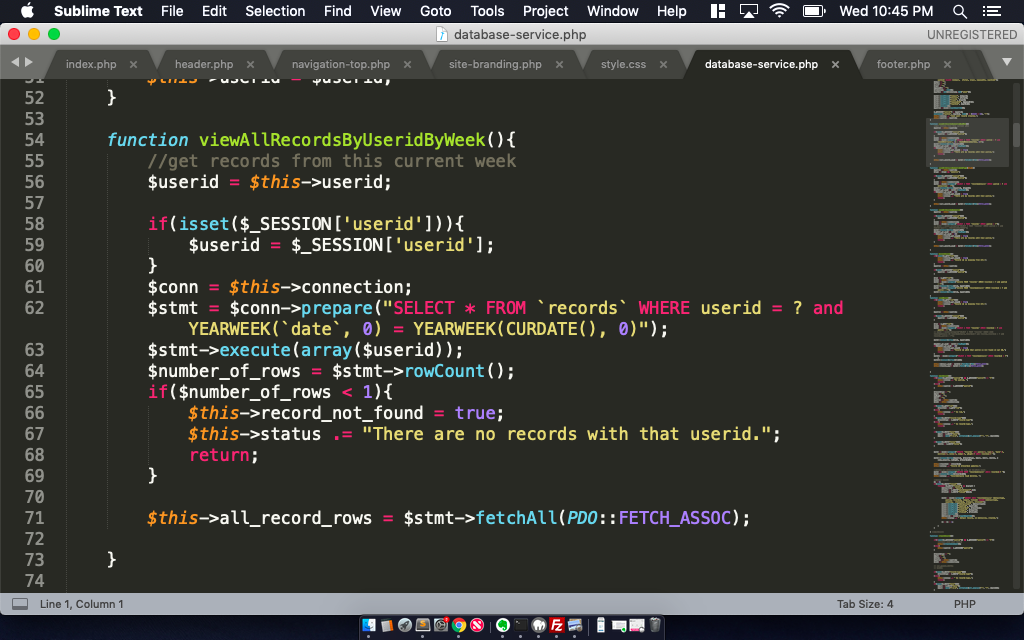
A few years ago, I built a fitness tracking app for a niche sport. It was a hobby project to better track my BJJ training. Since then, I continue to average ~10 registrations weekly without any marketing efforts.
Consistent BJJ Tracker sign-ups are driven from Google Play. Even though it is only a web app (PWA), I was able to bundle it into an APK file using Trusted Web Activities and Digital Asset Links. Having an app listed in a marketplace leads to new users finding it naturally.
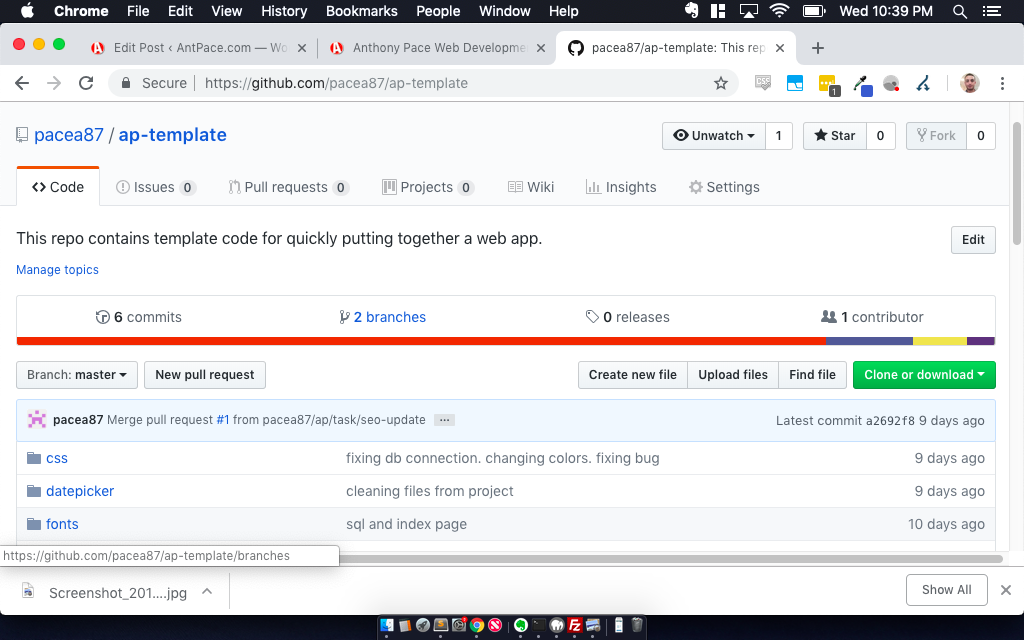
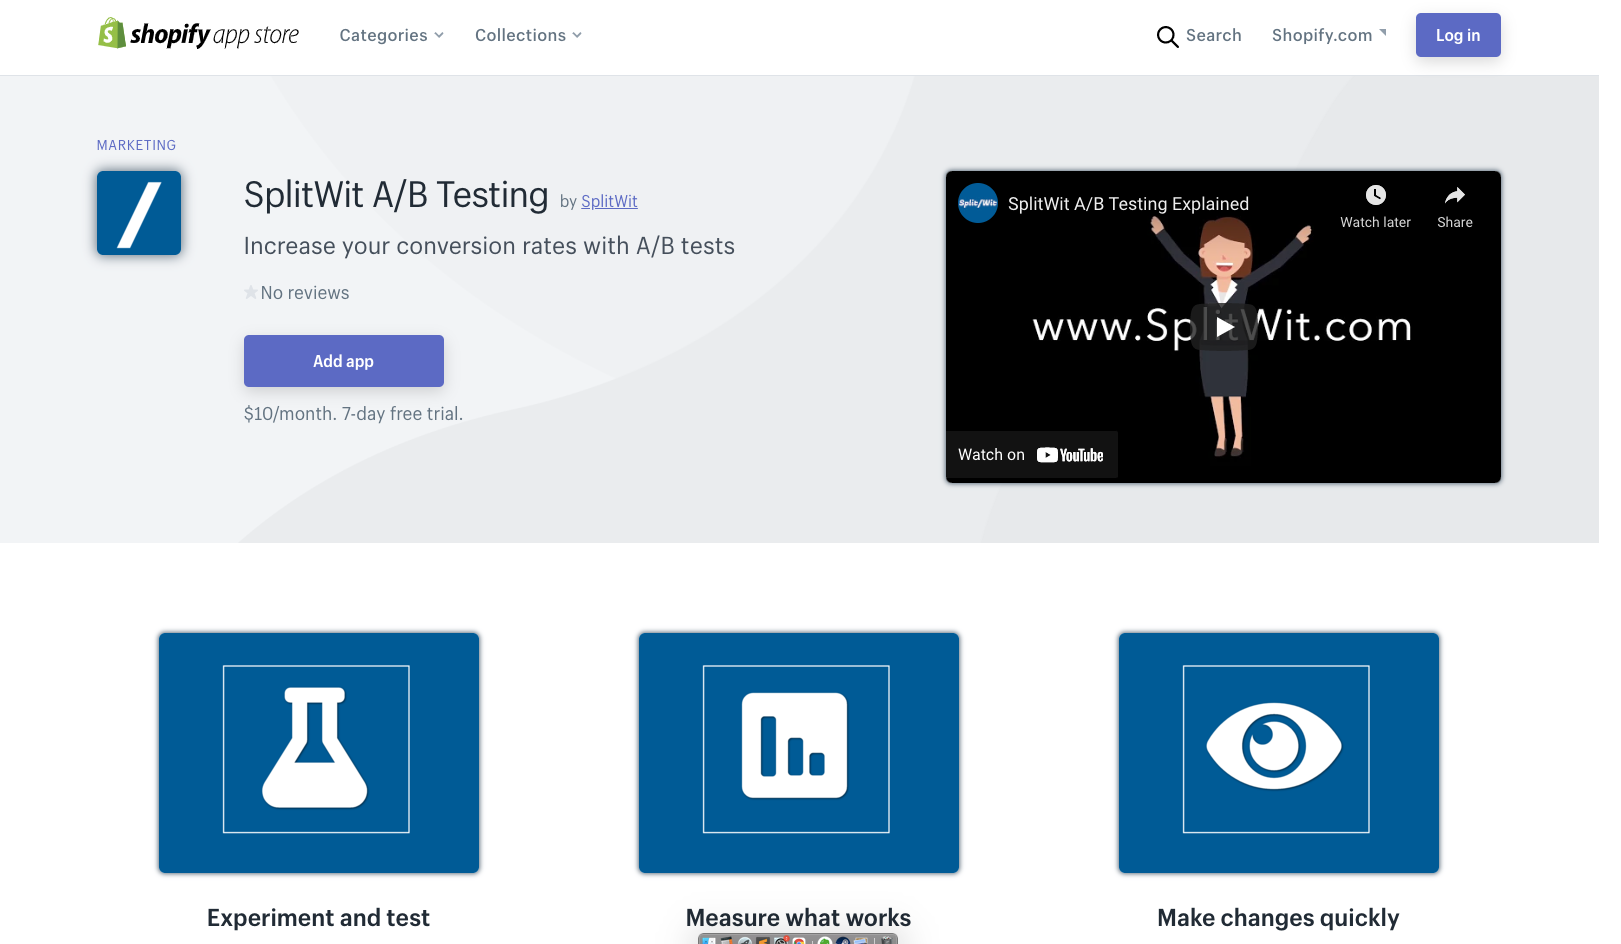
My next side project was a SAAS for split testing & conversion optimization. It helps websites A/B test to figure out what front-end changes lead to more sales, sign-ups, etc. The Shopify App Store was as perfect fit to attract shop owners to use SplitWit. I decided to build a public, embedded, Shopify app to reach new prospects.
I’ll explain how I did it, along with examples of building another one, all using PHP. This guide will make launching a Shopify App Store app easy, fast, repeatable.
Creating a Public Shopify App with PHP
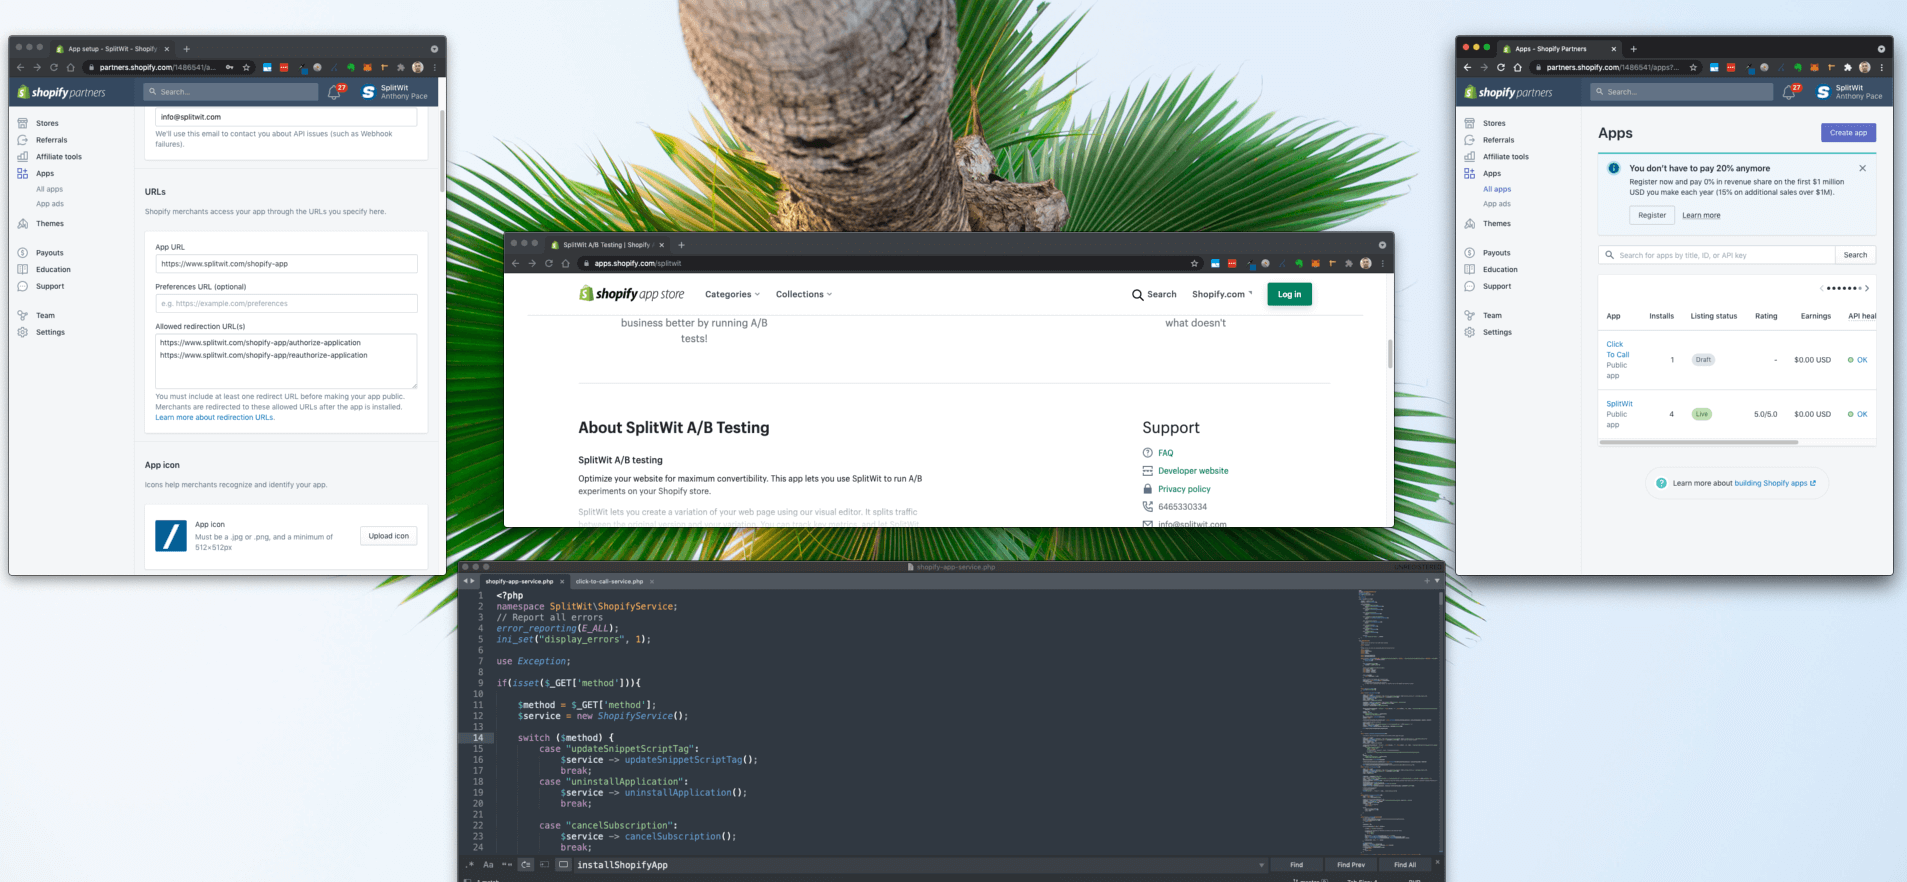
Embedded Shopify apps display in a merchant’s admin dashboard. They are meant to “add functionality to Shopify stores“. They are hosted on the developer’s infrastructure and are loaded via iFrame within Shopify. You can create a new app in your Shopify Partners dashboard to get started.
Since the SplitWit SAAS already existed as a subscription web app built on the LAMP stack, I only had to handle Shopify specific authorization and payments. I could essentially load the existing app in the dashboard’s iFrame after authentication. The new code I wrote contains methods for checking installation status, building the oAuth URL, subscribing users to recurring application charges, and more.
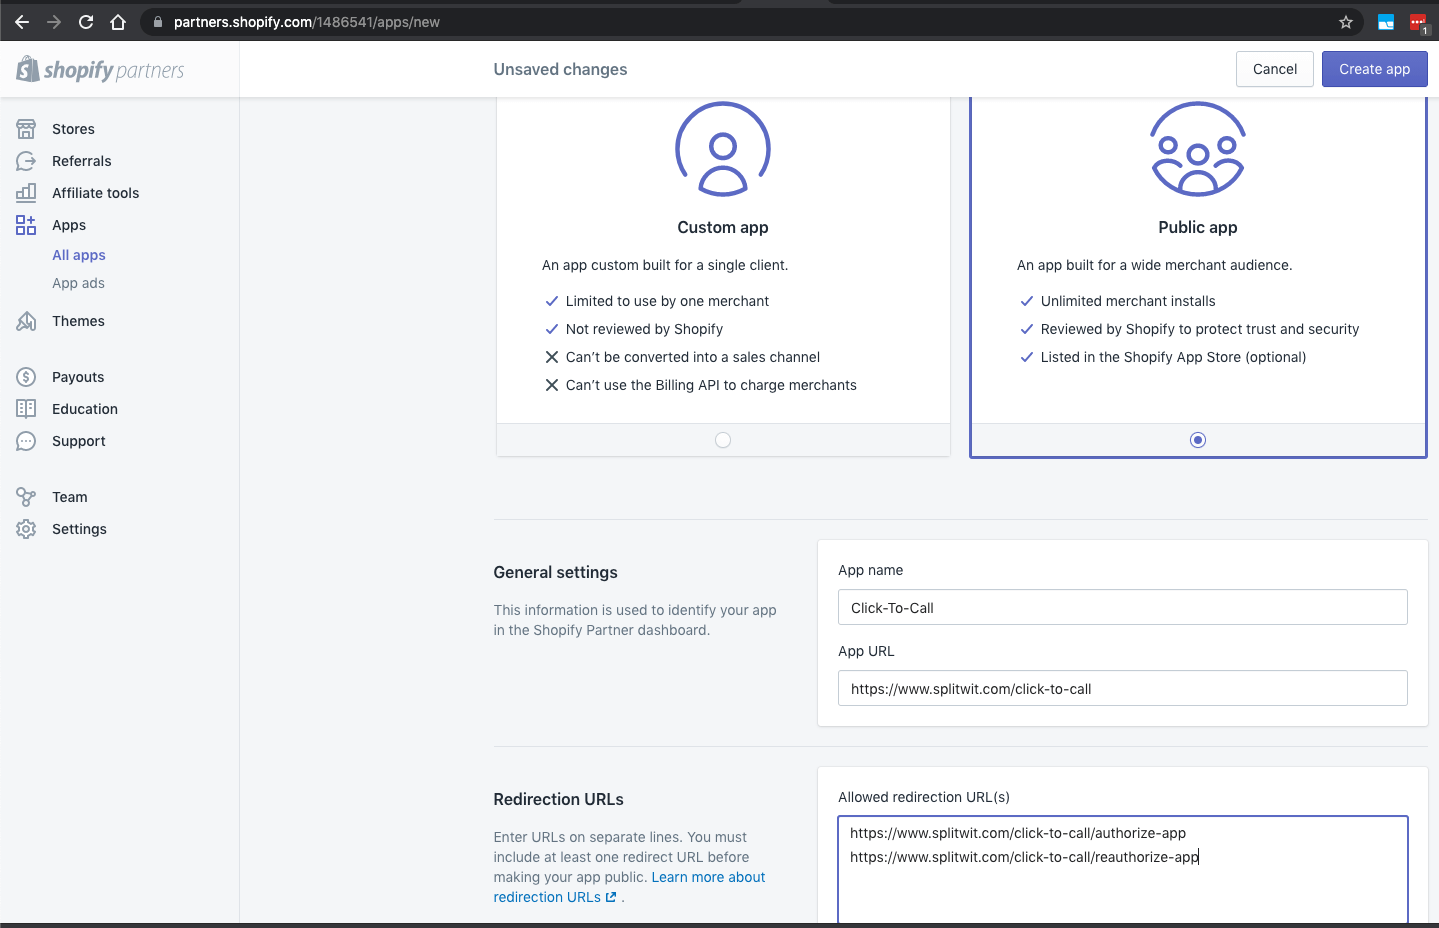
When I created my next Shopify app, Click to Call, I leveraged that code and refactored it to be more reusable. Configurable parameters let me set the database and API credentials dynamically.
Step 1: Check Installation Status
When the app’s url loads in the merchant admin dashboard, the first step is to check installation status for that shop.
public function checkInstallationStatus(){
	$conn = $this->conn;
	$shop = $_GET['shop'];

	//check if app is already installed or not
	$statement = $conn->prepare("SELECT * FROM `shopify_installation_complete` WHERE shop = :shop");
	$statement->execute(['shop' => $shop]);
	$count = $statement->rowCount();
	if($count == 0){
		//app is not yet installed
		return false;
	}else{
		//app is already installed
		$row = $statement->fetch();
		return $row;
	}

}
You’ll notice we don’t hit any Shopify API for this. Instead, our own database is queried. We manually track if the app has already been installed in a MySql table.
Two database tables are used to manage the Shopify App installation:
CREATE TABLE IF NOT EXISTS `shopify_authorization_redirect` (
    `shopify_authorization_redirect_id` int NOT NULL AUTO_INCREMENT,
    `shop` varchar(200),
    `nonce` varchar(500),
    `scopes` varchar(500),
    created_date datetime DEFAULT CURRENT_TIMESTAMP,
    updated_date datetime ON UPDATE CURRENT_TIMESTAMP,
    PRIMARY KEY (`shopify_authorization_redirect_id`)
);


CREATE TABLE IF NOT EXISTS `shopify_installation_complete` (
    `shopify_installation_complete_id` int NOT NULL AUTO_INCREMENT,
    `splitwit_account_id` int,
    `splitwit_project_id` int,
    `shop` varchar(200),
    `access_token` varchar(200),
    `scope` varchar(200),
    `expires_in` int,
    `associated_user_scope` varchar(200),
    `associated_user_id` BIGINT,
    `associated_user_first_name` varchar(200),
    `associated_user_last_name` varchar(200),
    `associated_user_email` varchar(200),
    `associated_user_email_verified` varchar(10),
    `associated_user_account_owner` varchar(10),
    `associated_user_account_locale` varchar(10),
    `associated_user_account_collaborator` varchar(10),
    created_date datetime DEFAULT CURRENT_TIMESTAMP,
    updated_date datetime ON UPDATE CURRENT_TIMESTAMP,
    PRIMARY KEY (`shopify_installation_complete_id`)
);
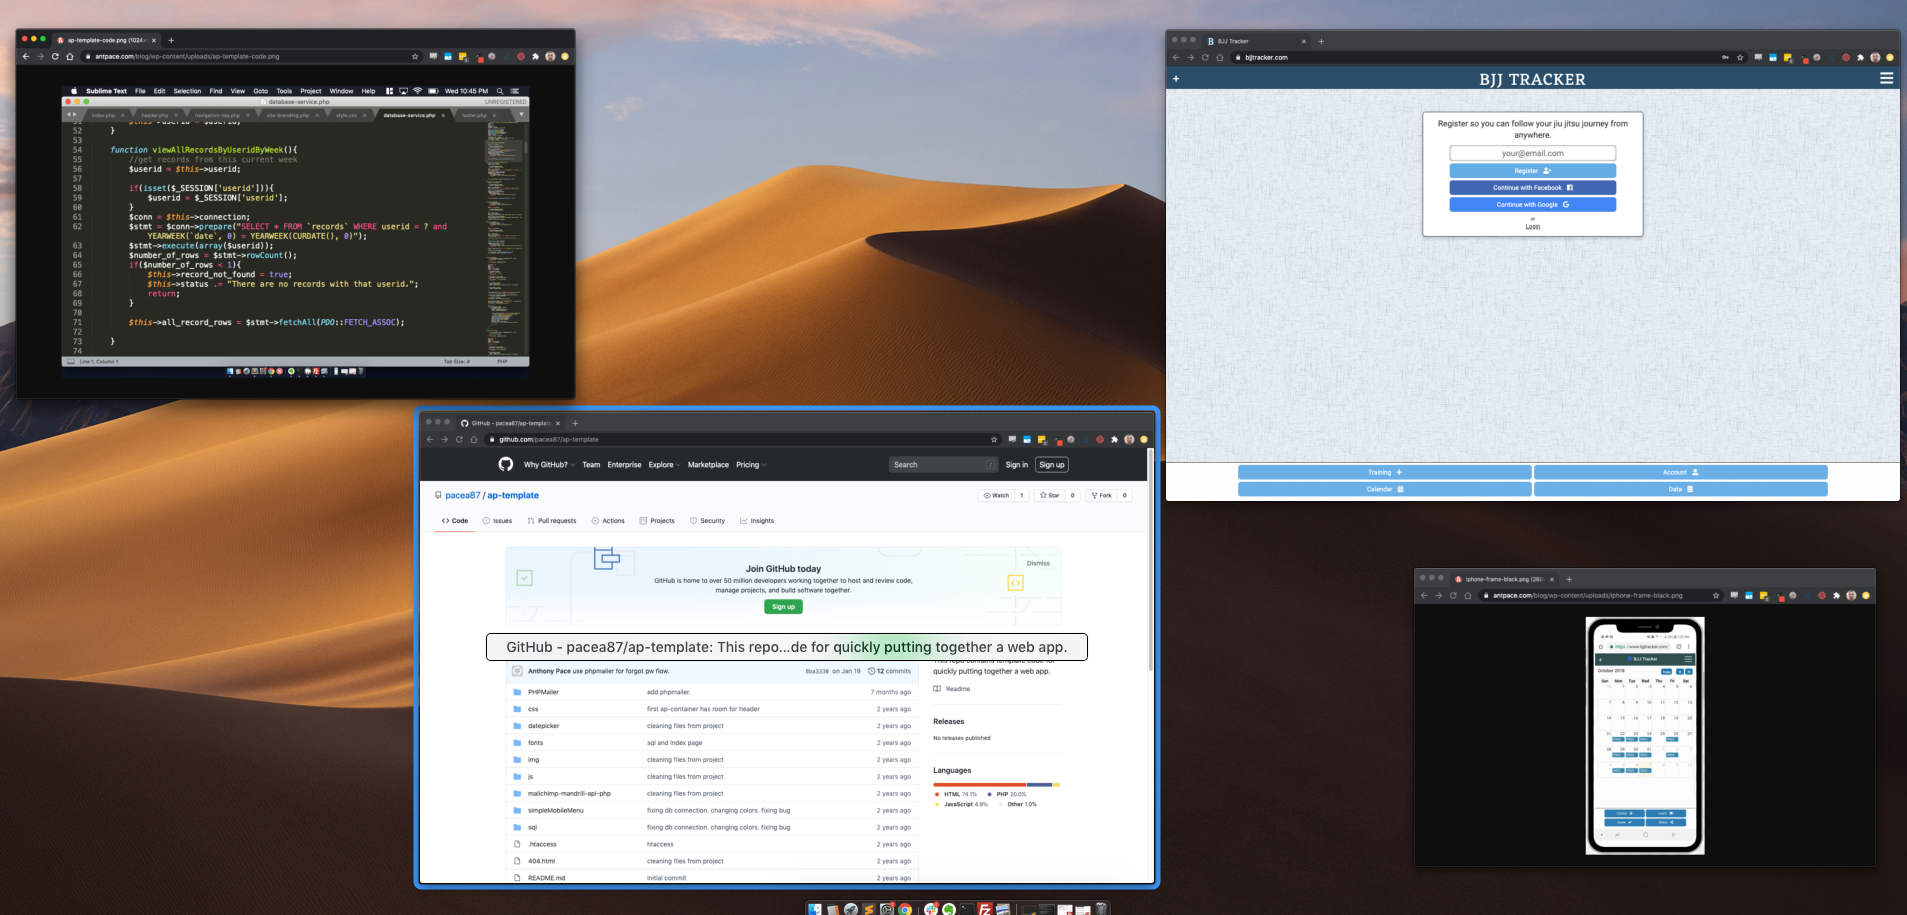
The root file (index.php) looks like this:
<?php

require '/var/www/html/service-layer/shopify-app-service.php';
include 'shopify-creds.php'; // $api_key, $secret, $app_db, $app_slug
use SplitWit\ShopifyService\ShopifyService;
$shopify_service = new ShopifyService($api_key, $secret, $app_db);

$already_installed = $shopify_service->checkInstallationStatus();

if(!$already_installed){
    $install_redirect_url = $shopify_service->buildAuthorizationUrl(false, $app_slug);
}else{
    $install_redirect_url = $shopify_service->buildAuthorizationUrl(true, $app_slug);
}
header('Location: ' . $install_redirect_url );

?>
After determining the merchant’s installation status, the next step is to authenticate them.
oAuth Authentication
The Shopify developer resources explain “how to ask for permission” with oAuth. The merchant user needs to be redirected to a Shopify URL:
https://{shop}.myshopify.com/admin/oauth/authorize?client_id={api_key}&scope={scopes}&redirect_uri={redirect_uri}&state={nonce}&grant_options[]={access_mode}
I wrote a PHP class “ShopifyService” (shopify-app-service.php) to handle all of the Shopify specific logic. The method buildAuthorizationUrl() builds the Shopify authorization URL. It accepts a boolean parameter set according to the merchant’s installation status. That value toggles the authorization URL’s redirect URI, directing the code flow through either first-time installation or re-authentication.
The built URL includes query params: an API key, a nonce, the scope of permission being requested, and a redirect URI. The shop name is the subdomain, and can be pulled as GET data delivered to your app.
The API key can be found in the developer’s partner dashboard in the app’s overview page.
A nonce (“number used once”) is used as an oAuth state parameter. It serves to “link requests and callbacks to prevent cross-site request forgery attacks.” We save that random value in our database to check against during the oAuth callback.
The redirect URI (the oAuth callback) is dynamic based on the users installation status.
public function buildAuthorizationUrl($reauth = false, $slug= "shopify-app"){
$conn = $this->conn;
$requestData = $this->requestData;
$scopes = "write_script_tags"; //write_orders,read_customers, read_content
$nonce = bin2hex(random_bytes(10));
$shop = $requestData['shop'];
//first check if there is already a record for this shop. If there is, delete it first.
$statement = $conn->prepare("SELECT * FROM `shopify_authorization_redirect` WHERE shop = :shop");
$statement->execute(['shop' => $shop]);
$count = $statement->rowCount();
if($count > 0){
$statement = $conn->prepare("DELETE FROM `shopify_authorization_redirect` WHERE shop = :shop");
$statement->execute(['shop' => $shop]);
}
$statement = $conn->prepare("INSERT INTO `shopify_authorization_redirect` (shop, nonce, scopes) VALUES (:shop, :nonce, :scopes)");
$statement->bindParam(':shop', $shop);
$statement->bindParam(':nonce', $nonce);
$statement->bindParam(':scopes', $scopes);
$statement->execute();
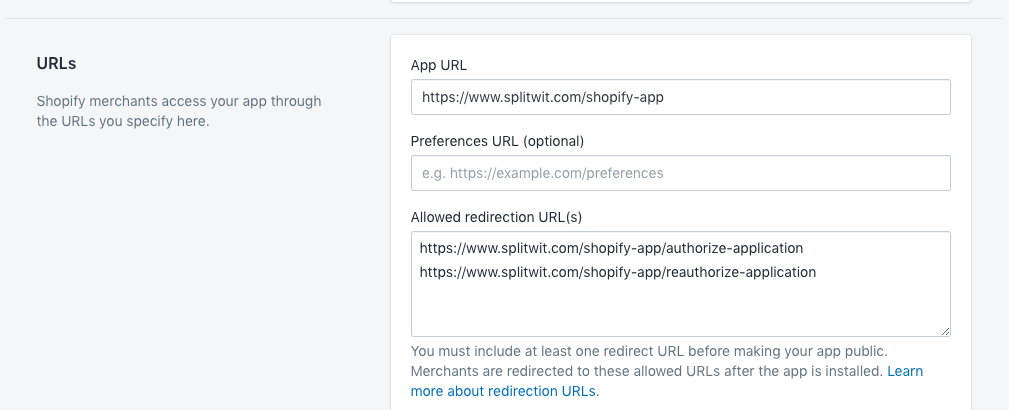
$redirect_uri = "https://www.splitwit.com/".$slug."/authorize-application";
if($reauth){ //change the redirect URI
$redirect_uri = "https://www.splitwit.com/".$slug."/reauthorize-application";
}
$redirect_url = "https://".$shop."/admin/oauth/authorize?client_id=". $this->api_key ."&scope=".$scopes."&redirect_uri=". $redirect_uri ."&state=".$nonce . "&grant_options[]=per-user";
return $redirect_url;
}
Both possible redirect URLs needed to be white-listed in the “App setup” page.
A location header routes the user. If the app hasn’t been installed yet, Shopify prompts the merchant to confirm authorization.
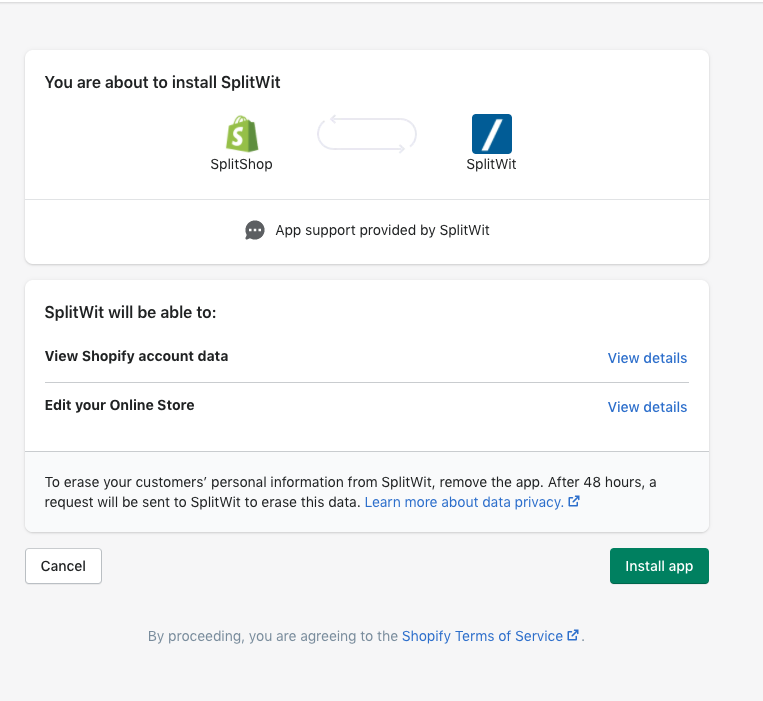
If the app was already installed then the oAuth grant screen is skipped entirely and the merchant is immediately routed to the /reauthorize-application resource instead (and ultimately lands on the app home screen).
Install App & Register the Merchant User
What actually happens when “Install app” is clicked? The user is redirected from Shopify permissions screen back to our app ( /authorize-application ), calling the authorizeApplication() function. That method receives four values as GET parameters: ‘shop’, ‘state’, ‘hmac’, ‘code’
The ‘shop’ name is used to look up the nonce value we saved when the Shopify authorization URL was first built. We compare it to the ‘state’ parameter. This security step ensures that the callback request is valid and is not fraudulent. We also check that the shop name provided matches a valid Shopify hostname. Here is the relevant code, pulled from authorizeApplication():
$conn = $this->conn;
$requestData = $this->requestData;
$requiredKeys = ['code', 'hmac', 'state', 'shop'];
foreach ($requiredKeys as $required) {
    if (!in_array($required, array_keys($requestData))) {
        throw new Exception("The provided request data is missing one of the following keys: " . implode(', ', $requiredKeys));
    }
}

//lookup and validate nonce
$shop = $requestData['shop'];

$statement = $conn->prepare("SELECT * FROM `shopify_authorization_redirect` WHERE shop = :shop");
$statement->execute(['shop' => $shop]);
$count = $statement->rowCount();
if($count == 0){
    throw new Exception("Nonce not found for this shop.");
}
$row = $statement->fetch();
$nonce = $row['nonce'];
//

//make sure the 'state' parameter provided matches the stored nonce
$state = $requestData['state'];
if($state !== $nonce){
    throw new Exception("Nonce does not match provided state.");
}
//

//validate the shop name
$pattern = "/[a-zA-Z0-9][a-zA-Z0-9\-]*\.myshopify\.com[\/]?/";
if(!preg_match($pattern, $shop)) {
    throw new Exception("The shop name is an invalid Shopify hostname.");
}
“Every request or redirect from Shopify” includes a HMAC value that can be used to verify its authenticity. Here is how I do it in PHP:
public function verifyHmac($requestData){
	// verify HMAC signature.
	// https://help.shopify.com/api/getting-started/authentication/oauth#verification
	if( !isset($requestData['hmac'])){
		return false;
	}

	$hmacSource = [];

	foreach ($requestData as $key => $value) {

	    if ($key === 'hmac') { continue; }

	    // Replace the characters as specified by Shopify in the keys and values
	    $valuePatterns = [
	        '&' => '%26',
	        '%' => '%25',
	    ];
	    $keyPatterns = array_merge($valuePatterns, ['=' => '%3D']);
	    $key = str_replace(array_keys($keyPatterns), array_values($keyPatterns), $key);
	    $value = str_replace(array_keys($valuePatterns), array_values($valuePatterns), $value);

	    $hmacSource[] = $key . '=' . $value;
	}

	sort($hmacSource);
	$hmacBase = implode('&', $hmacSource);
	$hmacString = hash_hmac('sha256', $hmacBase, $this->secret);
	// Verify that the signatures match
    if ($hmacString !== $requestData['hmac']) {
        return false;
    }else{
    	return true;
    }
}
That method is called in the class construct function, to be sure it happens every time.
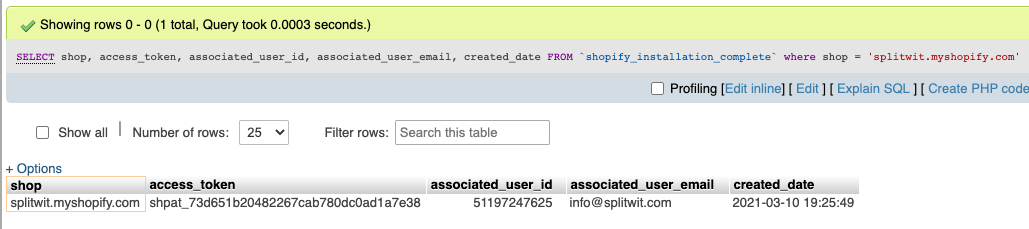
The ‘code’ parameter is the access code. It is exchanged for an access token by sending a request to the shop’s access_token endpoint. We record that token to the ‘shopify_installation_complete’ table along with relevant data.
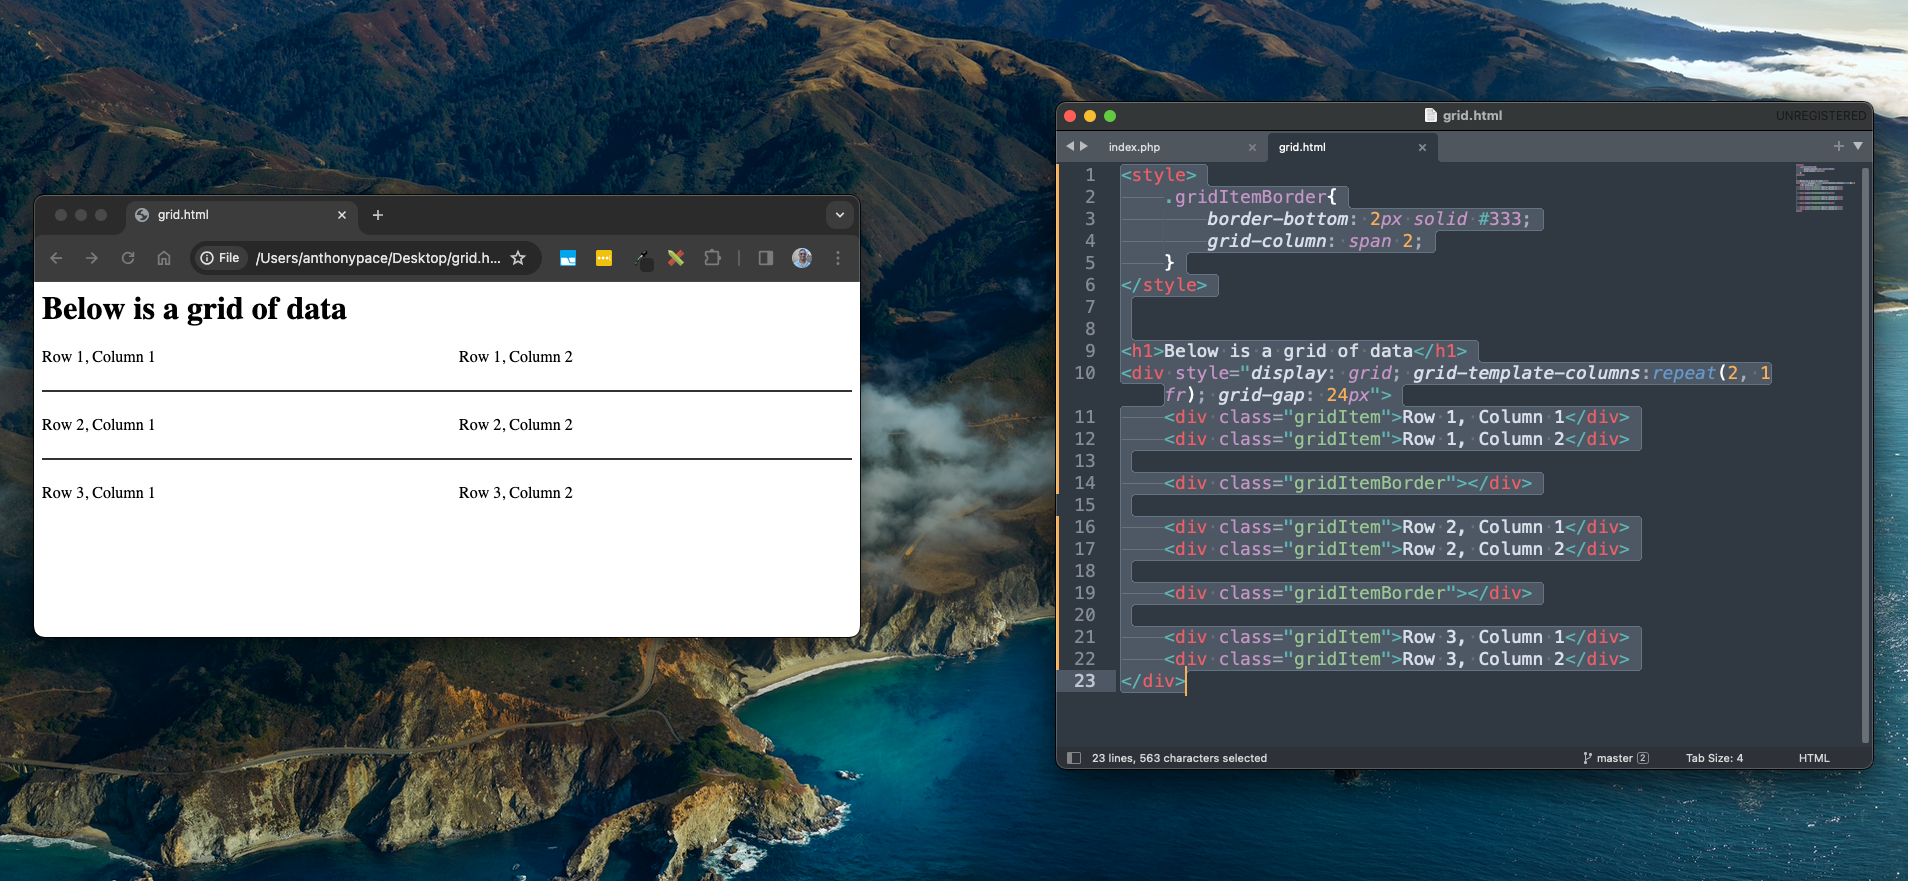
To fully complete the installation, app specific project records are saved. For SplitWit, this means a user-account is created along with an initial project. Any JavaScript tags are injected onto the merchant’s site using the Shopify admin API ScriptTag resource. Linking a privately hosted JS file, unique to each merchant, allows our app to dynamically update the shop website. You can learn about how that snippet tag works in another post that explains how the visual editor is built.
Lastly, a webhook is created to listen for when this app in uninstalled ( ‘topic’ => ‘app/uninstalled’ ) in order to call our “uninstallApplication” method. Webhooks allow you to listen for certain events in a shop, and run code based on data about what happened.
Once installation is complete, our server returns a header that reloads the app.

Below is the original authorizeApplication() method. Eventually, I moved app specific logic into its own files after refactoring this class to support another SAAS, Click to Call.
public function authorizeApplication(){
	$conn = $this->conn;
	$requestData = $this->requestData;
	$requiredKeys = ['code', 'hmac', 'state', 'shop'];
        foreach ($requiredKeys as $required) {
           if (!in_array($required, array_keys($requestData))) {
             throw new Exception("The provided request data is missing one of the following keys: " . implode(', ', $requiredKeys));
           }
        }

	//lookup and validate nonce
	$shop = $requestData['shop'];

	$statement = $conn->prepare("SELECT * FROM `shopify_authorization_redirect` WHERE shop = :shop");
	$statement->execute(['shop' => $shop]);
	$count = $statement->rowCount();
	if($count == 0){
        throw new Exception("Nonce not found for this shop.");
	}
	$row = $statement->fetch();
	$nonce = $row['nonce'];
	//

	//make sure the 'state' parameter provided matches the stored nonce
	$state = $requestData['state'];
	if($state !== $nonce){
        throw new Exception("Nonce does not match provided state.");
	}
	//

	//validate the shop name
	$pattern = "/[a-zA-Z0-9][a-zA-Z0-9\-]*\.myshopify\.com[\/]?/";
	if(!preg_match($pattern, $shop)) {
        throw new Exception("The shop name is an invalid Shopify hostname.");
	}
	//

	$already_installed = $this->checkInstallationStatus();
	//if it is already installed, then lets update the access token
        if(!$already_installed){
    	  //install the app

	  //exchange the access code for an access token by sending a request to the shop’s access_token endpoint
	  $code = $requestData['code'];
	  $post_url = "https://" . $shop . "/admin/oauth/access_token";

	  $params = [
            'client_id'    => $this->api_key,
            'client_secret'    => $this->secret,
            'code'    => $code
          ];

          $curl_response_json = $this->curlApiUrl($post_url, $params);
	  $access_token = $curl_response_json['access_token'];

          $statement = $conn->prepare("INSERT INTO `shopify_installation_complete` (shop, access_token, scope, expires_in, associated_user_scope, associated_user_id, associated_user_first_name, associated_user_last_name, associated_user_email, associated_user_email_verified, associated_user_account_owner, associated_user_account_locale, associated_user_account_collaborator) VALUES (:shop, :access_token, :scope, :expires_in, :associated_user_scope, :associated_user_id, :associated_user_first_name, :associated_user_last_name, :associated_user_email, :associated_user_email_verified, :associated_user_account_owner, :associated_user_account_locale, :associated_user_account_collaborator)");

	  $statement->bindParam(':shop', $shop);

	  $statement->bindParam(':access_token', $access_token);
	  $statement->bindParam(':scope', $curl_response_json['scope']);
	  $statement->bindParam(':expires_in', $curl_response_json['expires_in']);
	  $statement->bindParam(':associated_user_scope', $curl_response_json['associated_user_scope']);
	  $statement->bindParam(':associated_user_id', $curl_response_json['associated_user']['id']);
	  $statement->bindParam(':associated_user_first_name', $curl_response_json['associated_user']['first_name']);
	  $statement->bindParam(':associated_user_last_name', $curl_response_json['associated_user']['last_name']);
	  $statement->bindParam(':associated_user_email', $curl_response_json['associated_user']['email']);
	  $statement->bindParam(':associated_user_email_verified', $curl_response_json['associated_user']['email_verified']);
	  $statement->bindParam(':associated_user_account_owner', $curl_response_json['associated_user']['account_owner']);
	  $statement->bindParam(':associated_user_account_locale', $curl_response_json['associated_user']['locale']);
	  $statement->bindParam(':associated_user_account_collaborator', $curl_response_json['associated_user']['collaborator']);

	  $statement->execute();
	  $installation_complete_id = $conn->lastInsertId();

	  if(isset($curl_response_json['associated_user']['email']) && strlen($curl_response_json['associated_user']['email']) > 0){

		$store_name = explode(".", $shop);
		$store_name = ucfirst($store_name[0]);

		//create account
		$method = "thirdPartyAuth";
		$user_service_url = "https://www.splitwit.com/service-layer/user-service.php?third_party_source=shopify&method=" . $method . "&email=".$curl_response_json['associated_user']['email']."&companyname=" .$store_name . "&first=" . $curl_response_json['associated_user']['first_name'] . "&last=" . $curl_response_json['associated_user']['last_name'] ;

		$params = [];

		$curl_user_response_json = $this->curlApiUrl($user_service_url, $params);

		$account_id = $curl_user_response_json['userid'];

		$method = "createProject";

		$project_service_url = "https://www.splitwit.com/service-layer/project-service.php?method=" . $method . "&accountid=" . $account_id;

		$params = [
	            'projectname'    => $store_name . " Shopify",
	            'projectdomain'    => "https://".$shop,
	            'projectdescription'    => ""
	        ];

		$curl_project_response_json = $this->curlApiUrl($project_service_url, $params);
		$project_id = $curl_project_response_json['projectid'];
		$snippet = $curl_project_response_json['snippet'];


		//inject JS snippet into site
		// https://shopify.dev/docs/admin-api/rest/reference/online-store/scripttag#create-2020-04
		$create_script_tag_url = "https://" . $this->api_key . ":" . $this->secret . "@" . $shop . "/admin/api/2020-04/script_tags.json";
		$params = [
                    'script_tag' => [
                     'event' => 'onload',
                     'src' => 'https://www.splitwit.com/snippet/' . $snippet
                    ]
        	];

        	$headers = array(
		  'X-Shopify-Access-Token:' . $access_token,
		  'content-type: application/json'
		);

		$json_string_params = json_encode($params);

		$create_script_curl_response_json = $this->curlApiUrl($create_script_tag_url, $json_string_params, $headers);

		//shopify app should only ever have access to this one project.
		//write accountID and ProjectID to this shopify_installation_complete record.

		$statement = $conn->prepare("UPDATE `shopify_installation_complete` SET splitwit_account_id = ?, splitwit_project_id = ? WHERE shopify_installation_complete_id = ?");

		$statement->execute(array($account_id, $project_id, $installation_complete_id));

    	}

    	//create webhook to listen for when app in uninstalled.
	//https://{username}:{password}@{shop}.myshopify.com/admin/api/{api-version}/{resource}.json
	// https://shopify.dev/docs/admin-api/rest/reference/events/webhook#create-2020-04
	$create_webhook_url = "https://" . $this->api_key . ":" . $this->secret . "@" . $shop . "/admin/api/2020-04/webhooks.json";
	$params = [
                'webhook' => [
                    'topic' => 'app/uninstalled',
                    'address' => 'https://www.splitwit.com/service-layer/shopify-app-service?method=uninstallApplication',
                    'format' => 'json'
                ]
        ];

	$headers = array(
		'X-Shopify-Access-Token:' . $access_token,
		'content-type: application/json'
	);

	$json_string_params = json_encode($params);

    	$create_webhook_curl_response_json = $this->curlApiUrl($create_webhook_url, $json_string_params, $headers);

	//installation complete.
   }

   header('Location: ' . "https://" . $shop . "/admin/apps/splitwit");

}
You’ll notice that I call a custom method that abstracts the PHP cURL (client URL library) methods. This helps me avoid repeating the same code in multiple places.
public function curlApiUrl($url, $params, $headers = false, $use_post = true, $use_delete = false, $use_put = false){

	$curl_connection = curl_init();
	// curl_setopt($curl_connection, CURLOPT_FOLLOWLOCATION, true);
	if($headers){
	    curl_setopt($curl_connection, CURLOPT_HTTPHEADER, $headers);
	    curl_setopt($curl_connection, CURLOPT_HEADER, false);
	}
	curl_setopt($curl_connection, CURLOPT_URL, $url);

       // TODO: refactor these three conditions into one, that accepts the RESTful request type!!
       if($use_post){
	    curl_setopt($curl_connection, CURLOPT_POST, true);
	    curl_setopt($curl_connection, CURLOPT_POSTFIELDS, $params);
	}
        if($use_delete){
	    curl_setopt($curl_connection, CURLOPT_CUSTOMREQUEST, "DELETE");
	}
        if($use_put){
	    curl_setopt($curl_connection, CURLOPT_CUSTOMREQUEST, "PUT");
	    curl_setopt($curl_connection, CURLOPT_POSTFIELDS, $params);
	}
	//end TODO

	curl_setopt($curl_connection, CURLOPT_RETURNTRANSFER, true);
	$curl_response = curl_exec($curl_connection);
	$curl_response_json = json_decode($curl_response,true);
	curl_close($curl_connection);
	return $curl_response_json;
}
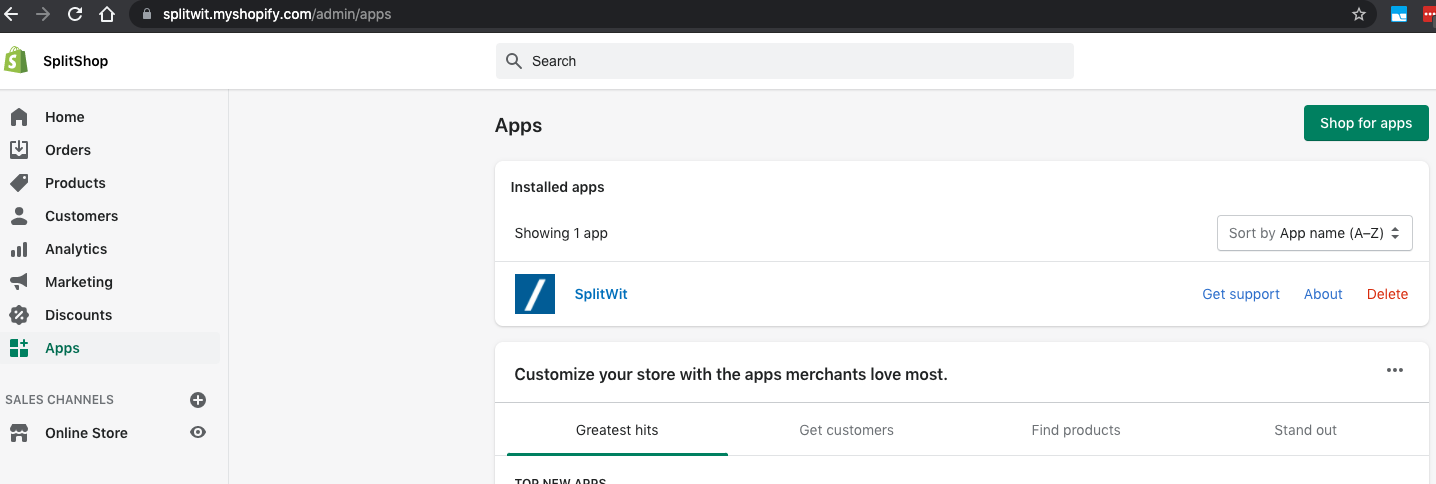
The merchant will be able to find the app in the ‘Apps’ section of their dashboard. Shopify remembers that permission was granted by the merchant.
Returning User Log in
The oAuth grant screen will not show again when the app is selected in the future. As the installation status returns true, our code will flow into the reAuthenticate() method. The same validation checks are performed and a new access token is received.
public function reAuthenticate(){
    $conn = $this->conn;
    $requestData = $this->requestData;
    $requiredKeys = ['code', 'hmac', 'state', 'shop'];
    foreach ($requiredKeys as $required) {
        if (!in_array($required, array_keys($requestData))) {
            throw new Exception("The provided request data is missing one of the following keys: " . implode(', ', $requiredKeys));
            // return;
        }
    }

    //lookup and validate nonce
    $shop = $requestData['shop'];

    $statement = $conn->prepare("SELECT * FROM `shopify_authorization_redirect` WHERE shop = :shop");
    $statement->execute(['shop' => $shop]);
    $count = $statement->rowCount();
    if($count == 0){
        throw new Exception("Nonce not found for this shop.");
    }
    $row = $statement->fetch();
    $nonce = $row['nonce'];
    //

    //make sure the 'state' parameter provided matches the stored nonce
    $state = $requestData['state'];
    if($state !== $nonce){
        throw new Exception("Nonce does not match provided state.");
    }
    //

    //validate the shop name
    $pattern = "/[a-zA-Z0-9][a-zA-Z0-9\-]*\.myshopify\.com[\/]?/";
    if(!preg_match($pattern, $shop)) {
        throw new Exception("The shop name is an invalid Shopify hostname.");
    }

    //exchange the access code for an access token by sending a request to the shop’s access_token endpoint
    $code = $requestData['code'];
    $post_url = "https://" . $shop . "/admin/oauth/access_token";

    $params = [
        'client_id'    => $this->api_key,
        'client_secret'    => $this->secret,
        'code'    => $code
    ];

    $curl_response_json = $this->curlApiUrl($post_url, $params);
    $access_token = $curl_response_json['access_token'];

    $statement = $conn->prepare("UPDATE `shopify_installation_complete` SET access_token = ? WHERE shop = ?");
    $statement->execute(array($access_token, $shop));

    header('Location: ' . "/home?shop=".$shop);
}
The merchant is routed to the app’s /home location. A few session variables are set and the user interface is loaded.
<?php
require '/var/www/html/service-layer/shopify-app-service.php';
use SplitWit\ShopifyService\ShopifyService;
$shopify_service = new ShopifyService();
include '/var/www/html/head.php';
?>
<style>
	.back-to-projects{
		display: none;
	}
</style>

<body class="dashboard-body">
    <?php
    // log the user out...
    $sess_service = new UserService();
    $sess_service -> logout();
    //logout destroys the session. make sure to start a new one.
    if (session_status() == PHP_SESSION_NONE) {
        session_start();
    }
    // ...then log them in
    $already_installed = $shopify_service->checkInstallationStatus();
    $shopify_service->makeSureRecordsExist($already_installed);
    $projectid = $shopify_service->splitwit_project_id;
    $accountid = $shopify_service->splitwit_account_id;
    $_SESSION['accountid'] = $accountid;
    $_SESSION['userid'] =  $accountid;
    $_SESSION['email'] = $already_installed['associated_user_email'];

    $sess_service -> login();
    $_SESSION['active'] = true;
    include '/var/www/html/includes/experiments-ui.php';

    ?>
</body>
</html>
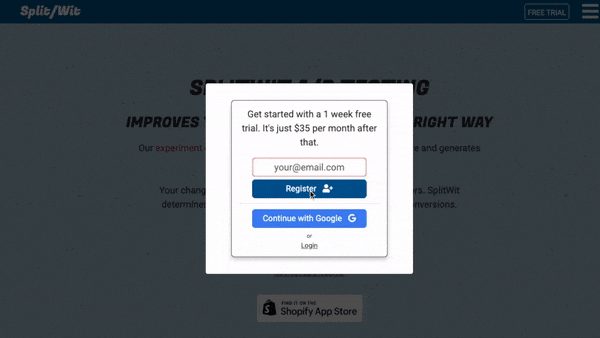
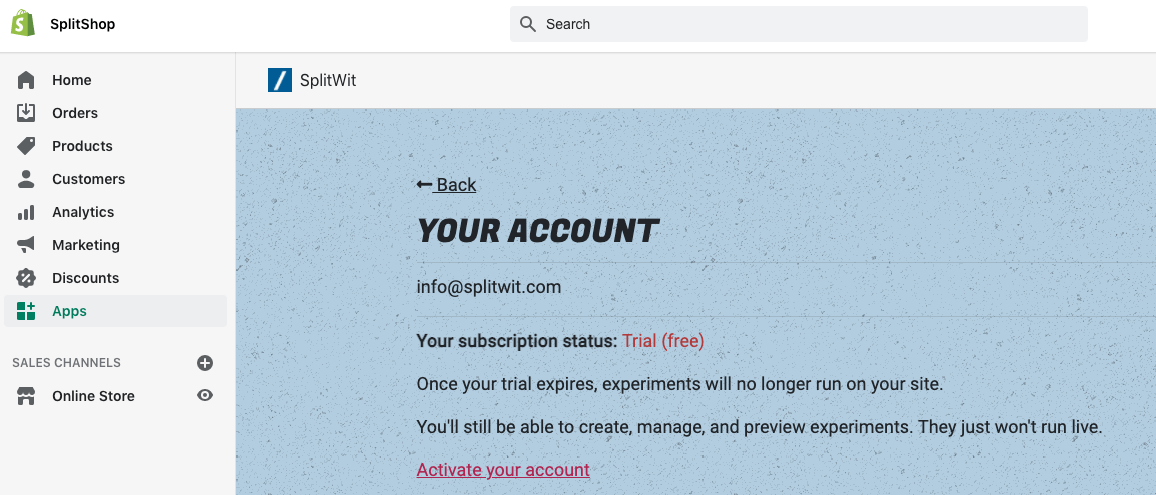
The method makeSureRecordsExist() checks that the SplitWit user account and project records exist, as a failsafe. The .back-to-projects CTA is hidden because Shopify users only have access to one project for their shop. The app is installed for free, while premium functionality requires a subscription after a one-week trial.
When building my second Shopify app, I started with an empty home screen UI:
<?php
require '/var/www/html/service-layer/shopify-app-service.php';
include 'shopify-creds.php';
use SplitWit\ShopifyService\ShopifyService;
$shopify_service = new ShopifyService($api_key, $secret, $app_db);
?>
<html>
<head>
</head>
<body>

</body>
<script>


    if(self!==top){
        // if loaded outside of an iframe, redirect away to a marketing page
        window.location = "https://www.splitwit.com";
    }


</script>
</html>
Subscription Payment
SplitWit’s codebase is originally used as a non-Shopify, stand-alone, web app SAAS. It uses Stripe as a payment gateway. Shopify requires apps to use their Billing API instead. To remedy this, I’m able to write Shopify specific front-end code with a simple JavaScript check. I leverage the browser’s window.self property to check if my app’s code is running in the top most window (opposed to being nested in an iFrame).
if(self!==top){
	// shopify app
	$(".activate-cta").remove();
	if(window.pastDueStatus || window.customerId.length === 0){
		$(".activate-loading").show();

		$.ajax({
			url:"/service-layer/shopify-app-service?method=createRecurringApplicationCharge",
			complete: function(response){
				console.log(response)
				//user is redirected to shopify confirmation screen
				$(".activate-loading").hide();
				$(".activate-cta-top").attr("href", response.responseText).show();
			}
		});
	}

	$(".back-cta").click(function(){
		window.history.back();
	})
	$(".reset-pw-cta").hide()

}else{

	$(".activate-cta").click(function(){
		$(".stripe-payment-modal").show();
	});

	$(".back-cta").hide();
}
If it’s not the top most window, I assume the code is running in Shopify. I’ll change the click-event listener on the .activate-cta element to create a recurring subscription charge. An AJAX call is made to our PHP end-point that hits Shopify’s RecurringApplicationCharge API.
public function createRecurringApplicationCharge(){

	$conn = $this->conn;
	$statement = $conn->prepare("SELECT * FROM `shopify_installation_complete` WHERE splitwit_account_id = :splitwit_account_id");
	$statement->execute(['splitwit_account_id' => $_SESSION['accountid']]);
	$row = $statement->fetch();
	$shop = $row['shop'];
	$access_token = $row['access_token'];

	$create_recurring_charge_url = "https://" . $this->api_key . ":" . $this->secret . "@" . $shop . "/admin/api/2020-04/recurring_application_charges.json";
	$params = [
        'recurring_application_charge' => [
            'name' => 'Basic Plan',
            'price' => 25.0,
            // 'return_url' => "https://" . $shop . "/admin/apps/splitwit",
            // 'test' => true,
            'return_url' => "https://www.splitwit.com/service-layer/shopify-app-service?method=confirmSubscription"
        ]
	];
	$headers = array(
		'X-Shopify-Access-Token: ' . $access_token,
	 	'content-type: application/json'
	);
	$json_string_params = json_encode($params);

	$create_recurring_charge_curl_response_json = $this->curlApiUrl($create_recurring_charge_url, $json_string_params, $headers);
	echo $create_recurring_charge_curl_response_json['recurring_application_charge']['confirmation_url'];
}
The charge ID (delivered by the Shopify request to our ‘return_url’), payment processor, and subscription expiry date are saved to our database on call-back before returning a location header to reload the app.
public function confirmSubscription(){

	$conn = $this->conn;
	$statement = $conn->prepare("SELECT * FROM `shopify_installation_complete` WHERE splitwit_account_id = :splitwit_account_id");
	$statement->execute(['splitwit_account_id' => $_SESSION['accountid']]);
	$row = $statement->fetch();
	$shop = $row['shop'];

 	$charge_id = $_REQUEST['charge_id'];
	//write shopify billing ID to db
	$sql = "UPDATE `account` SET payment_processor = ?, billing_customer_id = ?, current_period_end = ?, past_due = 0 WHERE accountid = ?";
	$result = $conn->prepare($sql);
	$current_period_end = new \DateTime();  //we need the slash here (before DateTime class name), since we're in a different namespace (declared at the top of this file)
	$current_period_end->modify( '+32 day' );
	$current_period_end = $current_period_end->format('Y-m-d H:i:s');
	$payment_processor = "shopify";
	$result->execute(array($payment_processor, $charge_id, $current_period_end, $_SESSION['accountid']));

	//redirect to app
	header('Location: ' . "https://" . $shop . "/admin/apps/splitwit");

}
That charge ID (saved to our database in a column titled “billing_customer_id”) can later be passed back to Shopify to delete the recurring charge.
Cancel a Subscription
Once a subscription is active, I can check the payment processor saved the the account’s DB record to toggle the “cancel account” functionality from Stripe to Shopify.
<?php if ($account_row['payment_processor'] == "shopify"){ ?>
	//hit shopify service

	$(".cancel-cta").click(function(){
		//
		$.ajax({
			url:"/service-layer/shopify-app-service?method=cancelSubscription",
			complete: function(response){
				window.location.reload();
			}
		});
	});

<?php }else{ ?>
	//hit the stripe service

	$(".cancel-cta").click(function(){
		$(".cancel-subscription-modal").show();
	});

<?php }?>
The cancelSubscription method hits the same Shopify recurring_application_charges API, but uses a DELETE request. It also deletes the Shopify billing ID from our records.
public function cancelSubscription(){

	$conn = $this->conn;
	$statement = $conn->prepare("SELECT * FROM `shopify_installation_complete` WHERE splitwit_account_id = :splitwit_account_id");
	$statement->execute(['splitwit_account_id' => $_SESSION['accountid']]);
	$row = $statement->fetch();
	$shop = $row['shop'];
	$access_token = $row['access_token'];

	$statement = $conn->prepare("SELECT * FROM `account` WHERE accountid = :accountid");
	$statement->execute(['accountid' => $_SESSION['accountid']]);
	$account_row = $statement->fetch();
	$charge_id = $account_row['billing_customer_id'];


	$delete_recurring_charge_url = "https://" . $this->api_key . ":" . $this->secret . "@" . $shop . "/admin/api/2020-04/recurring_application_charges/#" . $charge_id . ".json";

	$params = [];
	$headers = array(
		'X-Shopify-Access-Token: ' . $access_token,
	 	'content-type: application/json'
	);
	$json_string_params = json_encode($params);
	$delete = true;

	$delete_recurring_charge_curl_response_json = $this->curlApiUrl($delete_recurring_charge_url, $json_string_params, $headers, $delete);

	//delete shopify billing ID from db
	$empty_string = "";
	$sql = "UPDATE `account` SET payment_processor = ?, billing_customer_id = ? WHERE accountid = ?";
	$result = $conn->prepare($sql);
	$result->execute(array($empty_string, $empty_string, $_SESSION['accountid']));

	echo $delete_recurring_charge_curl_response_json;


}
I can use these same recurring application API end-point functions with minimal adjustments for other Shopify apps that I build. After refactoring, I am able to specify an app database as a GET parameter in the AJAX calls to my Shopify PHP service.
Uninstall the App
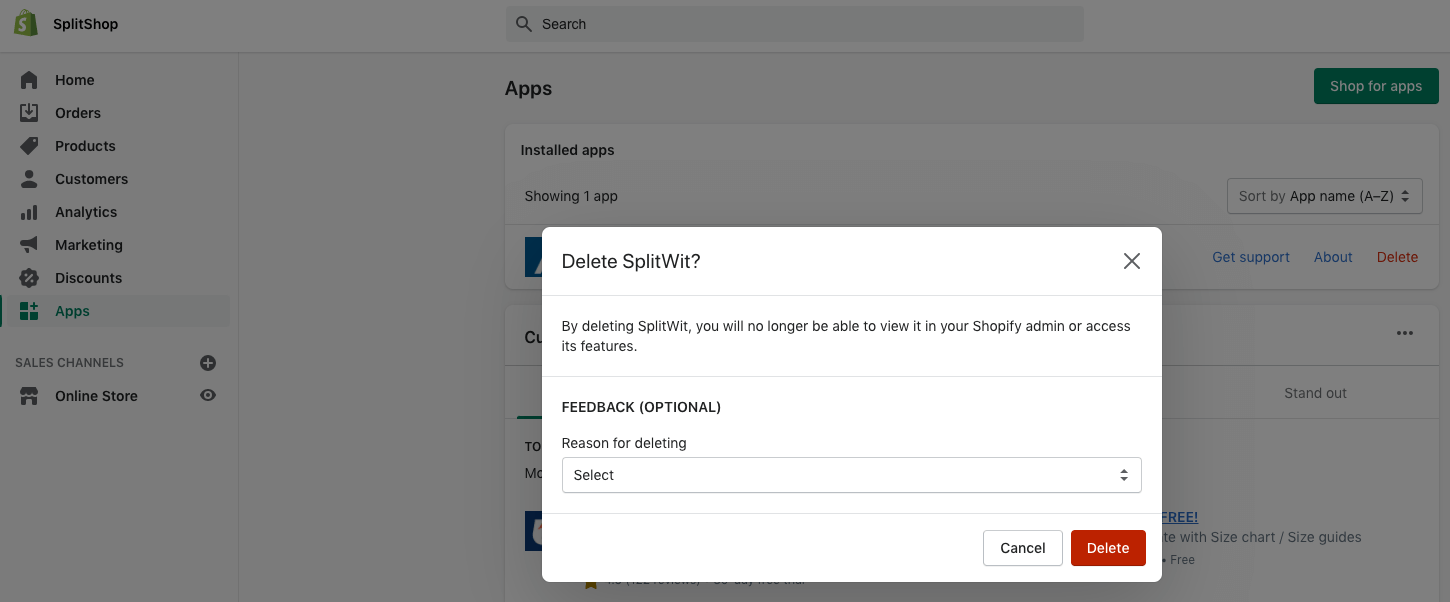
Merchants can choose to delete apps from their shop. This will remove it from their list of installed apps. If they try installing it again, they will be re-promoted for permissions. When an app is deleted, a webhook is notified so that code can handle server-side uninstall logic:
The payment processor and billing ID associated with the merchant’s account is set to an empty string. The ‘shopify_installation_complete’ shop record is deleted.
public function uninstallApplication(){
	$conn = $this->conn;

	$res = '';
	$hmac_header = $_SERVER['HTTP_X_SHOPIFY_HMAC_SHA256'];
	$topic_header = $_SERVER['HTTP_X_SHOPIFY_TOPIC'];
	$shop_header = $_SERVER['HTTP_X_SHOPIFY_SHOP_DOMAIN'];
	$data = file_get_contents('php://input'); //similar to $_POST
	$decoded_data = json_decode($data, true);
	$verified = $this->verifyWebhook($data, $hmac_header);

	if( $verified == true ) {
	  if( $topic_header == 'app/uninstalled' || $topic_header == 'shop/update') {
	    if( $topic_header == 'app/uninstalled' ) {
			$domain = $decoded_data['domain'];

			$statement1 = $conn->prepare("SELECT * FROM `shopify_installation_complete` WHERE shop = ?");
			$statement1->execute(array($domain));
			$row = $statement1->fetch();
			$accountid = $row['splitwit_account_id'];

			//delete shopify billing ID from db
			$empty_string = "";
			$result = $conn->prepare("UPDATE `account` SET payment_processor = ?, billing_customer_id = ? WHERE accountid = ?");
			$result->execute(array($empty_string, $empty_string, $accountid));

			$statement = $conn->prepare("DELETE FROM `shopify_installation_complete` WHERE shop = ?");
			$statement->execute(array($domain));

	    } else {
	      $res = $data;
	    }
	  }
	} else {
	  $res = 'The request is not from Shopify';
	}

}
Any webhook requests have the HMAC delivered as a header (instead of a query param, as in the case of oAuth requests) and is processed differently. “The HMAC verification procedure for OAuth is different from the procedure for verifying webhooks“. The method verifyWebhook() takes care of it:
public function verifyWebhook($data, $hmac_header){
  $calculated_hmac = base64_encode(hash_hmac('sha256', $data, $this->secret, true));
  return hash_equals($hmac_header, $calculated_hmac);
}
Cache Busting
When project changes are recorded in the app, the merchant’s snippet file is updated. We need to be sure that their website recognizes the latest version. In a separate class (that handles project & snippet logic) I make a HTTP request to my method that re-writes the script tag.
public function updateSnippetScriptTag(){
	$projectid = $_GET['projectid'];
	$conn = $this->conn;
	$sql = "SELECT * FROM `shopify_installation_complete` WHERE splitwit_project_id = ?";
	$result = $conn->prepare($sql);
	$result->execute(array($projectid));
	$row = $result->fetch(\PDO::FETCH_ASSOC);
	$number_of_rows = $result->rowCount();
	if($number_of_rows == 1){
		$access_token = $row['access_token'];
		$shop = $row['shop'];
		$sql = "SELECT * FROM `project` WHERE projectid = ?";
		$project_result = $conn->prepare($sql);
		$project_result->execute(array($projectid));
		$project_row = $project_result->fetch(\PDO::FETCH_ASSOC);
		$snippet = $project_row['snippet'];

		$script_tag_url = "https://" . $this->api_key . ":" . $this->secret . "@" . $shop . "/admin/api/2020-04/script_tags.json";
		$headers = array(
		  'X-Shopify-Access-Token:' . $access_token,
		  'content-type: application/json'
		);
		$params = [];
		$json_string_params = json_encode($params);
		$use_post = false;
		//get existing script tag
		$get_script_curl_response_json = $this->curlApiUrl($script_tag_url, $json_string_params, $headers, $use_post);
		$tags = $get_script_curl_response_json['script_tags'];

		foreach ($tags as $tag) {
			$id = $tag['id'];
			$delete_script_tag_url = "https://" . $this->api_key . ":" . $this->secret . "@" . $shop . "/admin/api/2020-04/script_tags/" . $id . ".json";
			$use_delete = true;
			$delete_script_curl_response_json = $this->curlApiUrl($delete_script_tag_url, $json_string_params, $headers, $use_post, $use_delete);
		}

		//add snippet
		$snippet = "https://www.splitwit.com/snippet/" . $snippet . "?t=" . time();
		$params = [
			'script_tag' => [
				'event' => 'onload',
				'src' => $snippet
			]
		];
		$json_string_params = json_encode($params);
		$create_script_curl_response_json = $this->curlApiUrl($script_tag_url, $json_string_params, $headers);

	}
}
Once our Shopify app is built and tested we can begin to prepare for submission to the Shopify App Market.
Preparing for production
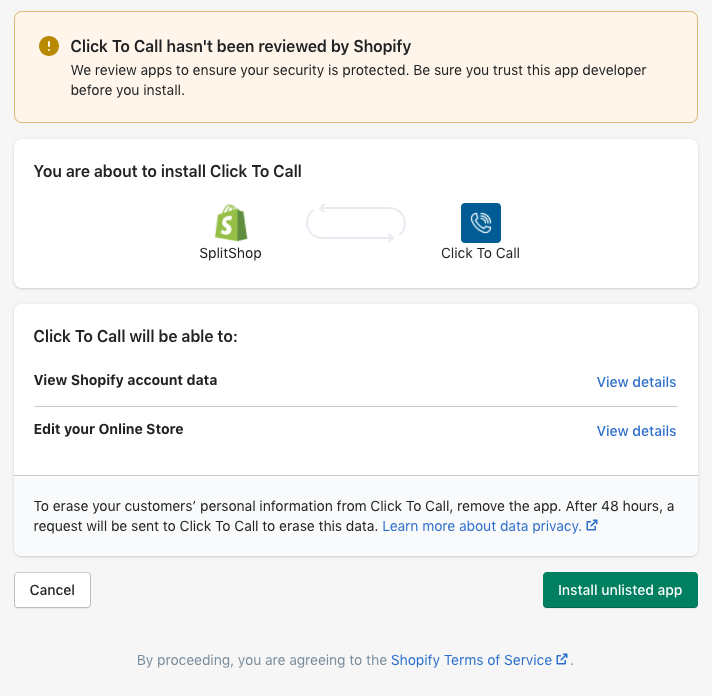
Shopify allows you to test your app on a development store.
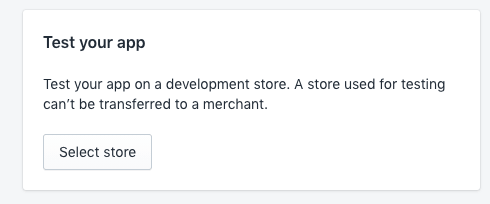
After debugging your code locally, make sure it works end-to-end in Shopify’s environment.
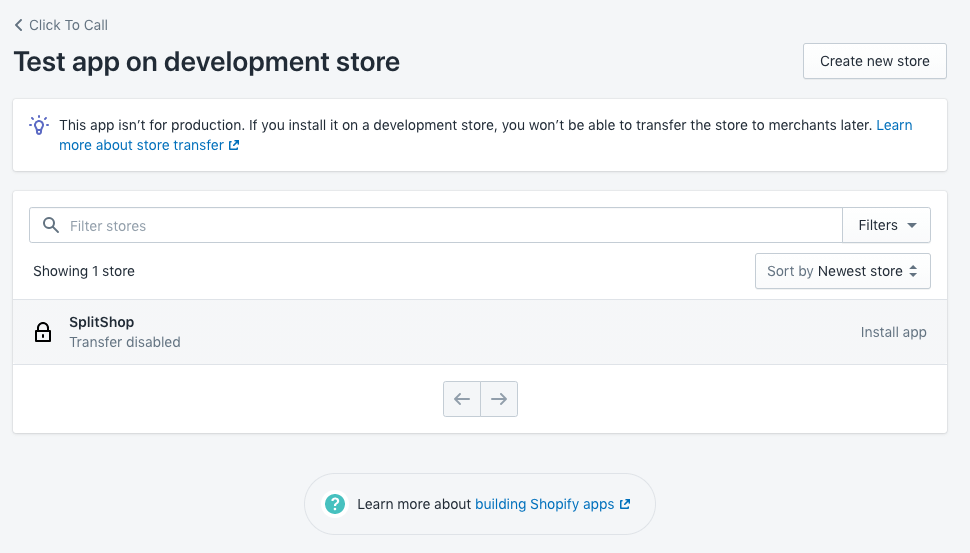
Even though the app is “unlisted”, and has not yet been accepted into the Shopify App Market, you’ll still be able to work through the entire UX flow.
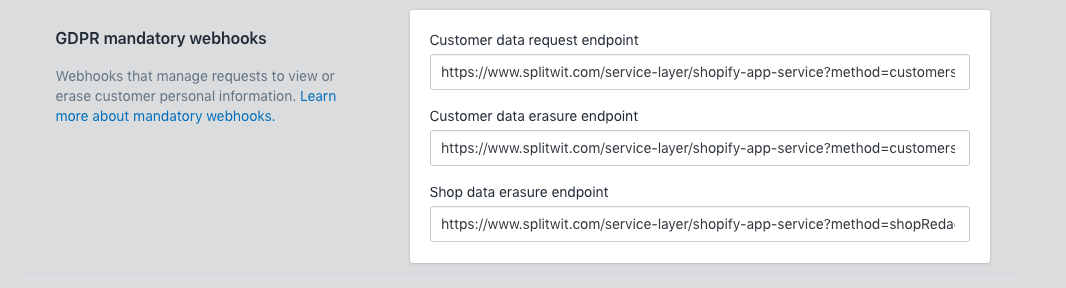
GDPR mandatory webhooks
“Each app developer is responsible for making sure that the apps they build for the Shopify platform are GDPR compliant.” Every app is required to provide three webhook end-points to help manage the data it collects. These end-points make requests to to view stored customer data, delete customer data, and delete shop data. After handling the request, an HTTP status of 200/OK should be returned. PHP lets us do that with its header() function:
header("HTTP/1.1 200 OK");
These GDPR webhook subscriptions can be managed on the “App setup” page.
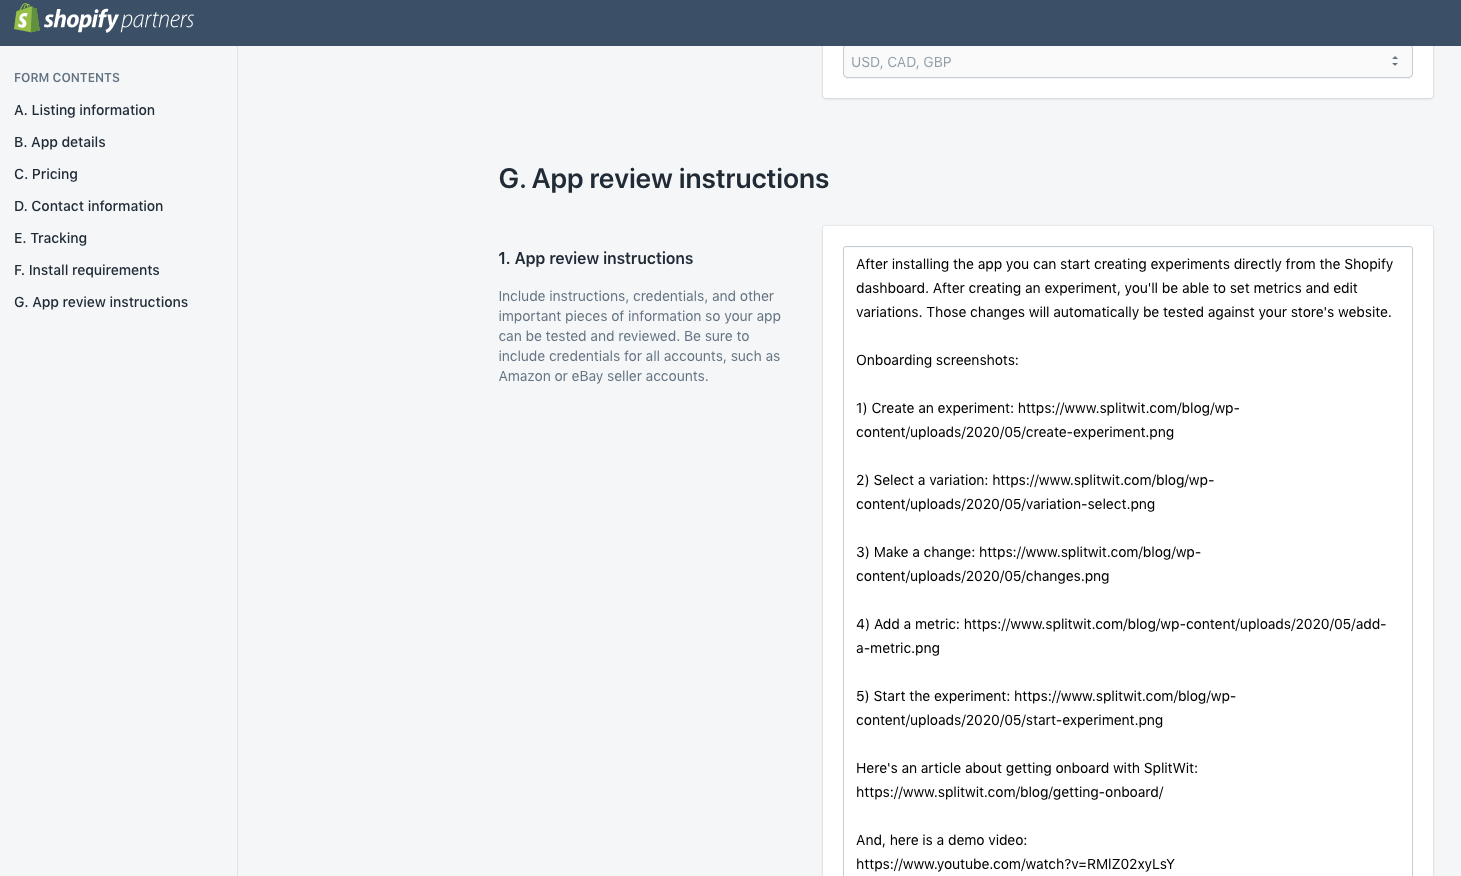
App Listing
Before submitting your app to the Shopify App Market, you’ll need to complete “Listing Information”. This section includes the app’s name, icon, description, pricing details, and more. It is encouraged to include screenshots and a demonstration video. Detailed app review instructions, along with screenshots and any on-boarding information, will help move the approval process along more quickly.
Approval Process
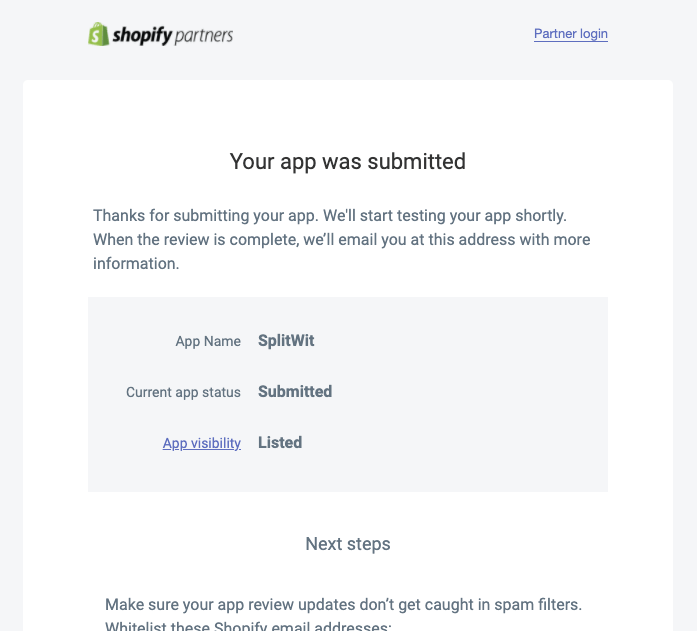
Complete the setup and listing sections, and submit your app.
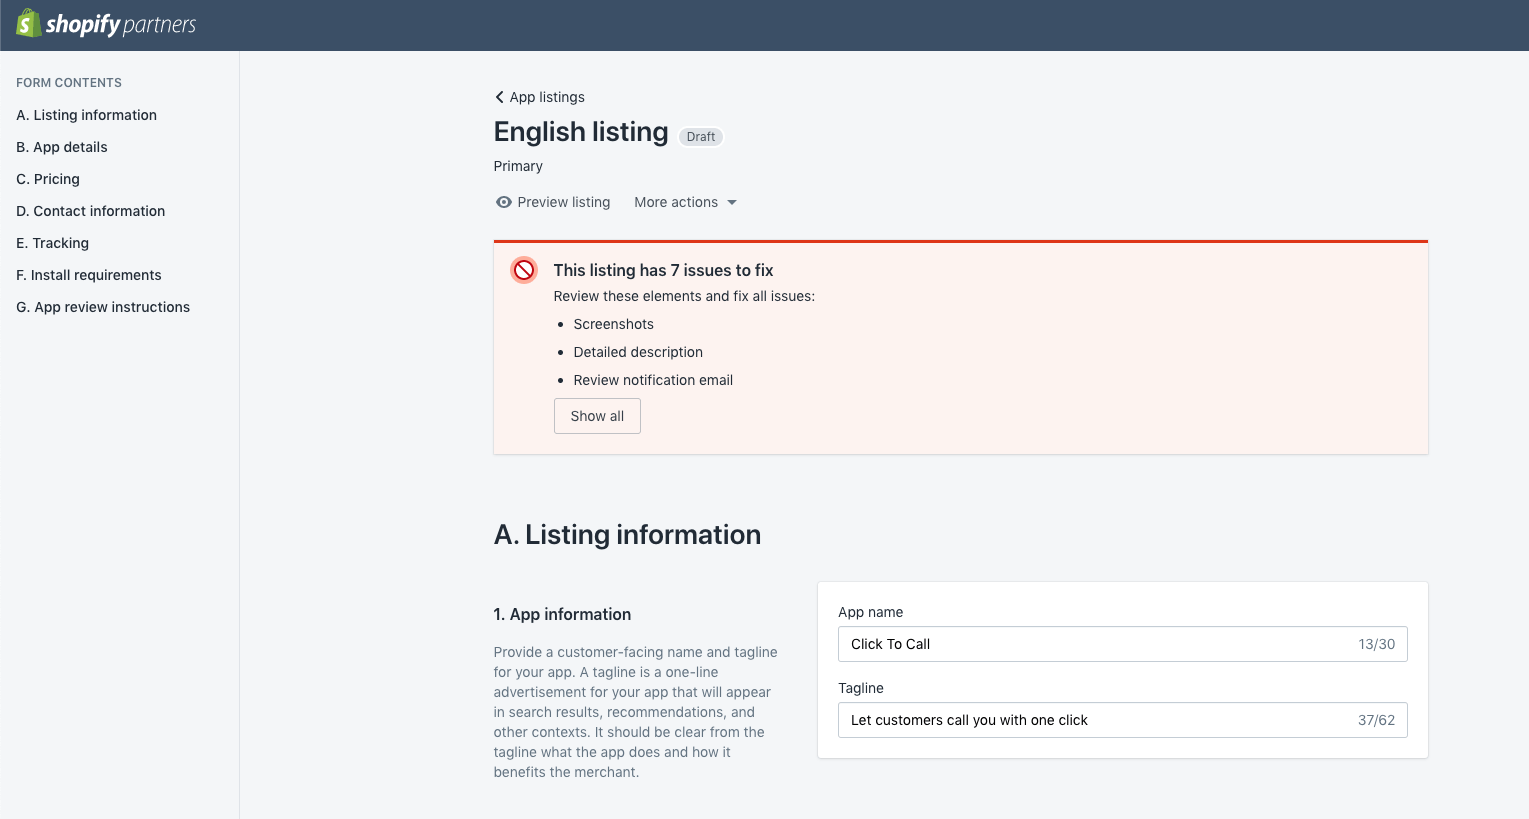
You’ll receive an email letting you know that testing will begin shortly.
You may be required to make updates based on feedback from Shopify’s review process. After making any required changes, your application will be listed on the Shopify App Store. Below is an example of feedback that I had received:
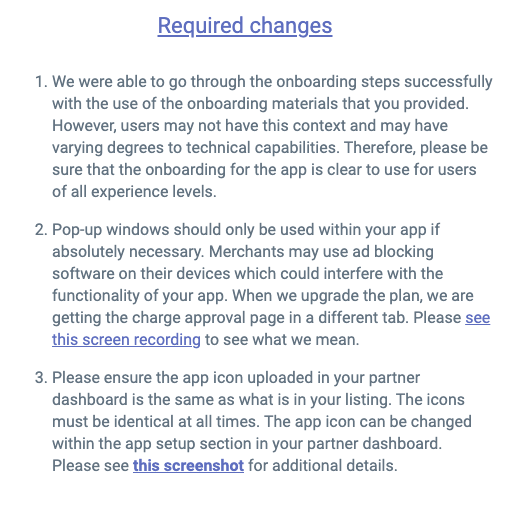
To remedy the first required change I added additional onboarding copy to the app’s listing and included a demonstration YouTube video.
The second point was fixed by stopping any links from opening in new tabs. (Although, the reviewer’s note about ad blocking software stopping new tabs from opening is bogus).
The third issue was resolved by making sure the graphic assets detailed in my app listing were consistent.
Soon after making these changes, my app was finally approved and listed.
Keep Building
While writing this article I extended and refactored my PHP code to support multiple apps. I added configuration files to keep database settings modular. The Shopify PHP class can serve as back-end to several implementations. If you have any questions about how to build a Shopify app, or need my help, send me a message.
Update:
I wrote a subsequent post about building another Shopify app. It’s called SplitWit Click to Call. It explains the creative details that go into shipping a fulling working SAAS. I dive into new features that are only available to Shopify themes running the latest OS2.0 experience.
Additional References
https://github.com/LukeTowers/php-shopify-api
https://weeklyhow.com/shopify-uninstall-webhook-api-tutorial
https://github.com/markrogoyski/awesome-php