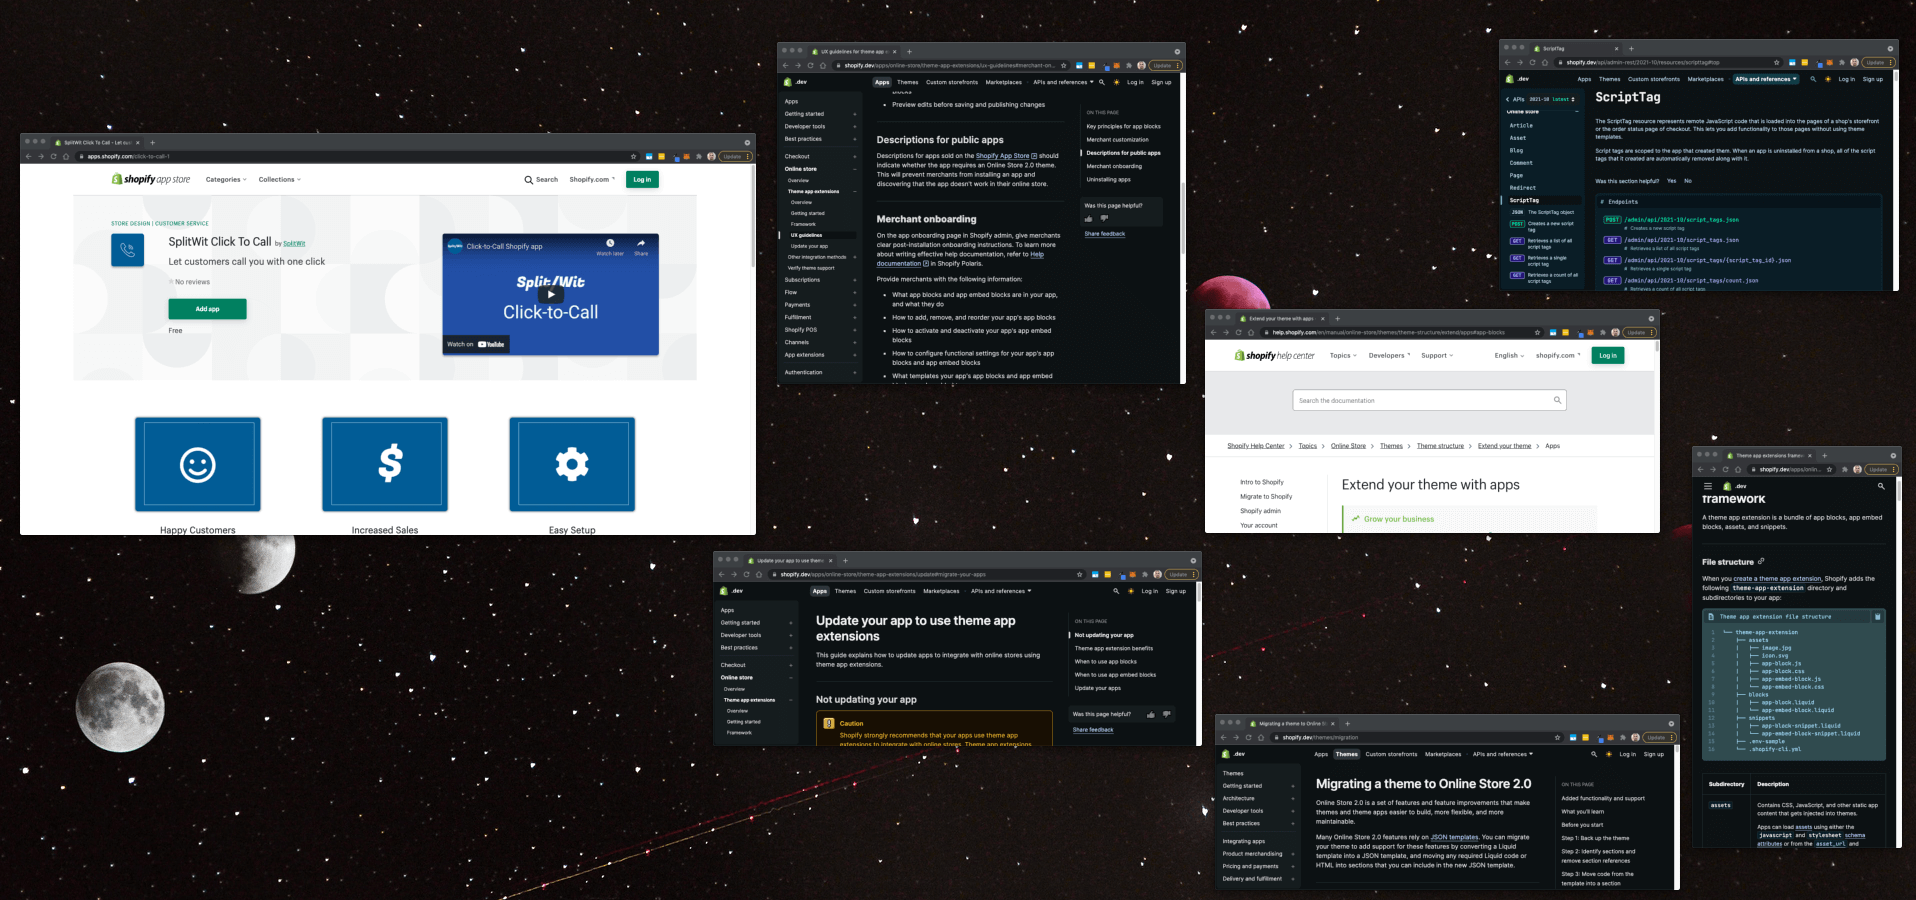
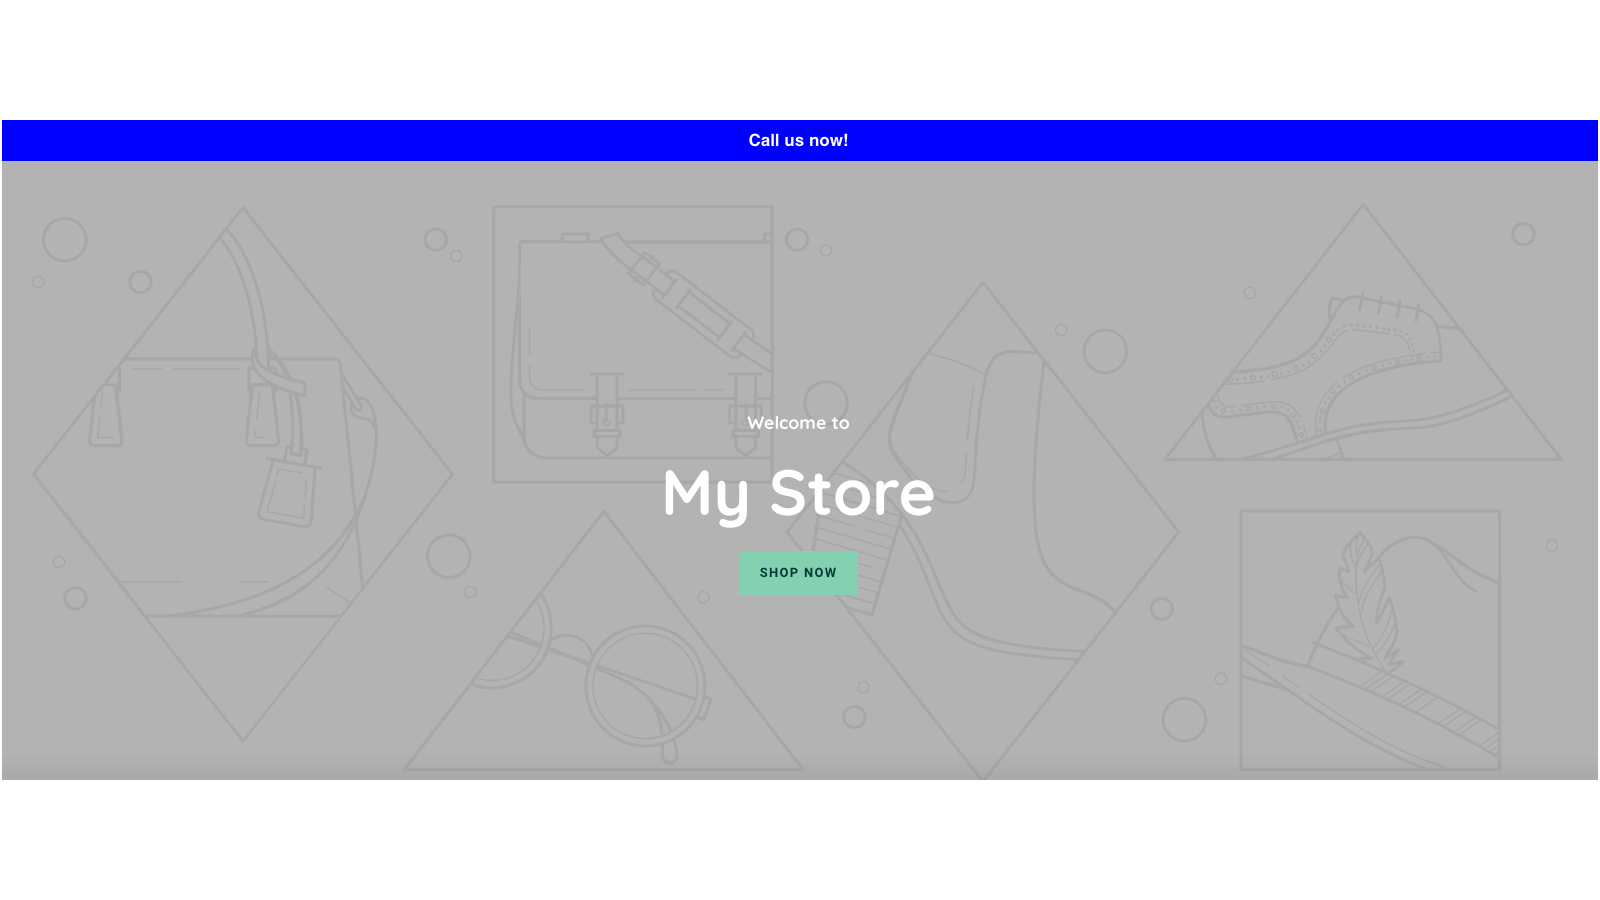
After writing my last post about How to create a Shopify app, I decided to build a new one as a side project. Taking myself through the entire process helped me to tighten up the details I mentioned. This one adds a sticky banner to a store’s front-end, prompting users to “click to call”.
It’s built on top of the code I used for the SplitWit Shopify app. I adjusted some of the methods to accept configuration parameters to differentiate between the two. Code had to be added to support new functionality. SplitWit already had a feature to add a sticky banner to a site’s existing UI. I used the same workflow to inject the merchant’s settings as JavaScript.
function writeSnippetFile($shopify_installation_complete_id){

    $conn = $this->connection;
    $sql = "SELECT * FROM `prompts` WHERE shopify_installation_complete_id = ?";
    $result = $conn->prepare($sql);
    $result->execute(array($shopify_installation_complete_id));
    $row = $result->fetch(PDO::FETCH_ASSOC);
    $phone_number = $row['phone_number'];
    $message_text = $row['message_text'];
    $color = $row['color'];
    $bg_color = $row['bg_color'];
    $position = $row['position'];
    $display = $row['display'];
    $mobile_only = $row['mobile_only'];
    $filename = $row['snippet'];

    $sticky_html = "";

    if($display == "hide"){
        $sticky_html .= "<style>#ctc-splitwit-sticky{display:none;}</style>";
    }

    if($mobile_only == "true"){
        $sticky_html .= "<style>@media(min-width: 1000px){#ctc-splitwit-sticky{display:none;}}</style>";
    }

    $sticky_html .= "<div style='font-weight:bold;".$position.":0;position:fixed;z-index:100000;left:0px;text-align:center;padding:8px 20px;width:100%;background:".$bg_color.";color:".$color."' id='ctc-splitwit-sticky'><p style='margin:0px'><a href='tel:".$phone_number."'>".$message_text."</a></p></div>";

    $changecode = '$("body").append("'.$sticky_html.'")';

    $snippet_template = file_get_contents("/var/www/html/click-to-call/snippet/snippet-template.js");
    $myfile = fopen("/var/www/html/click-to-call/snippet/".$filename, "w") or die("Unable to open file!");

    $txt = "window.CTCsplitWitChangeCode = ".$changecode . "\n" . $snippet_template;

    fwrite($myfile, $txt) or die("Unable to save file!");

    fclose($myfile);
}
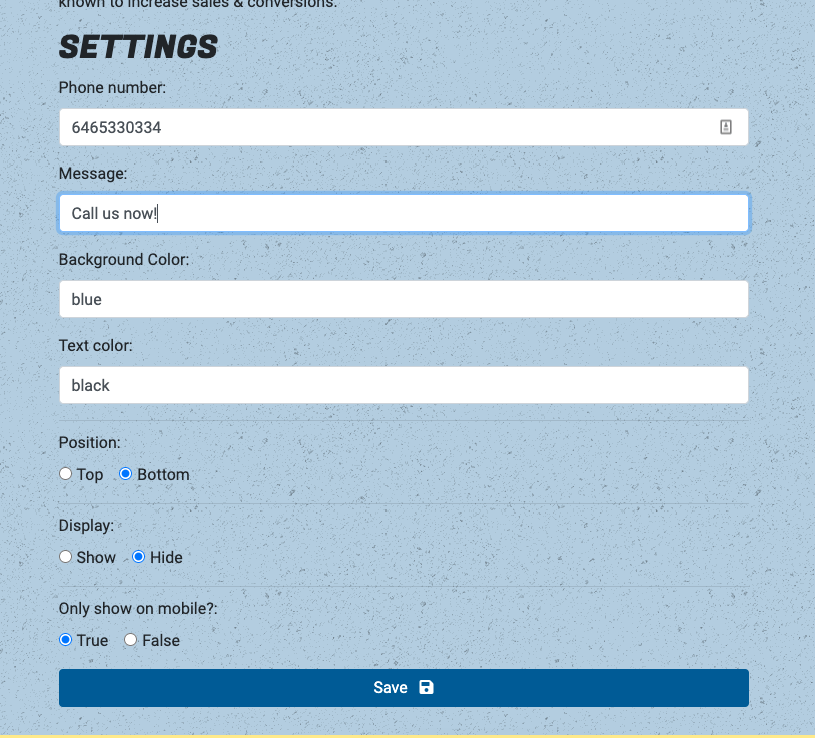
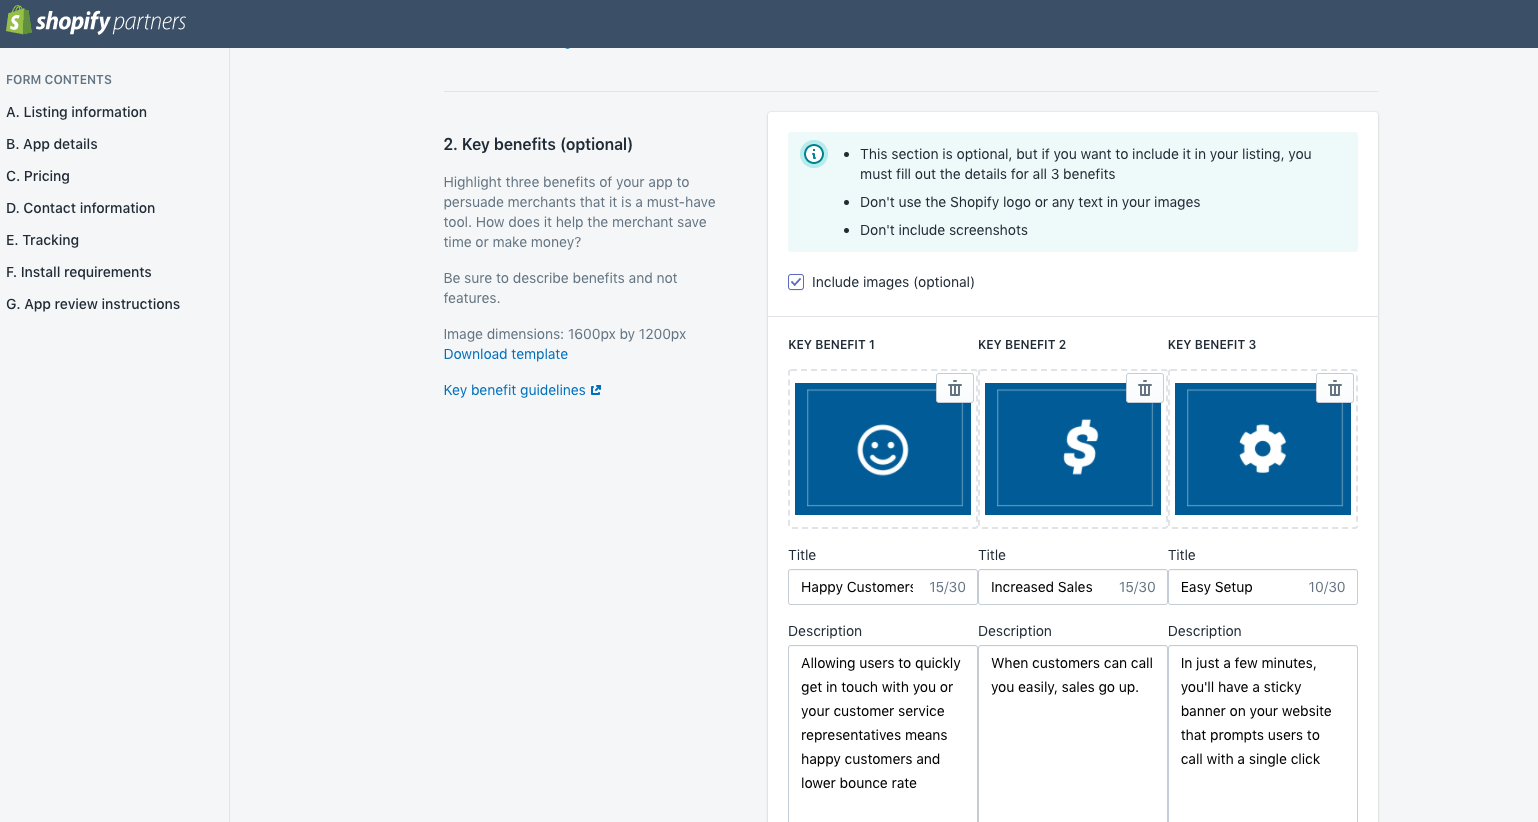
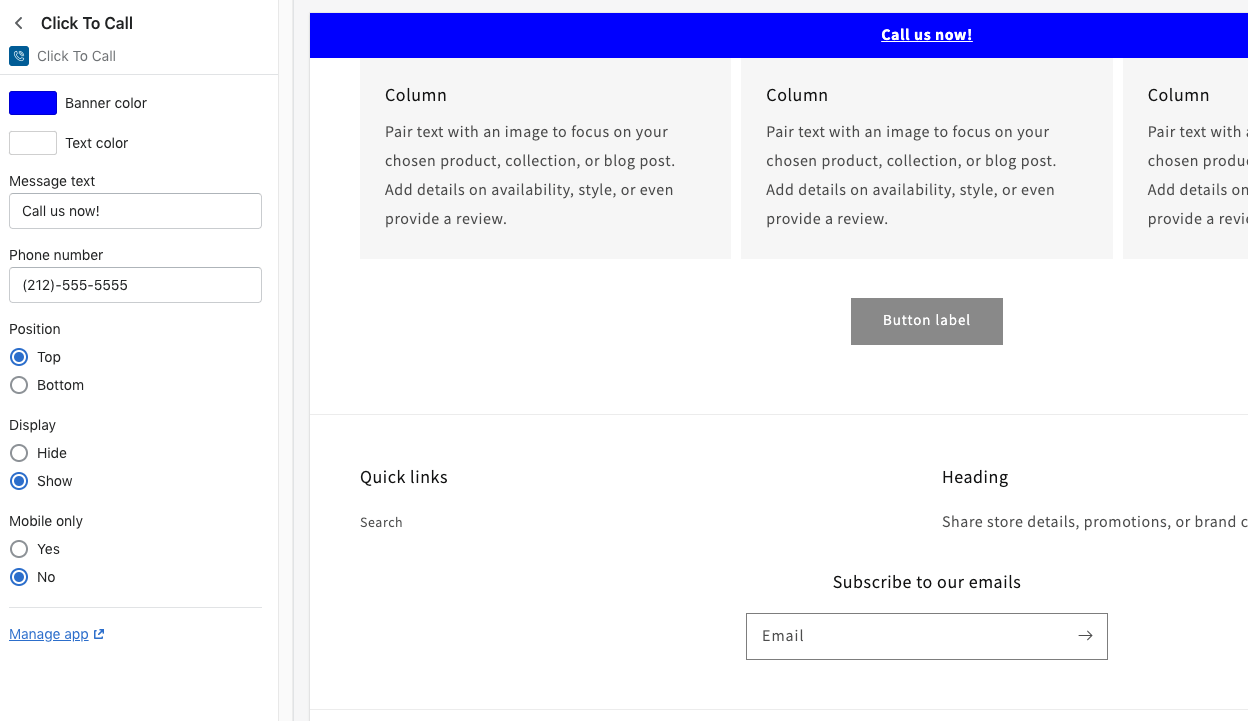
The app’s admin view is a simple input form with settings to control the sticky bar UI that is injected into the merchant’s store-front.
In addition to updating and refactoring my code, I wrote copy and drafted design for this digital product. I used SplitWit branding guidelines (fonts, colors, etc.) to establish an adjacent feel.

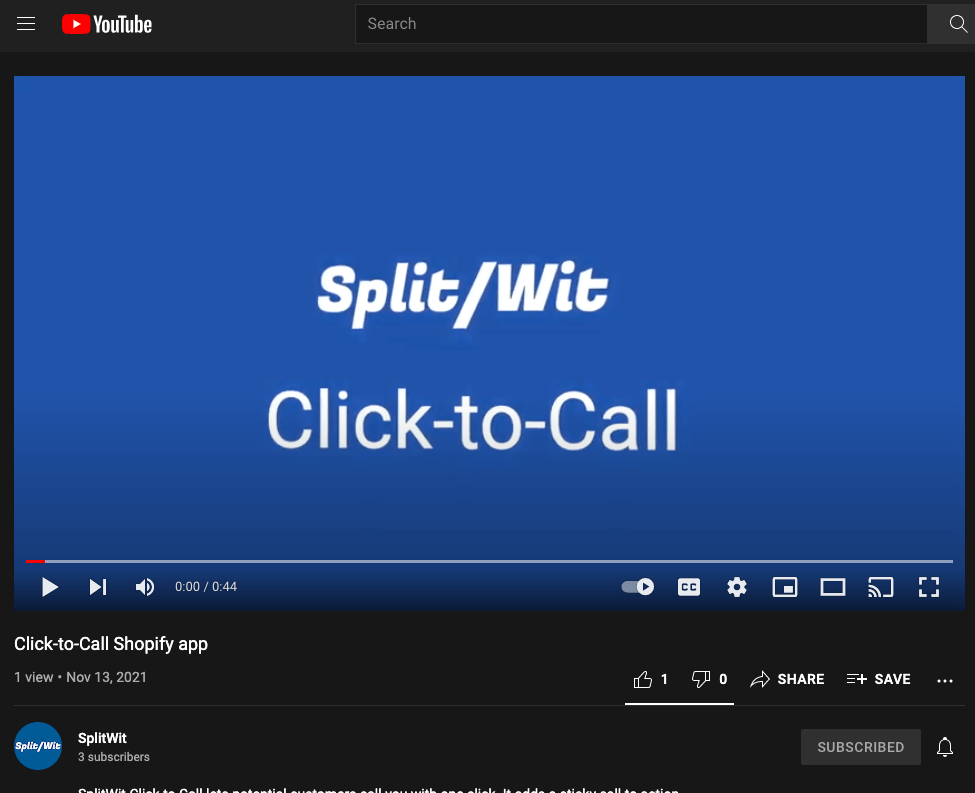
Although it’s optional, I wanted to include a promo video in the listing. Having had previously created videos for SplitWit, I was able to quickly spin one together. I already created background music files in Garage Band for other projects. Here’s the one I chose to use – feel free to borrow it for what ever you like. The text animations were exported from Keynote. I added screenshots, included stock animation from VideoPlasty, and recorded voice-over lines using a Yeti microphone.
I drafted other graphic assets that were required in the app listing using the GIMP – software I’ve used for over twenty years
A few days after submission, I received an email with required changes.
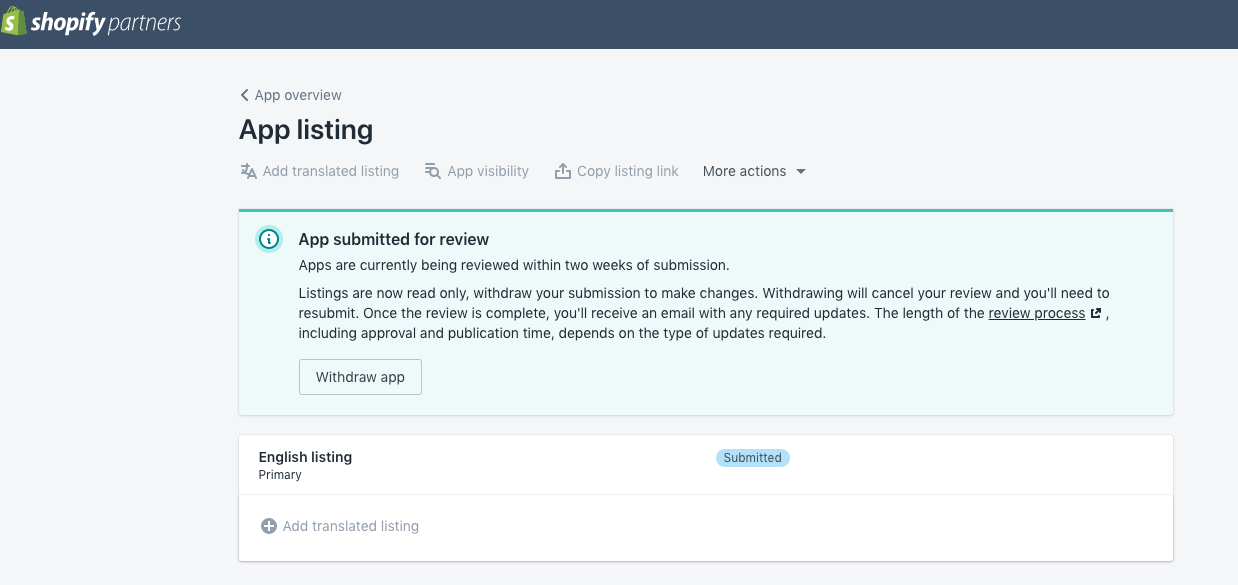
They were mostly minor issues. Things like the app’s name, a screenshot used in the listing, and an OAuth redirect bug.
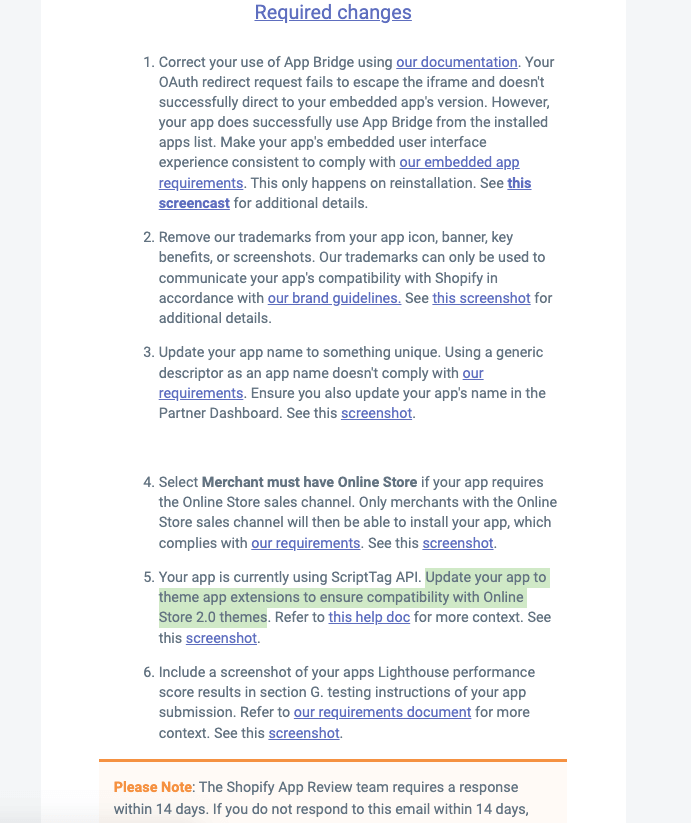
One of the requests said, “Update your app to theme app extensions to ensure compatibility with Online Store 2.0 themes.”
2.0 themes? What does that mean?
Shopify recently announced Online Store 2.0 (OS 2.0). It’s essentially a set of improvements to the platform that makes themes and apps more flexible and maintainable. This benefits both merchants and developers. Enhanced app support means app functionality can be leveraged anywhere in a theme by using app blocks in the theme customizer.
SplitWit Click-to-Call injects HTML to manipulate a store’s user interface. That code comes from a JavaScript file that’s referenced in the page’s source code. That reference is added upon installation using the ScriptTag API. The JS file itself is generated & updated whenever a merchant clicks “save” in the app’s admin view. This required change is requesting that we provide an app block option as an alternative for compatible themes.
Shopify is encouraging OS 2.0 apps to instead use “theme app extensions” because they don’t edit theme code. It allows merchants to add your app’s UI elements, along with any settings, through its theme editor.
The documentation mentions that it “reduce[s] the effort required to integrate apps in themes”. In my particular case, it actually seems to add a step.
Theme App Extensions
App blocks are a type of “theme app extension” supported by Shopify’s Online Store 2.0. To create an app block available in the theme editor, I added a directory to my app using the below file structure. I was able to auto-generate it with the Shopify CLI by using the command shopify extension create.
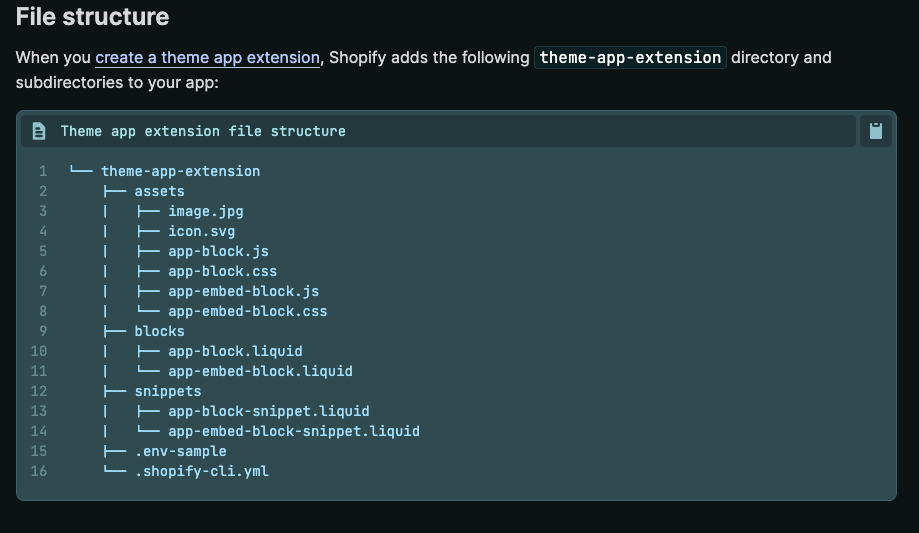
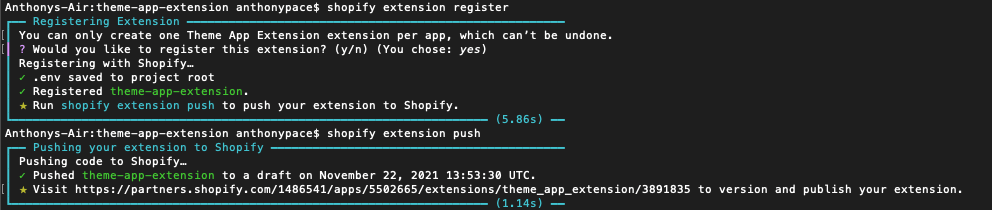
From the command line, I registered this folder as an extension, and pushed my code.
In my app block .liquid file I used the same HTML template from my original PHP snippet, swapping my database variables for Shopify block settings.
{% if block.settings.display == "hide" %}
<style>#ctc-splitwit-sticky{display:none;}</style>
{% endif %}

{% if block.settings.mobile_only == "yes" %}
<style>@media(min-width: 1000px){#ctc-splitwit-sticky{display:none;}}</style>
{% endif %}

<div style="font-weight:bold;{{block.settings.position}}:0;position:fixed;z-index:100000;left:0px;text-align:center;padding:8px;width:100%;background:{{block.settings.bg_color}};color:{{block.settings.color}}" id="ctc-splitwit-sticky"><p style=margin:0px><a style="color:{{block.settings.color}} " href="tel:{{block.settings.phone_number}}">{{block.settings.message_text}}</a></p></div>

{% schema %}
{
  "name": "Click To Call",
  "target": "section",
  "settings": [
    {
      "type": "color",
      "id": "bg_color",
      "label": "Banner color",
      "default": "#0000FF"
    },
    {
      "type": "color",
      "id": "color",
      "label": "Text color",
      "default": "#FFFFFF"
    },
    {
      "type": "text",
      "id": "message_text",
      "label": "Message text",
      "default": "Call us now!"
    },
    {
      "type": "text",
      "id": "phone_number",
      "label": "Phone number",
      "default": "(212)-555-5555"
    },
    {
      "type": "radio",
      "id": "position",
      "label": "Position",
      "options": [
        {
          "value": "top",
          "label": "Top"
        },
        {
          "value": "bottom",
          "label": "Bottom"
        }
      ],
      "default": "top"
    },
    {
      "type": "radio",
      "id": "display",
      "label": "Display",
      "options": [
        {
          "value": "hide",
          "label": "Hide"
        },
        {
          "value": "show",
          "label": "Show"
        }
      ],
      "default": "show"
    },
    {
      "type": "radio",
      "id": "mobile_only",
      "label": "Mobile only",
      "options": [
        {
          "value": "yes",
          "label": "Yes"
        },
        {
          "value": "no",
          "label": "No"
        }
      ],
      "default": "no"
    }
  ]
}
{% endschema %}
The schema JSON explicates the settings inputs exposed to the merchant. I set them to match the original settings view from my app’s interface.
This approach lets Shopify maintain the app’s configurations, instead of my SplitWit server database that’s hosted on AWS EC2. That’s less data developers can capture, but also less of a hosting burden.
Any time you update the theme app extension you’ll need to re-push the code from the Shopify CLI with the command shopify extension push. The extension code is not hosted on your own server. It lives solely in the Shopify infrastructure ecosystem.
Verify theme support
Not all themes support theme app extensions. Theme support needs to be verified at the time of installation.
The original settings view is still needed, just in case the merchant’s published theme does not support app blocks. If app blocks are supported, I don’t install the script tag snippet at all. Instead, the settings view is replaced with integration instructions telling the merchant how to activate the sticky banner from the theme editor.
If app blocks are not supported by the active theme, the snippet is installed and the settings input form displayed. Determining if the merchant’s theme supports app blocks requires adding the read_themes Shopify API scope access to the oAuth request.
$scopes = "write_script_tags,read_themes";
$redirect_url = "https://".$shop."/admin/oauth/authorize?client_id=". $this->api_key ."&scope=".$scopes."&redirect_uri=". $redirect_uri ."&state=".$nonce . "&grant_options[]=per-user";
I tested my code by switching from the basic “Minimalist” theme to a OS2.0 theme called “Dawn”. When the app is being installed, I do a few things to check if app blocks are supported:
- Get a list of the merchant’s installed themes, and check which is currently published
- Retrieve a list of assets in the published theme
- Check if JSON template files exist for at least one of the desired templates
$params = [];
$json_string_params = json_encode($params);
$headers = array(
'X-Shopify-Access-Token:' . $access_token,
'content-type: application/json'
);

// $install_ctc_curl_response_json = $this->curlApiUrl("https://www.splitwit.com/service-layer/click-to-call-service.php?method=installShopifyApp&installation_complete_id=".$installation_complete_id, $params);

// check if this merchant's published theme supports app blocks
// https://shopify.dev/api/admin-rest/2021-10/resources/theme
$read_themes_url = "https://" . $this->api_key . ":" . $this->secret . "@" . $shop . "/admin/api/2021-10/themes.json"; // list of all installed themes
$read_themes_curl_response_json = $this->curlApiUrl($read_themes_url, $json_string_params, $headers, false);
$themes = $read_themes_curl_response_json['themes'];
$published_theme_id = 0;
foreach ($themes as $theme) {
	// live theme has a role of main
	if($theme['role'] == "main"){
		$published_theme_id = $theme['id'];
		// echo "The main theme is " . $theme['name'] . "<br /><br /><br />";
	}
}

// Retrieve a list of assets in the published theme
$get_theme_assets_url = "https://" . $this->api_key . ":" . $this->secret . "@" . $shop . "/admin/api/2021-10/themes/".$published_theme_id."/assets.json";
$get_theme_assets_curl_response_json = $this->curlApiUrl($get_theme_assets_url, $json_string_params, $headers, false);


// Check if JSON template files exist for at least one of the desired templates
// For other applications, you might want to check that they exist for ALL desired templates
$assets = $get_theme_assets_curl_response_json['assets'];
$probably_block_support = false;
$templates = ['index', 'cart', 'page.contact', 'product', 'collection'];

foreach ($assets as $asset) {
	foreach ($templates as $template) {
		if($asset['key'] == "templates/".$template.".json" ){
			$probably_block_support = true;
			break; // this checks that JSON template files exist for at least one of the desired templates. If you want to check that they exist for ALL desired templates, you can move this break to the 'else' condition
		}else{
			$probably_block_support = false;
			// break;
		}
	}

	if($probably_block_support){
		break;
	}
}
Shopify recommends additionally checking:
- The body of JSON templates to determine what section is set as `main`
- The content of each `main` section and if it has a schema that contains a block of type ‘@app’
<?php
// we can continue further checks here
// https://shopify.dev/apps/online-store/verify-support

if($probably_block_support){
	// https://shopify.dev/api/admin-rest/2021-10/resources/asset#[get]/admin/api/2021-10/themes/{theme_id}/assets.json?asset[key]=templates/index.liquid

	foreach ($templates as $template) {
		$get_single_asset_url = "https://" . $this->api_key . ":" . $this->secret . "@" . $shop . "/admin/api/2021-10/themes/".$published_theme_id."/assets.json?asset[key]=templates/".$template.".json";

		$get_single_asset_curl_response_json = $this->curlApiUrl($get_single_asset_url, $json_string_params, $headers, false);
		// var_dump($get_single_asset_curl_response_json['asset']['value']);
		$asset_value_json = json_decode($get_single_asset_curl_response_json['asset']['value']);
		var_dump($asset_value_json->sections);
		echo "<hr />";
		// break;
	}
}
From my testing, those last two steps were not reliable and ultimately irrelevant.
If app blocks are supported, the snippet is not created nor injected through the Shopify script_tag API. I make note of it in the database.
$timestamp = time();
$snippet = md5($timestamp);
$snippet = $snippet . ".js";
$using_app_blocks = 0;

// don't create the snippet if we think they have app block support
if ($probably_block_support) {
  $using_app_blocks = 1;

}else{

  // create snippet file
  $myfile = fopen("/var/www/html/click-to-call/snippet/".$snippet, "w");
  fclose($myfile);

  // inject JS snippet into site
  // https://shopify.dev/docs/admin-api/rest/reference/online-store/scripttag#create-2020-04
  $create_script_tag_url = "https://" . $this->api_key . ":" . $this->secret . "@" . $shop . "/admin/api/2020-04/script_tags.json";
  $params = [
       'script_tag' => [
         'event' => 'onload',
         'src' => 'https://www.splitwit.com/click-to-call/snippet/' . $snippet
       ]
  ];
  $json_string_params = json_encode($params);
  $create_script_curl_response_json = $this->curlApiUrl($create_script_tag_url, $json_string_params, $headers);
}

$stmt = $conn->prepare("INSERT INTO `prompts` (shopify_installation_complete_id, snippet, shop, using_app_blocks, access_token) VALUES (:shopify_installation_complete_id, :snippet, :shop, :using_app_blocks, :access_token)");
$stmt->bindParam(':shopify_installation_complete_id', $installation_complete_id);
$stmt->bindParam(':snippet', $snippet);
$stmt->bindParam(':shop', $shop);
$stmt->bindParam(':using_app_blocks', $using_app_blocks);
$stmt->bindParam(':access_token', $access_token);
$stmt->execute();
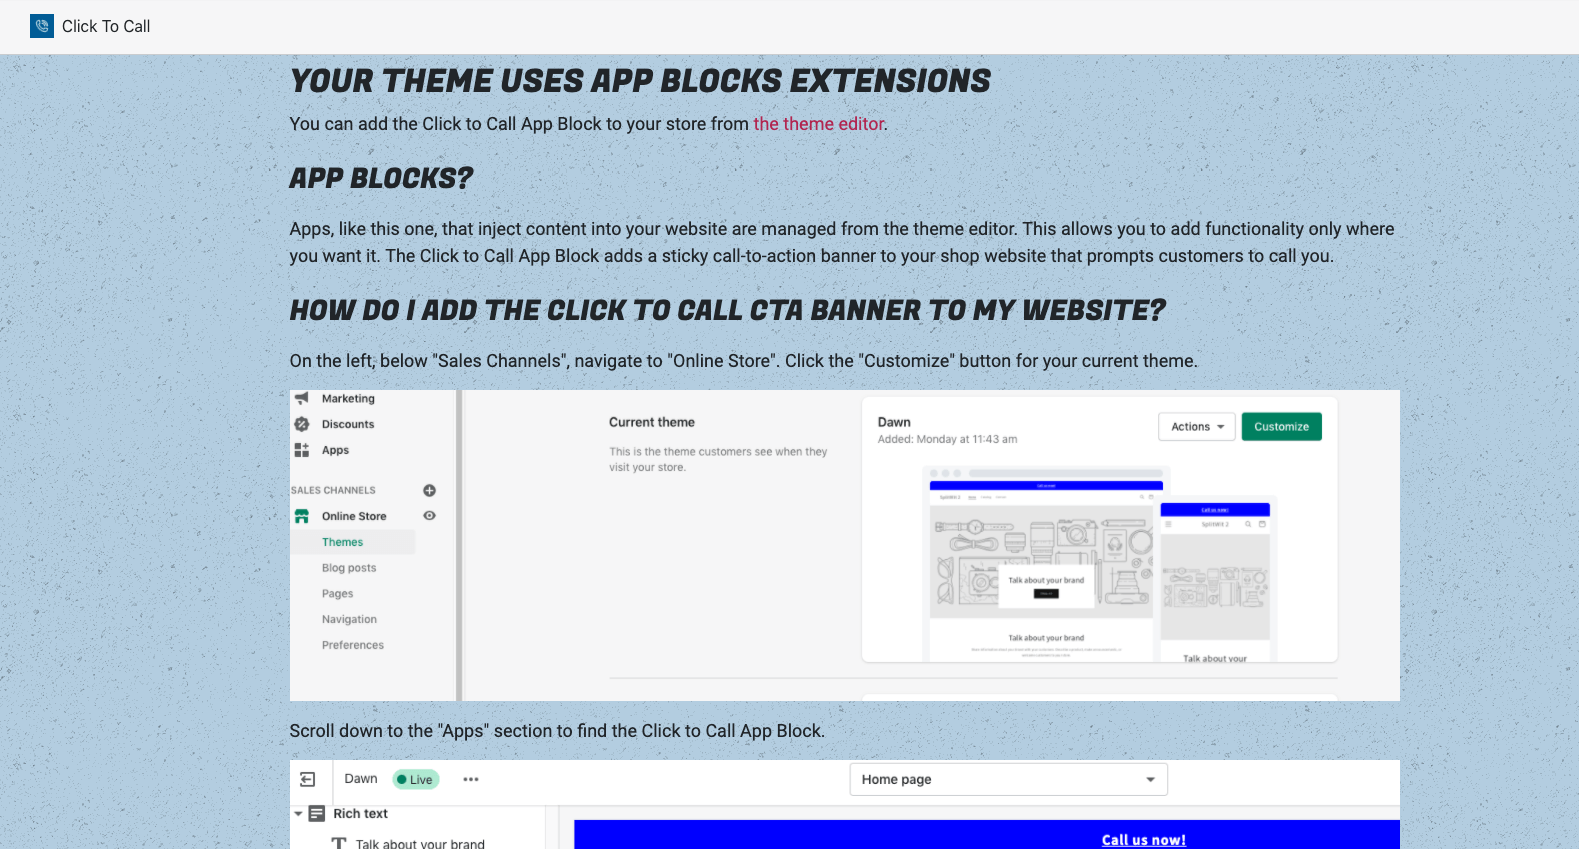
I check for that value from the front-end to display steps for integrating the app block from the theme customizer. Shopify guidelines require that we provide merchants with post-installation onboarding instructions. Those directions replace the settings input form. Configurations will be managed through the block itself.
Although Shopify does provide recommendations for merchant onboarding, there is no boiler-plate copy. A basic explanation, with screenshots, sufficed.
These updates satisfied the app review team’s request. I responded to their email, and a day later received their reply. It complained that the “app doesn’t have a functional user interface (UI)” when app blocks are enabled. That was because all of the settings were being managed by the app block data. To solve this issue, I moved the phone number and message fields back to the app’s settings view. I saved those values as metafields using the Shopify REST API.
// write this data to custom metafields, so we can access it from app blocks
$clickToCallRecord = $this->getClickToCallRecord($shopify_installation_complete_id);
$access_token = $clickToCallRecord['access_token'];
$shop = $clickToCallRecord['shop'];
$params = [];
$params = [
    "metafield" => [
      "namespace" => "clicktocall",
      "key" => "phone_number",
      "value" => $_POST['phone_number'],
      "type" => "string"
    ],
    "metafield" => [
      "namespace" => "clicktocall",
      "key" => "message_text",
      "value" => $_POST['message_text'],
      "type" => "string"
    ],
  ];
$json_string_params = json_encode($params);
$headers = array(
  'X-Shopify-Access-Token:' . $access_token,
  'content-type: application/json'
);


$url = "https://" . $this->api_key . ":" . $this->secret . "@" . $shop . "/admin/api/2021-10/metafields.json";
$response = $this->curlApiUrl($url, $json_string_params, $headers);
Update: The Shopify metafield POST API would only create/update a single metafield per request. I had to break it out into two calls. From what I’ve read it seems like a PUT request might do that trick for multiple fields, but for my use-case this approach is fine. Here you can see how I do it when setting default metadata on installation:
$params = [
    "metafield" => [
      "namespace" => "clicktocall",
      "key" => "phone_number",
      "value" => "(555)-555-5555",
      "type" => "string"
    ]
  ];
$json_string_params = json_encode($params);


$url = "https://" . $this->api_key . ":" . $this->secret . "@" . $shop . "/admin/api/2021-10/metafields.json";
$response = $this->curlApiUrl($url, $json_string_params, $headers);

$params = [
    "metafield" => [
      "namespace" => "clicktocall",
      "key" => "message_text",
      "value" => "Give us a call!",
      "type" => "string"
    ],
  ];
$json_string_params = json_encode($params);
$response = $this->curlApiUrl($url, $json_string_params, $headers);
I populated them from the app block liquid file by accessing the global ‘shop’ object:
<a style="color:{{block.settings.color}} " href="tel:{{ shop.metafields.clicktocall.phone_number.value }}">{{ shop.metafields.clicktocall.message_text.value }}</a>
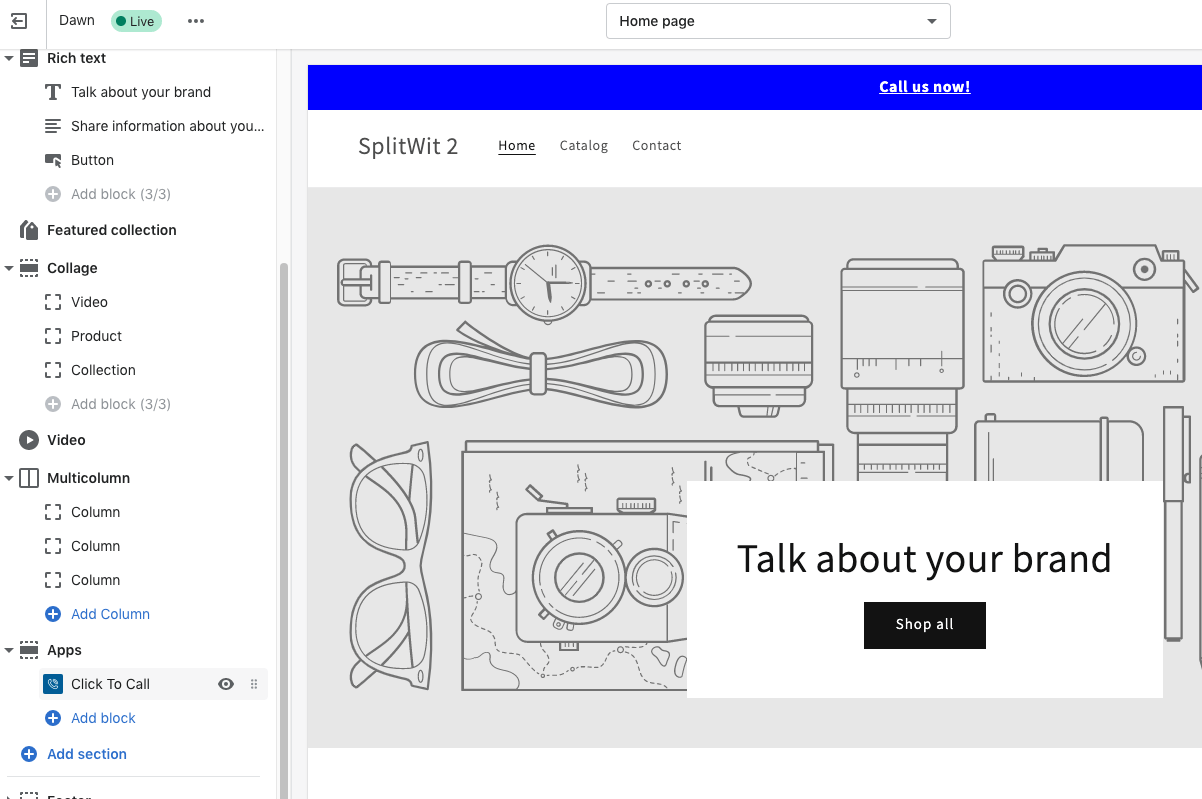
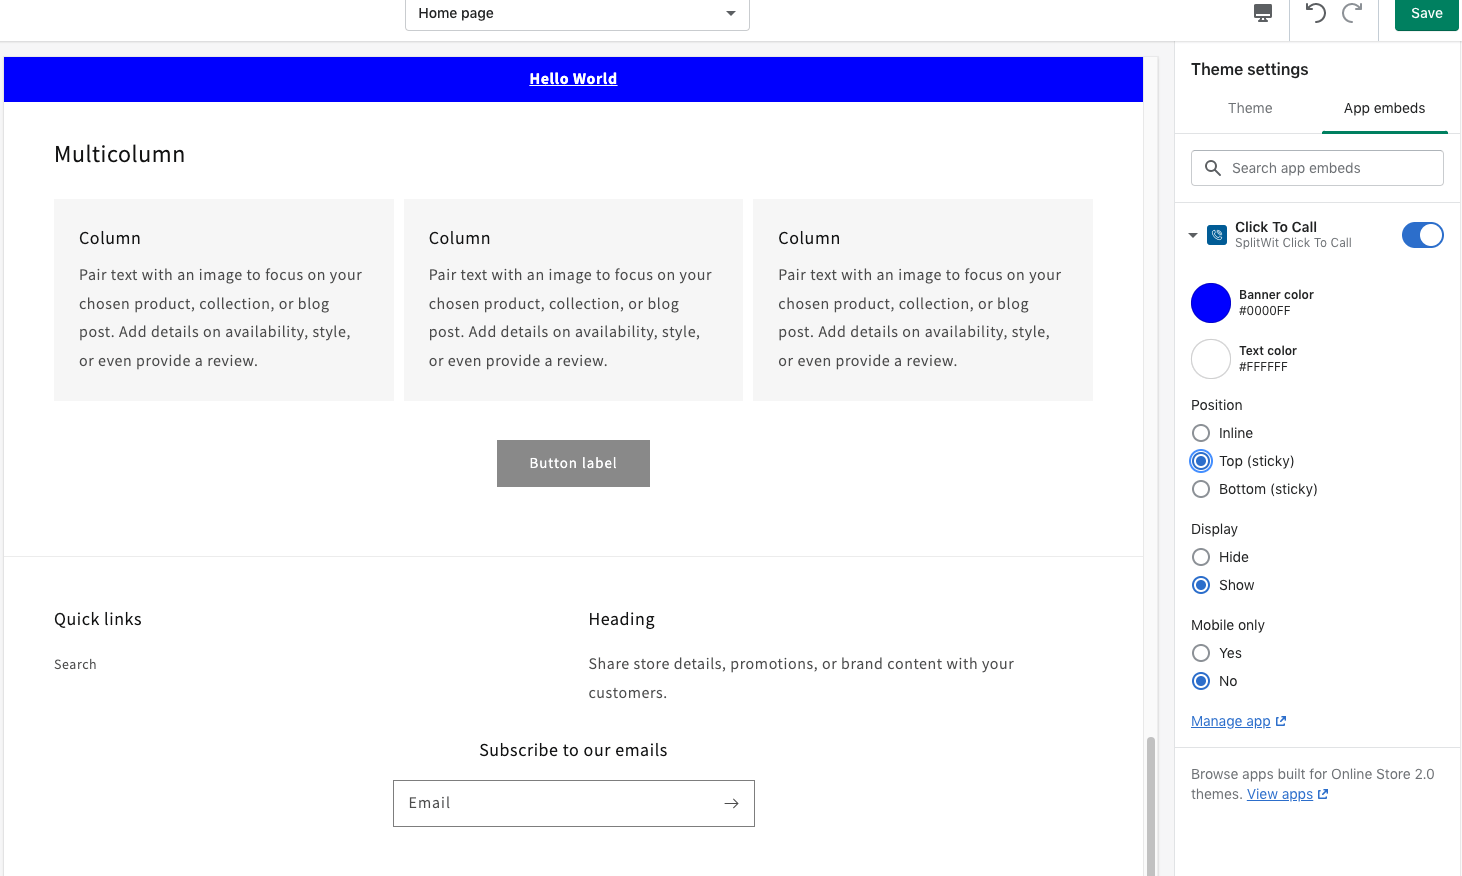
After another response, they commented that I should be using “App Embed Blocks” instead of just “App Blocks”. That was because my UI component is a “floating or overlaid element”. It exists outside of the normal DOM flow and was not inline with other HTML nodes. This only required a small update to the liquid file’s schema, changing the “target” from “section” to “body”.
Although only a small difference, it does affect how merchants add Click To Call in the theme customizer. They must navigate to the Theme Settings area, and add it as an “App Embed”.
Luckily, I’m able to deep link merchants directly to that view from my onboarding instructions. The link also automatically activates my app embed. All I needed to do was get the extension’s UUID by running shopify extension info from my command line and I was able to build the URL.
Add the Click To Call App Block from <a href="https://<?php echo $clickToCallRecord['shop']; ?>/admin/themes/current/editor?context=apps&activateAppId=b52ccd8e-54b1-4b6d-a76f-abaed45dea97/click-to-call" target="_blank">the theme editor</a>
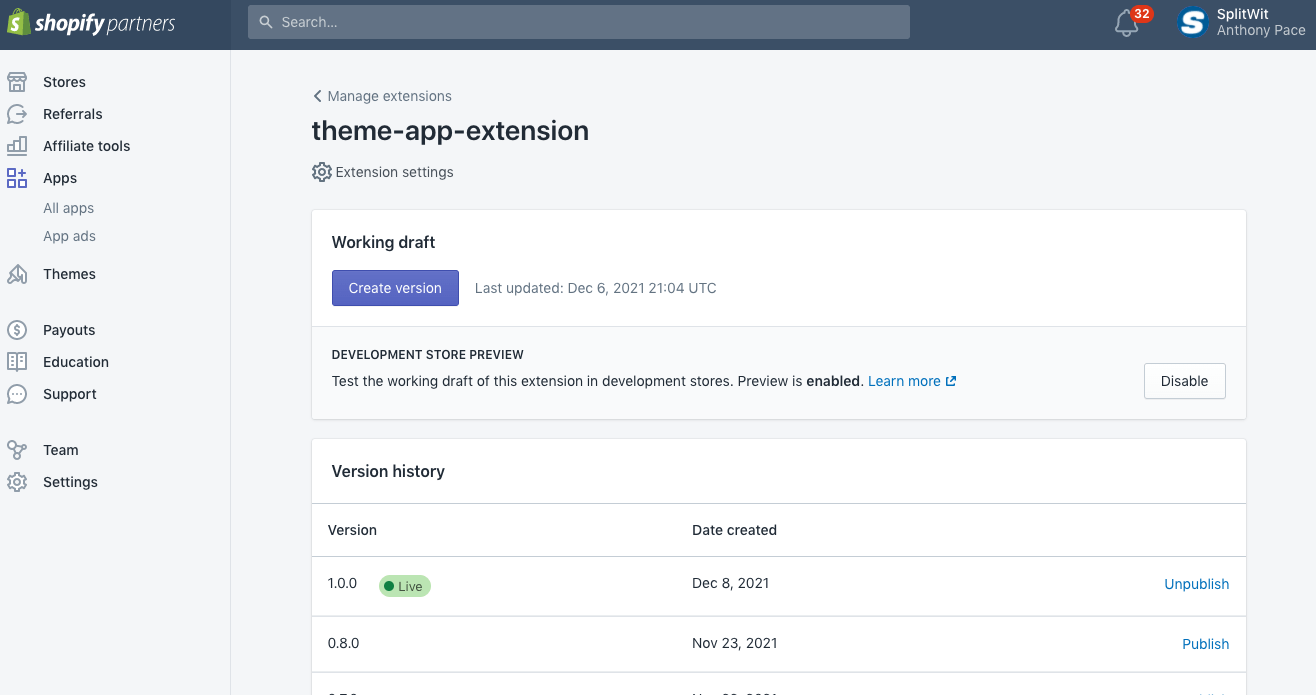
I updated my app’s home screen onboarding instructions to reflect this new flow. Everything appeared to be working when I tested, yet the app review team complained that the above issues were still unresolved. It turns out, I was able to immediately see changes to the extension that I pushed from the CLI because “development store preview” was enabled. The review team could not until I published a new version:
After that fix, the app was accepted to the Shopify App Market. If you are a Shopify merchant, check it out and let me know what you think.