Transform Your Site: A Case Study on Redesigning with WordPress Gutenberg on AWS Lightsail

Website Revamp with WordPress Gutenberg via AWS Lightsail

AWS Lightsail

Dan owns a theatre costume shop called “On Cue Costumes” in Montclair, New Jersey. Like many of my clients, he had an existing website that needed to be modernized. It needed to be redesigned and responsive. This project reminded me a lot of an art website I did a few years ago. It had lots of pages, content, and images that needed to be transferred. And, like that project, I chose to use Amazon Web Services as our cloud provider and WordPress as the content management system. Last time, I installed WordPress and all of the server software manually using AWS EC2. This time I decided to use AWS Lightsail to setup a managed WordPress instance. The WordPress installation uses Bitnami as the package library.
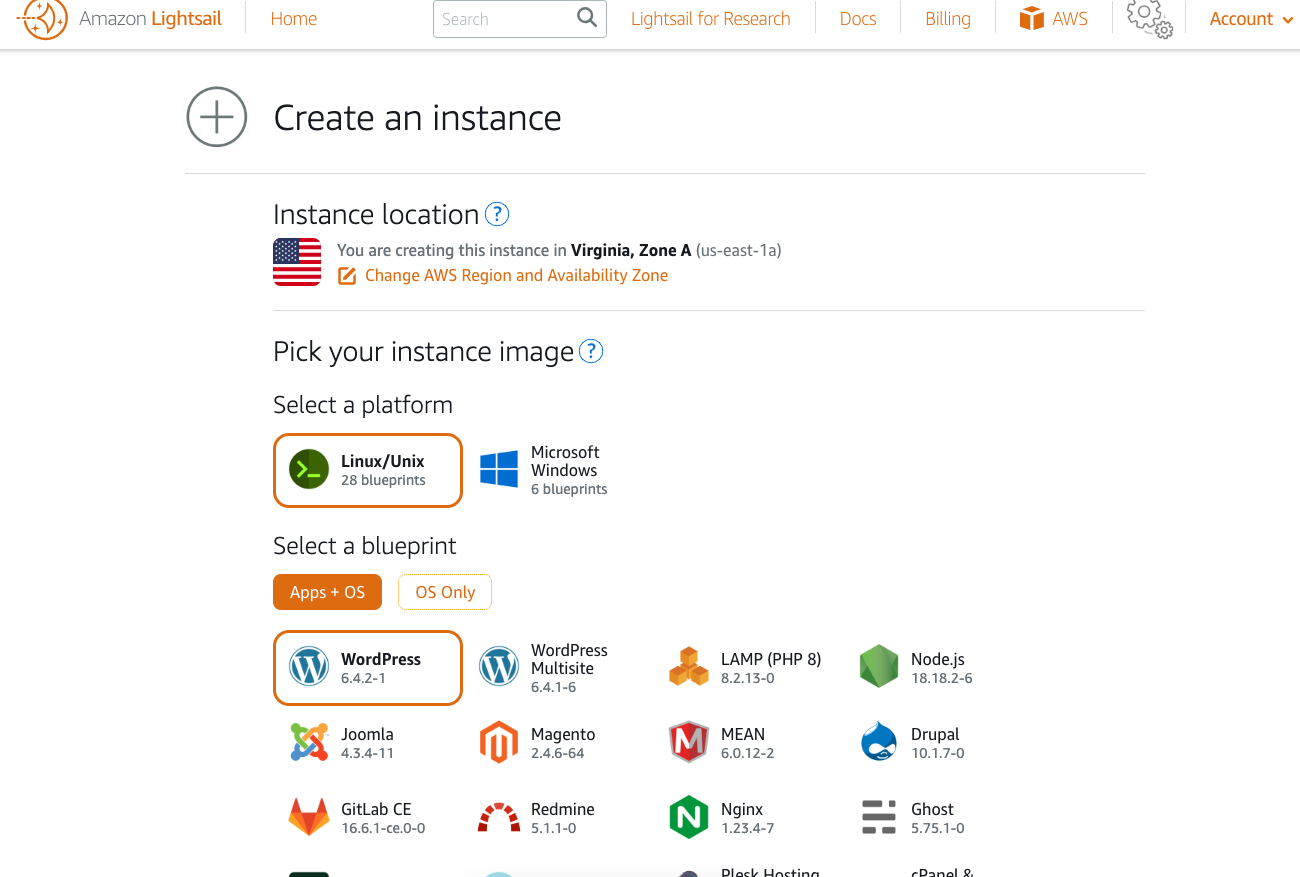
selecting wordpress for aws lightsail

This greatly reduced the time it took to get things up and running. It also provides cost predictably (EC2 is pay as you go) and automatic backups. (When running WordPress on EC2 I would run nightly SQL dumps as a redundancy mechanism). A month before starting work on this website I purchased a new domain in my personal AWS account.

When time came to begin working, I created a new AWS account for Dan’s business. Route 53 made it easy to transfer the domain name. Then, I created a new hosted zone for that domain and pointed the A record to the Lightsail instance’s IP address. Set up was easy enough to not need a walk-through. But, just to be sure, I watched a YouTube first. I’m glad I did because the top comment mentioned “Why did you not set a static IP address before creating your A records?”

The documentation mentions that “The default dynamic public IP address attached to your Amazon Lightsail instance changes every time you stop and restart the instance”. To preempt that from being a problem, I was able to create a static IP address and attach it to the instance. I updated the A record to use that new address.

Here is a before shot of the business’s website:

The legacy site, "OnCueCostumesOnline.com"
The legacy site, “OnCueCostumesOnline.com”

WordPress Gutenberg

Now that the infrastructure was set up, I was able to login to wp-admin. The Lightsail dashboard gives you the default credentials along with SSH access details. I used a premium theme called “Movie Cinema Blocks”. It has an aesthetic that fit the theatre look and made sense for this business.

premium wordpress theme
The original layout provided by the theme

The Gutenberg editor made it easy to craft the homepage with essential information and photos. The theme came with a layout pattern that I adjusted to highlight the content in a meaningful way. In a few places where I wanted to combine existing photos , I used the built in collage utility found in the Google Photos web app.

I created a child-theme after connecting via sFTP and edited the templates to remove the comment sections. I added custom CSS to keep things responsive:

@media(max-width: 1630px){
	.navigation-column .wp-block-navigation{
		justify-content: center !important;
	}
}
@media(max-width: 1550px){
	.navigation-columns .menu-column{
		flex-basis: 45% !important;
	}
}

@media(max-width: 1000px){
	 .hide-on-mobile{
		 display: none
	 }
	.navigation-columns{
		flex-wrap: wrap !important;
	}

	.navigation-column{
		flex-basis: 100% !important;
    	flex-grow: 1 !important;
	}
	.navigation-column h1{
		text-align: center;
	}
	.navigation-column .header-download-button{
		justify-content: center !important;
	}
	.navigation-column .wp-block-navigation a{
		font-size: 14px;
	}
}

@media (min-width: 1000px) {
    .hide-on-desktop {
        display: none !important;
    }
}

.homepage-posts img{
	border-radius: 10px;
}
.homepage-posts a{
	text-decoration: none;
}

@media (max-width: 780px) {
	.mobile-margin-top{ 
		margin-top: 32px !important;
	}
}

h6 a{
	text-decoration:none !important;
}

.entry-content a{
	text-decoration: none !important;
}

input[type="search"]{
       background-color: white !important;
}

I kept the existing color palette and I used a free web font, called Peace sans, for the site logo:

@font-face {
  font-family: 'peacesans';
  src: url('https://www.oncuecostumes.com/wp-content/themes/movie-cinema-blocks/assets/fonts/peacesans.ttf') format('truetype');
  font-weight: normal;
  font-style: normal;
}

.logo-font {
  font-family: 'peacesans', Lexend Deca, sans-serif;
}

The biggest challenge was importing all of the content from the existing website. We added each costume show as a post and used categories for taxonomy. The “Latest Posts” block in Gutenberg allowed us to showcase the content organized by that classification.

The original website displayed a simple list of all records. It has separate pages only for shows that have images. Others are just listed as plain text. After manually adding all of the hyperlinked content, over one-hundred remained that were only titles.
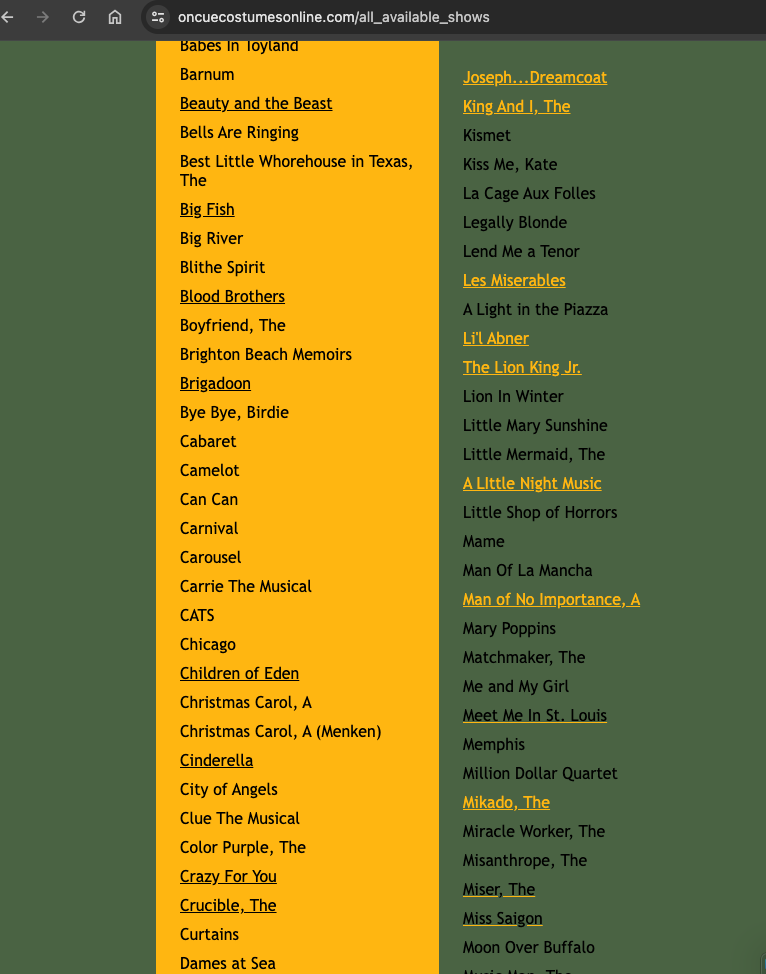
list of shows

To remove the hyperlinked entries, so that I could copy/paste the rest, I used some plain JavaScript in the browser console:

// Get all anchor elements
const allLinks = document.getElementsByTagName('a');

// Convert the HTMLCollection to an array for easier manipulation
const linksArray = Array.from(allLinks);

// Remove each anchor element from the DOM
linksArray.forEach(link => {
    link.parentNode.removeChild(link);
});

It was easier to copy the remaining entries from the DOM inspector than it was from the UI. But that left me with <li> markup that needed to be deleted on every line. I pasted the result into Sublime Text, used the Selection -> Split into Lines control to clean up all at once, and found an online tool to quickly remove all empty lines.  I saved it as a plain text file. Then, I used a plugin called “WordPress Importer” to upload each title as an empty post.

Contact Form Email

The contact page needed to have a form that allows users to send a message to the business owner. To create the form, I used the “Contact Form 7” plugin. “WP Mail SMTP” let us integrate AWS SES to power the transactional messages. Roadblocks arose during this integration.

Authoritative Hosted Zone

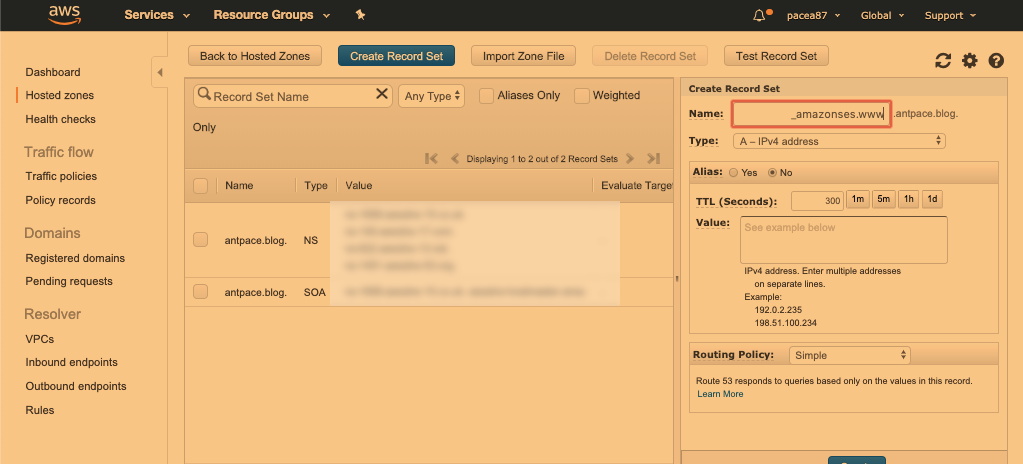
The domain verification failed even though I added the appropriate DKIM CNAME records to the hosted zone I created in this new account. At this point, I still needed to verify a sending address. This business used a @yahoo account for their business email. I decided to use AWS WorkMail to create a simple info@ inbox. (In the past, Google Workspace has been my go-to). This gave me a pivotal clue to resolving the domain verification problem.
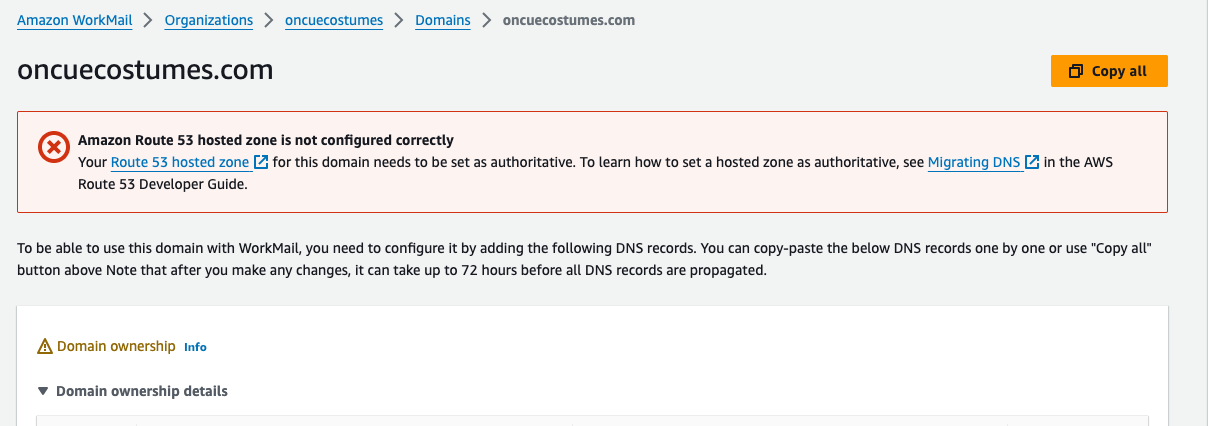
aws workmail warning

At the top of the WorkMail domain page, it warned that the domain’s hosted zone was not authoritative. It turns out, that after I transferred this domain from my personal account to the new one the nameserver records continued to point to the old hosted zone. I deleted the hosted zone in the origin account, and updated the NS records on the domain in the new account to point to the new hosted zone. Minutes later, the domain passed verification.

Sandbox limits

The initial SES sandbox environment has sending limits – only 200 per day and only to verified accounts. Since messages were only being sent to the business owner, we could have just verified his receiving email address. The main issue was that the default WordPress admin email address was literally user@example.com. When I tried updating this to a verified address, WordPress would also try to send an email to user@example.com, causing SES to fail. I requested production access, and in the mean time tried to update that generic admin address in the database directly.

SSH Tunnel and Database Access

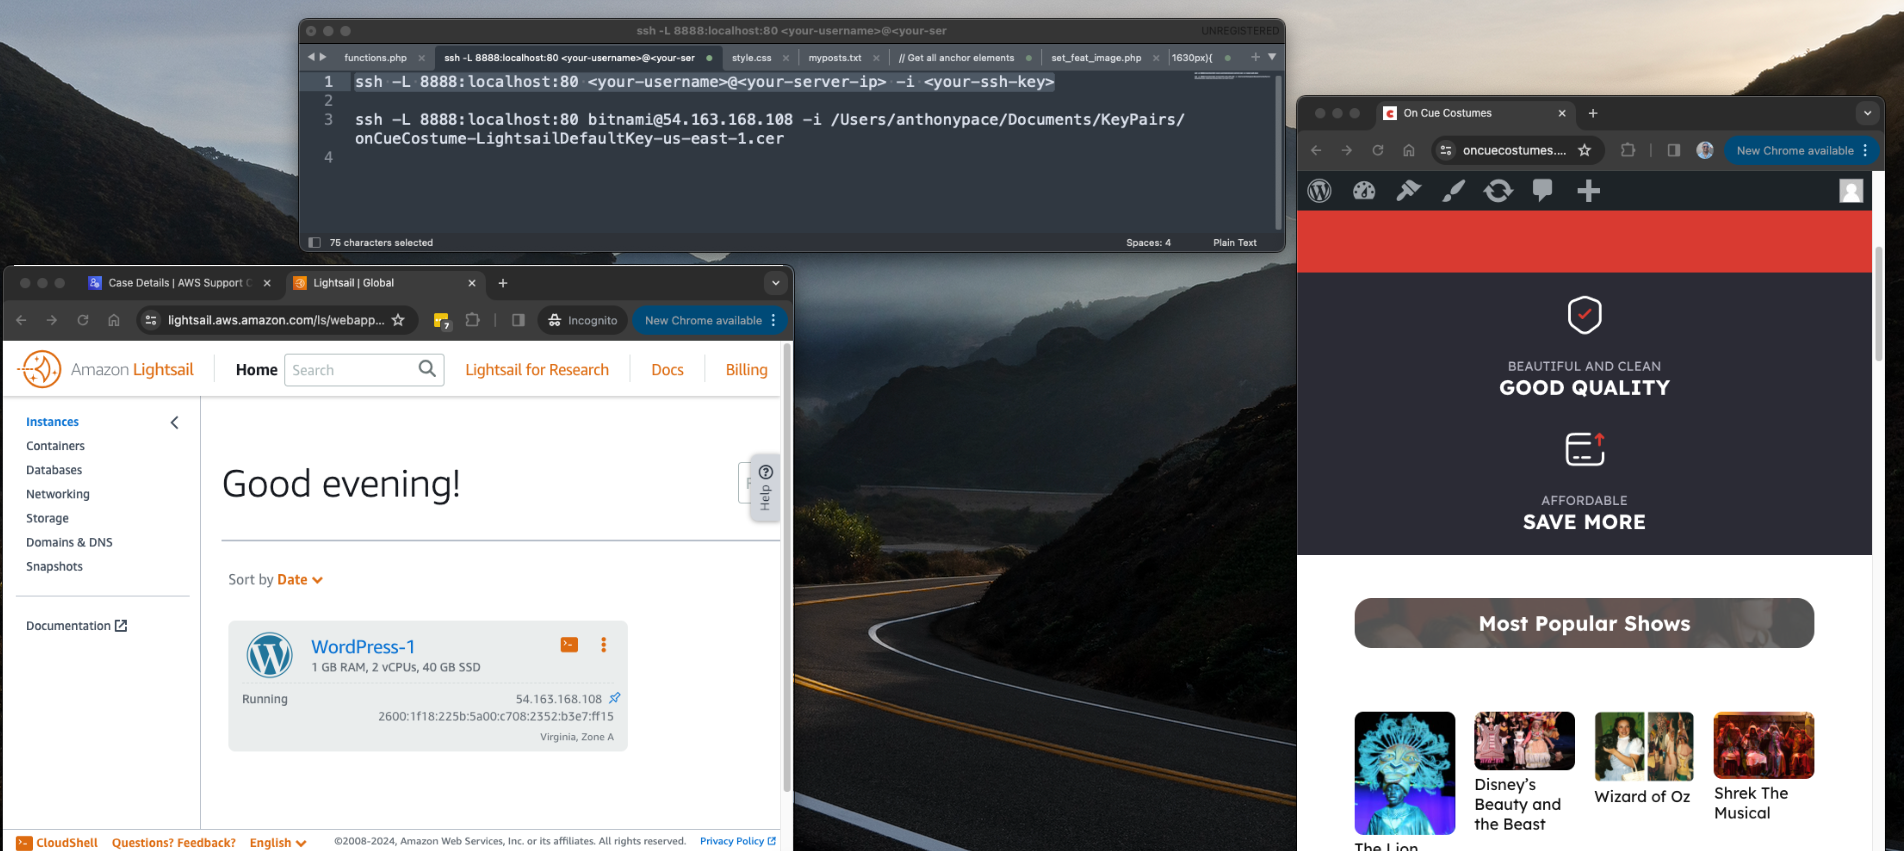
When looking at the server files in FileZilla, I noticed that phpMyAdmin was installed. I tried to access it from a web browser, but it warned that it was only accessible from localhost. I set up an SSH tunnel to access phpMyAdmin through my computer. From my Mac Terminal, I commanded:

ssh -L 8888:localhost:80 <your-username>@<your-server-ip> -i <your-ssh-key>

It told me that there was a bad permissions issue with the key file (even though this was the same file I had been using for sFTP). I fixed it from the command line:

chmod 600 onCueCostume-LightsailDefaultKey-us-east-1.cer

Once connected, I could access the server’s installation of phpMyAdmin from this browser URL: `http://localhost:8888/phpmyadmin`

Presented with a login screen, I didn’t know what credentials to use. From the Lightsail dashboard I connected to the server via web terminal. I looked up the MySql password with this command: `cat /home/bitnami/bitnami_credentials`

I assumed the username would be root – but no, it turned out to be user.

Production Access

After requesting production access, AWS responded, “It looks like we previously increased the sending limits for at least one other AWS account that you do not appear to be using. Before we make a decision about your current request, we would like to know why you cannot send from your existing unused account.”

What did this mean? I think it happened because I used my credit card on this new account, before switching it over to the business owner. This probably set off an automatic red flag on their end. Interestingly, the correspondence said “To protect our methods, we cannot provide any additional information about how we identified the related accounts.”

I responded and explained the situation honestly, “I am not aware of another account that I am not using. I do have my own AWS account for my web design business, but it is unrelated to this account – and it is not unused.” Within a few hours, production access was granted.

New Website

The original scope of this project was to build a new website showcasing content that already existed.  We were able to finalize the layout and design quickly. Here is a screenshot of the homepage:

homepage design of a wordpress website

To write this article, I referred to my ChatGPT chat log as a source of journal notes.

Adding SSL Certificate for HTTPS

The Bitnami installation comes with a tool `bncert-tool` that handles everything. It even sets up redirects to ensure your site always uses the secure HTTPS protocol. Refer to this AWS documentation: “Enable HTTPS on your WordPress instance in Lightsail“. You can run it from the command line interface. If it is not already installed you can download it: `wget -O bncert-linux-x64.run https://downloads.bitnami.com/files/bncert/latest/bncert-linux-x64.run`

At first, I tried installing the certs manually, using Let’s Encrypt – which was a bad idea. I encountered a problem resulting in a mismatch between the SSL certificate (server.crt) and the private key (server.key). This prevented Apache from restarting (panic). I was able to resolve the problem by generating a new self-signed certificate (relief). Make sure you take back-ups and snapshots before messing with anything via command line.

Snapshots

Lightsail allows for manual and automatic snapshots. My WordPress installation was about 40 gigabytes. Storage costs five cents per gigabyte – which is about two dollars per month to store a single snapshot.
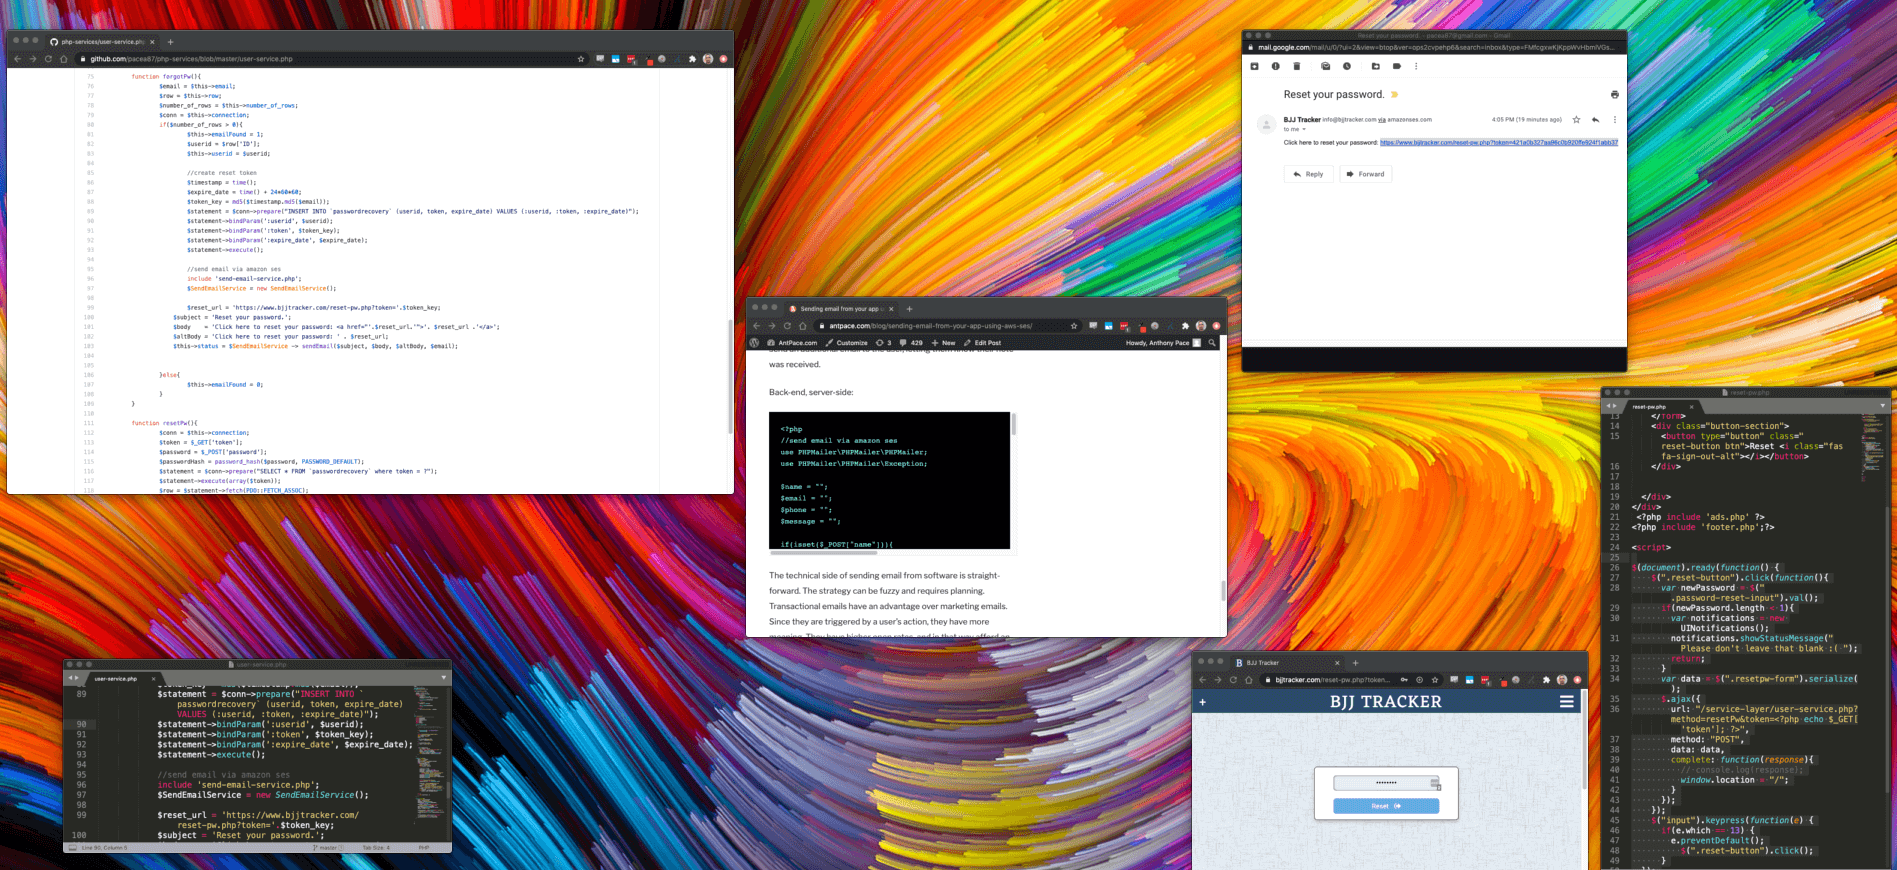
 

Reset password flow in PHP

reset password

My email account is a skeleton key to anything online I’ve signed up for. If I forget a password, I can reset it. Implementing this feature for a web app takes just a few steps.

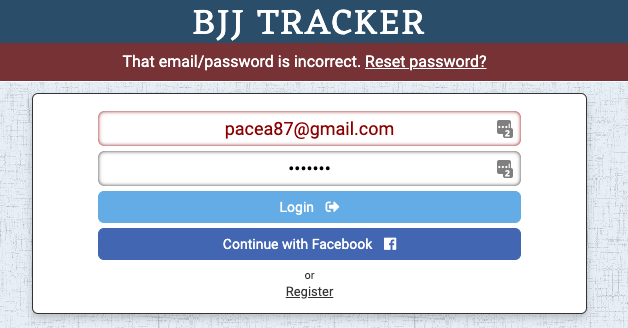
When users enter an incorrect password, I prompt them to reset it.

incorrect password warning

Clicking the reset link calls a “forgot password” back-end service.

$(document).on("click",".reset-pw-cta", function(){
	var email = $(this).attr("data");
	$.ajax({
		url:"/service-layer/user-service.php?method=forgotPw&email="+email,
		complete:function(response){
			console.log(response.responseText)
			window.showStatusMessage("A password reset email as been sent to " + email);
		}
	})
});

A token is created in our ‘password recovery’ database table. That token is related back to an account record.

password recovery database table

As a security practice, recovery tokens are deleted nightly by a cron job.

An email is then sent containing a “reset password” link embedded with the token. AWS SES and PHPMailer is used to send that message.

function forgotPw(){
	$email = $this->email;
	$row = $this->row;
	$number_of_rows = $this->number_of_rows;
	$conn = $this->connection;
	if($number_of_rows > 0){
		$this->emailFound = 1;
		$userid = $row['ID'];
		$this->userid = $userid;

		//create reset token
		$timestamp = time();
		$expire_date = time() + 24*60*60;
		$token_key = md5($timestamp.md5($email));
		$statement = $conn->prepare("INSERT INTO `passwordrecovery` (userid, token, expire_date) VALUES (:userid, :token, :expire_date)");
		$statement->bindParam(':userid', $userid);
		$statement->bindParam(':token', $token_key);
		$statement->bindParam(':expire_date', $expire_date);
		$statement->execute();

		//send email via amazon ses
		include 'send-email-service.php';	
		$SendEmailService = new SendEmailService();

		$reset_url = 'https://www.bjjtracker.com/reset-pw.php?token='.$token_key;
	        $subject = 'Reset your password.';
	        $body    = 'Click here to reset your password: <a href="'.$reset_url.'">'. $reset_url .'</a>';
	        $altBody = 'Click here to reset your password: ' . $reset_url;
	        $this->status = $SendEmailService -> sendEmail($subject, $body, $altBody, $email);


	}else{
		$this->emailFound = 0;
	}
}

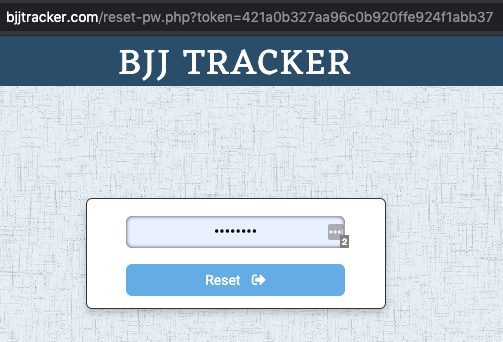
That link navigates to a page with a “reset password” form.

reset password form

Upon submission the new password and embedded token are passed along to the server.

$(document).ready(function() {
    $(".reset-button").click(function(){
      var newPassword = $(".password-reset-input").val();
      if(newPassword.length < 1){
        var notifications = new UINotifications();
        notifications.showStatusMessage("Please don't leave that blank :( ");
        return;
      }
      var data = $(".resetpw-form").serialize();
      $.ajax({
        url: "/service-layer/user-service.php?method=resetPw&token=<?php echo $_GET['token']; ?>",
        method: "POST",
        data: data,
        complete: function(response){
          // console.log(response);
          window.location = "/";
        }
      });
    });
    $("input").keypress(function(e) {
      if(e.which == 13) {
        e.preventDefault();
          $(".reset-button").click();
      }
  });
  

});

The correct recovery record is selected by using the token value. That provides the user ID of the account that we want to update. The token should be deleted once the database is updated.

function resetPw(){
	$conn = $this->connection;
	$token = $_GET['token'];
	$password = $_POST['password'];
	$passwordHash = password_hash($password, PASSWORD_DEFAULT);
	$statement = $conn->prepare("SELECT * FROM `passwordrecovery` where token = ?");
	$statement->execute(array($token));
	$row = $statement->fetch(PDO::FETCH_ASSOC);
	$userid = $row['userid'];

	$update_statement = $conn->prepare("UPDATE `users` SET password = ? where ID = ?");
	$update_statement->execute(array($passwordHash, $userid));

	$delete_statement = $conn->prepare("DELETE FROM `passwordrecovery` where token = ?");
	$delete_statement->execute(array($token));
}

This is a secure and user-friendly workflow to allow users to reset their passwords.

Sending email from your app using AWS SES

amazon ses

Simple Email Service (SES) from AWS

Email is the best way that we can communicate with our users; still better than SMS or app notifications. An effective messaging strategy can enhance the journey our products offer.

This post is about sending email from the website or app you’re developing. We will use SES to send transactional emails. AWS documentation describes Simple Email Service (SES) as “an email sending and receiving service that provides an easy, cost-effective way for you to send email.” It abstracts away managing a mail server.

Identity verification

When you first get set up, SES will be in sandbox mode. That means you can only send email to verified receivers. To get production access and start sending emails to the public, you will need to verify an email address and a sending domain.

Configuring your domain name

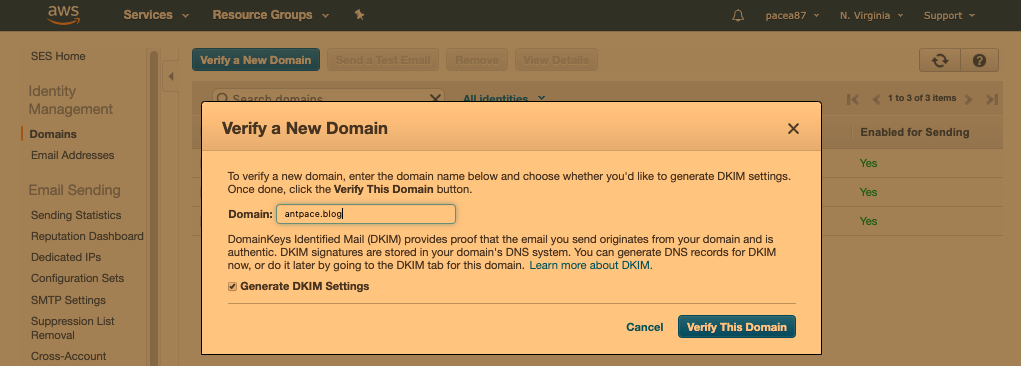
Sending email through SES requires us to verify the domain name that messages will be coming from. We can do this from the “Domains” dashboard.

Verify a new domain name

This will generate a list of record sets that will need to be added to our domain as DNS records. I use Route 53, another Amazon service, to manage my domains – so that’s where I’ll need to enter this info. If this is a new domain that you are working with, you will need to create a “hosted zone”in AWS for it first.

AWS Route 53

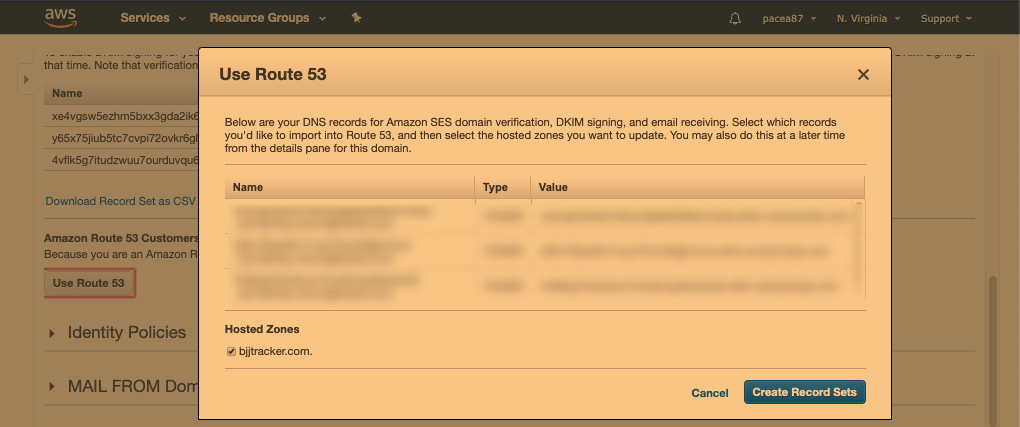
As of this update, Amazon recommends using CNAME DKIM (DomainKeys Identified Mail) records instead of TXT records to authenticate your domain. These signatures enhance the deliverability of your mail with DKIM-compliant email providers. If your domain name is in Route 53, SES will automatically import the CNAME records for you.

warning message about legacy TXT records

Understand deliverability

We want to be confident that intended recipients are actually getting the messages that are sent.  Email service providers, and ISPs, want to prevent being abused by spammers. Following best practices, and understanding deliverability, can ensure that emails won’t be blocked.

Verify any email addresses that you are sending messages from: “To maintain trust between email providers and Amazon SES, Amazon SES needs to ensure that its senders are who they say they are.”

You should use an email address that is at the domain you verified. To host business email, I suggest AWS WorkMail or Google Workspace

verify a new email in AWS

Make sure DKIM has been verified for your domain:  “DomainKeys Identified Mail (DKIM) provides proof that the email you send originates from your domain and is authentic”. If you’re already using Route 53 to manage your DNS records, SES will present an option to automatically create the necessary records.

Route 53 DKIM records

Be reputable. Send high quality emails and make opt-out easy. You don’t want to be marked as spam. Respect sending quotas. If you’re plan on sending bulk email to a list-serve, I suggest using an Email Service Provider such as MailChimp (SES could be used for that too, but is outside the scope of this writing).

Sending email

SES can be used three ways: either by API, the SMTP interface, or the console. Each method lists different ways to authenticate. “To interact with [Amazon SES], you use security credentials to verify who you are and whether you have permission to interact with Amazon SES.” Next, we will use the API credentials – an access key ID and secret access key.

Create an access key pair

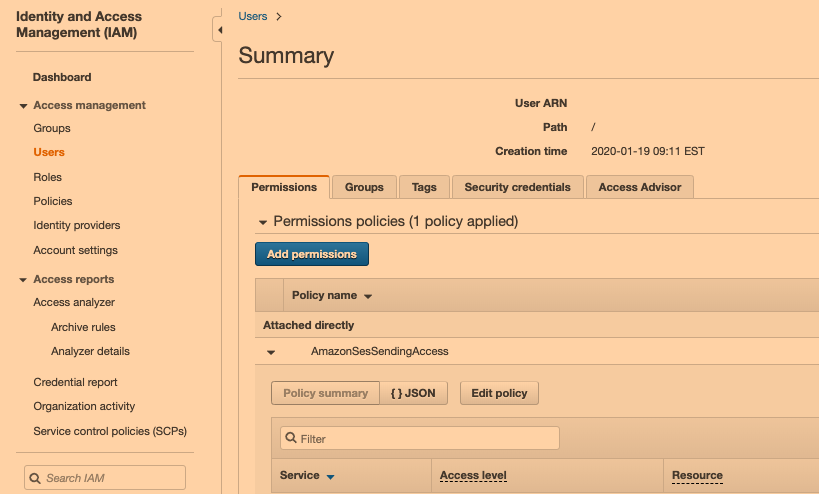
An access key can be created using Identity and Access Management (IAM). You use access keys to sign programmatic requests that you make to AWS.” This requires creating a user, and setting its permissions policies to include “AmazonSESSendingAccess”. We can create an access key in the “security credentials” for this user.

Permission policy for IAM user

Integrating with WordPress

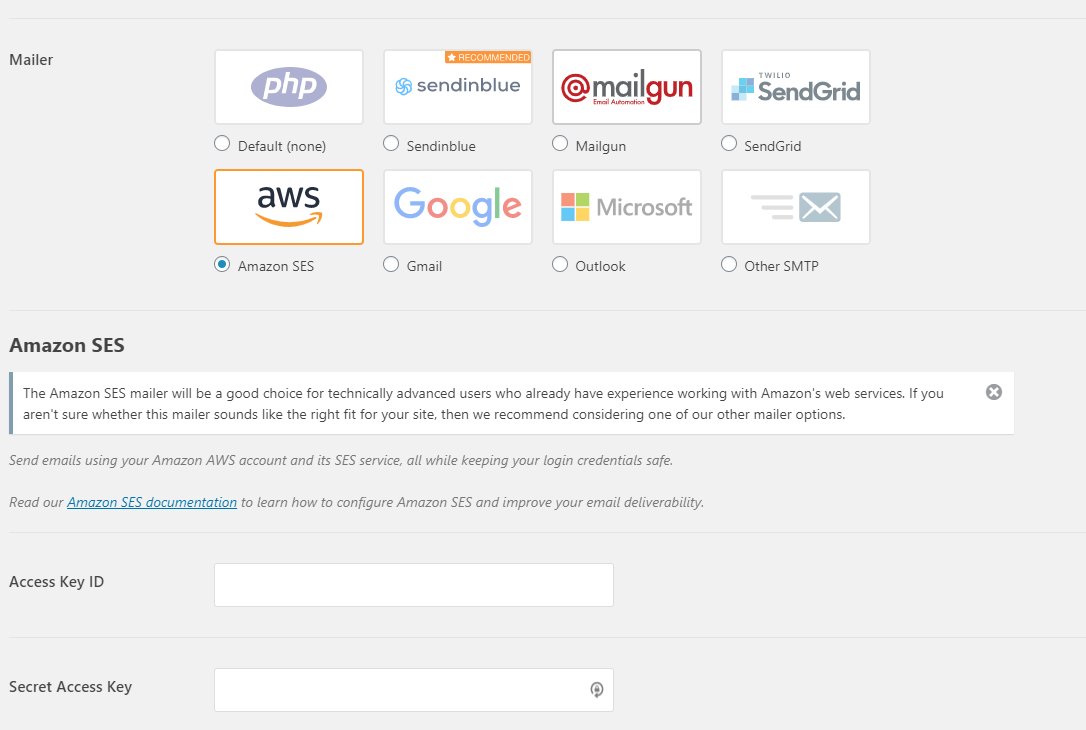
Sending email from WordPress is made easy with plugins. They can be used to easily create forms. Those forms can be wired to use the outbound mail server of our choice using WP Mail SMTP Pro. All we’ll need to do is enter the access key details. If we try to send email without specifying a mail server, forms will default to sending messages directly from the LAMP box hosting the website. That would result in low-to-no deliverability.

Screenshot of WP Mail SMTP Pro

As of this update, the above plugin now only provides the “Amazon SES” option with a premium (not free) monthly subscription. That’s OK, because we can still use Amazon SES through the “Other SMTP” option.

SMTP Username and Password

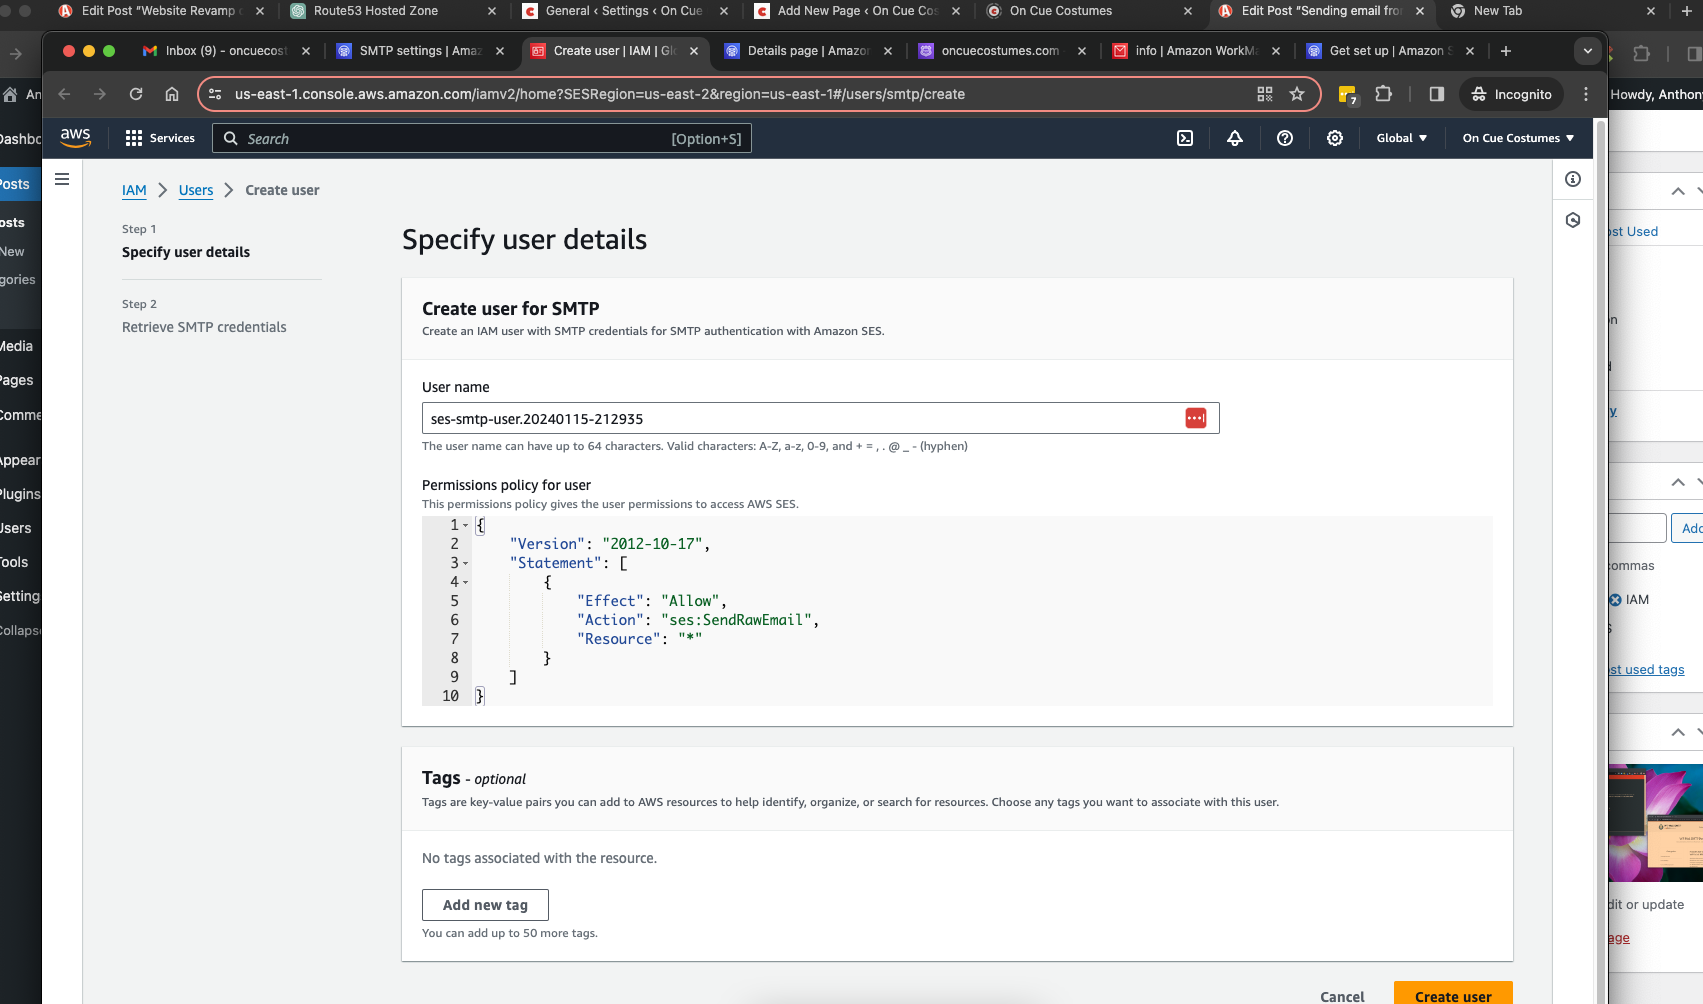
The “Other SMTP” option asks for a username and password. You can create those credentials from Amazon SES by going to “SMTP Settings”. When you click “Create SMTP credentials” you will be redirected to the IAM service to create a user with the details already filled

creating a new IAM user for SMTP

It will give you the SMTP user name (different than the IAM user name) and password on the following screen. After you add these details to the plugin, any emails sent from this WordPress instance will use SES as the mail server. As a use case, I create forms with another plugin called “Contact Form 7”. Any emails sent through these forms will use the above set up.

Integrating with custom code

Although the WordPress option is simple, the necessary plugin has an annual cost. Alternatively, SES can integrate with custom code we’ve written. We can use PHPMailer to abstract away the details of sending email programmatically. Just include the necessary files, configure some variables, and call a send() method.

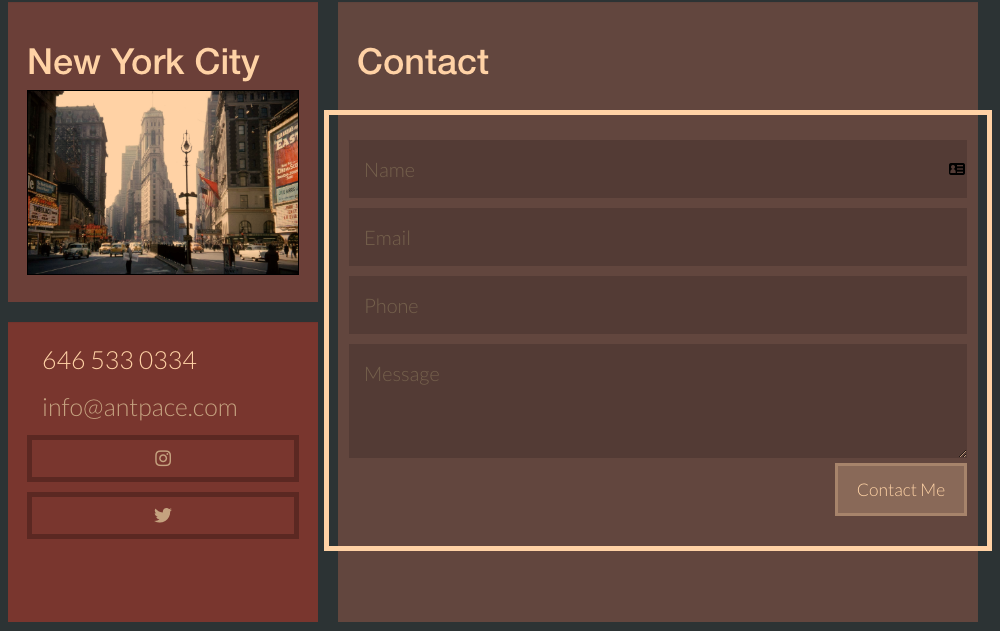
Contact form powered by SES

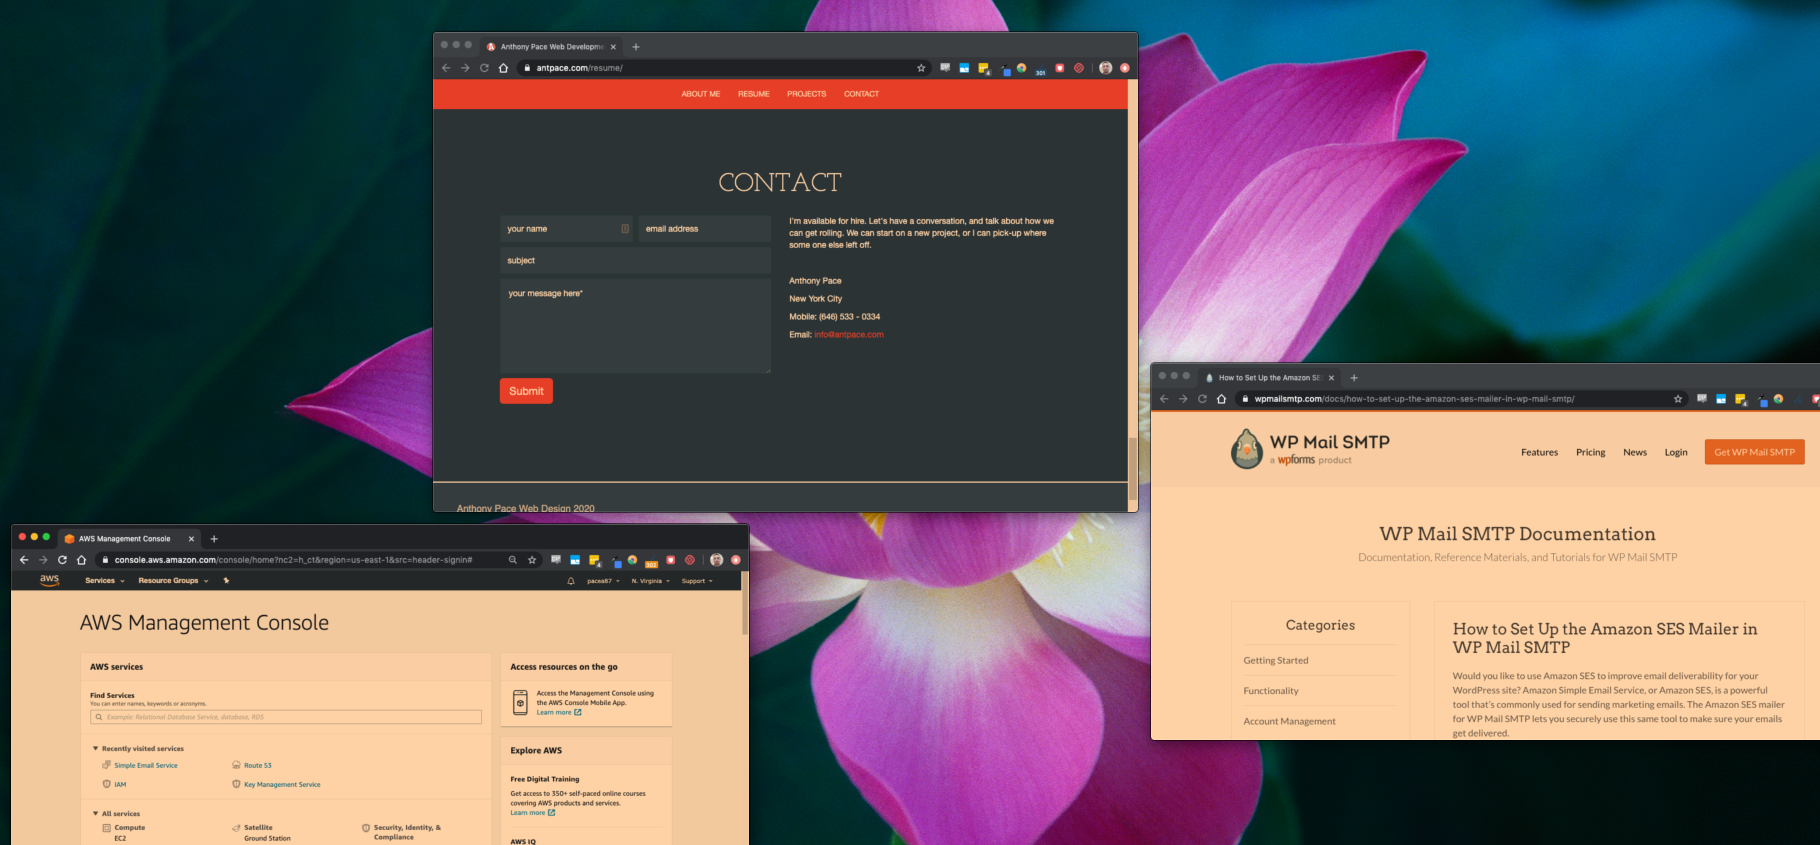
The contact forms on my résumé  and portfolio webpages use this technique. I submit the form data to a PHP file that uses PHPMailer to interact with SES. The front-end uses a UI notification widget to give the user alerts. It’s available on my GitHub, so check it out.

Front-end, client-side:

<form id="contactForm">
    <div class="outer-box">
      
        <input type="text" placeholder="Name" name="name" value="" class="input-block-level bordered-input">
        <input type="email" placeholder="Email" value="" name="email" class="input-block-level bordered-input">
        <input type="text" placeholder="Phone" value="" name="phone" class="input-block-level bordered-input">
       
        <textarea placeholder="Message" rows="3" name="message" id="contactMessage" class="input-block-level bordered-input"></textarea>
        <button type="button" id="contactSubmit" class="btn transparent btn-large pull-right">Contact Me</button>
    </div>
</form>
<link rel="stylesheet" type="text/css" href="/ui-messages/css/ui-notifications.css"> 
<script src="/ui-messages/js/ui-notifications.js"></script>
<script type="text/javascript">
$(function(){
	var notifications = new UINotifications();
	$("#contactSubmit").click(function(){
		var contactMessage = $("#contactMessage").val();
		if(contactMessage < 1){
			notifications.showStatusMessage("Don't leave the message area empty.");
			return;
		}
		var data = $("#contactForm").serialize();
		$.ajax({
			type:"POST",
			data:data,
			url:"assets/contact.php",
			success:function(response){
				console.log(response);
				notifications.showStatusMessage("Thanks for your message. I'll get back to you soon.");
				$("form input, form textarea").val("");					
			}
			
		});
	});
});
</script>

In the PHP file,  we set the username and password as the access key ID and access key secret. Make sure the region variable matches what you’re using in AWS. #TODO: It would be best practice to record the message to a database. (The WordPress plugin from earlier handles that out-of-the-box). We might also send an additional email to the user, letting them know their note was received.

Back-end, server-side:

<?php
//send email via amazon ses
use PHPMailer\PHPMailer\PHPMailer;
use PHPMailer\PHPMailer\Exception;

$name = "";
$email = "";
$phone = "";
$message = "";

if(isset($_POST["name"])){
	$name = $_POST["name"];
}
if(isset($_POST["email"])){
	$email = $_POST["email"];
}
if(isset($_POST["phone"])){
	$phone = $_POST["phone"];
}
if(isset($_POST["message"])){
	$message = $_POST["message"];
}

$region = "us-east-1"
$aws_key_id = "xxx"
$aws_key_secret = "xxx"

require '/var/www/html/PHPMailer/src/Exception.php';
require '/var/www/html/PHPMailer/src/PHPMailer.php';
require '/var/www/html/PHPMailer/src/SMTP.php';
// // Instantiation and passing `true` enables exceptions
$mail = new PHPMailer(true);
try {
	if(strlen($message) > 1){
    //Server settings
	    $mail->SMTPDebug = 2;                                       // Enable verbose debug output
	    $mail->isSMTP();                                            // Set mailer to use SMTP
	    $mail->Host       = 'email-smtp.' . $region . '.amazonaws.com';  // Specify main and backup SMTP servers
	    $mail->SMTPAuth   = true;                                   // Enable SMTP authentication
	    $mail->Username   = $aws_key_id;                     // access key ID
	    $mail->Password   = $aws_key_secret;                               // AWS Key Secret
	    $mail->SMTPSecure = 'tls';                                  // Enable TLS encryption, `ssl` also accepted
	    $mail->Port       = 587;                                    // TCP port to connect to

	    //Recipients
	    $mail->setFrom('XXX@antpace.com', 'Portfolio');
	    $mail->addAddress("XXX@antpace.com");     // Add a recipient
	    $mail->addReplyTo('XXX@antpace.com', 'Portfolio');

	    // Content
	    $mail->isHTML(true);                                  // Set email format to HTML
	  
	    $mail->Subject = 'New message from your portfolio page.';
	    $mail->Body    = "This message was sent from: $name - $email - $phone \n Message: $message";
	    $mail->AltBody = "This message was sent from: $name - $email - $phone \n Message: $message";
	    
	    $mail->send();
	    echo 'Message has been sent';
	}
    
} catch (Exception $e) {
    echo "Message could not be sent. Mailer Error: {$mail->ErrorInfo}";
}

?>

The technical side of sending email from software is straight-forward. The strategy can be fuzzy and requires planning. Transactional emails have an advantage over marketing emails. Since they are triggered by a user’s action, they have more meaning. They have higher open rates, and in that way afford an opportunity.

How can we optimize the usefulness of these emails? Be sure to create a recognizable voice in your communication that resonates your brand. Provide additional useful information, resources, or offers. These kind of emails are an essential part of the user experience and your product’s development.

You can find the code for sending emails this way on my GitHub.