Simple Email Service (SES) from AWS
Email is the best way that we can communicate with our users; still better than SMS or app notifications. An effective messaging strategy can enhance the journey our products offer.
This post is about sending email from the website or app you’re developing. We will use SES to send transactional emails. AWS documentation describes Simple Email Service (SES) as “an email sending and receiving service that provides an easy, cost-effective way for you to send email.” It abstracts away managing a mail server.
Identity verification
When you first get set up, SES will be in sandbox mode. That means you can only send email to verified receivers. To get production access and start sending emails to the public, you will need to verify an email address and a sending domain.
Configuring your domain name
Sending email through SES requires us to verify the domain name that messages will be coming from. We can do this from the “Domains” dashboard.
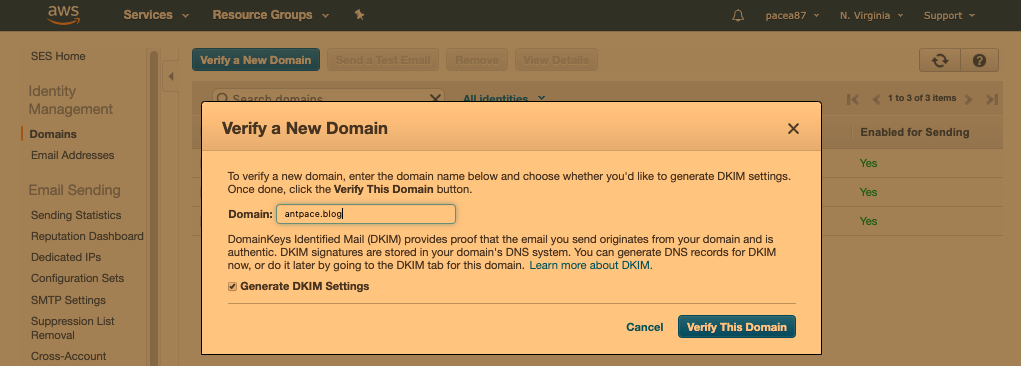
This will generate a list of record sets that will need to be added to our domain as DNS records. I use Route 53, another Amazon service, to manage my domains – so that’s where I’ll need to enter this info. If this is a new domain that you are working with, you will need to create a “hosted zone”in AWS for it first.
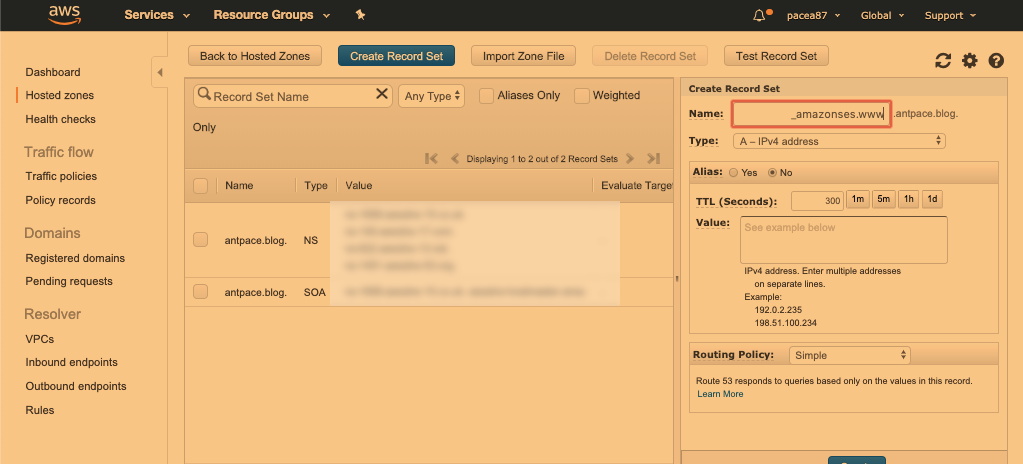
As of this update, Amazon recommends using CNAME DKIM (DomainKeys Identified Mail) records instead of TXT records to authenticate your domain. These signatures enhance the deliverability of your mail with DKIM-compliant email providers. If your domain name is in Route 53, SES will automatically import the CNAME records for you.

Understand deliverability
We want to be confident that intended recipients are actually getting the messages that are sent. Email service providers, and ISPs, want to prevent being abused by spammers. Following best practices, and understanding deliverability, can ensure that emails won’t be blocked.
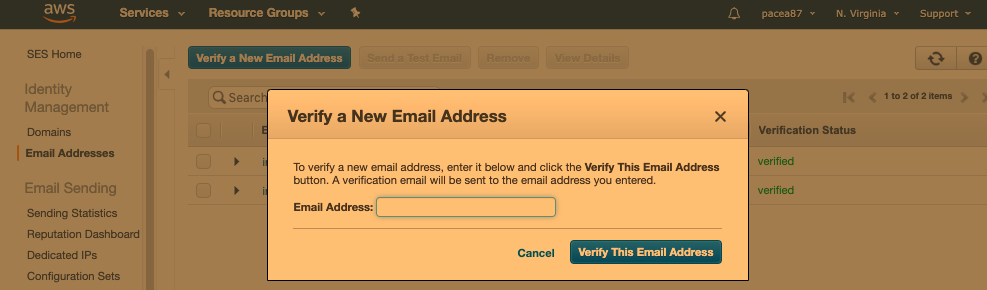
Verify any email addresses that you are sending messages from: “To maintain trust between email providers and Amazon SES, Amazon SES needs to ensure that its senders are who they say they are.”
You should use an email address that is at the domain you verified. To host business email, I suggest AWS WorkMail or Google Workspace
Make sure DKIM has been verified for your domain: “DomainKeys Identified Mail (DKIM) provides proof that the email you send originates from your domain and is authentic”. If you’re already using Route 53 to manage your DNS records, SES will present an option to automatically create the necessary records.

Be reputable. Send high quality emails and make opt-out easy. You don’t want to be marked as spam. Respect sending quotas. If you’re plan on sending bulk email to a list-serve, I suggest using an Email Service Provider such as MailChimp (SES could be used for that too, but is outside the scope of this writing).
Sending email
SES can be used three ways: either by API, the SMTP interface, or the console. Each method lists different ways to authenticate. “To interact with [Amazon SES], you use security credentials to verify who you are and whether you have permission to interact with Amazon SES.” Next, we will use the API credentials – an access key ID and secret access key.
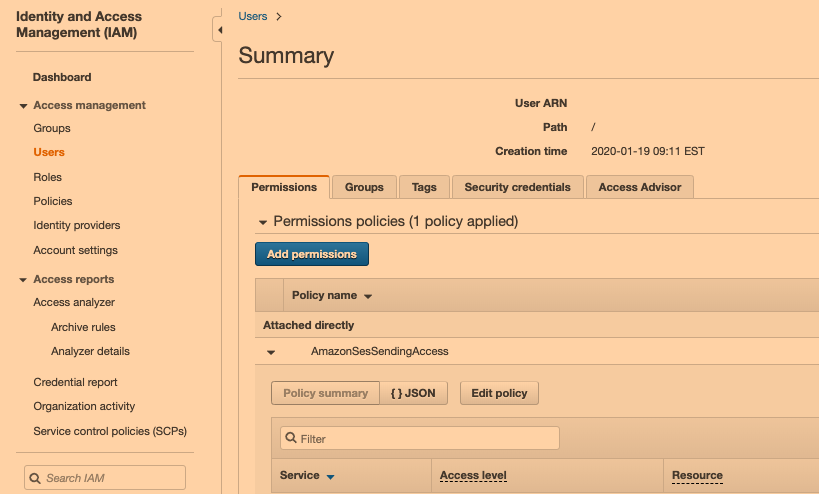
Create an access key pair
An access key can be created using Identity and Access Management (IAM). “You use access keys to sign programmatic requests that you make to AWS.” This requires creating a user, and setting its permissions policies to include “AmazonSESSendingAccess”. We can create an access key in the “security credentials” for this user.
Integrating with WordPress
Sending email from WordPress is made easy with plugins. They can be used to easily create forms. Those forms can be wired to use the outbound mail server of our choice using WP Mail SMTP Pro. All we’ll need to do is enter the access key details. If we try to send email without specifying a mail server, forms will default to sending messages directly from the LAMP box hosting the website. That would result in low-to-no deliverability.
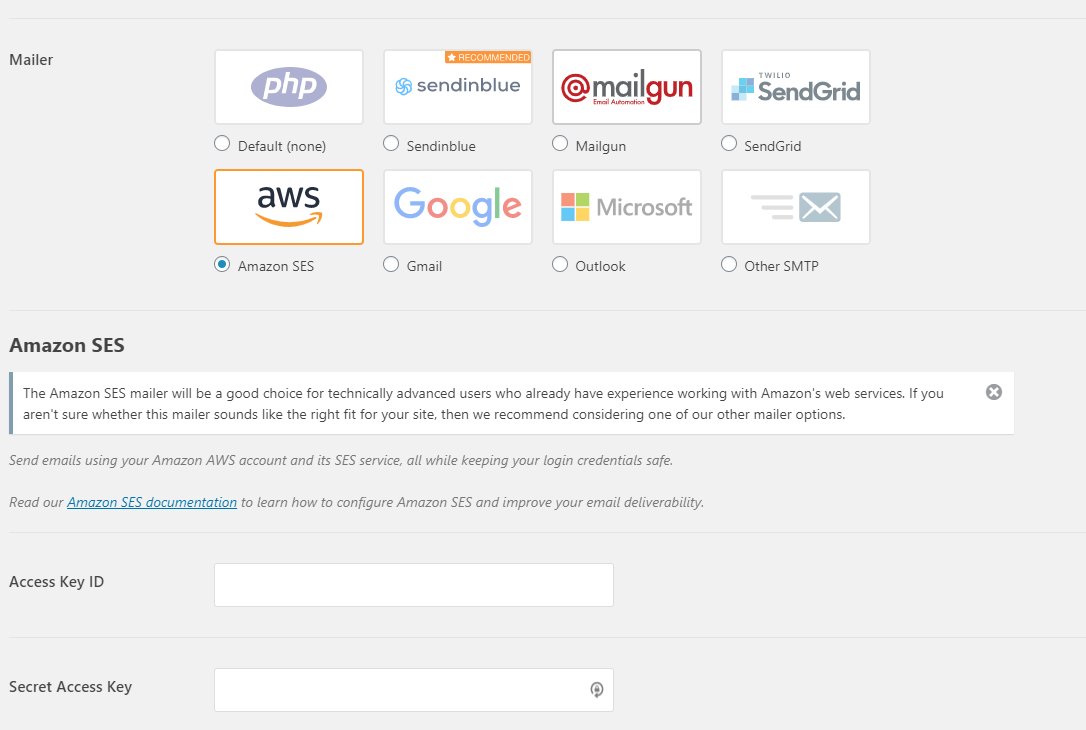
As of this update, the above plugin now only provides the “Amazon SES” option with a premium (not free) monthly subscription. That’s OK, because we can still use Amazon SES through the “Other SMTP” option. You can read about how I used this choice to send emails from a WordPress site’s contact form.
SMTP Username and Password
The “Other SMTP” option asks for a username and password. You can create those credentials from Amazon SES by going to “SMTP Settings”. When you click “Create SMTP credentials” you will be redirected to the IAM service to create a user with the details already filled
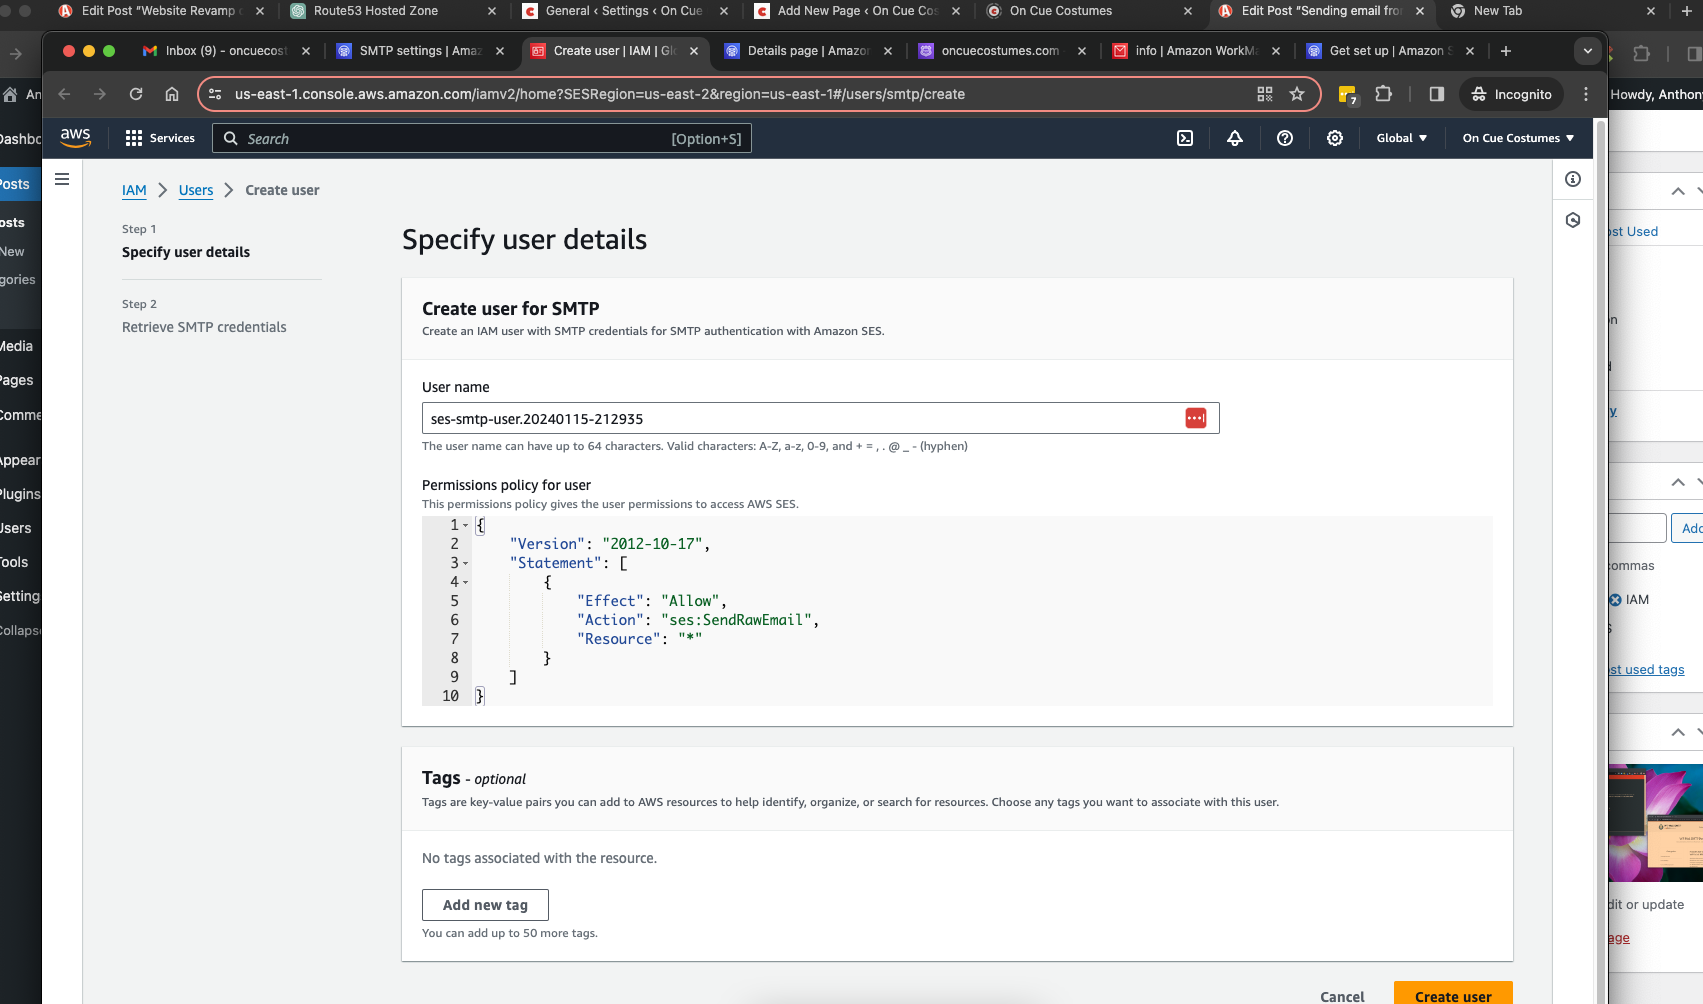
It will give you the SMTP user name (different than the IAM user name) and password on the following screen. After you add these details to the plugin, any emails sent from this WordPress instance will use SES as the mail server. As a use case, I create forms with another plugin called “Contact Form 7”. Any emails sent through these forms will use the above set up.
Integrating with custom code
Although the WordPress option is simple, the necessary plugin has an annual cost. Alternatively, SES can integrate with custom code we’ve written. We can use PHPMailer to abstract away the details of sending email programmatically. Just include the necessary files, configure some variables, and call a send() method.
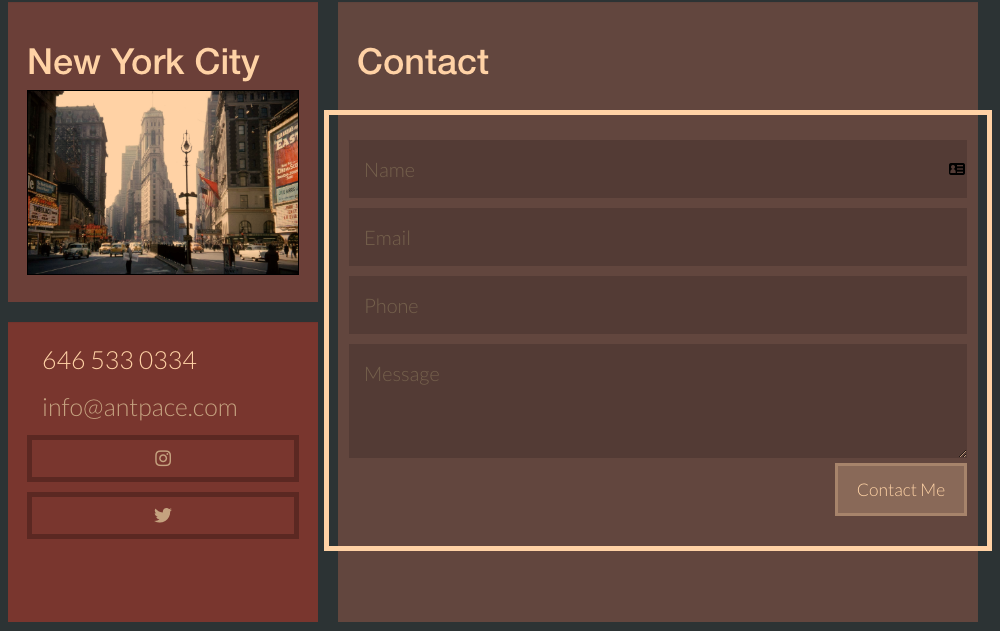
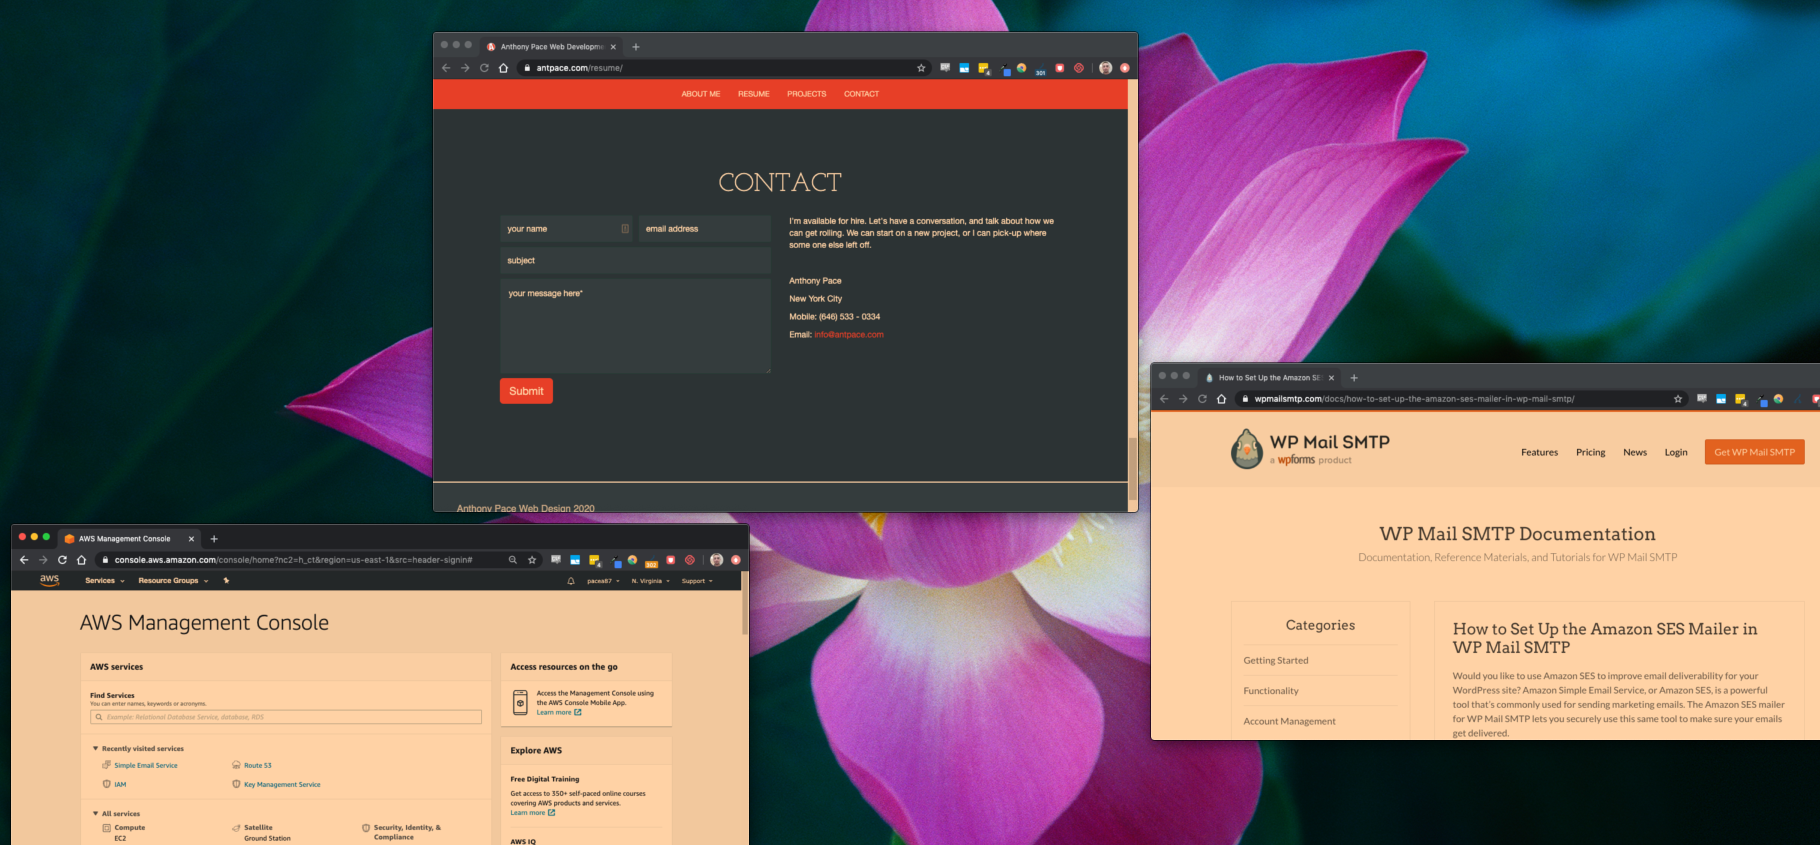
The contact forms on my résumé and portfolio webpages use this technique. I submit the form data to a PHP file that uses PHPMailer to interact with SES. The front-end uses a UI notification widget to give the user alerts. It’s available on my GitHub, so check it out.
Front-end, client-side:
<form id="contactForm">
    <div class="outer-box">

        <input type="text" placeholder="Name" name="name" value="" class="input-block-level bordered-input">
        <input type="email" placeholder="Email" value="" name="email" class="input-block-level bordered-input">
        <input type="text" placeholder="Phone" value="" name="phone" class="input-block-level bordered-input">

        <textarea placeholder="Message" rows="3" name="message" id="contactMessage" class="input-block-level bordered-input"></textarea>
        <button type="button" id="contactSubmit" class="btn transparent btn-large pull-right">Contact Me</button>
    </div>
</form>
<link rel="stylesheet" type="text/css" href="/ui-messages/css/ui-notifications.css">
<script src="/ui-messages/js/ui-notifications.js"></script>
<script type="text/javascript">
$(function(){
	var notifications = new UINotifications();
	$("#contactSubmit").click(function(){
		var contactMessage = $("#contactMessage").val();
		if(contactMessage < 1){
			notifications.showStatusMessage("Don't leave the message area empty.");
			return;
		}
		var data = $("#contactForm").serialize();
		$.ajax({
			type:"POST",
			data:data,
			url:"assets/contact.php",
			success:function(response){
				console.log(response);
				notifications.showStatusMessage("Thanks for your message. I'll get back to you soon.");
				$("form input, form textarea").val("");
			}

		});
	});
});
</script>
In the PHP file, we set the username and password as the access key ID and access key secret. Make sure the region variable matches what you’re using in AWS. #TODO: It would be best practice to record the message to a database. (The WordPress plugin from earlier handles that out-of-the-box). We might also send an additional email to the user, letting them know their note was received.
Back-end, server-side:
<?php
//send email via amazon ses
use PHPMailer\PHPMailer\PHPMailer;
use PHPMailer\PHPMailer\Exception;

$name = "";
$email = "";
$phone = "";
$message = "";

if(isset($_POST["name"])){
	$name = $_POST["name"];
}
if(isset($_POST["email"])){
	$email = $_POST["email"];
}
if(isset($_POST["phone"])){
	$phone = $_POST["phone"];
}
if(isset($_POST["message"])){
	$message = $_POST["message"];
}

$region = "us-east-1"
$aws_key_id = "xxx"
$aws_key_secret = "xxx"

require '/var/www/html/PHPMailer/src/Exception.php';
require '/var/www/html/PHPMailer/src/PHPMailer.php';
require '/var/www/html/PHPMailer/src/SMTP.php';
// // Instantiation and passing `true` enables exceptions
$mail = new PHPMailer(true);
try {
	if(strlen($message) > 1){
    //Server settings
	    $mail->SMTPDebug = 2;                                       // Enable verbose debug output
	    $mail->isSMTP();                                            // Set mailer to use SMTP
	    $mail->Host       = 'email-smtp.' . $region . '.amazonaws.com';  // Specify main and backup SMTP servers
	    $mail->SMTPAuth   = true;                                   // Enable SMTP authentication
	    $mail->Username   = $aws_key_id;                     // access key ID
	    $mail->Password   = $aws_key_secret;                               // AWS Key Secret
	    $mail->SMTPSecure = 'tls';                                  // Enable TLS encryption, `ssl` also accepted
	    $mail->Port       = 587;                                    // TCP port to connect to

	    //Recipients
	    $mail->setFrom('XXX@antpace.com', 'Portfolio');
	    $mail->addAddress("XXX@antpace.com");     // Add a recipient
	    $mail->addReplyTo('XXX@antpace.com', 'Portfolio');

	    // Content
	    $mail->isHTML(true);                                  // Set email format to HTML

	    $mail->Subject = 'New message from your portfolio page.';
	    $mail->Body    = "This message was sent from: $name - $email - $phone \n Message: $message";
	    $mail->AltBody = "This message was sent from: $name - $email - $phone \n Message: $message";

	    $mail->send();
	    echo 'Message has been sent';
	}

} catch (Exception $e) {
    echo "Message could not be sent. Mailer Error: {$mail->ErrorInfo}";
}

?>
The technical side of sending email from software is straight-forward. The strategy can be fuzzy and requires planning. Transactional emails have an advantage over marketing emails. Since they are triggered by a user’s action, they have more meaning. They have higher open rates, and in that way afford an opportunity.
How can we optimize the usefulness of these emails? Be sure to create a recognizable voice in your communication that resonates your brand. Provide additional useful information, resources, or offers. These kind of emails are an essential part of the user experience and your product’s development.
You can find the code for sending emails this way on my GitHub.
Alternative to SES
In a recent project, a client had WordPress set up through AWS lightsail. By default, email sending for WP users’ new accounts and password reseting is not configured out-of-the-box (Unlike using WordPress.com, where it just works). They already were using Google Workspace for their email, so we decided to leverage that instead.
We decided to use ‘app passwords’. We needed to make sure two-factor authentication was set up. This allowed us to generate a password that can be used as the SMTP password.