In a previous article I discussed launching a website on AWS. The project was framed as transferring a static site from another hosting provider. This post will extend that to migrating a dynamic WordPress site with existing content.
Install WordPress
After following the steps to launch your website to a new AWS EC2 instance, you’ll be able to connect via sFTP. I use FileZilla as my client. You’ll need the hostname (public DNS), username (ec2-user in this example), and key file for access. The latest version of WordPress can be downloaded from wordpress.org. Once connected to the server, I copy those files to the root web directory for my setup: /var/www/html
Make sure the wp-config.php file has the correct details (username, password) for your database. You should use the same database name from the previous hosting environment.
Data backup and import
It is crucial to be sure we don’t lose any data. I make a MySql dump of the current database and copy the entire wp-content folder to my local machine. I’m careful to not delete or cancel the old server until I am sure the new one is working identically.
Install phpMyAdmin
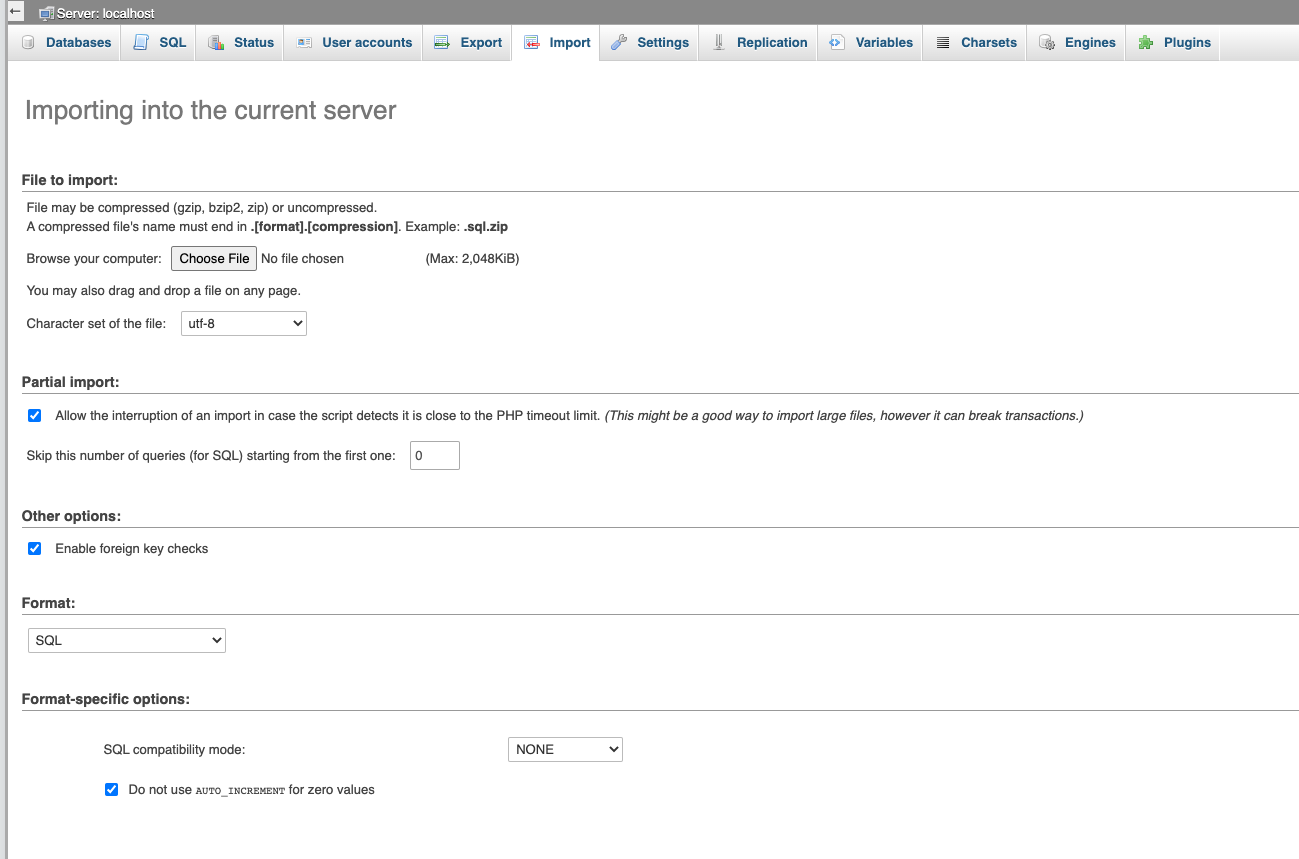
After configuring my EC2 instance, I install phpMyAdmin so that I can easily import the sql file.
sudo yum install php-mbstring -y
sudo systemctl restart httpd
sudo systemctl restart php-fpm
cd /var/www/html
wget https://www.phpmyadmin.net/downloads/phpMyAdmin-latest-all-languages.tar.gz
mkdir phpMyAdmin && tar -xvzf phpMyAdmin-latest-all-languages.tar.gz -C phpMyAdmin --strip-components 1
rm phpMyAdmin-latest-all-languages.tar.gz
sudo systemctl start mariadb
The above Linux commands installs the database management software on the root directory of the new web server. It is accessible from a browser via yourdomainname.com/phpMyAdmin. This tool is used to upload the data to the new environment.

Create the database and make sure the name matches what’s in wp-config.php from the last step. Now you’ll be able to upload your .sql file.
Next, I take the wp-content folder that I stored on my computer, and copy it over to the new remote. At this point, the site homepage will load correctly. You might notice other pages won’t resolve, and will produce a 404 “not found” response. That error has to do with certain Apache settings, and can be fixed by tweaking some options.
Server settings
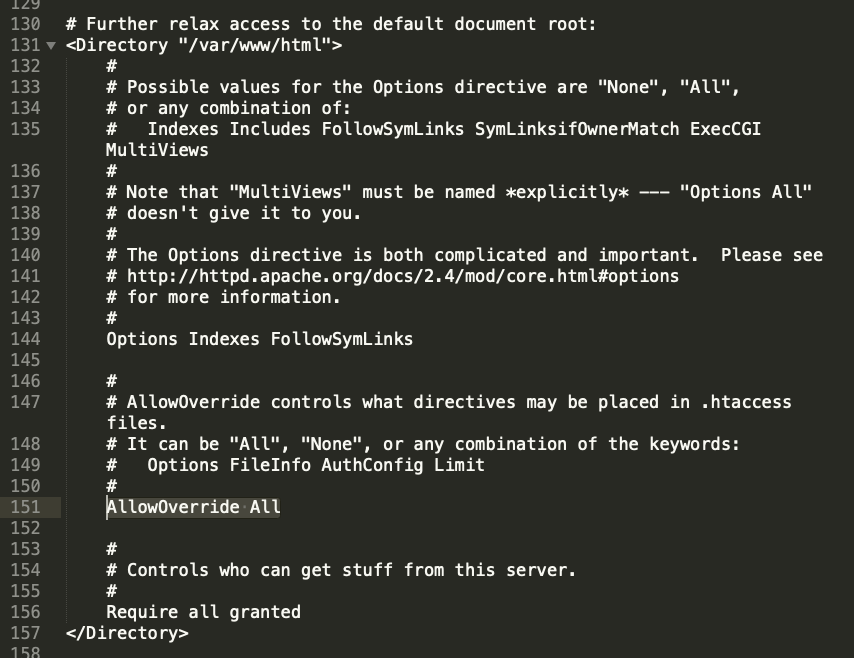
With my setup, I encountered the above issue with page permalinks . WordPress relies on the .htaccess file to route pages/posts with their correct URL slugs. By default, this Apache setup does not allow its settings to be overridden by .htaccess directives. To fix this issue, the httpd.conf file needs to be edited. Mine was located in this directory: /etc/httpd/conf
You’ll need to find (or create) a section that corresponds to the default document root: <Directory “/var/www/html”></Directory>. In that block, they’ll be a AllowOverride command that is set to “None”. That needs to be changed to “All” for our configuration file to work.

Final steps
After all the data and content has been transferred, do some smoke-testing. Try out as many pages and features as you can to make sure the new site is working as it should. Make sure you keep a back-up of everything some place secure (I use an S3 bucket). Once satisfied, you can switch your domain’s A records to point at the new box. Since the old and new servers will appear identical, I add a console.log(“new server”) to the header file. That allows me tell when the DNS update has finally resolved. Afterwards, I can safely cancel/decommission the old web hosting package.
Don’t forget to make sure SSL is setup!
Updates
AWS offers an entire suite of services to help businesses migrate. AWS Application Migration Service is a great choice to “simplify and expedite your migration while reducing costs”.
Upgrade PHP
In 2023, I used this blog post to stand-up a WordPress website. I was using a theme called Balasana. When I would try to set “Site Icon” (favicon) from the “customize” UI I would receive a message stating that “there has been an error cropping your image“. After a few Google searches, and also asking ChatGPT, the answer seemed to be that GD (a graphics library) was either not installed or not working properly. I played with that for almost an hour, but with no success. GD was installed, and so was ImageMagick (a back-up graphics library that WordPress falls back on).
The correct answer was that I needed to upgrade PHP. The AWS Linux 2 image comes with PHP 7.2. Upgrading to version 7.4 did the trick. I was able to make that happen, very painlessly, by following a blog post from Gregg Borodaty . The title of his post is “Amazon Linux 2: Upgrading from PHP 7.2 to PHP 7.4” (thanks Gregg).
Update
My recommendation, as of 2024, is to use a managed WordPress service. I wrote a post about using AWS Lightsail for that purpose: Website Redesign with WordPress Gutenberg via AWS Lightsail
