For a recent side project I was tasked with enhancing an existing HTML table. That table displayed search results. The records were dynamic, populated by an AJAX call after the “search” button was pressed. One of the requests was to let users click on the column headers to sort the table. Each click would organize the data, toggling ascending and descending, based on the column values.
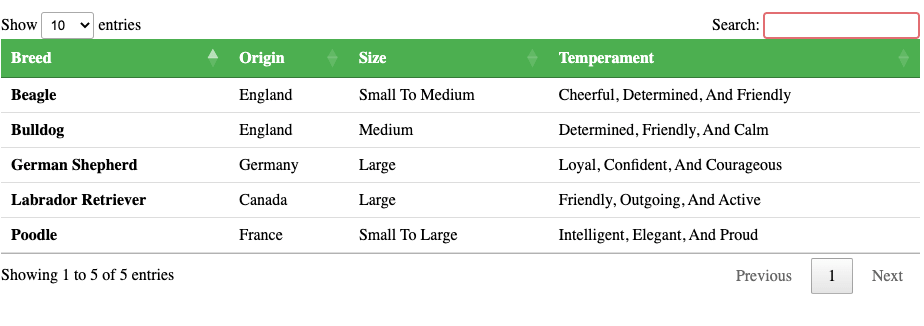
My first idea was to use a front-end library. I love abstractions, and hate reinventing the wheel. I’ve used the DataTables jQuery plug-in before, and thought it might be a good fit. All I had to do was include two CDN file references – one for CSS styles and another for JavaScript functionality. After that, I could select the table by ID and call a single function:
This added quick and easily out-of-the-box functionality, with bells and whistles.
It seemed great, but the extras that it added, such as pagination and front-end search were unnecessary, and actually got in the way of the design specification. Those might be easy enough to clean up by passing options into the method call, or even with a bit of custom CSS, but still seemed like overkill.
Further, the DataTables library would occasionally throw errors about an “incorrect column count”, depending on what results my back-end provided. That was because the data model, and possible front-end actions for this app were more complex that you might think. The HTML wasn’t strictly semantic and the information wasn’t just tabular.
The more I thought about it, the more I felt that plain vanilla JavaScript should be enough to get the job done. And, since we’re living in the future, I decided to ask an AI chat-bot called ChatGPT.
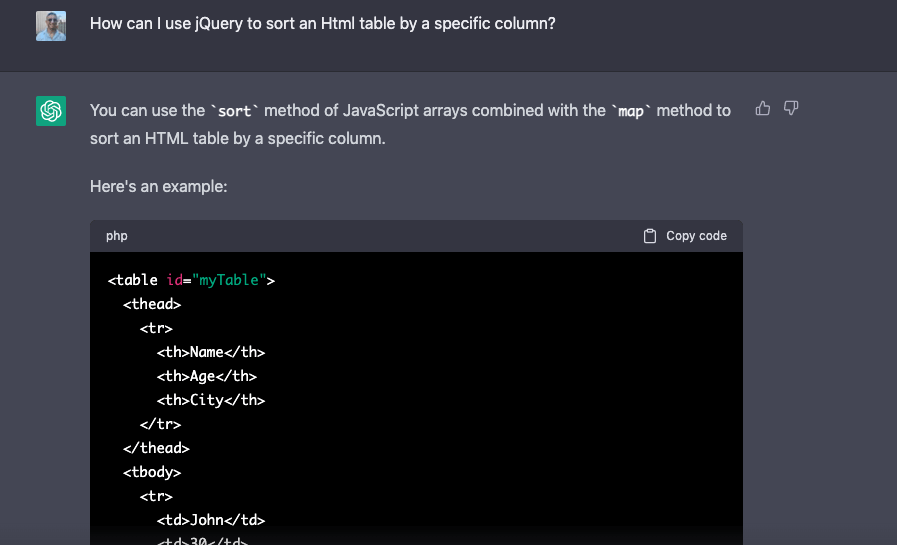
I asked “How can I use jQuery to sort an HTML table by a specific column?”
It told me that “You can use the sort method of JavaScript arrays combined with the map method to sort an HTML table by a specific column,” and gave me a specific code example!
I was very impressed. Here is the JavaScript code it provided:
<script>
$(document).ready(function() {
  var table = $('#myTable tbody tr').get();

  table.sort(function(a, b) {
    var A = $(a).children('td').eq(1).text();
    var B = $(b).children('td').eq(1).text();

    if(A < B) {
      return -1;
    }

    if(A > B) {
      return 1;
    }

    return 0;
  });

  $.each(table, function(index, row) {
    $('#myTable').children('tbody').append(row);
  });
});
</script>
I added this code to a click-handler in my app, after adjusting the element selectors. Although it worked (kind of), it did not operate quite as I expected. It only performed the sort on a single column, and did not alternate the order on each click.
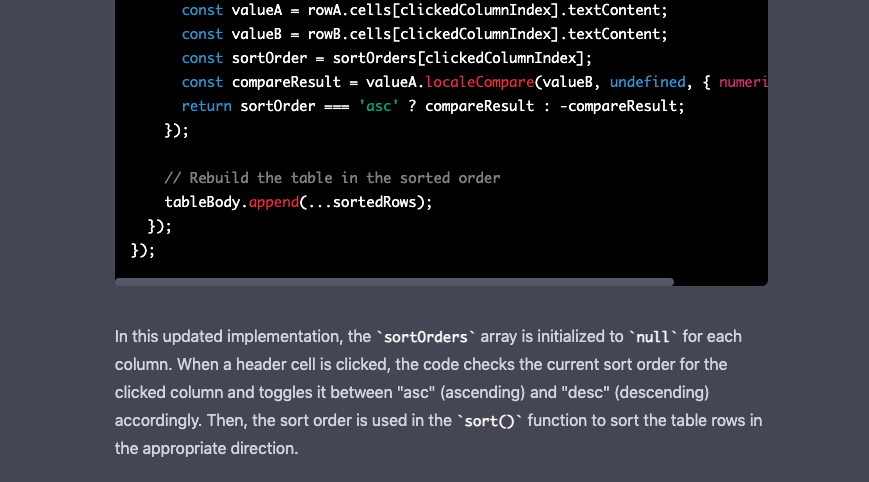
I continued to ask the chat-bot more questions, making refinements to the functionality. I wanted the code to toggle between ascending and descending on each click. Also, I figured it could be nice to avoid jQuery completely and just use basic JS.
Eventually, it told me “To toggle between ascending and descending order when sorting the table, you can keep track of the current sorting order for each column in a separate array”. Below, you can see the full code implementation:
<style>
table {
border-collapse: collapse;
width: 100%;
}
th, td {
text-align: left;
padding: 8px;
border-bottom: 1px solid #ddd;
}
tr:nth-child(even) {
background-color: #f2f2f2;
}
th {
background-color: #4CAF50;
color: white;
cursor: pointer;
}
td:first-child {
font-weight: bold;
}
td:nth-child(3), td:nth-child(4) {
text-transform: capitalize;
}
#search-input {
padding: 8px;
margin-bottom: 12px;
width: 100%;
box-sizing: border-box;
border: 2px solid #ccc;
border-radius: 4px;
font-size: 16px;
}
#search-input:focus {
outline: none;
border-color: #4CAF50;
}
</style>
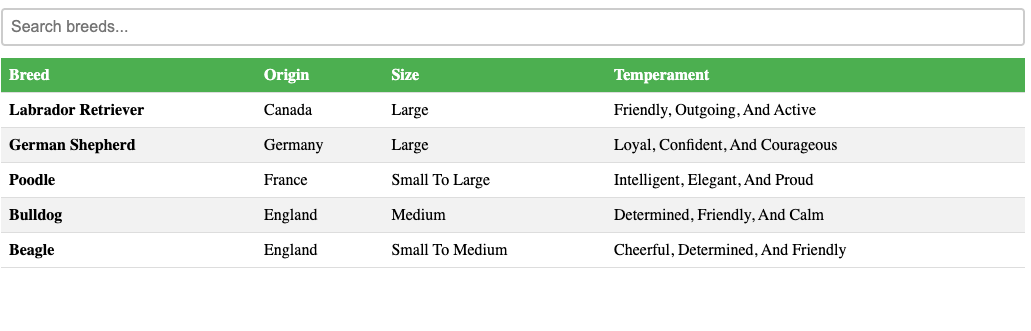
<input type="text" id="search-input" placeholder="Search breeds...">
<button>Search</button>
<table id="dog-table">
<thead>
<tr>
<th>Breed</th>
<th>Origin</th>
<th>Size</th>
<th>Temperament</th>
</tr>
</thead>
<tbody>
<tr>
<td>Labrador Retriever</td>
<td>Canada</td>
<td>Large</td>
<td>Friendly, outgoing, and active</td>
</tr>
<tr>
<td>German Shepherd</td>
<td>Germany</td>
<td>Large</td>
<td>Loyal, confident, and courageous</td>
</tr>
<tr>
<td>Poodle</td>
<td>France</td>
<td>Small to Large</td>
<td>Intelligent, elegant, and proud</td>
</tr>
<tr>
<td>Bulldog</td>
<td>England</td>
<td>Medium</td>
<td>Determined, friendly, and calm</td>
</tr>
<tr>
<td>Beagle</td>
<td>England</td>
<td>Small to Medium</td>
<td>Cheerful, determined, and friendly</td>
</tr>
</tbody>
</table>
<script>
// Get the table element
const table = document.querySelector('table');
// Get the header row and its cells
const headerRow = table.querySelector('thead tr');
const headerCells = headerRow.querySelectorAll('th');
// Get the table body and its rows
const tableBody = table.querySelector('tbody');
const tableRows = tableBody.querySelectorAll('tr');
// Initialize sort order for each column
let sortOrders = Array.from(headerCells).map(() => null);
// Attach a click event listener to each header cell
headerCells.forEach((headerCell, index) => {
headerCell.addEventListener('click', () => {
// Extract the column index of the clicked header cell
const clickedColumnIndex = index;
// Toggle the sort order for the clicked column
if (sortOrders[clickedColumnIndex] === 'asc') {
sortOrders[clickedColumnIndex] = 'desc';
} else {
sortOrders[clickedColumnIndex] = 'asc';
}
// Sort the rows based on the values in the clicked column and the sort order
const sortedRows = Array.from(tableRows).sort((rowA, rowB) => {
const valueA = rowA.cells[clickedColumnIndex].textContent;
const valueB = rowB.cells[clickedColumnIndex].textContent;
const sortOrder = sortOrders[clickedColumnIndex];
const compareResult = valueA.localeCompare(valueB, undefined, { numeric: true });
return sortOrder === 'asc' ? compareResult : -compareResult;
});
// Rebuild the table in the sorted order
tableBody.append(...sortedRows);
});
});
</script>
Using predictive language models as a coding assistant is very helpful. I can’t wait to see what other uses we find for this technology, especially as it gets better.
I discovered a bug in a web app that I built a few years ago. It was difficult to debug because it only happened intermittently. As any programmer knows, issues that can’t be reproduced consistently (and locally) present the most pain. Ultimately, it was causing database records to be created in double – but only when certain conditions evaluated true in the app state.
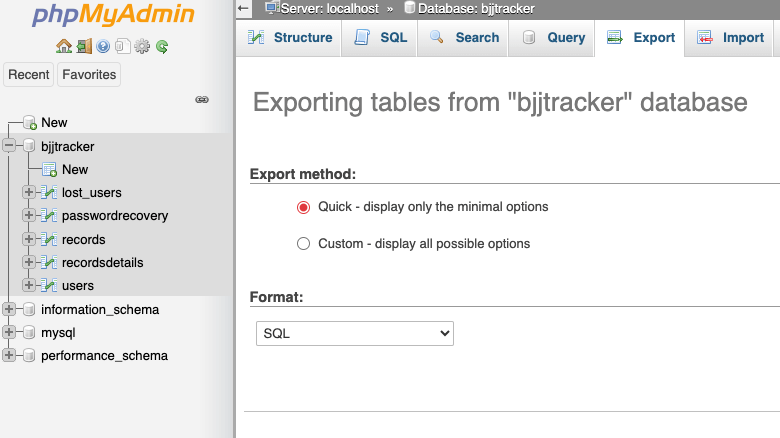
I’ll get into the code fix in another post. Here, I’ll show you how I cleaned up the database. This application has over ten-thousand data records in production. The first thing I did before messing around was to export a back-up of the prod DB. That was only me being extra careful – I already have a nightly job that dumps the entire production database as a .sql file to an S3 bucket. Taking an export on the fly is easy through phpMyAdmin.
Export database from phpMyAdmin
Step one is to identify duplicates and store them in a temporary table, using a GROUP BY clause. In MySQL (and most other SQL-based database systems),GROUP BY is used to group rows from a table based on one or more columns.
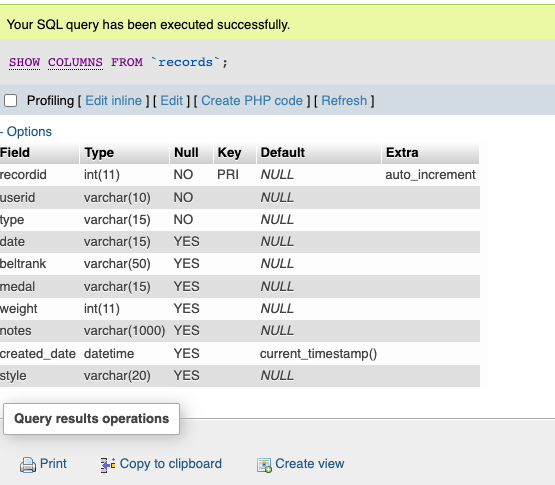
The duplicate rows that I am interested in have all identical values, except for their primary keys. I can group those rows (and put them into a new, temporary, table) by including all of the table columns names (except the primary key) in my SQL statement. You can list those names in phpMyAdmin with this command:
SHOW COLUMNS FROM `records`;
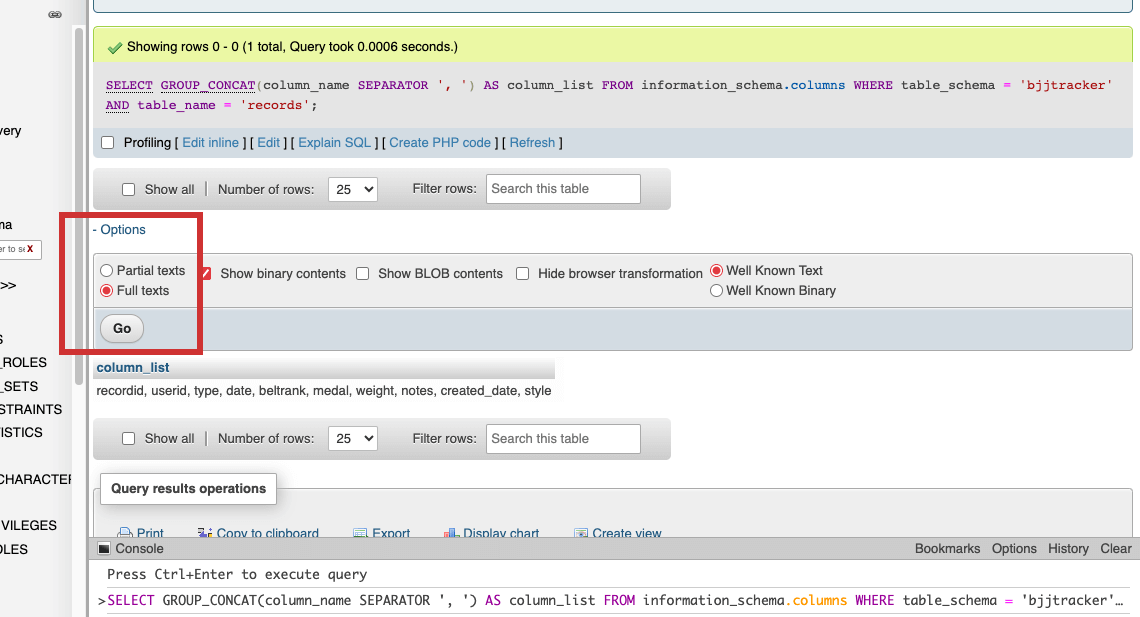
My tables have quite a few columns. Instead of copy/pasting each field name, I used SQL code to list them out together. This was possible by leveraging the INFORMATION_SCHEMA database, a special system database that provides metadata about the database server itself in MySQL. I could retrieve the column names and then concatenate them into a single string using the GROUP_CONCAT function:
SELECT GROUP_CONCAT(column_name SEPARATOR ', ') AS column_list
FROM information_schema.columns
WHERE table_schema = 'bjjtracker'
  AND table_name = 'records';
The result displayed as abbreviated until I selected “Full texts” from the options menu (highlighted below)
I could now copy/paste that column_list into my SQL statement. Remove the primary key field (usually the first one), or else no duplicates will be found (unless your use-case involves records having repeated primary key values, which is a less likely scenario).
CREATE TABLE TempTable AS
SELECT userid, type, date, beltrank, medal, weight, notes, created_date, style -- List all columns except the primary key
FROM `records`
GROUP BY userid, type, date, beltrank, medal, weight, notes, created_date, style -- Group by all columns except the primary key
HAVING COUNT(*) > 1; -- Indicates their is more than one record with exactly matching values
Now we have a new table that contains records that are duplicative in our original table. Step 2 is to delete the duplicates from the original table.
DELETE FROM `records`
WHERE (userid, type, date, beltrank, medal, weight, notes, created_date, style) IN (
    SELECT userid, type, date, beltrank, medal, weight, notes, created_date, style
    FROM TempTable
);
Don’t forget to delete that temporary table before you leave:
DROP TEMPORARY TABLE IF EXISTS TempTable;
Dealing with NULL values
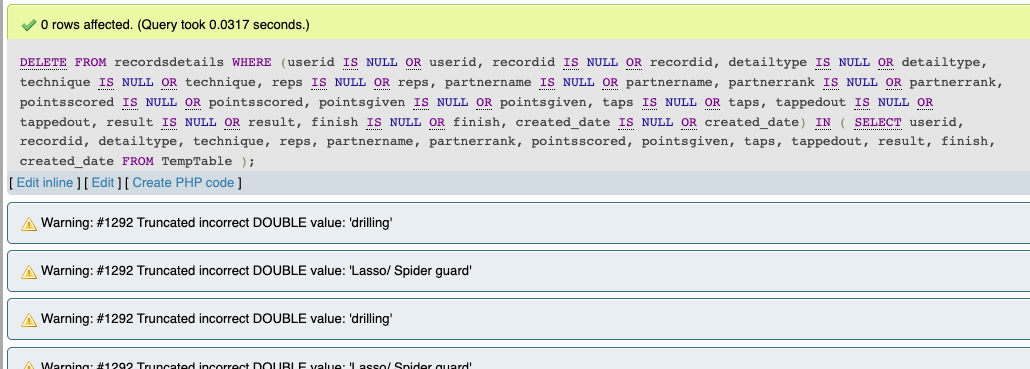
On the first table I used this on, everything worked as expected. On a subsequent run against another table, zero rows were deleted even though my temp table contained duplicate records. I deduced that it was because of NULL values causing the comparison to not work as expected. I figured that I had to handle NULL values explicitly using the IS NULL condition on each field.
DELETE FROM recordsdetails
WHERE
    (userid IS NULL OR userid,
     recordid IS NULL OR recordid,
     detailtype IS NULL OR detailtype,
     technique IS NULL OR technique,
     reps IS NULL OR reps,
     partnername IS NULL OR partnername,
     partnerrank IS NULL OR partnerrank,
     pointsscored IS NULL OR pointsscored,
     pointsgiven IS NULL OR pointsgiven,
     taps IS NULL OR taps,
     tappedout IS NULL OR tappedout,
     result IS NULL OR result,
     finish IS NULL OR finish,
     created_date IS NULL OR created_date)
IN (
    SELECT userid, recordid, detailtype, technique, reps, partnername, partnerrank, pointsscored, pointsgiven, taps, tappedout, result, finish, created_date
    FROM TempTable
);
But yet, I still got zero rows being deleted. This time though, I was seeing a warning. It complained: “Warning: #1292 Truncated incorrect DOUBLE value”
This suggests that there is a data type mismatch or issue in the comparison involving numeric and string values. My guess is that the IS NULL handling was causing type conversion issues. To remedy this, I wrote a more explicit query by combining the AND and OR conditions.
DELETE FROM recordsdetails
WHERE
    (userid IS NULL OR userid IN (SELECT userid FROM TempTable)) AND
    (recordid IS NULL OR recordid IN (SELECT recordid FROM TempTable)) AND
    (detailtype IS NULL OR detailtype IN (SELECT detailtype FROM TempTable)) AND
    (technique IS NULL OR technique IN (SELECT technique FROM TempTable)) AND
    (reps IS NULL OR reps IN (SELECT reps FROM TempTable)) AND
    (partnername IS NULL OR partnername IN (SELECT partnername FROM TempTable)) AND
    (partnerrank IS NULL OR partnerrank IN (SELECT partnerrank FROM TempTable)) AND
    (pointsscored IS NULL OR pointsscored IN (SELECT pointsscored FROM TempTable)) AND
    (pointsgiven IS NULL OR pointsgiven IN (SELECT pointsgiven FROM TempTable)) AND
    (taps IS NULL OR taps IN (SELECT taps FROM TempTable)) AND
    (tappedout IS NULL OR tappedout IN (SELECT tappedout FROM TempTable)) AND
    (result IS NULL OR result IN (SELECT result FROM TempTable)) AND
    (finish IS NULL OR finish IN (SELECT finish FROM TempTable)) AND
    (created_date IS NULL OR created_date IN (SELECT created_date FROM TempTable));
That worked! With a cleaned database, it was time to figure out what was causing the bug in the first place, and to fix the problem.
Clones in quiet dance; Copies of our code converge; Echoes of our souls;
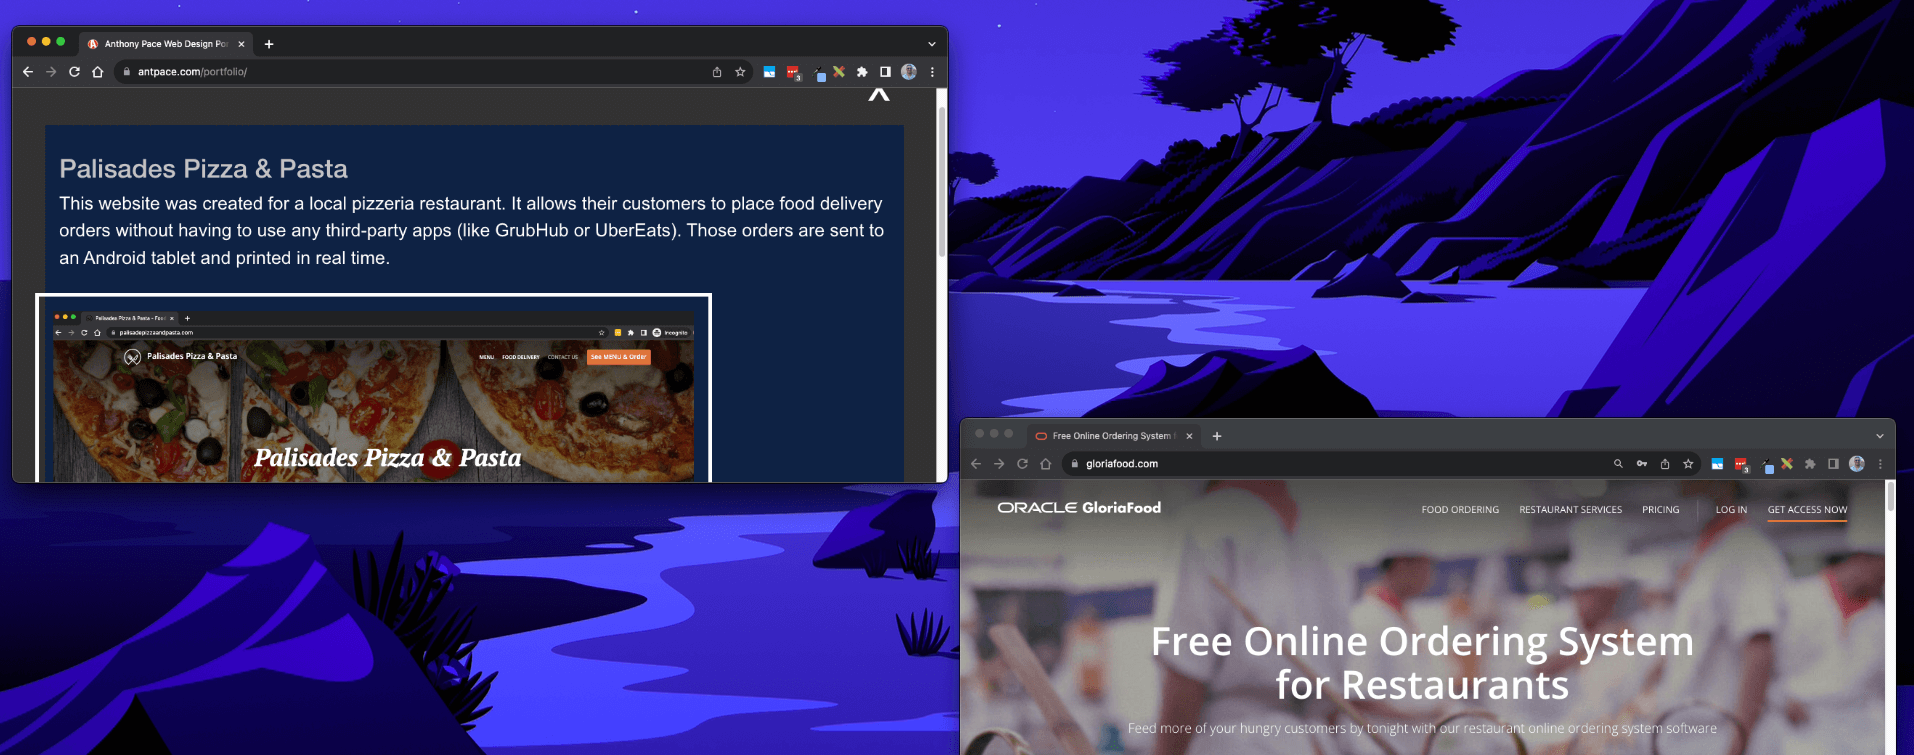
A Digital Transformation Case Study: Boosting Restaurant Sales with Custom Web Development and Online Ordering Integration
Client background & challenge
When I was younger I worked as a pizza delivery driver. Years later, the pizzeria where I once worked commissioned me to build their website. They were busier than ever thanks to online ordering (GrubHub, Seamless, UberEats), but were getting hit with high service fees.
They wanted their own website to be able to take orders for food online and send a notification to their iPad. That way they could avoid using apps like GrubHub that charged additional fees.
Project overview & execution
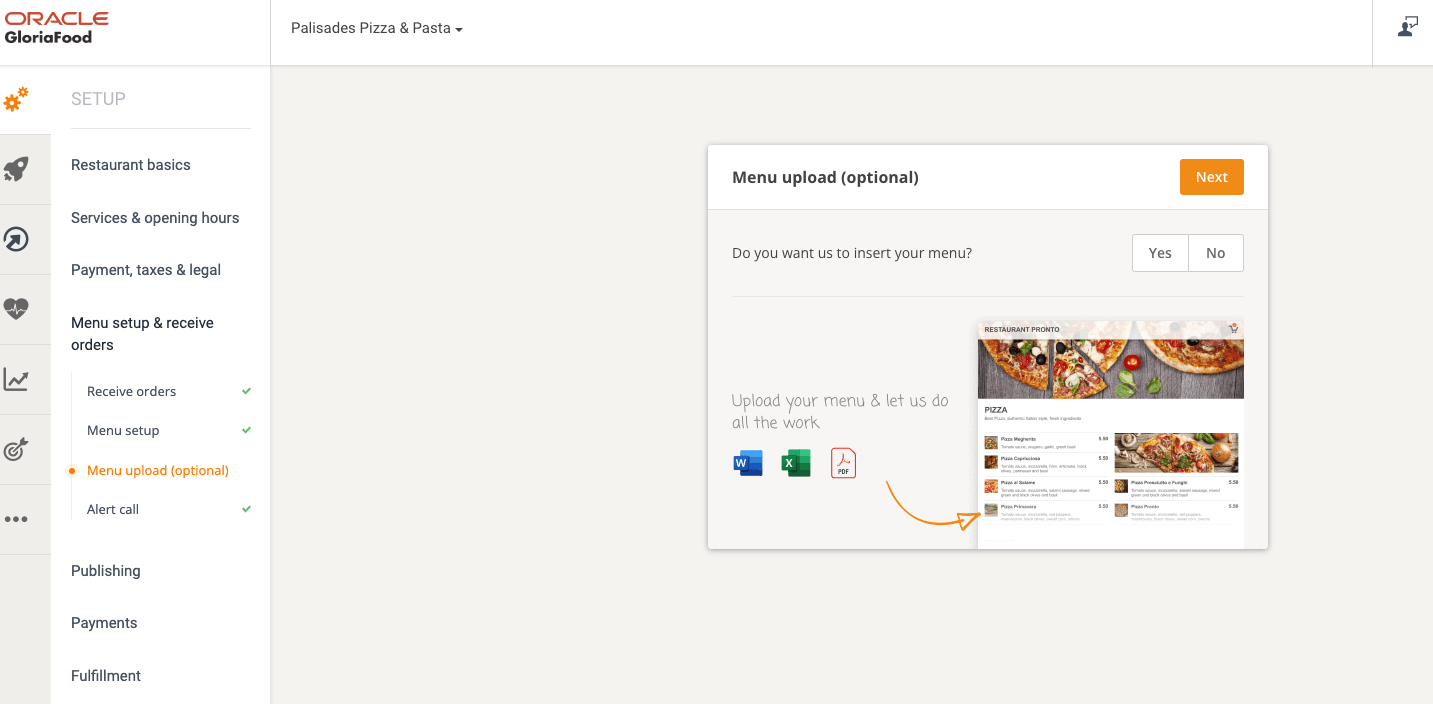
I used a service called GloriaFood that provides ready-made website templates, a secure payment process, and a messaging system. It integrates with Stripe for processing payments. There is an iPad app that receives push notifications when new orders are placed. The website builder required no code, and had a ton of options. I was able to register the pizzeria’s domain name directly though the admin portal, and generate a sales optimized website with hosting all setup. It was “seamless” – pun intended!
There are also options for integrating their ordering UI with an existing website, a Facebook page, or a dine-in QR code. The an option to publish a custom app required an additional cost per month.
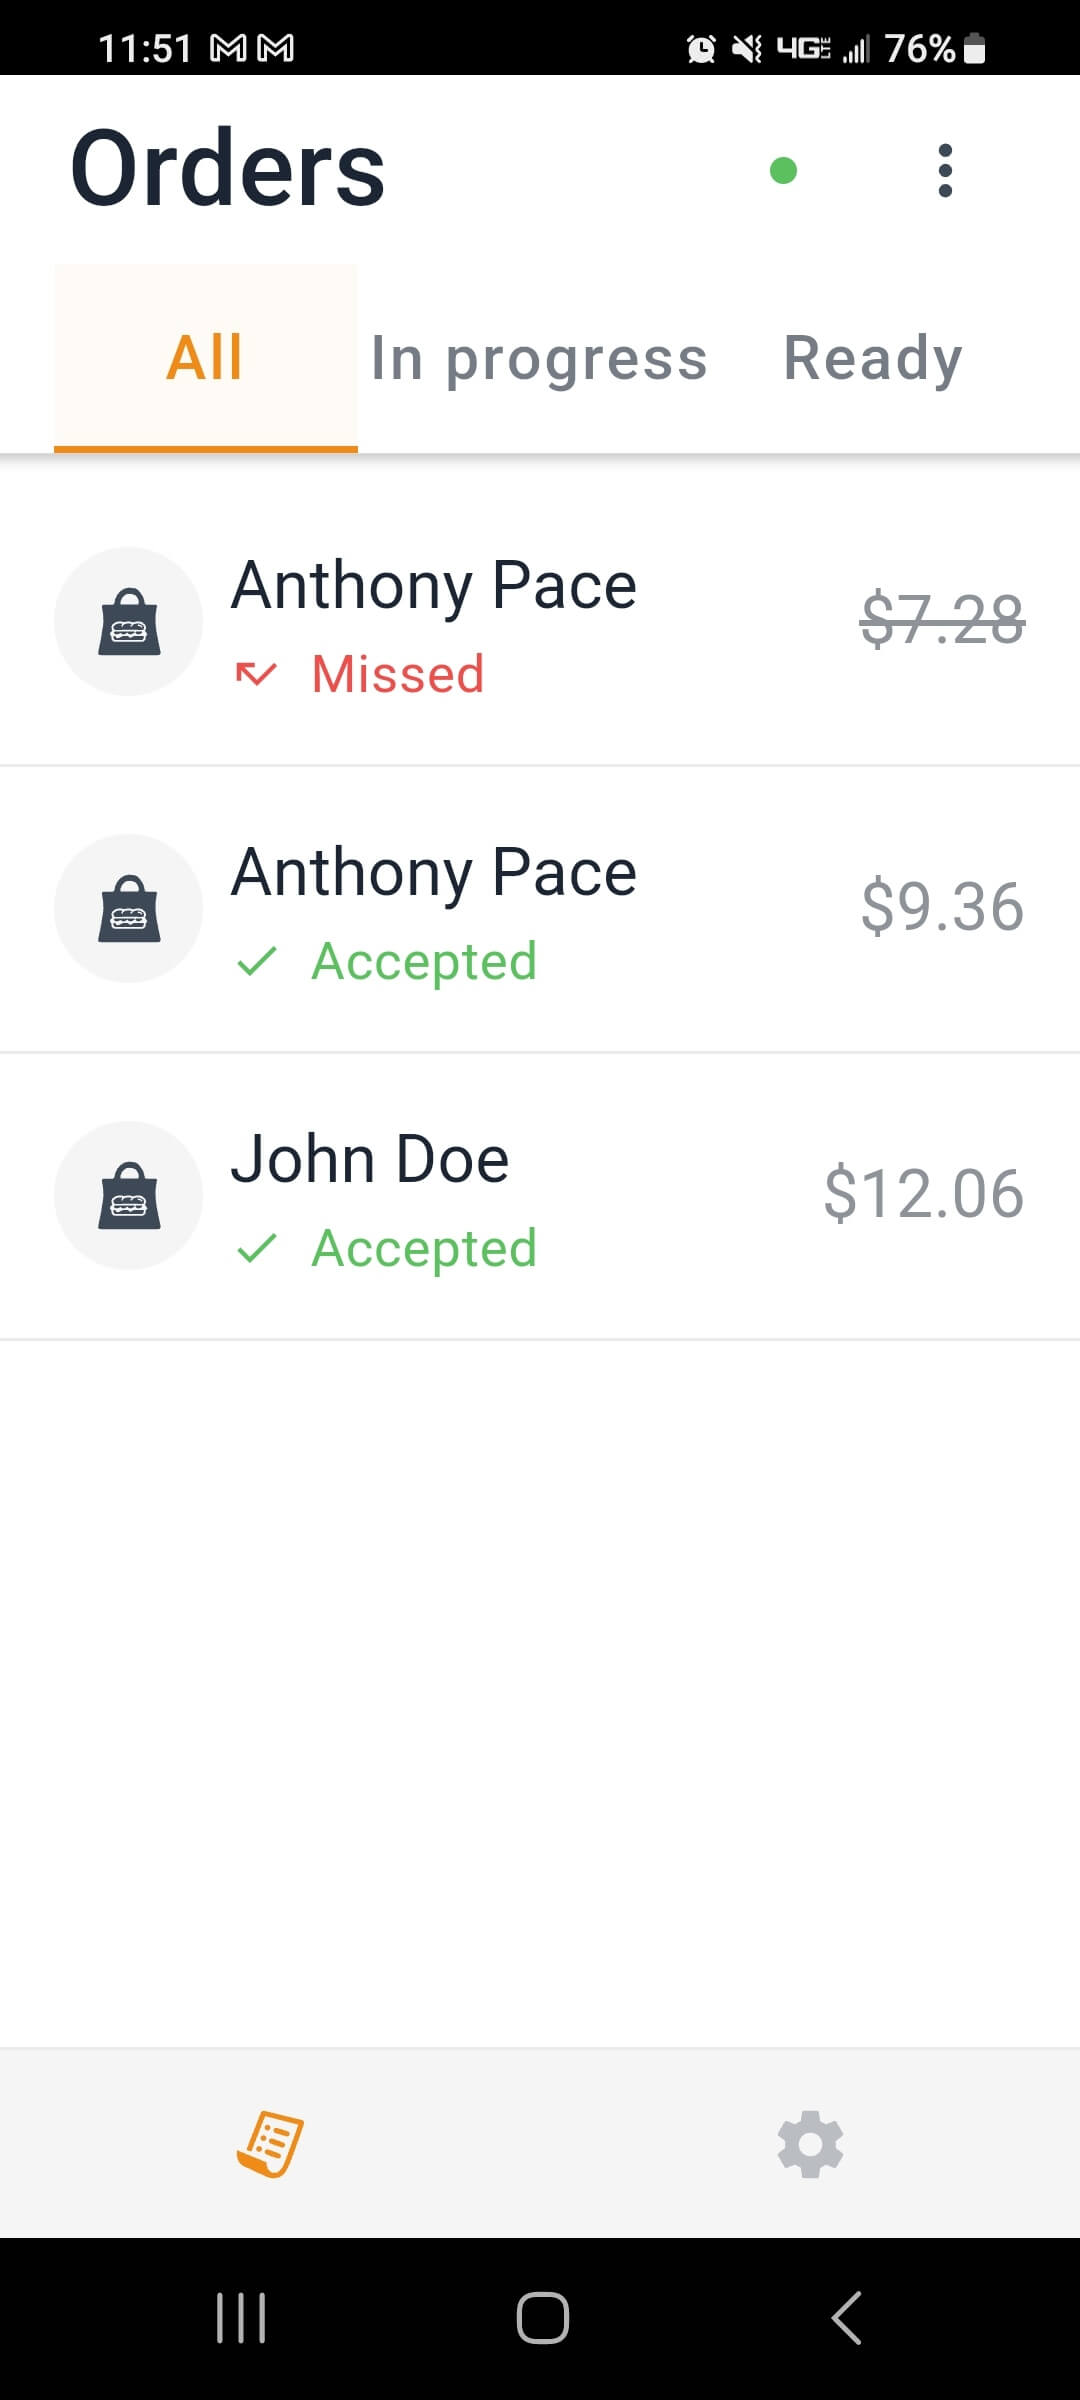
I even traveled to this restaurant’s physical location, selected and purchased a tablet computer for them, installed the GloriaFood app to receive orders, and connected it to their mobile printer.
It’s amazing how much I was able to accomplish without writing a single line of code. The most technical part of this project was setting up a Stripe account and putting the API keys into the GloriaFood admin panel. GloriaFood is a product by Oracle, a company that specializes in providing a wide range of software and hardware products and services.
Print Design
As an extra part of this project, I designed a business card with a QR code linking to the new website. The business owner planned to give this to customers who ordered through other food ordering apps such as GrubHub, Seamless, UberEats, and Slice.
Results
Sales Increase
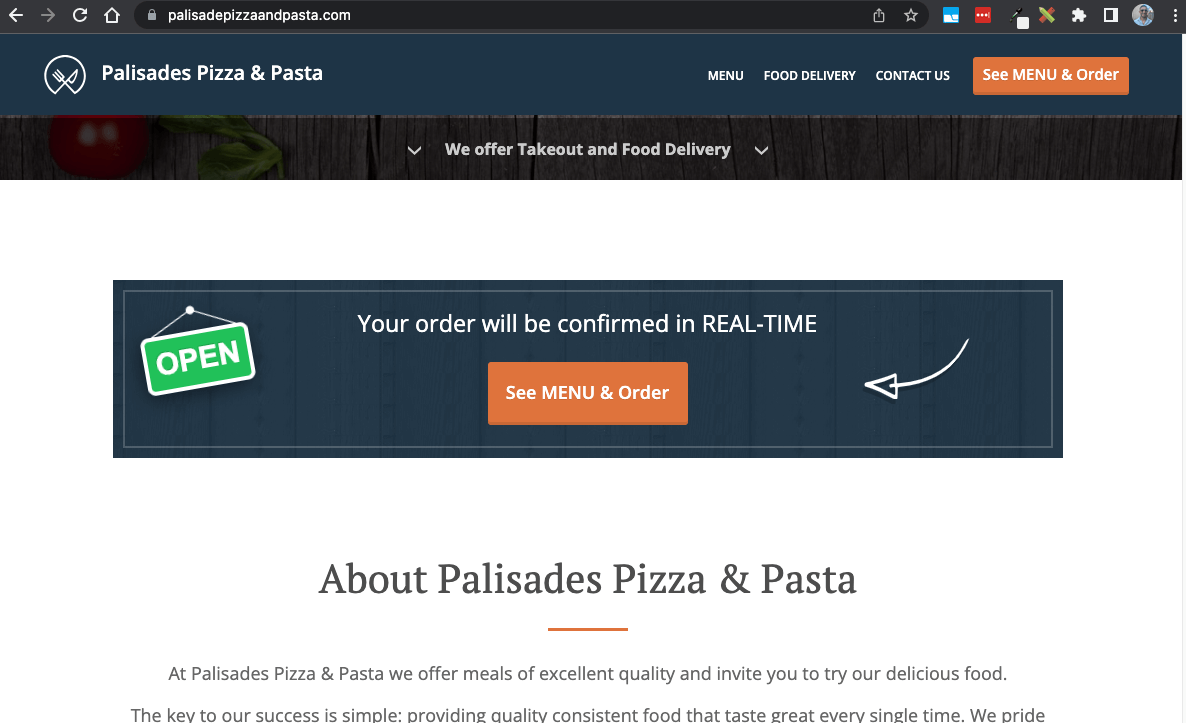
Since the launch of the new website, the restaurant has witnessed a notable surge in online orders, marking a 25% increase. This substantial rise not only signifies a successful digital transformation but also illustrates the growing customer preference for a seamless, direct ordering experience. The intuitive interface and easy navigation on the restaurant’s website have played a strong role in attracting and retaining customers, driving a higher volume of online orders and significantly contributing to the restaurant’s revenue growth.
Cost Savings
Transitioning from third-party ordering platforms like GrubHub, Seamless, and UberEats to a self-hosted online ordering system through has led to big cost savings. Third-party platforms usually charge hefty commissions, which eat into the restaurant’s profits and inflate prices for customers. With the new website, the restaurant has eliminated these intermediary costs, ensuring better profitability while also offering customers more competitive pricing.
Customer Feedback
The feedback received from both the restaurant management and its customers has been overwhelmingly positive. The restaurant staff has praised the streamlined process, which has simplified order management and allowed for a smoother operation during busy hours.
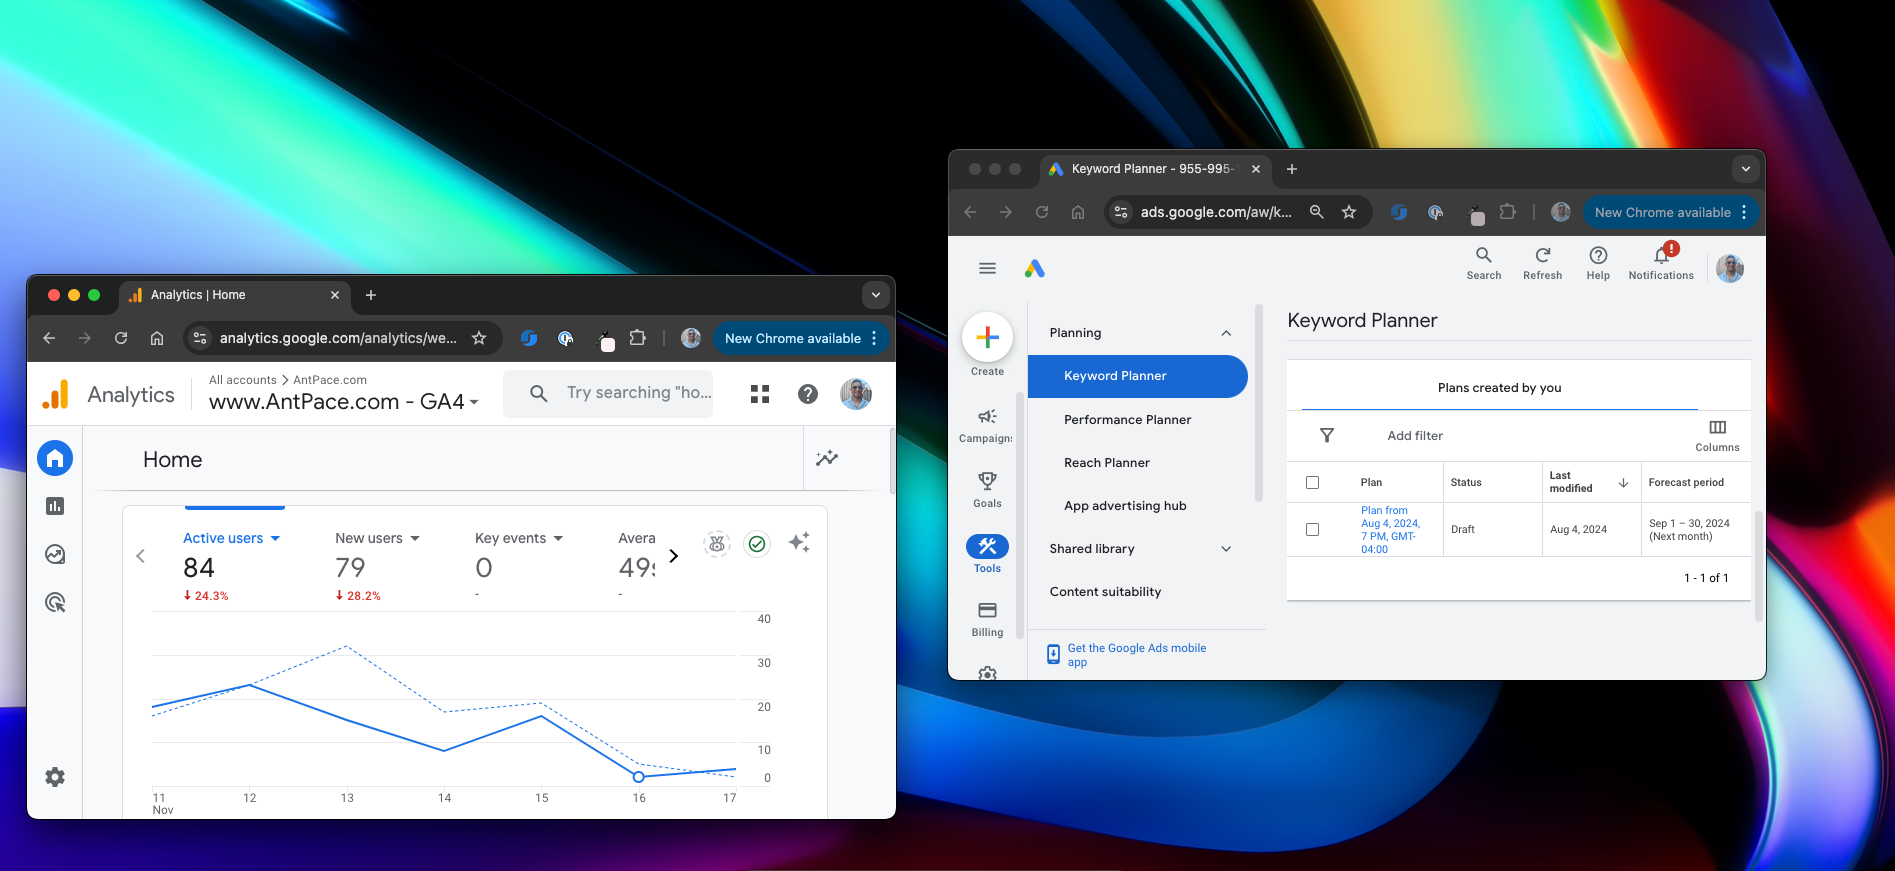
After a client approached me about improving their Google Ads campaign, I could tell they were doing a lot of things right—but they weren’t getting the results they wanted. Their ads were active, their click-through rate was decent, and they were spending about $650 per month. On the surface, everything seemed fine.
But as I dug deeper, I saw an opportunity to transform their campaign from “good enough” into something that could truly drive new clients to their business.
Google Ad Account Audit
The first thing I noticed was that their ads setup was missing some key pieces. For starters, there was no way to measure what happened after someone clicked on an ad. Conversion tracking hadn’t been set up, so there was no way to tell if those clicks led to sign-ups, contact form submissions, or any other meaningful action. It’s like running a sales campaign and never finding out how many people bought something.
Another issue was the structure of the ads themselves. Everything was running through a single ad and ad group, all of which pointed to their homepage. While this kind of setup can work as a starting point, it’s not ideal for targeting specific audiences. Imagine searching for “self-defense classes” and landing on a generic homepage with no mention of self-defense—it’s a missed opportunity to connect with a potential client.
Finally, their campaign wasn’t linked to Google Analytics, which meant there was no insight into what visitors did once they arrived on the site. Did they spend time exploring? Did they leave immediately? Did they look at multiple pages? These questions were left unanswered.
Google Ad Campaign Improvements Plan
After reviewing their campaign, I proposed a complete overhaul. First, I explained the importance of defining what success looks like—what actions do we want people to take when they click on an ad? For this client, it made sense to track things like contact form submissions and clicks to their scheduling platform. By setting up conversion tracking, we could finally measure the real impact of their ad spend.
Next, I suggested restructuring their campaign into three distinct ad groups, each with its own audience and purpose. The first ad group would target people new to their services, highlighting beginner-friendly options. The second would focus on fitness enthusiasts looking for a fun and effective workout. The third would spotlight programs for women, emphasizing empowerment and inclusion.
Each ad group would feature two different ads to test different messages and see what resonated most with each audience. And instead of pointing all traffic to the homepage, I recommended creating dedicated landing pages tailored to the ad group. If someone clicked on an ad for fitness classes, they’d land on a page showcasing the physical and mental benefits of their programs. If they clicked on an ad for women’s classes, they’d be greeted with content specifically designed for that audience.
Finally, I emphasized the need to connect Google Analytics to their campaign. This would give us a clearer picture of how people interacted with the site after clicking on an ad, providing valuable insights for ongoing optimization.
Marketing & Development Implementation
The client loved the plan, and here’s what I did next. I spent a couple of hours implementing these changes, setting up the ad groups, writing the ads, building the landing pages, and integrating analytics and conversion tracking. Once that was done, we were ready to relaunch the campaign with a much stronger foundation. I used the Google Site Kit plugin for WordPress to manage analytics.
I built the landing pages as part of their WordPress website. I drafted the copy for each page, added relevant photos, and applied proven design principles that would guide potential customers through the sales funnel. I used the same copy outline and content layout for each.
Landing Page Content Outline
Hero Section
Headline
Subheadline
CTA Button
Benefits Section
Headline: Why this offer is valuable
Highlight key benefit 1
Highlight key benefit 2
Highlight key benefit 3
What to Expect / Program Details
Headline: Set expectations
Short paragraph explaining details or structure
CTA button
Testimonials
Headline (Social Proof): “What are customers are saying”
Testimonial 1
Testimonial 2
FAQ Section
Headline: Answer common questions
Q1 & Answer
Q2 & Answer
Q3 & Answer
Final CTA Section
Headline (Closing statement)
CTA button
Getting Results with Google Ads
Of course, ads don’t run themselves. The client will need to decide when they want to turn the campaign back on and how much they’re comfortable spending each month. But with these optimizations in place, they’ll be able to make data-driven decisions and see exactly how their investment is paying off.
Every business wants to get the most out of their marketing budget. For this client, that means attracting new customers who are truly interested in their services. By taking the time to set up conversion tracking, target specific audiences, and create tailored landing pages, we’re turning their Google Ads campaign into a powerful tool for growth.
If you’re running Google Ads and feel like you’re not getting the results you should, you’re not alone. With the right strategy and a little bit of work, you can transform your campaign into something that delivers real, measurable value.
Want to learn more about how I can help your business grow? Let’s talk.
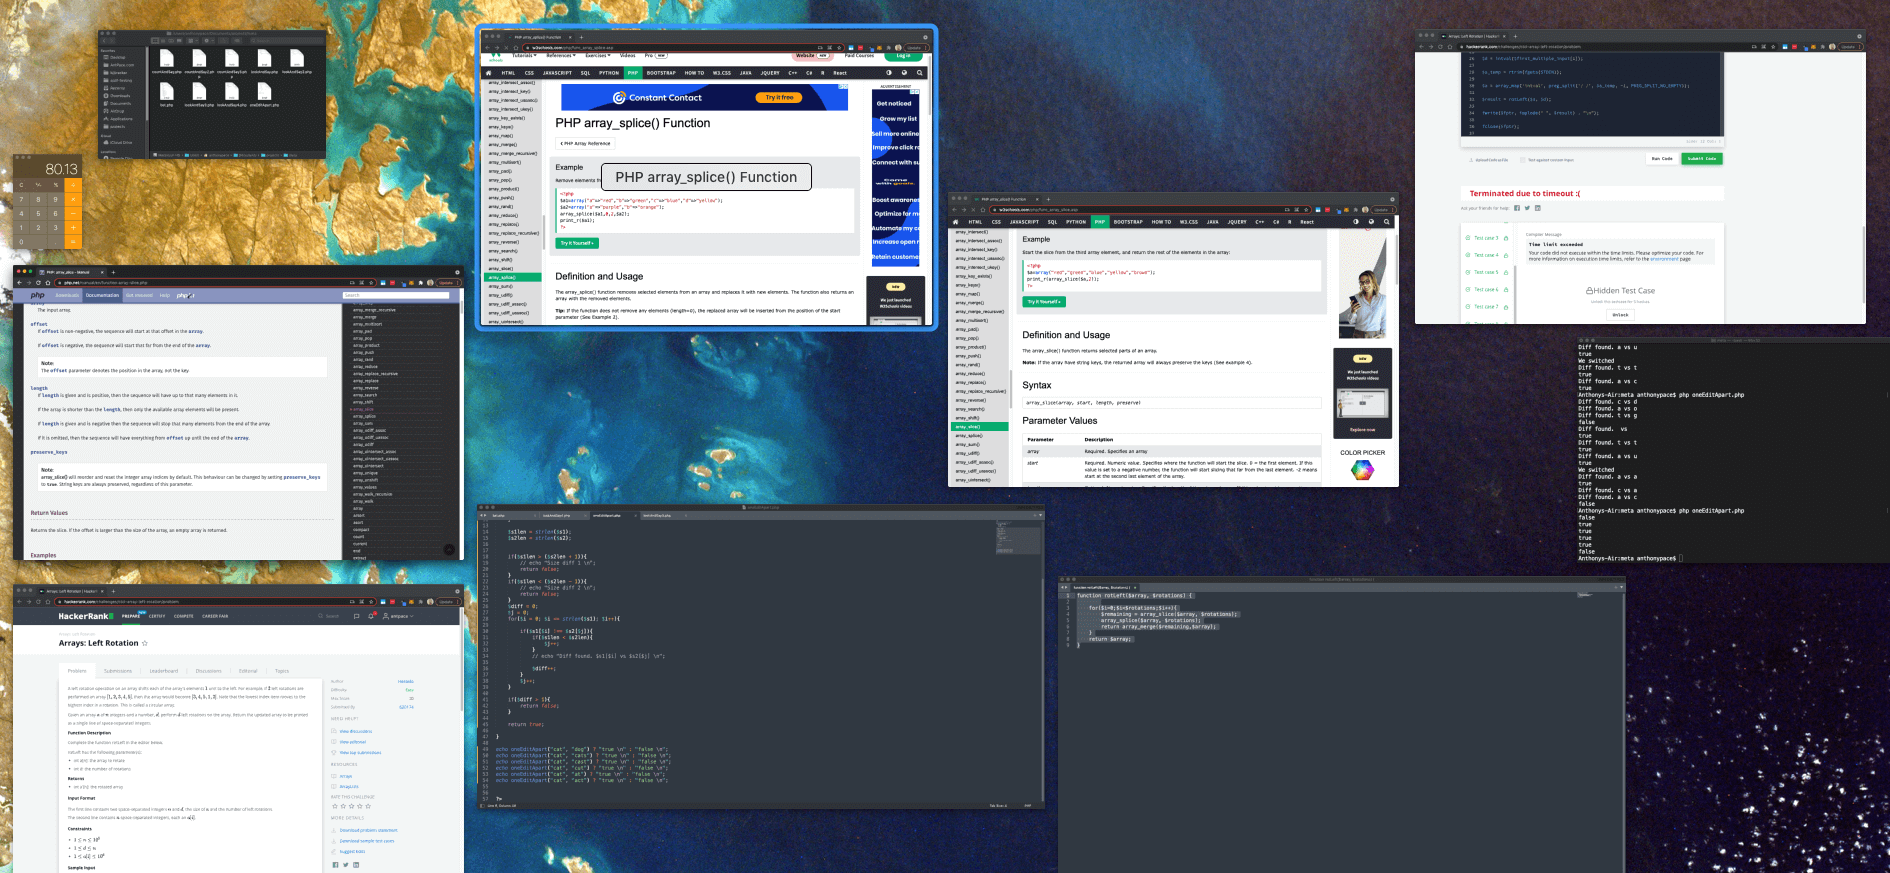
An operation to rotate an array will shift each element to the left. We can perform this function X number of times depending on the input parameters. Since the lowest index element moves to the highest index upon rotation, this is called a circular array.
All we need to do is remove the first element of the array, save it in a variable, and then attach it to the end of the array. This can be done inside of a loop that iterates the number of times that we want to rotate the data. The function can take in the original array and the number of rotations. It returns the newly rotated array:
Although this code will work, and gets the job done, it is slow. When I tried this as a solution on HackRank (a code challenge website) it passed 9/10 test cases. It failed once, citing “time limit exceeded”.
The problem is with array_shift. It’s a PHP function that removes “the first value of an array off and returns it.” This shortens the array by a single element, moving everything else down one index. The algorithmic efficiency (expressed in Big-O notation) of array_shift() is O(n). That means, the larger the input array, the more time it will take to complete.
Next, I tried using array_reverse and array_pop. I figured that since array_pop() has a constant algorithmic efficiency, noted as O(1), it would help. Regardless of the size of the input, it would always take the same amount of time. But, due to the use of array_reverse (twice!) it was even slower:
This code does not need to use any kind of loop, which helps to speed things up. First, array_slice() grabs the elements up to the point that the data should be rotated, and saves them to the variable $remaining. Next, array_splice() removes those same elements. Lastly, array_merge() glues the elements back together in the expected, rotated order.
This sort of computer science programming challenge can commonly be found during software engineering job interviews. When coming up with an answer, it is important to consider speed and performance. Understanding computing cost-effectiveness and Big-O can be a deciding factor in how your coding skills are judged.
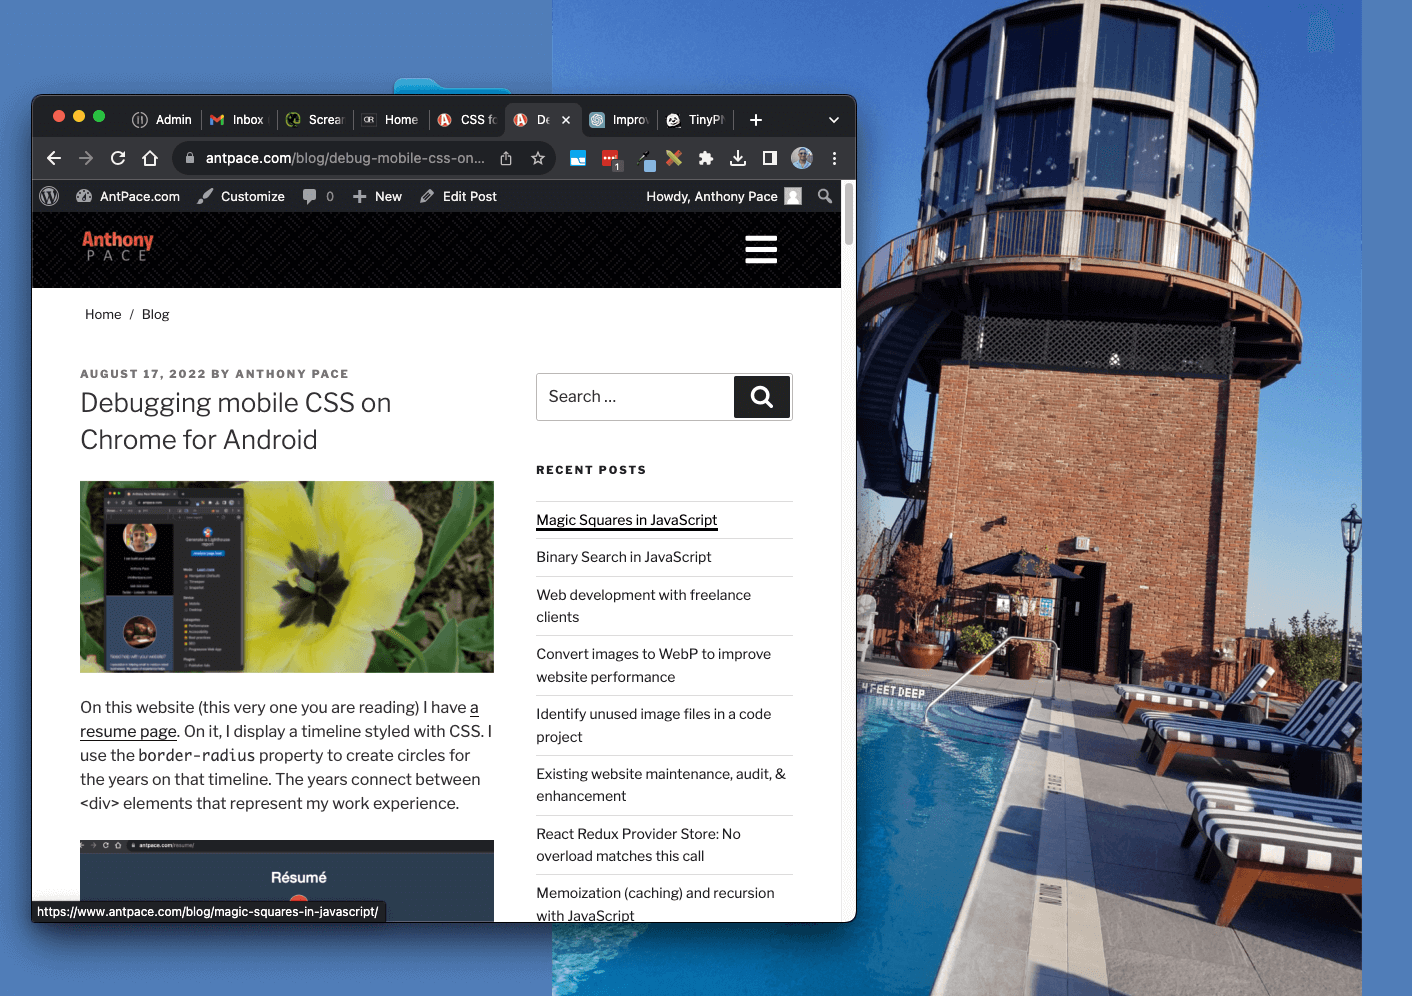
How to add an underline to website text should be covered in any intro to web development course. The old-fashioned HTML way uses a now-deprecated tag:
<u>This will appear underlined!</u>
Modern approaches use CSS to define such a style:
<p style="text-decoration: underline;">This will appear underlined!</p>
Even better, properly written code will separate the inline styles, like so:
But, suppose I want to have that underline to become thicker instead of disappearing. That will require an advanced, super-secret CSS technique. To make it work, we will utilize box-shadow.
In the world of cascading style sheets, the box-shadow property adds a shadow effect around any HTML element. The shadow is described by its offsets, relative to the element. Leveraging this, we can create a shadow that looks like an underline. On hover, we can adjust the settings to change its appearance:
The Great Resignation is an early 2020s buzz phrase. It describes a large portion of the workforce quitting. This Big Quit has been precipitated by numerous factors, but most obviously the CoVid-19 pandemic. Truthfully, the snowball started rolling prior to the worldwide shutdown. Online freelancing and digital nomadism have been picking up steam for nearly a decade. Ubiquitous Wi-Fi, inexpensive devices, and on-demand cloud computing paved the road of the Extraordinary Exodus. The ability to work remotely, I believe, is one of the strongest drivers of this cultural shift.
Employment as we know it is a raw deal. It exploits workers and business owners. Only since the advent of the industrial revolution has the modern work schedule and environment taken this shape.
Employees are tasked to toil in serfdom. The employer is expected to be a parent. Those costs, risks, and responsibilities weigh heavily on executive shoulders. And that gravity ultimately crushes workers as exploitation.
Employer sponsored medicine took hold after World War 2. To fight inflation, the 1942 Stabilization Act was passed. That law prevented employers’ from raising wages. As a work-around to compete for high-demand workers, companies began offering health benefits as a competitive incentive. Nearly a century later, healthcare and employment are intertwined in the bleakest of scenarios.
Now can be the epoch of freedom. It’s the original promise of all the technological advances we now enjoy. Greater prosperity, with fewer shackles to hold us down. That also means businesses can enjoy larger output with less overhead.
When writing this, I was careful not to refer to employers as bosses. Ultimately, they are the clients. Workers should be expected to “manage up”, as they control labor, and in turn, production output and capital income.
What about health insurance?
It’s an absurd burden that businesses are expected to provide employees with healthcare. With that type of expectation, employers feel justified squeezing out every last drop of labor juice – be it sweat or tears.
Even worse, as workers, it’s crazy that access to medicine is tied to employment. Public health should be a public service, paid for by taxes. And, I’m not suggesting that taxes should be raised, but instead reallocated from bureaucratic waste, corruption, and cruelty.
Healthcare is among numerous benefits subsidized and off-loaded to the private sector. It has a taste similar to the Western tipping scheme found in the restaurant service industry.
Freedom
Nine hours in an office each day doesn’t leave time for much else. It was a routine I faced for years, along with many other New York straphangers. A long daily commute was the little time I could find to read, meditate, or relax. My only exercise came from pushing deadlines, jumping through hoops, and squeezing in meetings.
An age of abundance is possible within our lifetime. Laborers are being replaced by technology. Remember, most jobs are bullshit anyway. Humanity can feed itself, and anything more is just pollution.
Freelance
A freelance side hustle is the first step in buying your freedom. Owning, and running, your own remote business comes pretty close to what I imagine as the Digital Dream. When working as a freelance web developer I follow a process to ensure success. I am able to pitch potential clients on improvements, audits, and maintenance agreements.
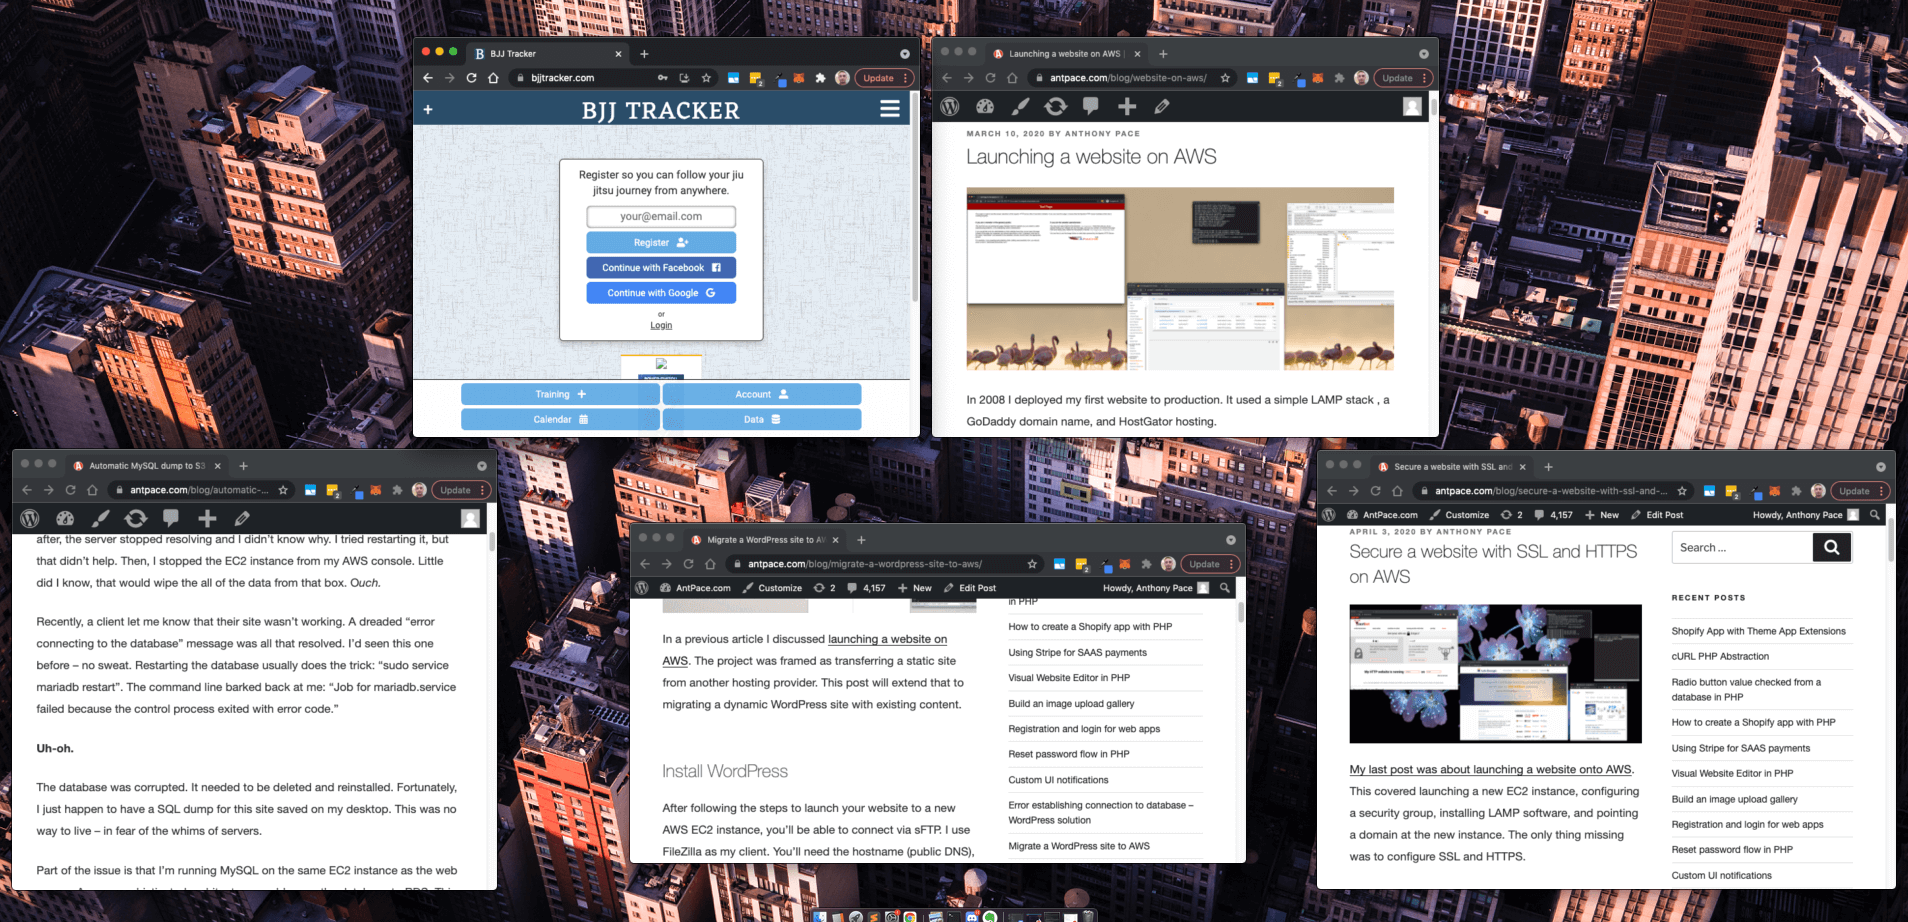
Recently, one of my websites went down. After noticing, I checked my EC2 dashboard and saw the instance stopped. AWS had emailed me to say that due to a physical hardware issue, it was terminated. When an instance is terminated, all of its data is lost. Luckily, all of my data is backed up automatically every night.
Since I don’t use RDS, I have to manually manage data redundancy. After a few disasters, I came up with a solution to handle it. I trigger a nightly cron-job to run a shell script. That script takes a MySQL dump and uploads it to S3.
As long as I have the user generated data, everything else is replaceable. The website that went down is a fitness tracking app. Every day users record their martial arts progress. Below are the ten steps taken to bring everything back up.
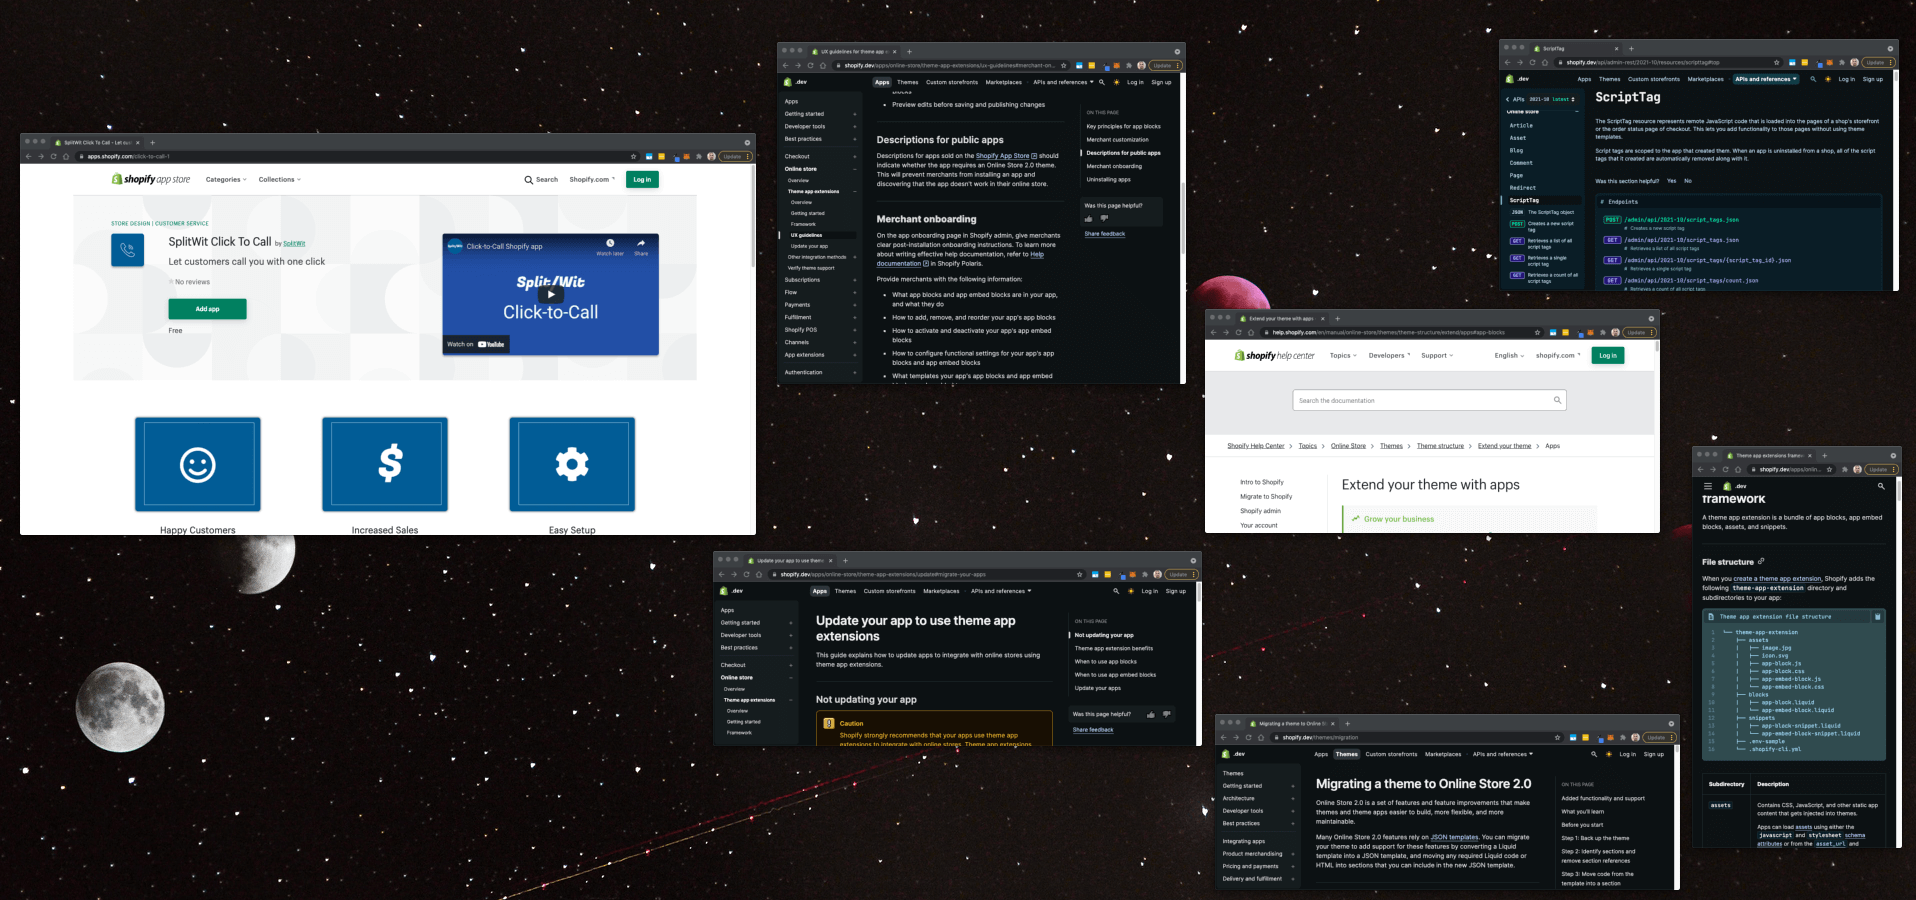
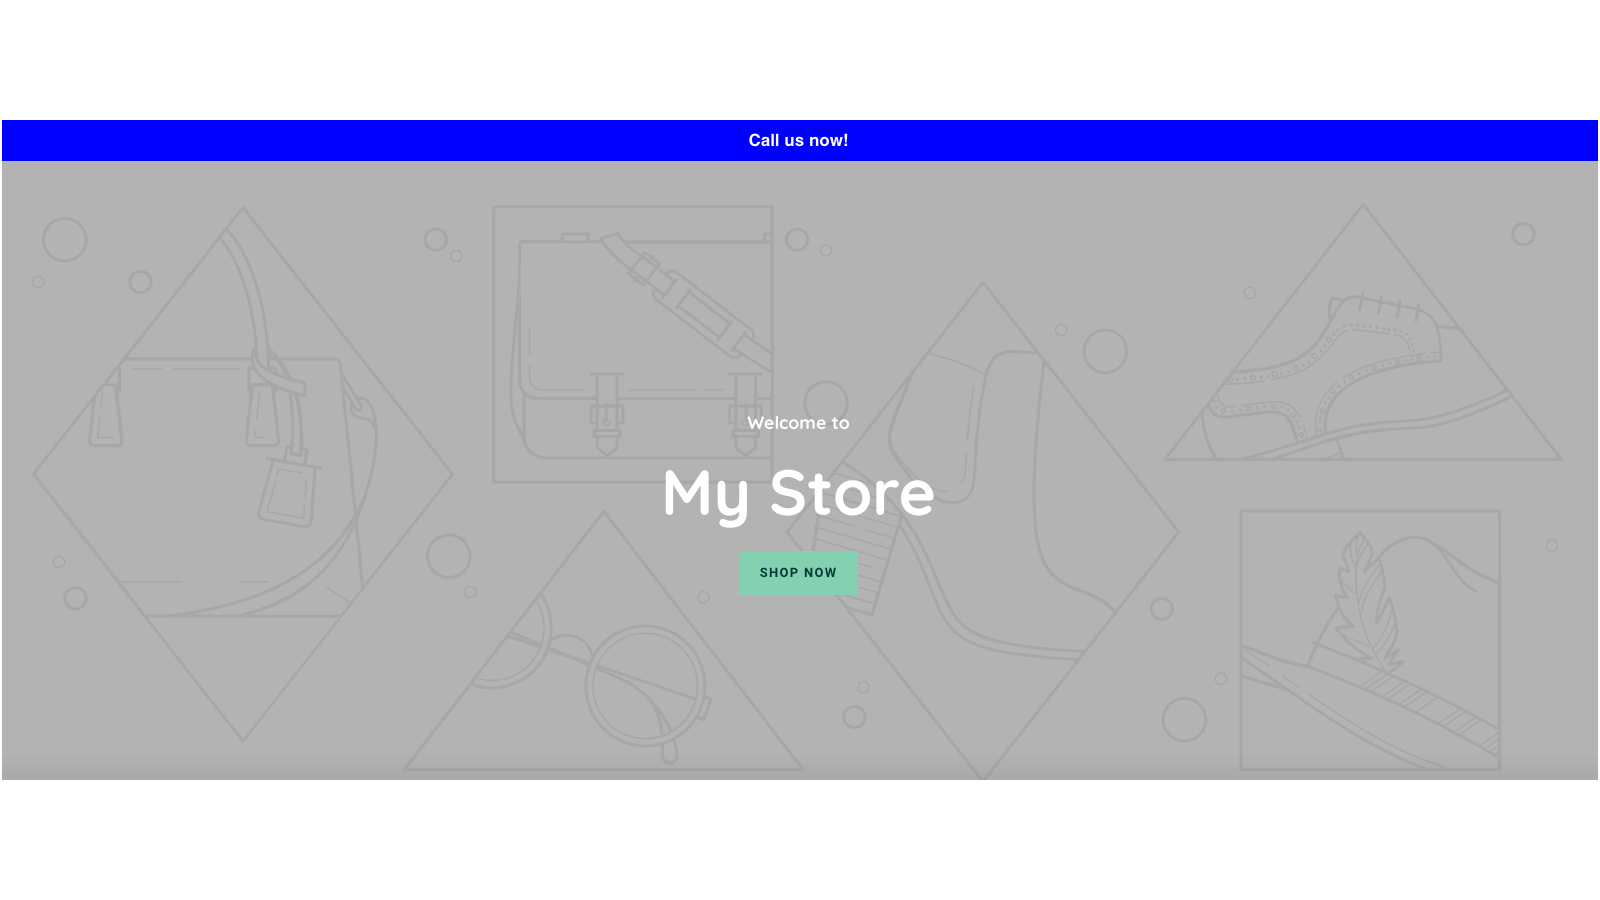
After writing my last post about How to create a Shopify app, I decided to build a new one as a side project. Taking myself through the entire process helped me to tighten up the details I mentioned. This one adds a sticky banner to a store’s front-end, prompting users to “click to call”.
It’s built on top of the code I used for the SplitWit Shopify app. I adjusted some of the methods to accept configuration parameters to differentiate between the two. Code had to be added to support new functionality. SplitWit already had a feature to add a sticky banner to a site’s existing UI. I used the same workflow to inject the merchant’s settings as JavaScript.
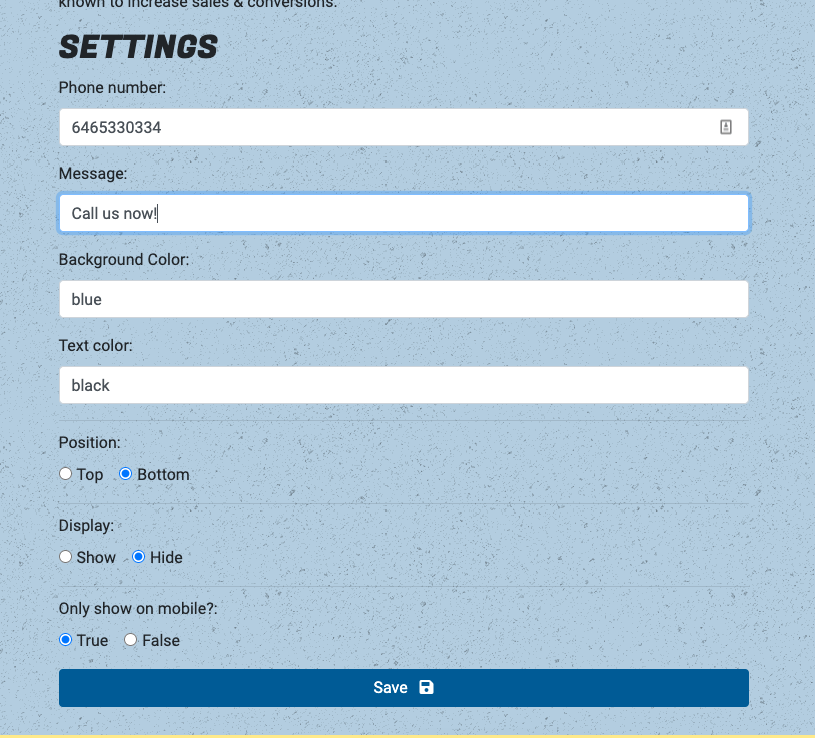
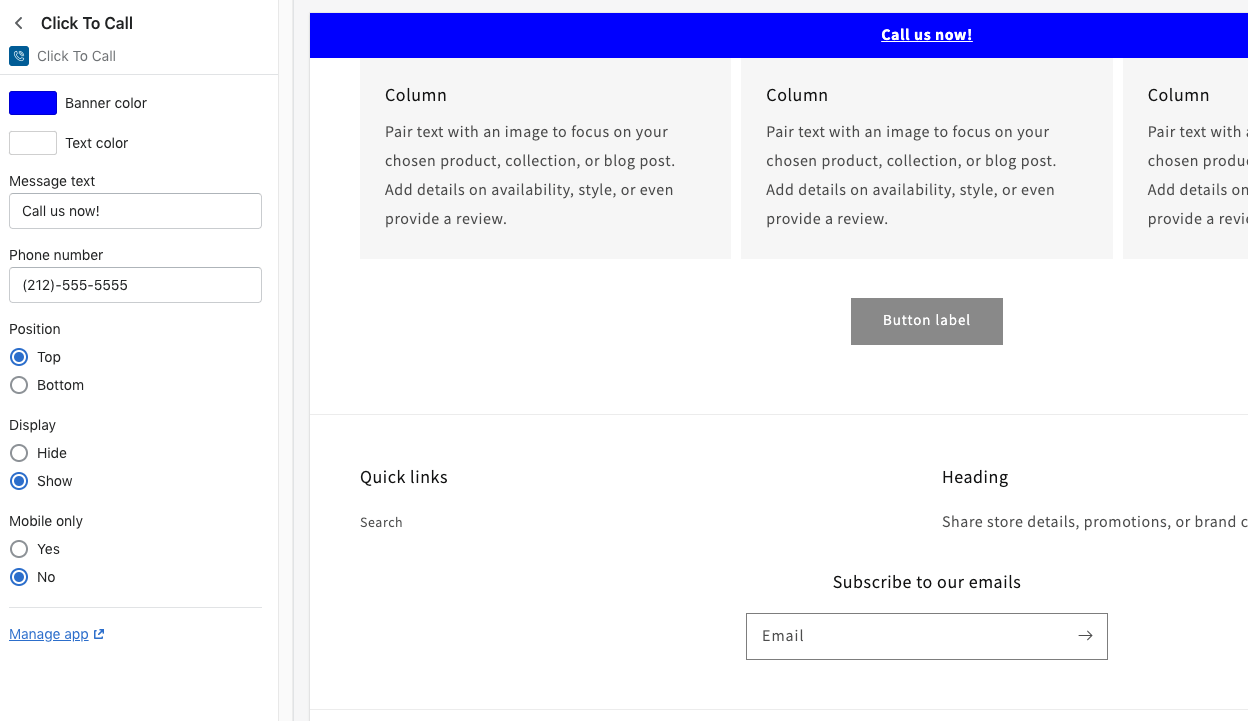
The app’s admin view is a simple input form with settings to control the sticky bar UI that is injected into the merchant’s store-front.
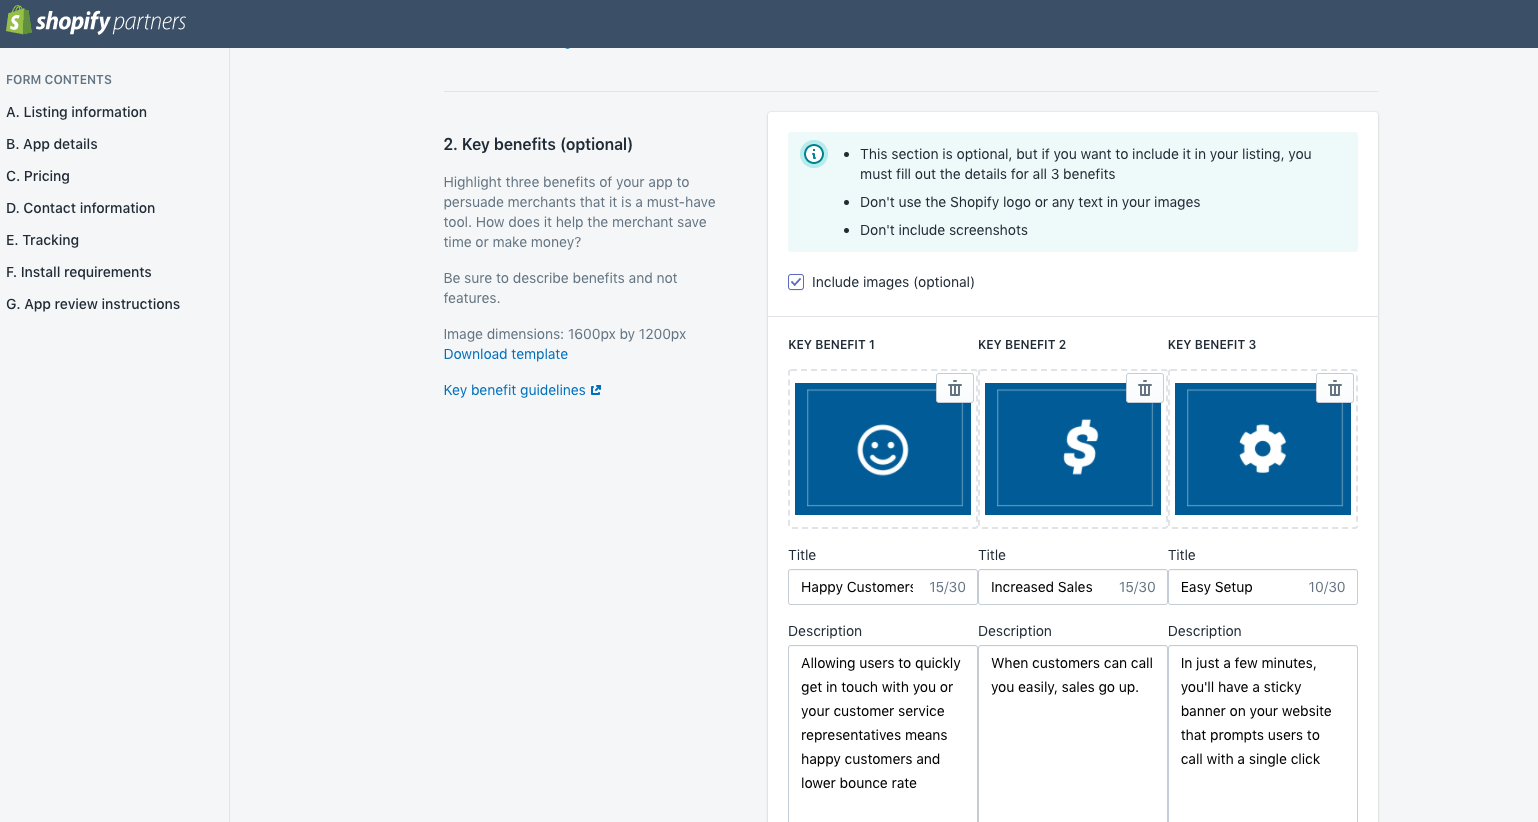
In addition to updating and refactoring my code, I wrote copy and drafted design for this digital product. I used SplitWit branding guidelines (fonts, colors, etc.) to establish an adjacent feel.
Although it’s optional, I wanted to include a promo video in the listing. Having had previously created videos for SplitWit, I was able to quickly spin one together. I already created background music files in Garage Band for other projects. Here’s the one I chose to use – feel free to borrow it for what ever you like. The text animations were exported from Keynote. I added screenshots, included stock animation from VideoPlasty, and recorded voice-over lines using a Yeti microphone.
I drafted other graphic assets that were required in the app listing using the GIMP – software I’ve used for over twenty years
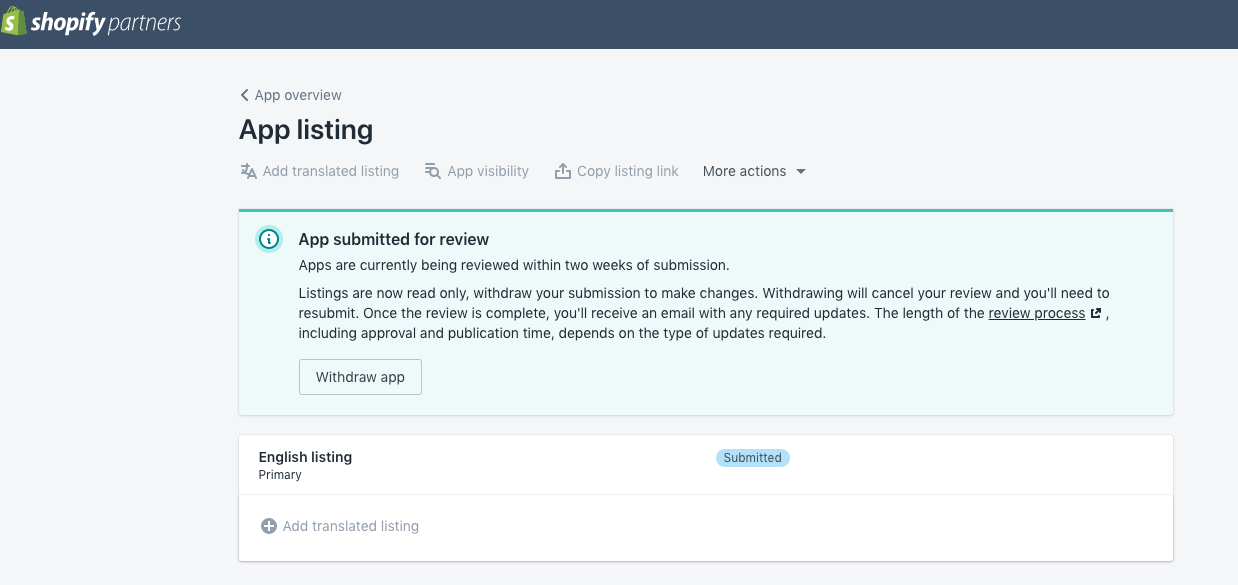
A few days after submission, I received an email with required changes.
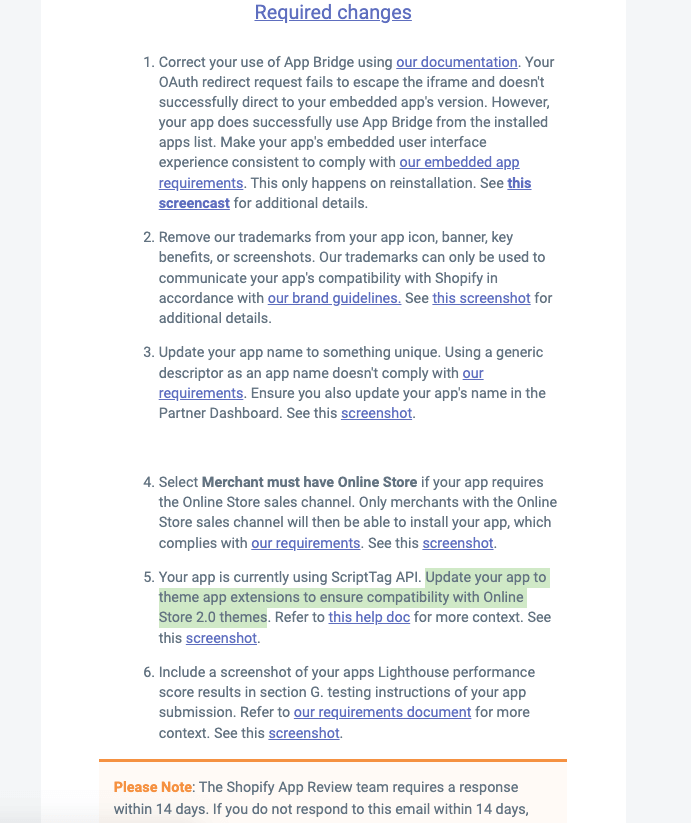
They were mostly minor issues. Things like the app’s name, a screenshot used in the listing, and an OAuth redirect bug.
One of the requests said, “Update your app to theme app extensions to ensure compatibility with Online Store 2.0 themes.”
2.0 themes? What does that mean?
Shopify recently announced Online Store 2.0 (OS 2.0). It’s essentially a set of improvements to the platform that makes themes and apps more flexible and maintainable. This benefits both merchants and developers. Enhanced app support means app functionality can be leveraged anywhere in a theme by using app blocks in the theme customizer.
SplitWit Click-to-Call injects HTML to manipulate a store’s user interface. That code comes from a JavaScript file that’s referenced in the page’s source code. That reference is added upon installation using the ScriptTag API. The JS file itself is generated & updated whenever a merchant clicks “save” in the app’s admin view. This required change is requesting that we provide an app block option as an alternative for compatible themes.
Shopify is encouraging OS 2.0 apps to instead use “theme app extensions” because they don’t edit theme code. It allows merchants to add your app’s UI elements, along with any settings, through its theme editor.
The documentation mentions that it “reduce[s] the effort required to integrate apps in themes”. In my particular case, it actually seems to add a step.
Theme App Extensions
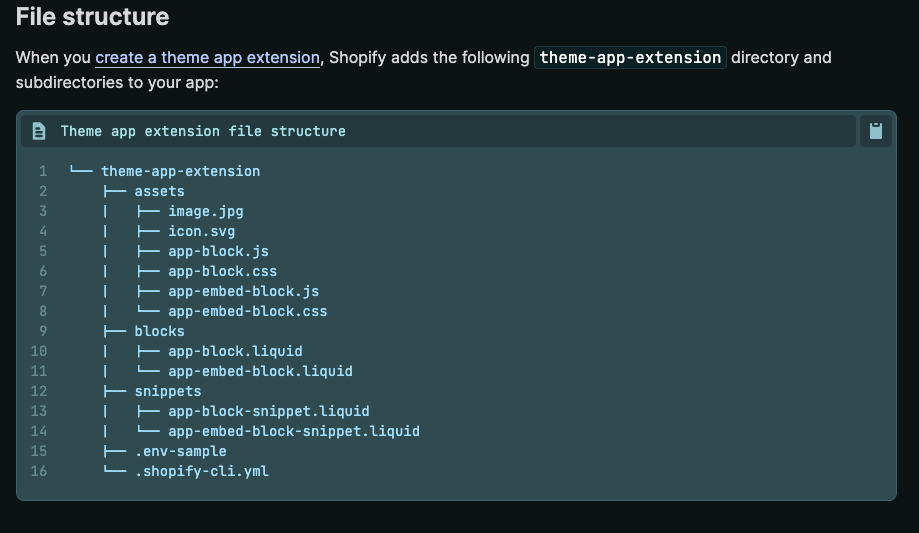
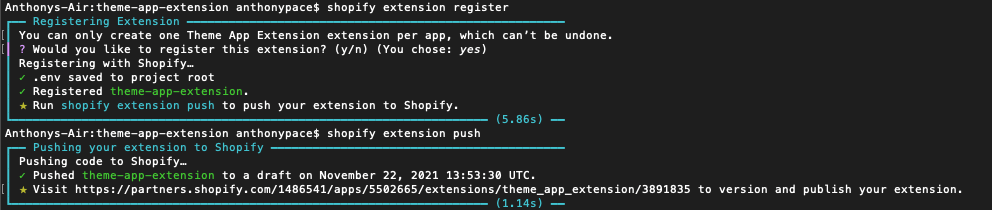
App blocks are a type of “theme app extension” supported by Shopify’s Online Store 2.0. To create an app block available in the theme editor, I added a directory to my app using the below file structure. I was able to auto-generate it with the Shopify CLI by using the command shopify extension create.
From the command line, I registered this folder as an extension, and pushed my code.
In my app block .liquid file I used the same HTML template from my original PHP snippet, swapping my database variables for Shopify block settings.
The schema JSON explicates the settings inputs exposed to the merchant. I set them to match the original settings view from my app’s interface.
This approach lets Shopify maintain the app’s configurations, instead of my SplitWit server database that’s hosted on AWS EC2. That’s less data developers can capture, but also less of a hosting burden.
Any time you update the theme app extension you’ll need to re-push the code from the Shopify CLI with the command shopify extension push. The extension code is not hosted on your own server. It lives solely in the Shopify infrastructure ecosystem.
Verify theme support
Not all themes support theme app extensions. Theme support needs to be verified at the time of installation.
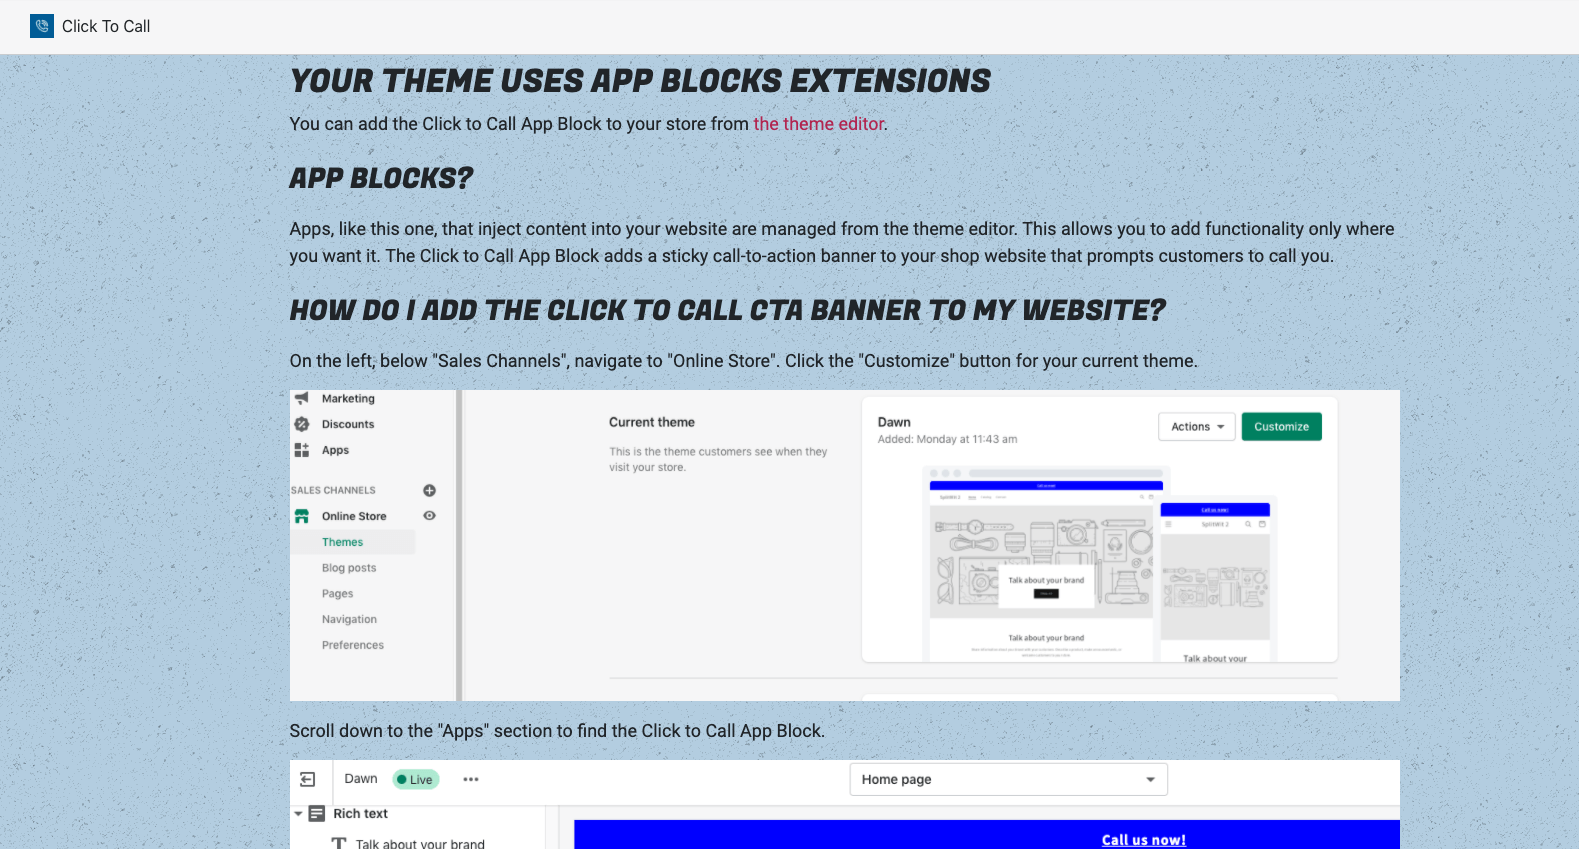
The original settings view is still needed, just in case the merchant’s published theme does not support app blocks. If app blocks are supported, I don’t install the script tag snippet at all. Instead, the settings view is replaced with integration instructions telling the merchant how to activate the sticky banner from the theme editor.
If app blocks are not supported by the active theme, the snippet is installed and the settings input form displayed. Determining if the merchant’s theme supports app blocks requires adding the read_themes Shopify API scope access to the oAuth request.
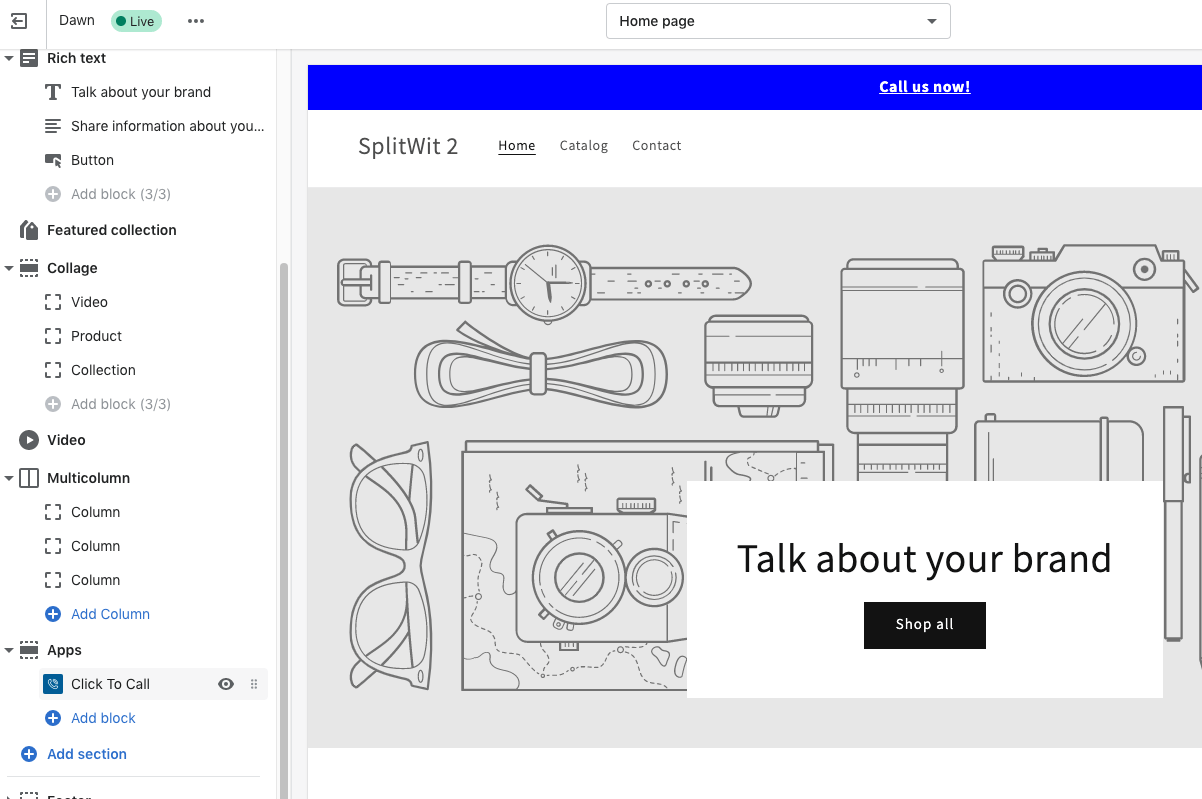
I tested my code by switching from the basic “Minimalist” theme to a OS2.0 theme called “Dawn”. When the app is being installed, I do a few things to check if app blocks are supported:
Get a list of the merchant’s installed themes, and check which is currently published
Retrieve a list of assets in the published theme
Check if JSON template files exist for at least one of the desired templates
$params = [];
$json_string_params = json_encode($params);
$headers = array(
'X-Shopify-Access-Token:' . $access_token,
'content-type: application/json'
);

// $install_ctc_curl_response_json = $this->curlApiUrl("https://www.splitwit.com/service-layer/click-to-call-service.php?method=installShopifyApp&installation_complete_id=".$installation_complete_id, $params);

// check if this merchant's published theme supports app blocks
// https://shopify.dev/api/admin-rest/2021-10/resources/theme
$read_themes_url = "https://" . $this->api_key . ":" . $this->secret . "@" . $shop . "/admin/api/2021-10/themes.json"; // list of all installed themes
$read_themes_curl_response_json = $this->curlApiUrl($read_themes_url, $json_string_params, $headers, false);
$themes = $read_themes_curl_response_json['themes'];
$published_theme_id = 0;
foreach ($themes as $theme) {
	// live theme has a role of main
	if($theme['role'] == "main"){
		$published_theme_id = $theme['id'];
		// echo "The main theme is " . $theme['name'] . "<br /><br /><br />";
	}
}

// Retrieve a list of assets in the published theme
$get_theme_assets_url = "https://" . $this->api_key . ":" . $this->secret . "@" . $shop . "/admin/api/2021-10/themes/".$published_theme_id."/assets.json";
$get_theme_assets_curl_response_json = $this->curlApiUrl($get_theme_assets_url, $json_string_params, $headers, false);


// Check if JSON template files exist for at least one of the desired templates
// For other applications, you might want to check that they exist for ALL desired templates
$assets = $get_theme_assets_curl_response_json['assets'];
$probably_block_support = false;
$templates = ['index', 'cart', 'page.contact', 'product', 'collection'];

foreach ($assets as $asset) {
	foreach ($templates as $template) {
		if($asset['key'] == "templates/".$template.".json" ){
			$probably_block_support = true;
			break; // this checks that JSON template files exist for at least one of the desired templates. If you want to check that they exist for ALL desired templates, you can move this break to the 'else' condition
		}else{
			$probably_block_support = false;
			// break;
		}
	}

	if($probably_block_support){
		break;
	}
}
Shopify recommends additionally checking:
The body of JSON templates to determine what section is set as `main`
The content of each `main` section and if it has a schema that contains a block of type ‘@app’
I check for that value from the front-end to display steps for integrating the app block from the theme customizer. Shopify guidelines require that we provide merchants with post-installation onboarding instructions. Those directions replace the settings input form. Configurations will be managed through the block itself.
These updates satisfied the app review team’s request. I responded to their email, and a day later received their reply. It complained that the “app doesn’t have a functional user interface (UI)” when app blocks are enabled. That was because all of the settings were being managed by the app block data. To solve this issue, I moved the phone number and message fields back to the app’s settings view. I saved those values as metafields using the Shopify REST API.
Update: The Shopify metafield POST API would only create/update a single metafield per request. I had to break it out into two calls. From what I’ve read it seems like a PUT request might do that trick for multiple fields, but for my use-case this approach is fine. Here you can see how I do it when setting default metadata on installation:
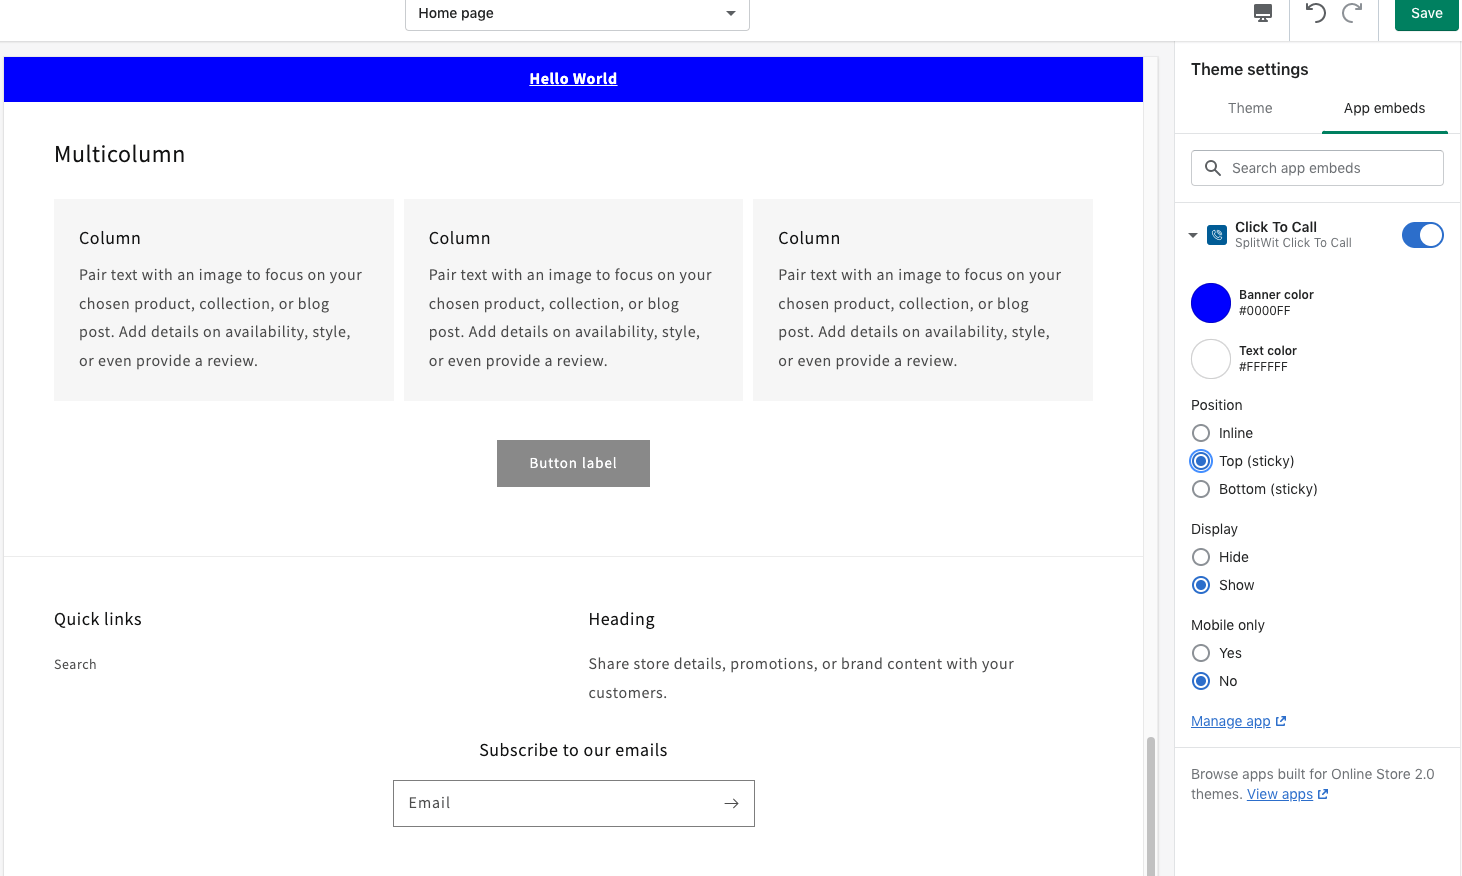
After another response, they commented that I should be using “App Embed Blocks” instead of just “App Blocks”. That was because my UI component is a “floating or overlaid element”. It exists outside of the normal DOM flow and was not inline with other HTML nodes. This only required a small update to the liquid file’s schema, changing the “target” from “section” to “body”.
Although only a small difference, it does affect how merchants add Click To Call in the theme customizer. They must navigate to the Theme Settings area, and add it as an “App Embed”.
Luckily, I’m able to deep link merchants directly to that view from my onboarding instructions. The link also automatically activates my app embed. All I needed to do was get the extension’s UUID by running shopify extension info from my command line and I was able to build the URL.
Add the Click To Call App Block from <a href="https://<?php echo $clickToCallRecord['shop']; ?>/admin/themes/current/editor?context=apps&activateAppId=b52ccd8e-54b1-4b6d-a76f-abaed45dea97/click-to-call" target="_blank">the theme editor</a>
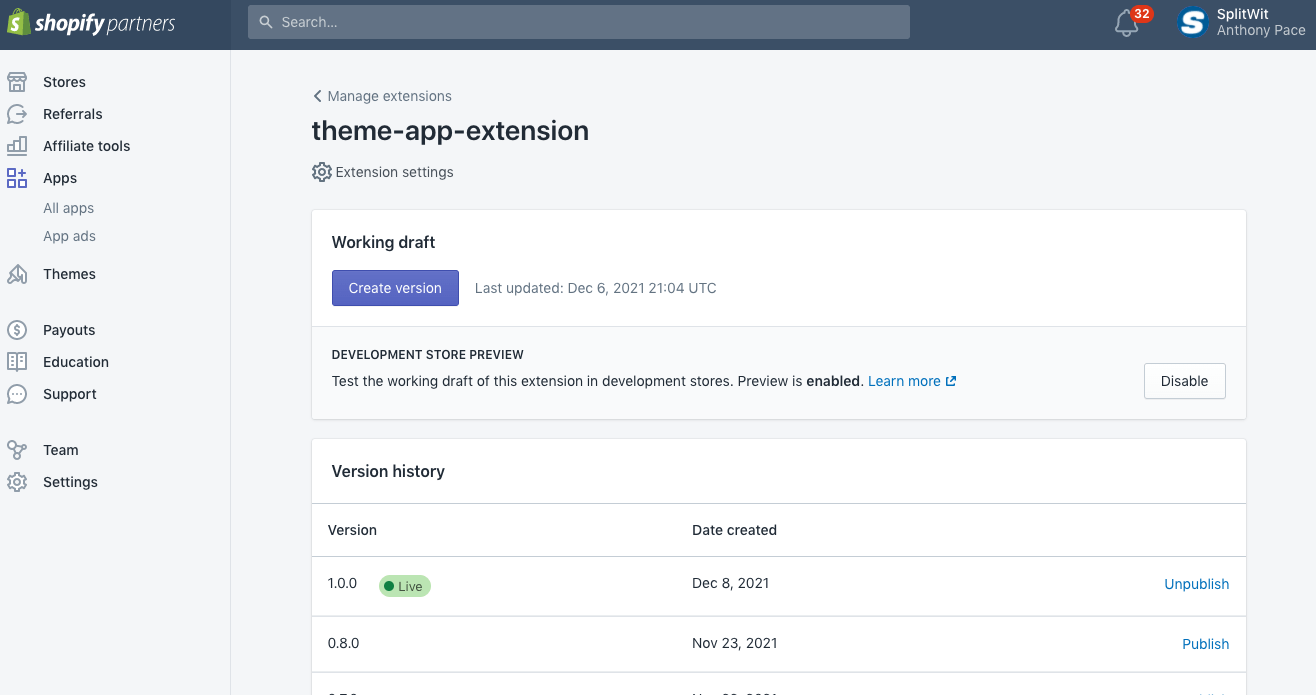
I updated my app’s home screen onboarding instructions to reflect this new flow. Everything appeared to be working when I tested, yet the app review team complained that the above issues were still unresolved. It turns out, I was able to immediately see changes to the extension that I pushed from the CLI because “development store preview” was enabled. The review team could not until I published a new version:
After that fix, the app was accepted to the Shopify App Market. If you are a Shopify merchant, check it out and let me know what you think.
cURL is a PHP library that lets you make HTTP requests. To use it, you need to install the libcurl package. If you’re using PHP on web server, it’s probably already there. The cURL functions have a number of options, depending on what request you’d like to make. You can read all about it in the PHP official documentation.
I had a number of projects that was using it all over the place, to make a variety of requests. I was repeating a lot of code, and my mix-matching began to get confusing. Finally, I wrote a function that takes request options as arguments and does all the work:
cURL’s default request type is always GET. If I want to use a different HTTP verb, I can specify it as an argument. Adding this function as an abstraction layer over existing methods helps me get things done more quickly, and kept my code clear, clean, and under control.