Build an image upload gallery

media gallery upload with s3

Allowing users to upload images to your app can be a pivotal feature. Many digital products rely on it. This post will show you how to do it using PHP and AWS S3.

image upload gallery

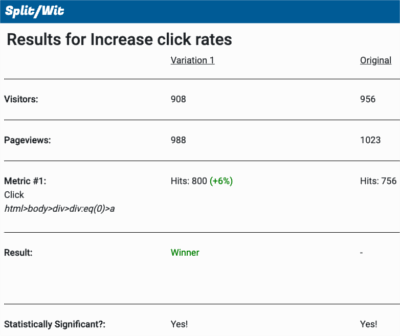
After launching version 1.0 of SplitWit, I decided to enhance the platform by adding features. An important A/B experiment involves swapping images. This is particularly useful on ecommerce stores that sell physical products.

Originally, users could only swap images by entering a URL. To the average website owner, this would seem lame. For SplitWit to be legit, adding images on the fly had to be a feature.

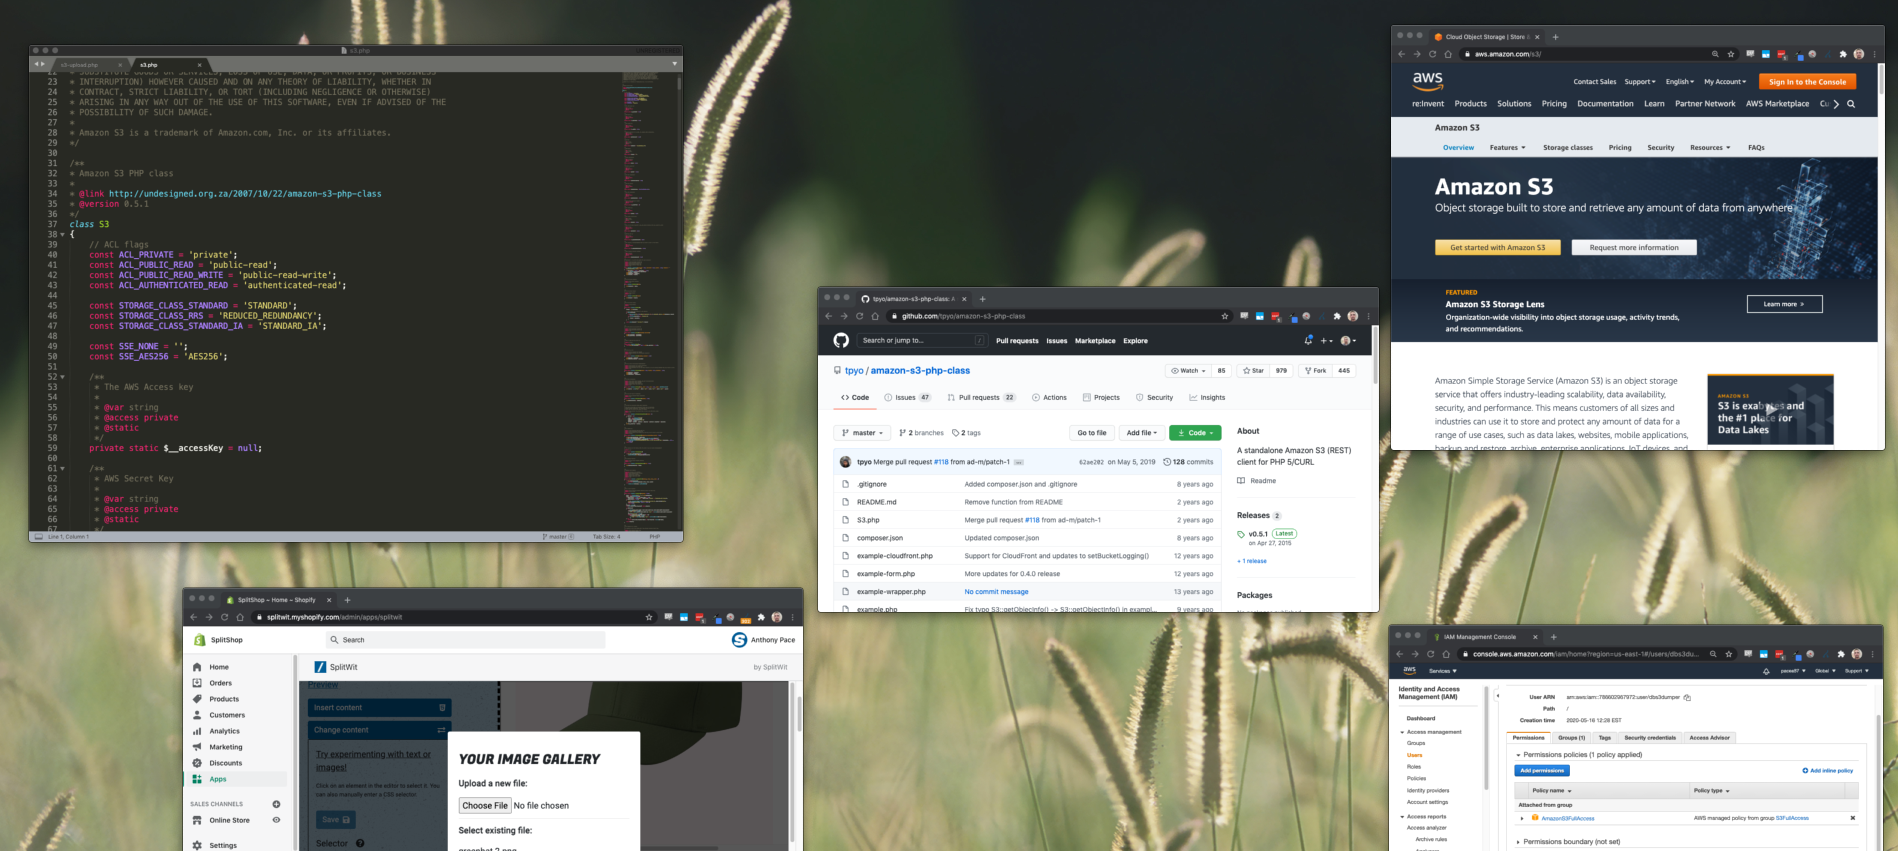
I wrote three scripts – one to upload files, one to fetch them, and one to delete them. Each leverages a standalone PHP class written by Donovan Schönknecht, making it easy to interact with AWS S3. All you’ll need is your S3 bucket name and IAM user credentials. The library provides methods to do everything you need.

AWS S3

Amazon S3 stands for “simple storage service”. It provides data storage that is scalable, secure, highly available, and performant.

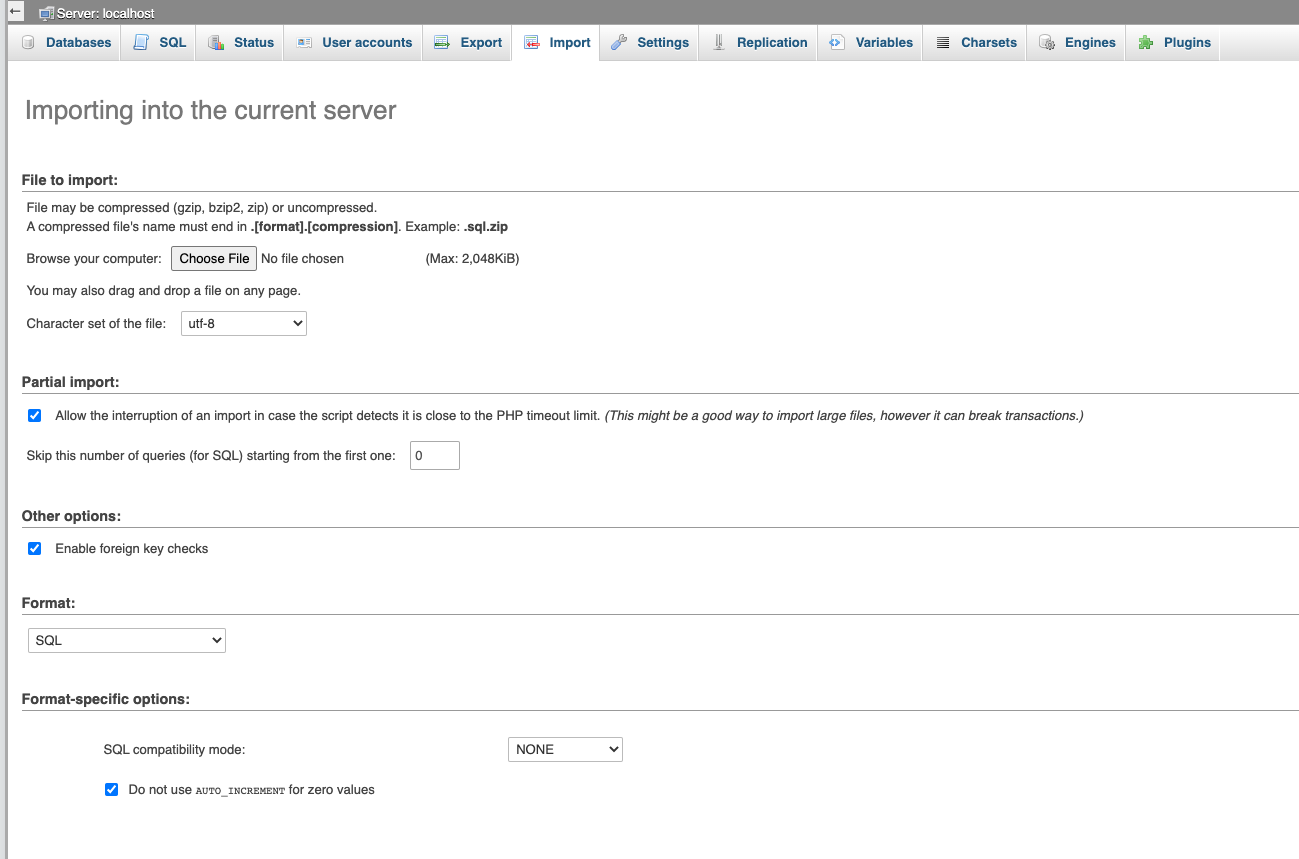
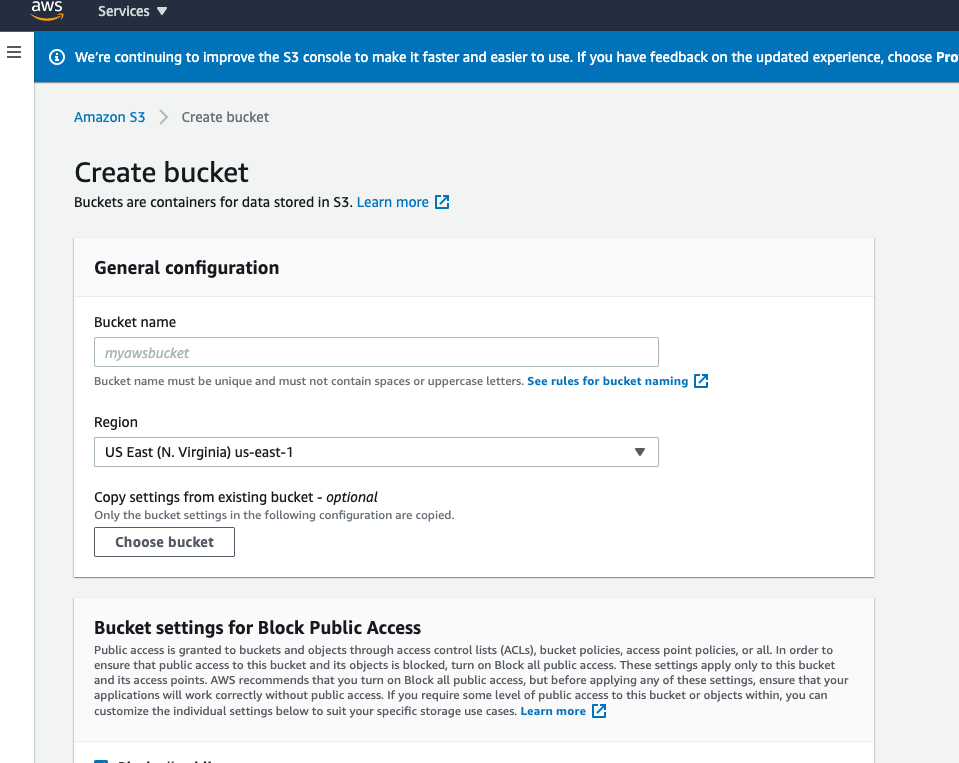
A new bucket can be created directly from the management console.

create new s3 bucket

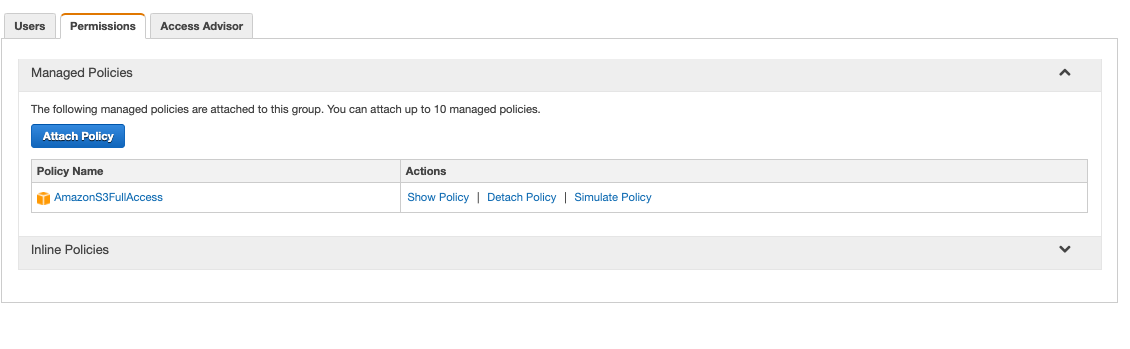
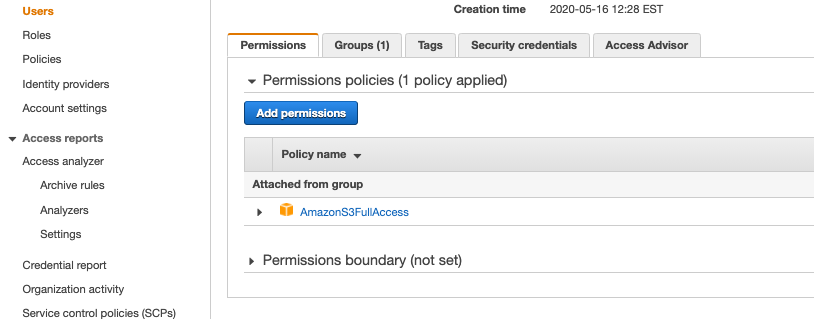
You’ll want to create a new IAM user to programmatically interact with this bucket. Make sure that new user is added to a group that includes the permission policy “AmazonS3FullAccess”. You can find the access key ID and secret in the “Security credentials” tab.

IAM user in AWS with permissions for S3

Uploading image files

When users select an image in the visual editor, they are shown a button to upload a new file. Clicking on it opens the gallery modal.

<div id="image-gallery-modal" class="modal image-gallery-modal" style="display: none;">
  <div class="modal-content">
    <h3>Your image gallery</h3>
    <p><strong>Upload a new file:</strong></p>
    <input class="uploadimage" id="uploadimage" type="file" name="uploadimage" />
    <p class="display-none file-error"></p>
    <div><hr /></div>
    <div class="image-gallery-content"></div>
    <p class="loading-images"><i class="fas fa-spinner fa-spin"></i> Loading images...</p>
  </div>
</div>

The HTML file-type input element presents a browser dialog to select a file. Once selected, the image data is posted to the S3 upload script. The newly uploaded image then replaces the existing image in the visual editor. 

$(".uploadimage").change(function(){
    
    var file = $(this)[0].files[0];   
    var formData = new FormData();
    formData.append("file", file, file.name);
    formData.append("upload_file", true);         

    $.ajax({
      type: "POST",
      url: "/s3-upload.php",
      xhr: function () {
        var myXhr = $.ajaxSettings.xhr();
        if (myXhr.upload) {
            // myXhr.upload.addEventListener('progress', that.progressHandling, false);
        }
        return myXhr;
      },
      success: function (response) {
        console.log(response);
        
        document.getElementById("uploadimage").value = "";

        if(response !== "success"){
          $(".file-error").text(response).show();
          setTimeout(function(){ $(".file-error").fadeOut();}, 3000)
          return;
        }
        
        $("#image-gallery-modal").hide();
        loadS3images();
        var newImageUrl = "https://splitwit-image-upload.s3.amazonaws.com/<?php echo $_SESSION['userid'];?>/" + file.name;
        $("input.img-url").val(newImageUrl);
        $(".image-preview").attr("src", newImageUrl).show();
        $(".image-label .change-indicator").show();

        //update editor (right side)
        var selector = $(".selector-input").val();
        var iFrameDOM = $("iframe#page-iframe").contents()
        if($(".element-change-wrap").is(":visible")){
          iFrameDOM.find(selector).attr("src", newImageUrl).attr("srcset", "");
          $(".element-change-save-btn").removeAttr("disabled");
        }
        if($(".insert-html-wrap").is(":visible")){
          var position = $(".position-select").val();
          var htmlInsertText = "<img style='display: block; margin: 10px auto;' class='htmlInsertText' src='"+newImageUrl+"'>";
          iFrameDOM.find(".htmlInsertText").remove();
          if(position == "before"){
            iFrameDOM.find(selector).before(htmlInsertText);
          }
          if(position == "after"){
            iFrameDOM.find(selector).after(htmlInsertText);
          }
        }
      },
      error: function (error) {
        console.log("error: ");
        console.log(error);
      },
      async: true,
      data: formData,
      cache: false,
      contentType: false,
      processData: false,
      timeout: 60000
  });

});

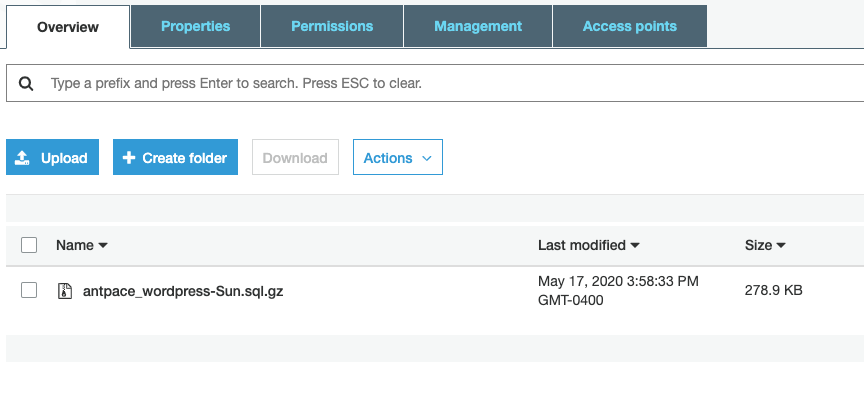
The upload script puts files in the same S3 bucket, under a separate sub-directory for each user account ID. It checks the MIME type on the file to make sure an image is being uploaded.

<?php
require 's3.php';
 
$s3 = new S3("XXXX", "XXXX"); //access key ID and secret

// echo "S3::listBuckets(): ".print_r($s3->listBuckets(), 1)."\n";

$bucketName = 'image-upload';

if(isset($_FILES['file'])){
	$file_name = $_FILES['file']['name'];   
	$uploadFile = $_FILES['file']['tmp_name']; 

	if ($_FILES['file']['size'] > 5000000) { //5 megabyte
     	   echo 'Exceeded filesize limit.';
     	   die();
    	}
    	$finfo = new finfo(FILEINFO_MIME_TYPE);
	if (false === $ext = array_search(
	        $finfo->file($uploadFile),
	        array(
	            'jpg' => 'image/jpeg',
	            'png' => 'image/png',
	            'gif' => 'image/gif',
	        ),
	        true
	    )) {
	    	if($_FILES['file']['type'] == ""){
	    		echo 'File format not found. Please re-save the file.';
	    	}else{
		    	echo 'Invalid file format.';
		    }
     	    die();
	 }

	//create new directory with account ID, if it doesn't already exist
	session_start();
	$account_id = $_SESSION['userid'];

	if ($s3->putObjectFile($uploadFile, $bucketName, $account_id."/".$file_name, S3::ACL_PUBLIC_READ)) {
		echo "success";
	}

}
?>

After upload, the gallery list is reloaded by the loadS3images() function.

Fetching image files from S3

When the image gallery modal first shows, that same loadS3images() runs to populate any images that have been previously uploaded.

function loadS3images(){

  $.ajax({
      url:"/s3-get-objects.php",
      complete: function(response){
        gotImages = true;
        $(".loading-images").hide();
        var data = JSON.parse(response.responseText);
        var x;
        var html = "<p><strong>Select existing file:</strong></p>";
        var l = 0;
        for (x in data) {
          l++;
          var name = data[x]["name"];
          nameArr = name.split("/");
          name = nameArr[1];
          var imgUrl = "https://splitwit-image-upload.s3.amazonaws.com/<?php echo $_SESSION['userid'];?>/" + name;
          html += "<div class='image-data-wrap'><p class='filename'>"+name+"</p><img style='width:50px;display:block;margin:10px;' src='' class='display-none'><button type='button' class='btn select-image'>Select</button> <button type='button' class='btn preview-image'>Preview</button> <button type='button' class='btn delete-image'>Delete</button><hr /></div>"
        }
        if(l){
          $(".image-gallery-content").html(html);
        }

      }
    });
}

It hits the “get objects” PHP script to pull the files in the account’s directory.

<?php
require 's3.php';
 
$s3 = new S3("XXX", "XXX"); //access key ID and secret

$bucketName = 'image-upload';
session_start();
$account_id = $_SESSION['userid'];
$info = $s3->getBucket($bucketName, $account_id);
echo json_encode($info);

?>

Existing images can be chosen to replace the one currently selected in the editor. There are also options to preview and delete.

Delete an S3 object

When the delete button is pressed for a file in the image gallery, all we need to do is pass the filename along. If the image is currently being used, we also remove it from the editor.

$(".image-gallery-content").on("click", ".delete-image", function() {
    var parent = $(this).parent();
    var filename = parent.find(".filename").text();
    var currentImageUrl = $(".img-url").val();
    if(currentImageUrl =="https://splitwit-image-upload.s3.amazonaws.com/<?php echo $_SESSION['userid'];?>/" + filename){
      $(".img-url").val(testSelectorElImage);
      $(".image-preview").attr("src", testSelectorElImage);
      var selector = $(".selector-input").val();
      var iFrameDOM = $("iframe#page-iframe").contents()
      iFrameDOM.find(selector).attr("src", testSelectorElImage);
    }
    $.ajax({
      method:"POST",
      data: { 
        'filename': filename, 
      },
      url: "/s3-delete.php?filename="+filename,
      complete: function(response){
        parent.remove();
        if(!$(".image-data-wrap").length){
          $(".image-gallery-content").html("");
        }
      }
    })

}); 


<?php
require 's3.php';
 
$s3 = new S3("XXX", "XXX"); //access key ID and secret

$bucketName = 'image-upload';
session_start();
$account_id = $_SESSION['userid'];
$filename = $_POST['filename'];
if ($s3->deleteObject($bucketName, $account_id."/".$filename) ){
	echo "S3::deleteObject(): Deleted file\n";
}

?>


Reset password flow in PHP

reset password

My email account is a skeleton key to anything online I’ve signed up for. If I forget a password, I can reset it. Implementing this feature for a web app takes just a few steps.

When users enter an incorrect password, I prompt them to reset it.

incorrect password warning

Clicking the reset link calls a “forgot password” back-end service.

$(document).on("click",".reset-pw-cta", function(){
	var email = $(this).attr("data");
	$.ajax({
		url:"/service-layer/user-service.php?method=forgotPw&email="+email,
		complete:function(response){
			console.log(response.responseText)
			window.showStatusMessage("A password reset email as been sent to " + email);
		}
	})
});

A token is created in our ‘password recovery’ database table. That token is related back to an account record.

password recovery database table

As a security practice, recovery tokens are deleted nightly by a cron job.

An email is then sent containing a “reset password” link embedded with the token. AWS SES and PHPMailer is used to send that message.

function forgotPw(){
	$email = $this->email;
	$row = $this->row;
	$number_of_rows = $this->number_of_rows;
	$conn = $this->connection;
	if($number_of_rows > 0){
		$this->emailFound = 1;
		$userid = $row['ID'];
		$this->userid = $userid;

		//create reset token
		$timestamp = time();
		$expire_date = time() + 24*60*60;
		$token_key = md5($timestamp.md5($email));
		$statement = $conn->prepare("INSERT INTO `passwordrecovery` (userid, token, expire_date) VALUES (:userid, :token, :expire_date)");
		$statement->bindParam(':userid', $userid);
		$statement->bindParam(':token', $token_key);
		$statement->bindParam(':expire_date', $expire_date);
		$statement->execute();

		//send email via amazon ses
		include 'send-email-service.php';	
		$SendEmailService = new SendEmailService();

		$reset_url = 'https://www.bjjtracker.com/reset-pw.php?token='.$token_key;
	        $subject = 'Reset your password.';
	        $body    = 'Click here to reset your password: <a href="'.$reset_url.'">'. $reset_url .'</a>';
	        $altBody = 'Click here to reset your password: ' . $reset_url;
	        $this->status = $SendEmailService -> sendEmail($subject, $body, $altBody, $email);


	}else{
		$this->emailFound = 0;
	}
}

That link navigates to a page with a “reset password” form.

reset password form

Upon submission the new password and embedded token are passed along to the server.

$(document).ready(function() {
    $(".reset-button").click(function(){
      var newPassword = $(".password-reset-input").val();
      if(newPassword.length < 1){
        var notifications = new UINotifications();
        notifications.showStatusMessage("Please don't leave that blank :( ");
        return;
      }
      var data = $(".resetpw-form").serialize();
      $.ajax({
        url: "/service-layer/user-service.php?method=resetPw&token=<?php echo $_GET['token']; ?>",
        method: "POST",
        data: data,
        complete: function(response){
          // console.log(response);
          window.location = "/";
        }
      });
    });
    $("input").keypress(function(e) {
      if(e.which == 13) {
        e.preventDefault();
          $(".reset-button").click();
      }
  });
  

});

The correct recovery record is selected by using the token value. That provides the user ID of the account that we want to update. The token should be deleted once the database is updated.

function resetPw(){
	$conn = $this->connection;
	$token = $_GET['token'];
	$password = $_POST['password'];
	$passwordHash = password_hash($password, PASSWORD_DEFAULT);
	$statement = $conn->prepare("SELECT * FROM `passwordrecovery` where token = ?");
	$statement->execute(array($token));
	$row = $statement->fetch(PDO::FETCH_ASSOC);
	$userid = $row['userid'];

	$update_statement = $conn->prepare("UPDATE `users` SET password = ? where ID = ?");
	$update_statement->execute(array($passwordHash, $userid));

	$delete_statement = $conn->prepare("DELETE FROM `passwordrecovery` where token = ?");
	$delete_statement->execute(array($token));
}

This is a secure and user-friendly workflow to allow users to reset their passwords.

Custom UI notifications

UI feedback alerts

Showing brief notifications to website visitors is an important UI/UX component. They’re useful for providing feedback. They can communicate success, failure, or warnings.

Don Norman (The Design of Everyday Things) mentions that “Feedback is essential, but not when it gets in the way of other things, including a calm and relaxing environment” and goes on to say “Feedback is essential, but it has to be done correctly”.

A common use-case is data validation. Specifically, when logging in or signing up. If the user enters an invalid email address, or wrong login credentials, we need to let them know. The built in browser alert() is clunky and unsophisticated. Plugins are bloated and over-engineered. I wrote some basic HTML, CSS, and JavaScript that gets the job done and looks great.

My code provides two versions of the alert. The first is a basic sticky bar that fades in and out at the top of the page.

example of alert message for an invalid email address

The other flashes in the middle of the screen. I call it “in-your-face” alerts and reserve them for positive success messages.

example of a flashing UI alert to provide positive feedback to users

The CSS adds styles for both versions. Both utilize ‘position: fixed’ to stay in a set location on the page. The “in-your-face” example uses a pulse animation to achieve its effect.

<!-- UI-notifications.css -->
<style>
body{
  margin: 0px;
}
.status-message{
  display: none;
  color: white;
  text-align: center;
  font-size: 16px;
  padding: 8px;
  border-top: 1px solid white;
  border-bottom: 1px solid white;
  position: fixed;
  width: 100%;
  top: 0px;
  padding: 28px 8px;
  background-color: #b12650;
  z-index: 1000;
}
.status-message-inner{
  margin: 0px;
}

.status-message-close{
  cursor: pointer;
  position: fixed;
  right: 10px;
}
.in-your-face{
  display: none;
  position: fixed;
  top: 45%;
  width: 100%;
  text-align: center;
  font-size: 48px;
  color: white;
  z-index: 2;
}
.in-your-face-inner{
    background: #005b96;
    width: 80%;
    margin: 0 auto;
    opacity: .85;
    padding: 10px;
}
@keyframes pulse{
  50%  {transform: scale(1.2);}

}
.pulse{
  animation: pulse 0.5s ease-in infinite;
}
</style>
<!-- end UI-notifications.css -->

The javascript relies on jQuery as a dependency. It is written as a class, with a constructor and two methods. Each method takes message text as a parameter.

class UINotifications {
	constructor() {
		window.jQuery || document.write('<script src="js/vendor/jquery-1.11.2.min.js"><\/script>');
		var statusMessageHtml = '<div class="status-message"><p class="status-message-inner"><span class="status-message-text">Welcome to My App</span><span class="status-message-close">X</span></p></div>';
		var inYourFaceHtml = '<div class="in-your-face pulse"><p class="in-your-face-inner"><span class="in-your-face-text">Great Job!</span></p></div>';

		$(document).on("click", ".status-message-close", function(){
			$(".status-message").fadeOut();
		});

		this.statusMessage = $("<div/>").html(statusMessageHtml);
		this.inYourFace = $("<div/>").html(inYourFaceHtml);
		
		$('body').prepend(this.inYourFace);
		$('body').prepend(this.statusMessage);

	}

 	showStatusMessage(message){
 		var notifications = this;
	  	var message = message || "Default Message"
	  	var statusMessageTimeout;
	  	
		if(notifications.statusMessage.find(".status-message").is(':visible')){
	     clearTimeout(statusMessageTimeout);
	    }

		notifications.statusMessage.find(".status-message .status-message-text").html(message);
		notifications.statusMessage.find(".status-message").fadeIn();
		
	    statusMessageTimeout = setTimeout(function(){
	       notifications.statusMessage.find(".status-message").fadeOut(); 
	    }, 5000)
		
	}
	showInYourFace(message, callback){
		var notifications = this;
		var inYourFaceTimeout;
		var inYourFaceRandoms = ["Good work!", "Hard work!", "Nice job!", "Hustle!"]

		var message = message || inYourFaceRandoms[Math.floor(Math.random()*inYourFaceRandoms.length)];;
		var callback = callback || function(){};

		if(notifications.inYourFace.find(".in-your-face").is(':visible')){
	     clearTimeout(inYourFaceTimeout);
	    }

		notifications.inYourFace.find(".in-your-face .in-your-face-text").html(message);
		notifications.inYourFace.find(".in-your-face").show();
		
	    inYourFaceTimeout = setTimeout(function(){
	       notifications.inYourFace.find(".in-your-face").fadeOut(function(){
	       	callback();
	       }); 

	    }, 1000)
	}
}

This is a simple and lightweight solution to showing web app visitors informative alerts without using a plugin. Please, checkout the code and use it in your next project.

You can find the code on GitHub.

Error establishing connection to database – WordPress solution

solutions for wordpress database errors

A crashed database is a problem I’ve encountered across multiple WordPress websites. When trying to load the site you’re faced with a dreaded “Error establishing a database connection” message. Restarting the DB service usually clears things up. But, sometimes it won’t restart at all – which is why I started automating nightly data dumps to an S3 bucket.

Recently, one particular site kept going down unusually often. I assumed it was happening due to low computing resources on the EC2 t3.micro instance. I decide to spin up a a new box with more RAM (t3.small) and migrate the entire WordPress setup.

Since I couldn’t be sure of what was causing the issue, I needed a way to monitor the health of my WordPress websites. I decided to write code that would periodically ping the site, and if it is down send an email alert and attempt to restart the database.

warning message when a website can't connect to the database

The first challenge was determining the status of the database. Even if it crashed, my site would still return a 200 OK response. I figured I could use cURL to get the homepage content, and then strip out any HTML tags to check the text output. If the text did match the error message, I could take further action.

Next, I needed to programmatically restart MySql. This is the command I run to do it manually: sudo service mariadb restart 

After doing some research, I found that I could use shell_exec() to run it from my PHP code. Unfortunately, Apache wouldn’t let the (non-password using) web server user execute that without special authorization. I moved that command to its own restart-db.sh file, and allowed my code to run it by adding this to the visudo file: apache ALL=NOPASSWD: /var/www/html/restart-db.sh

I also needed to make the file executable by adjusting permissions: sudo chmod +x /var/www/html/restart-db.sh

Once those pieces were configured, my code would work:

<?php

$url = "http://www.antpace.com/blog";
$curl_connection = curl_init();

curl_setopt($curl_connection, CURLOPT_URL, $url);

curl_setopt($curl_connection, CURLOPT_RETURNTRANSFER, true);
$curl_response = curl_exec($curl_connection);
$plain_text = strip_tags($curl_response);

if(strpos($plain_text, "Error establishing a database connection") !== false){
	echo "The DB is down.";
        
        //restart the database
        shell_exec('sudo /var/www/html/restart-db.sh');
        
        //send notification email
        import 'send-email.php';
        send_email();
}else{
	echo "The DB is healthy.";
}

?>

You can read more about how to send a notification email in another post that I wrote on this blog.

Create the cron job

A cron job is a scheduled task in Linux that runs at set times. For my PHP code to effectively monitor the health of the database, it needs to run often. I decided to execute it every five minutes. Below are three shell commands to create a cron job.

The first creates the cron file for the root user:

sudo touch /var/spool/cron/root

The next appends my cron command to that file:

echo "*/5 * * * * sudo wget -q 127.0.0.1/check-db-health.php" | sudo tee -a /var/spool/cron/root

And, the last sets the cron software to listen for that file:

sudo crontab /var/spool/cron/root

Alternatively, you can create, edit, and set the cron file directly by running sudo crontab -e . The contents of the cron file can be confirmed by running sudo crontab -l .


Migrate a WordPress site to AWS

Migrate a WordPress site to AWS

In a previous article I discussed launching a website on AWS. The project was framed as transferring a static site from another hosting provider. This post will extend that to migrating a dynamic WordPress site with existing content.

Install WordPress

After following the steps to launch your website to a new AWS EC2 instance, you’ll be able to connect via sFTP. I use FileZilla as my client. You’ll need the hostname (public DNS), username (ec2-user in this example), and key file for access. The latest version of WordPress can be downloaded from wordpress.org. Once connected to the server, I copy those files to the root web directory for my setup: /var/www/html

Make sure the wp-config.php file has the correct details (username, password) for your database. You should use the same database name from the previous hosting environment.

Data backup and import

It is crucial to be sure we don’t lose any data. I make a MySql dump of the current database and copy the entire wp-content folder to my local machine. I’m careful to not delete or cancel the old server until I am sure the new one is working identically.

Install phpMyAdmin

After configuring my EC2 instance, I install phpMyAdmin so that I can easily import the sql file.

sudo yum install php-mbstring -y
sudo systemctl restart httpd
sudo systemctl restart php-fpm
cd /var/www/html
wget https://www.phpmyadmin.net/downloads/phpMyAdmin-latest-all-languages.tar.gz
mkdir phpMyAdmin && tar -xvzf phpMyAdmin-latest-all-languages.tar.gz -C phpMyAdmin --strip-components 1
rm phpMyAdmin-latest-all-languages.tar.gz
sudo systemctl start mariadb

The above Linux commands installs the database management software on the root directory of the new web server. It is accessible from a browser via yourdomainname.com/phpMyAdmin. This tool is used to upload the data to the new environment.

phpMyAdmin import screen

Create the database and make sure the name matches what’s in wp-config.php from the last step. Now you’ll be able to upload your .sql file.

Next, I take the wp-content folder that I stored on my computer, and copy it over to the new remote. At this point, the site homepage will load correctly. You might notice other pages won’t resolve, and will produce a 404 “not found” response. That error has to do with certain Apache settings, and can be fixed by tweaking some options.

Server settings

With my setup, I encountered the above issue with page permalinks . WordPress relies on the .htaccess file to route pages/posts with their correct URL slugs. By default, this Apache setup does not allow its settings to be overridden by .htaccess directives. To fix this issue, the httpd.conf file needs to be edited. Mine was located in this directory: /etc/httpd/conf

You’ll need to find (or create) a section that corresponds to the default document root: <Directory “/var/www/html”></Directory>. In that block, they’ll be a AllowOverride command that is set to “None”. That needs to be changed to “All” for our configuration file to work.

apache config settings found in the HTTPD conf file

Final steps

After all the data and content has been transferred, do some smoke-testing. Try out as many pages and features as you can to make sure the new site is working as it should. Make sure you keep a back-up of everything some place secure (I use an S3 bucket). Once satisfied, you can switch your domain’s A records to point at the new box. Since the old and new servers will appear identical, I add a console.log(“new server”) to the header file. That allows me tell when the DNS update has finally resolved. Afterwards, I can safely cancel/decommission the old web hosting package.

Don’t forget to make sure SSL is setup!

Updates

AWS offers an entire suite of services to help businesses migrate. AWS Application Migration Service is a great choice to “simplify and expedite your migration while reducing costs”.

Upgrade PHP

In 2023, I used this blog post to stand-up a WordPress website. I was using a theme called Balasana. When I would try to set “Site Icon” (favicon) from the “customize” UI I would receive a message stating that “there has been an error cropping your image“. After a few Google searches, and also asking ChatGPT, the answer seemed to be that GD (a graphics library) was either not installed or not working properly. I played with that for almost an hour, but with no success. GD was installed, and so was ImageMagick (a back-up graphics library that WordPress falls back on).

The correct answer was that I needed to upgrade PHP. The AWS Linux 2 image comes with PHP 7.2. Upgrading to version 7.4 did the trick. I was able to make that happen, very painlessly, by following a blog post from Gregg Borodaty  (we don’t know each other). The title of his post is “Amazon Linux 2: Upgrading from PHP 7.2 to PHP 7.4” (thanks Gregg).

IntersectionObserver to lazy load images and assets on WordPress

wordpress homepage design

I write online a lot. Adding articles to this blog serves to build a catalog of technical solutions for future reference. Updating the homepage has improved user experience and SEO. The new design displays the most recent articles as clickable cards, rather than listing the entire text of each one. The changes for this were added to index.php file, in the child-theme folder. The theme’s original code already used a While() loop to iterate through the post records. My modification removed the article content, and only kept the title and image:

<div class="doc-item-wrap">
	<?php
	while ( have_posts() ) {
		the_post();
		echo "<div class='doc-item'><a href='". get_the_permalink() ."'><img class='lazy' data-src='".get_the_post_thumbnail_url()."'><h2>" . get_the_title() . "</h2></a></div>";
	} ?>
</div> <!-- doc-item-wrap -->

I used custom CSS, leveraging Flexbox, to style and position the cards:

.doc-item-wrap{
    display: flex;
    flex-wrap: wrap;
    justify-content: center;
}
.doc-item{
    width: 30%;
    padding: 20px;
    border: 3px solid #f0503a;
    margin: 15px;
    background: black;
    flex-grow: 1;
    text-align: center;
}
.doc-item:hover{
    background-color: #34495e;
}
.doc-item p{
    margin: 0px;
    line-height: 40px;
    color: white;
}
.doc-item img{
    display: block;
    margin: 0 auto;
}
.doc-item h2{
    font-size: 22px;
    color: white;

}
@media(max-width: 1000px){
	.doc-item{
		width: 45%
	}
}
@media(max-width: 700px){
	.doc-item{
		width: 100%
	}
}

The media queries adjust the size of the cards (and how many are in a row), based on screen size.

Look and feel of the design

Card layout design is a common way to arrange blog content. It gives visitors a visual overview of what’s available. It also stops the homepage from duplicating content that’s already available on the individual post pages.

You can see this pattern throughout the digital world. Card layout translates well across screen sizes and devices. Since I put much effort into writing, making it organized was a priority. This implementation can be extended to add additional content (such as date, description, etc.) and features (share links, animations, expandability). And, it fits nicely with what WordPress already provides.

Lazy loaded images

Image content can often be the biggest drag to site speed. Lazy loading media defers rendering until it is needed. Since this blog’s homepage has an image for each post, this was essential.

While iterating through post records the image URL is assigned to a custom data-src attribute on the image tag, leaving the normal src blank. This assures the image is not immediately retrieved nor loaded. I wrote a JavaScript function to lazy load the images, relying on the IntersectionObserver API. The card’s image does not load until a user scrolls it into view. This improves the speed of the page, which has a positive effect on SEO and UX.

The code creates a IntersectionObserver object.  It observes each of the image elements, checking to see if they are within the browser viewport. Once the image elements come into view, it takes the image URL from the data-src attribute, and assigns it to the tag’s src – causing the image to load.

document.addEventListener("DOMContentLoaded", function() {
  var lazyImages = [].slice.call(document.querySelectorAll("img.lazy"));
  if ("IntersectionObserver" in window) {
    let lazyImageObserver = new IntersectionObserver(function(entries, observer) {
      entries.forEach(function(entry) {
        if (entry.isIntersecting) {
          let lazyImage = entry.target;
          lazyImage.src = lazyImage.dataset.src;
          // lazyImage.srcset = lazyImage.dataset.srcset;
          lazyImage.classList.remove("lazy");
          lazyImageObserver.unobserve(lazyImage);
        }
      });
    });

    lazyImages.forEach(function(lazyImage) {
      lazyImageObserver.observe(lazyImage);
    });
  } 
});

The original JS code was referenced from a web.dev article. Web.dev is a resource created by Google that provides guidance, best practices, and tools to help web developers build better web experiences.

You can also use this same method for lazy loading videos, backgrounds, and other assets.

IntersectionObserver to lazily load JavaScript assets

I discovered another application for the IntersectionObserver implementation that I used above to load lazy load images. The Google Lighthouse performance score on my homepage was being dinged due to the “impact of third-party code”.

impact of 3rd party js on performance scores

The largest third-party resource was is used for the reCaptcha on a contact form at the bottom of my homepage. It makes sense to not load it until the user scrolls down to that section – especially because the UX expects them to take time to fill out the form before hitting “submit” anyway.

Using the same pattern as above, I created a new `IntersectionObserver` and passed the contact form section as the target:

function captchaLazyLoad(){
	contactCaptchaTarget = document.getElementById('contactSection')
	if (!contactCaptchaTarget) {
        return;
    }
	let contactCaptchaObserver = new IntersectionObserver(function(entries, observer) {
		if (entries[0].isIntersecting) {
            var script = document.createElement('script');
		    script.src = "https://www.google.com/recaptcha/api.js";
		    document.body.appendChild(script);
            contactCaptchaObserver.unobserve(contactCaptchaTarget);
        }
	})
	contactCaptchaObserver.observe(contactCaptchaTarget);
}

I included this function to the already existing `DOMContentLoaded`  event listener just below the loop to observe lazy image elements:

<script>
function captchaLazyLoad(){
	contactCaptchaTarget = document.getElementById('contactSection')
	if (!contactCaptchaTarget) {
        return;
    }
	let contactCaptchaObserver = new IntersectionObserver(function(entries, observer) {
		if (entries[0].isIntersecting) {
            var script = document.createElement('script');
		    script.src = "https://www.google.com/recaptcha/api.js";
		    document.body.appendChild(script);
            contactCaptchaObserver.unobserve(contactCaptchaTarget);
        }
	})
	contactCaptchaObserver.observe(contactCaptchaTarget);
}

document.addEventListener("DOMContentLoaded", function() {
  var lazyImages = [].slice.call(document.querySelectorAll("img.lazy"));
  if ("IntersectionObserver" in window) {
    let lazyImageObserver = new IntersectionObserver(function(entries, observer) {
      entries.forEach(function(entry) {
        if (entry.isIntersecting) {
          let lazyImage = entry.target;
          lazyImage.src = lazyImage.dataset.src;
          // lazyImage.srcset = lazyImage.dataset.srcset;
          lazyImage.classList.remove("lazy");
          lazyImageObserver.unobserve(lazyImage);
        }
      });
    });

    lazyImages.forEach(function(lazyImage) {
      lazyImageObserver.observe(lazyImage);
    });

    //
    captchaLazyLoad()

  } else {
    // Possibly fall back to a more compatible method here if IntersectionObserver does not exist on the browser
  }

});

</script>

This update raised my Lighthouse performance score by fifteen points!

Building my career in tech as a programmer

Anthony Pace's resume and portfolio

Building a fulfilling career can seem daunting. Technology and programming is a great option in today’s world. Resources and opportunities are abundant. You can work from anywhere and help build the future. When I started out, I faced challenges, doubt, and struggle. The ride has been worth it, and I’m excited to keep moving forward.

Starting out

About half way through college, I decided to dropout. I was majoring in Philosophy at a small school in New York.  My main source of income was delivering pizza in the Bronx.

A decade earlier, I found computer programming. I spent my nights coding desktop applications, learning HTML, and exploring the web. Those early days of technology laid the foundation for what would be my career.

When I left school in 2007, I wasn’t sure what to do next. I started earning money in tech that same year by starting a business. It focused on creating blogs and producing content. Ads and affiliate programs served to generate revenue.

It wasn’t as lucrative as I hoped. The real value came from the web development skills I honed. The software and technologies I used then, I still rely on today.

WordPress, Linux, and PHP. Writing, SEO, and digital marketing. These were the bricks I used to form the ground floor of my career in tech.

Service worker

While my early stint at entrepreneurship didn’t make me wealthy, it proved valuable. I managed to grow a freelance business leveraging this experience.

Networking and word-of-mouth were my primary means of growth. After printing business cards, I would give them to everyone I met. While delivering pizzas, I would hand them out to any small businesses or shops I passed.

I found my first paying customer in 2008. Since then, my client list has grown to triple digits.

The services I’ve offered range beyond web development. I’ve designed logos and written copy. I’ve managed infrastructure: web hosting, domain names, email, and more.

I have designed and managed both print and digital marketing campaigns. I’ve given strategy advice to young startups. Truly full stack: business, technology, and design. This has been a theme that has rung true my entire career.

The lessons learned during this period were ones of hard-work and getting the job done. The most valuable skills translate across industries. Finding clients fuels the engine of any business. The art of pitching and selling is a career-long study. Being able to manage business needs has proven to be foundational.

Office life

By 2011 I landed my first in-house gig, working at a marketing company. It felt like a turning point. I was the only developer, and got to deal directly with clients. I worked there for less than a year.

In 2012 I connected with a recruiter for the first time. They set me up on many interviews. I clicked with a small medical education company based in Manhattan. Hired as a web developer, I graduated to senior engineer and marketing specialist.

Team work

There, I was the head of all things digital. That meant building websites, coding native apps, and managing infrastructure. After a promotion to head of marketing my responsibilities expanded. Managing analytics took time. Copywriting promotional materials required patience. My horizons expanded while coordinating live events, and traveling internationally to exhibition shows.

Educational grants funded our projects. They included apps, websites, live events, and digital newsletters. Having a coordinated team was imperative to making things work. The project management and leadership was world-class and invaluable.

A single project was multifarious. I would design responsive layouts, build registration websites, deploy apps, and more. Once a product would launch, I would travel to live events to handle promotion and logistics. While I fulfilled many roles, I was lucky to work with a talented group.

Software Engineer

After four years, I made the difficult decision to leave the job that helped shape my career. A better opportunity presented itself in 2016. I was hired as a software engineer. This is when I came into my own as a programmer. I was able to collaborate with a brilliant team. The technologies I became familiar with continued to grow.

I got to work with early-stage startups and brands backed by venture capital. I learned the intricacies of building digital products and growing direct-to-consumer brands. My colleagues included entrepreneurs, CEOs, and product experts. The office was exciting and full of talent.

At the time of writing this (2020), we are stuck in quarantine due to the COVID-19 pandemic. We’re working remotely, but continuing to grow. Uncertain times prompt us to evaluate our circumstances and take inventory of what we value. What is the future of my career? How does it play into my life overall?

What’s next?

I love what I do for a living. I enjoy programming; I love problem solving; I’m an artist at heart. I plan on continuing to build software products. Chances are, I’ll be doing it somewhere other than New York City – especially since remote work seems to be the future of business.

If you’re thinking about starting a career in technology as a programmer, my advice is to jump right in. Start building, keep learning, and put yourself out there. If anyone reading this wants to chat about careers, technology, programming, or anything else, feel free to email me!

Statistics for hypothesis testing

statistics

Recently, I had to implement a function into SplitWit to determine statistical significance. Shortly after, I wrote a blog post that explains what statistical significance is, and how it is used.

Here, I’ll attempt to expound the code I wrote and what I learned along the way.

Statistical significance implies that the results of an experiment didn’t happen by random chance. SplitWit specifically deals with running A/B experiments (hypothesis testing) to help increase conversion rates. Getting this right is important.

Probability

Statistical significance is determined by calculating a “probability value”. The lower that value is, the more confident we can be that our results are probably not random. Statisticians refer to it as “p-value”. In this field of study, a p-value less than 0.05 is considered good. That translates to a less than 5% chance that the results of an experiment are due to error. Source.

When the probability of a sampling error is that low, we are said to have rejected the “null hypothesis” and affirmed our “alternative hypothesis”. Our alternative hypothesis, in the context of A/B website testing, refers to the experimental UI change we made successfully increasing our conversion rate. The null hypothesis represents the idea that our changes had no true affect on any improvement we may have seen.

SplitWit experiment results
SplitWit lets you set custom metrics to measure conversion rates

How do we calculate our p-value for an A/B split test on a eCommerce website?

Here are the steps to figure out if a hypothesis test is statistically significant:

  1. Determine the conversion rates for the control and variation
  2. Work out the standard error of the difference of those rates
  3. Derive a z-score using the conversion rates and the standard error
  4. Convert that z-score to a p-value
  5. Check if that p-value is below the desired confidence level (<0.05 for 95% confidence)

This recipe is based on a field of study called Bayesian statistics. It attempts to describe a degree of certainty for our experiments.

Conversion rates

The goal of running A/B split tests is to increase your website’s conversion rate. The idea is to make a UI change, show that variation to a portion of users, and then measure conversions against the control version. I calculate conversion rates by dividing the number of conversions by the number of visitors, giving me an average:

$control_conversion_rate = $control_conversions/$control_visitors;
$variation_conversion_rate = $variation_conversions/$variation_visitors;

Which ever version’s conversion rate is higher is the winner of the experiment. I calculate the winner’s uptick in conversion rate using this formula: (WinningConversionRate – LosingConversionRate) / LosingConversionRate

$uptick = 0;
if($control_conversion_rate > $variation_conversion_rate){
	$uptick = (($control_conversion_rate - $variation_conversion_rate) / ($variation_conversion_rate)) * 100;
}

if($control_conversion_rate < $variation_conversion_rate){
	$uptick = (($variation_conversion_rate - $control_conversion_rate) / ($control_conversion_rate)) * 100;
}


Calculating p-value

After researching, I determined that I would calculate my p-value from a “z-score”.

$p_value = calculate_p_value($z_score);

A z-score (also known as a standard score) tells us how far a data point is from the mean. Source.

For the purposes of A/B testing, the data points we are interested in is the conversion rates of our control and variation versions. Consider this code snippet for determining our z-score:

$z_score = ($variation_conversion_rate-$control_conversion_rate)/$standard_error;

This formula takes the difference between the two conversion rates, and divides it by their “standard error”. The standard error is meant to tell us how spread out our data is (sampling distribution). Source.

Standard error of two means’ difference

A conversion rate is essentially an average (mean). To properly determine our z-score, we’ll want to use the standard error of their difference.

First, we’d want to get the standard error of each of those rates. Source.

This is the formula to use: ( conversion_rate * ( 1 – conversion_rate ) / visitors )1/2

Translated as PHP code:

$standard_error_control = sqrt($control_conversion_rate * (1-$control_conversion_rate) / $control_visitors;)
$standard_error_variation = sqrt($variation_conversion_rate * (1-$variation_conversion_rate) / $variation_visitors);

Then, we’d use those values to find the standard error of their difference.

This is the formula: ( standard_error_control2 + standard_error_variation2  )1/2

Translated as PHP code:

$x = pow($standard_error_control, 2) + pow($standard_error_variation, 2);
$standard_error_of_difference = sqrt($x);

If we skip squaring our values in the 2nd step, we can also skip getting their square root in the first. Then, the code can be cleaned up, and put into a function:

public function standardErrorOfDifference($control_conversion_rate, $variation_conversion_rate, $control_visitors, $variation_visitors){
		
	$standard_error_1 = $control_conversion_rate * (1-$control_conversion_rate) / $control_visitors;
	$standard_error_2 = $variation_conversion_rate * (1-$variation_conversion_rate) / $variation_visitors;
	$x = $standard_error_1 + $standard_error_2;

	return sqrt($x);

}

This algorithm represents the “difference between proportions” and can be expressed by this formula: sqrt [p1(1-p1)/n1 + p2(1-p2)/n2]

Source.

Simplified even further, as PHP code:

$standard_error = sqrt( ($control_conversion_rate*(1-$control_conversion_rate)/$control_visitors)+($variation_conversion_rate*(1-$variation_conversion_rate)/$variation_visitors) );

Statistics as a service

Having considered all of these steps, we can put together a simple method to determine statistical significance. It takes the number of visitors and conversions for the control and the variation.

public function determineSignificance($controlVisitors, $variationVisitors, $controlHits, $variationHits){
	
	$control_conversion_rate = $control_hits/$control_visitors;
	$variation_conversion_rate = $variation_hits/$variation_visitors;

	$standard_error = sqrt( ($control_conversion_rate*(1-$control_conversion_rate)/$control_visitors)+($variation_conversion_rate*(1-$variation_conversion_rate)/$variation_visitors) );

	$z_score = ($variation_conversion_rate-$control_conversion_rate)/$standard_error;

	$p_value = $this->calculate_p_value($z_score);

	$significant = false;
	
	if($p_value<0.05){
		$significant = true;
	}else{
		$significant = false;
	}
        return $significant;
}

You can see this code in action by checking out the SplitWit statistical significance calculator.

If you own a website, give SplitWit a try for free.

You can find this code on GitHub.